Empower site builders and administrators with no-code tools to setup, enhance, configure, or maintain the site.

Admin Changelog

Working on an admin tool that will track changes to settings in the admin.

Synchro

SUMMARY

Synchro module (for Drupal 7) allow make deploy database changes to Production server on automatic way through Apache Ant.

  1. Deployment process splits to 3 steps:
  2. Move all data changes of Production site DB to Development site DB and put Production to maintenance mode.
  3. Final testing of Development site with actual data.
  4. Deploy tested database to production.

NOTE: Now supported only MySQL DB

INSTALL

Copy module folder to sites/all/modules or sites/[your_site]/modules folder
of Your Drupal site and enable it on modules list page.

USAGE

1. Assemble build.xml file for Apache Ant:

  • Go to "Configuration" -> "Synchro settings" page.
  • On first visit of "Synchro settings" page module make Scanning variables.
  • Only after finish scanning process "Synchro settings" page will be available.
  • In future if You need scan variables again (if You install/remove some modules). You can use one of this 2 ways:
  • -- Go to "Configuration" -> "Synchro settings" -> "Synchro scan variables sets" menu item.
  • -- On "Configuration" -> "Synchro settings" page click by tab "Synchro scan variables sets" on top part of page.

Launch soon

This module gives a launch soon page. All unauthenticated traffic will be redirected to the launch soon page.

Changelog

This module is meant to help document system changes throughout the site's lifetime. Currently, the module will only document changes under the "admin" path, excluding views and contexts.

Cronmonitor

Minimalist monitoring of Drupal cron in a client/server setup.

CSS Options

Example of css options on theme settings page

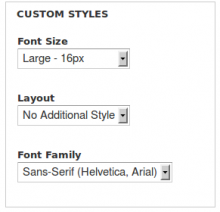
The CSS options module enables theme developers to easily expose some options around the included CSS within the site via the theme settings form.

This module does the housekeeping for managing the inclusion of conditional CSS within the site so the theme developer can focus on design.

Instructions

  1. download and enable the css_options module
  2. Within your theme create a css_options directory.
  3. within your theme's css_options directory create a directory for each option you want exposed to the user with the following naming convention. "YOUR OPTION.option". The end user will see a select choice with "YOUR OPTION" as its title.
  4. Within each option directory add one css file that represents the css corresponding to the choice. Name your file with the standard '.css' extension.

Example

If I create the following directory structure in my theme

  • css_options
    • Font Family.option
      • Sans-Serif (Helvitica, Arial).css
      • Serif (Georgia, Times).css

The css_options module will expose a "Font Family" option on the theme settings page with the following choices;

  • No Additional Style
  • Sans-Serif (Helvetica, Arial)
  • Serif (Georgia, Times)

Pages

Subscribe with RSS Subscribe to RSS - Administration tools