Guide for Drupal Single Sign On (SSO) using Okta as Identity Provider (IdP)
This document will help you in configuring SAML Single Sign-On (SSO) between Okta and your Drupal site. By following this guide, you can enable users to log in to your Drupal site using their Okta credentials, making it an Identity Provider.
The Drupal SAML SP 2.0 Single Sign On (SSO) module is compatible with Drupal 7, Drupal 8, Drupal 9, and Drupal 10.
Prerequisite:
- Install and activate the SAML SP 2.0 Single Sign On (SSO) - SAML Service Provider module on your Drupal site. Click here to check out the module installation step.
Setup Video:
Drupal SAML SP Metadata:
-
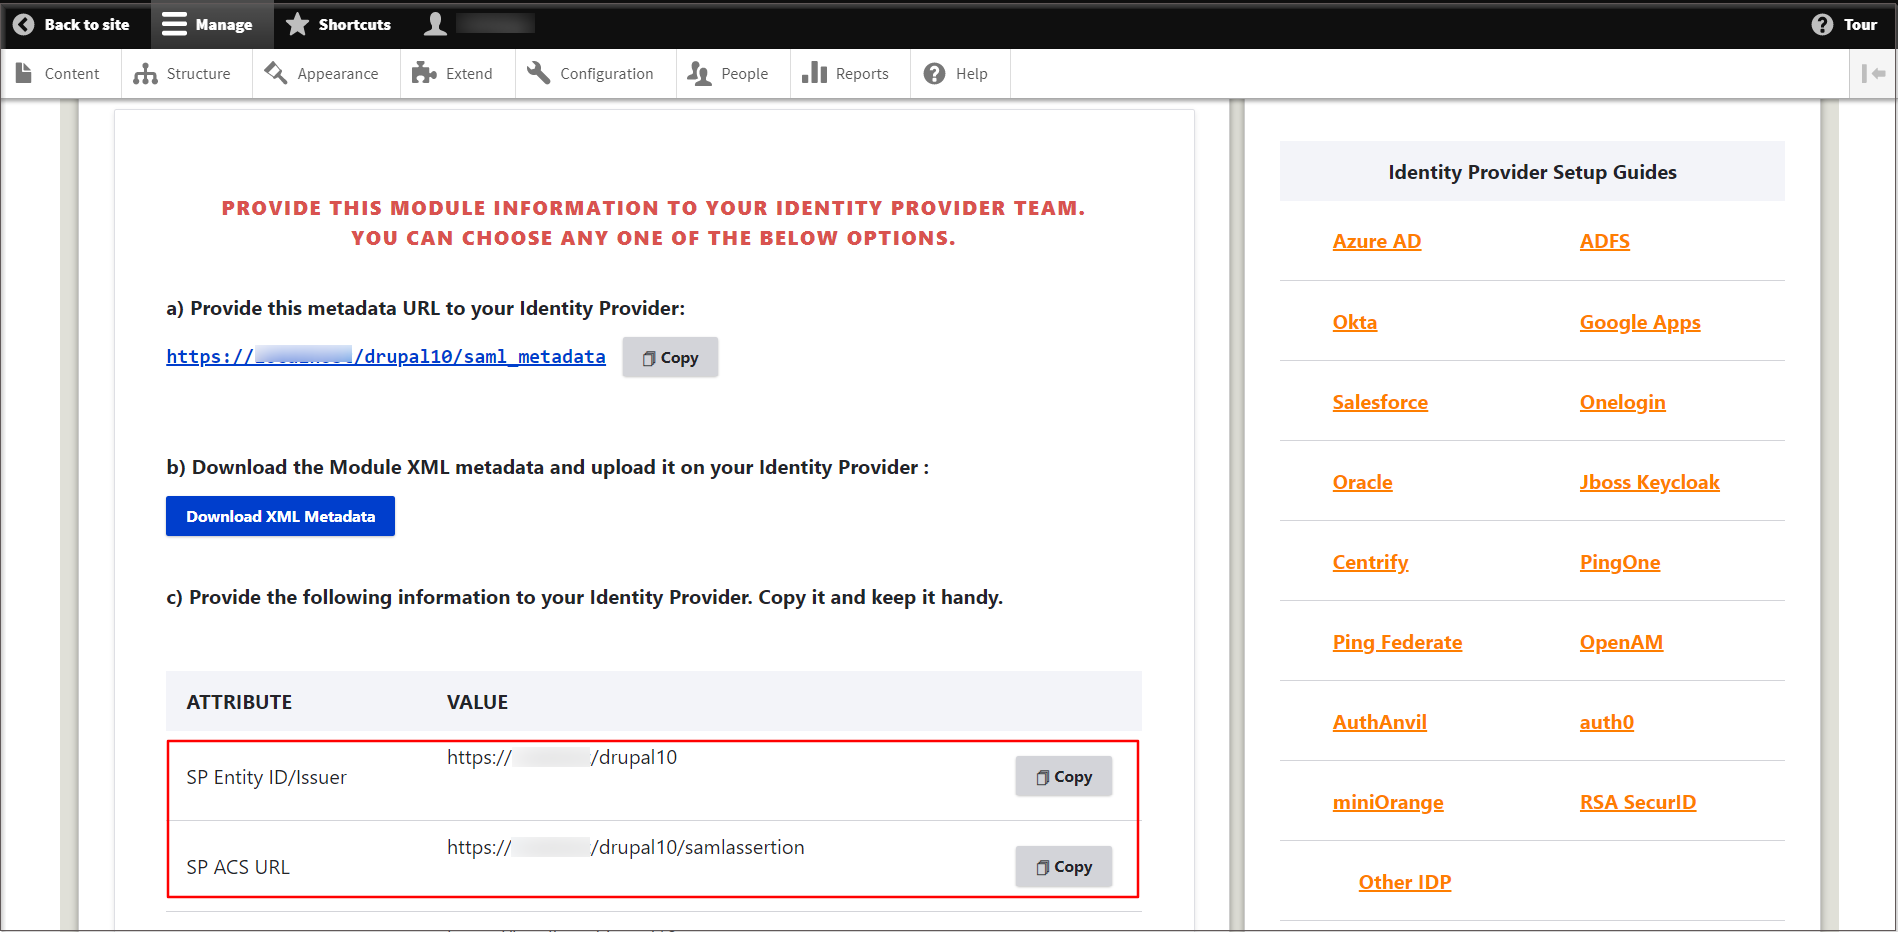
After installing the module on your Drupal site, in the Administration menu, navigate to Configuration -> People -> miniOrange SAML Login Configuration. (/admin/config/people/miniorange_saml/idp_setup)

- Under the Service Provider Metadata tab, copy the SP Entity ID/Issuer and SP ACS URL and keep them handy. This SP metadata is required to configure Okta as Identity Provider (IdP).
Configure SAML Single Sign-On Application in Okta:
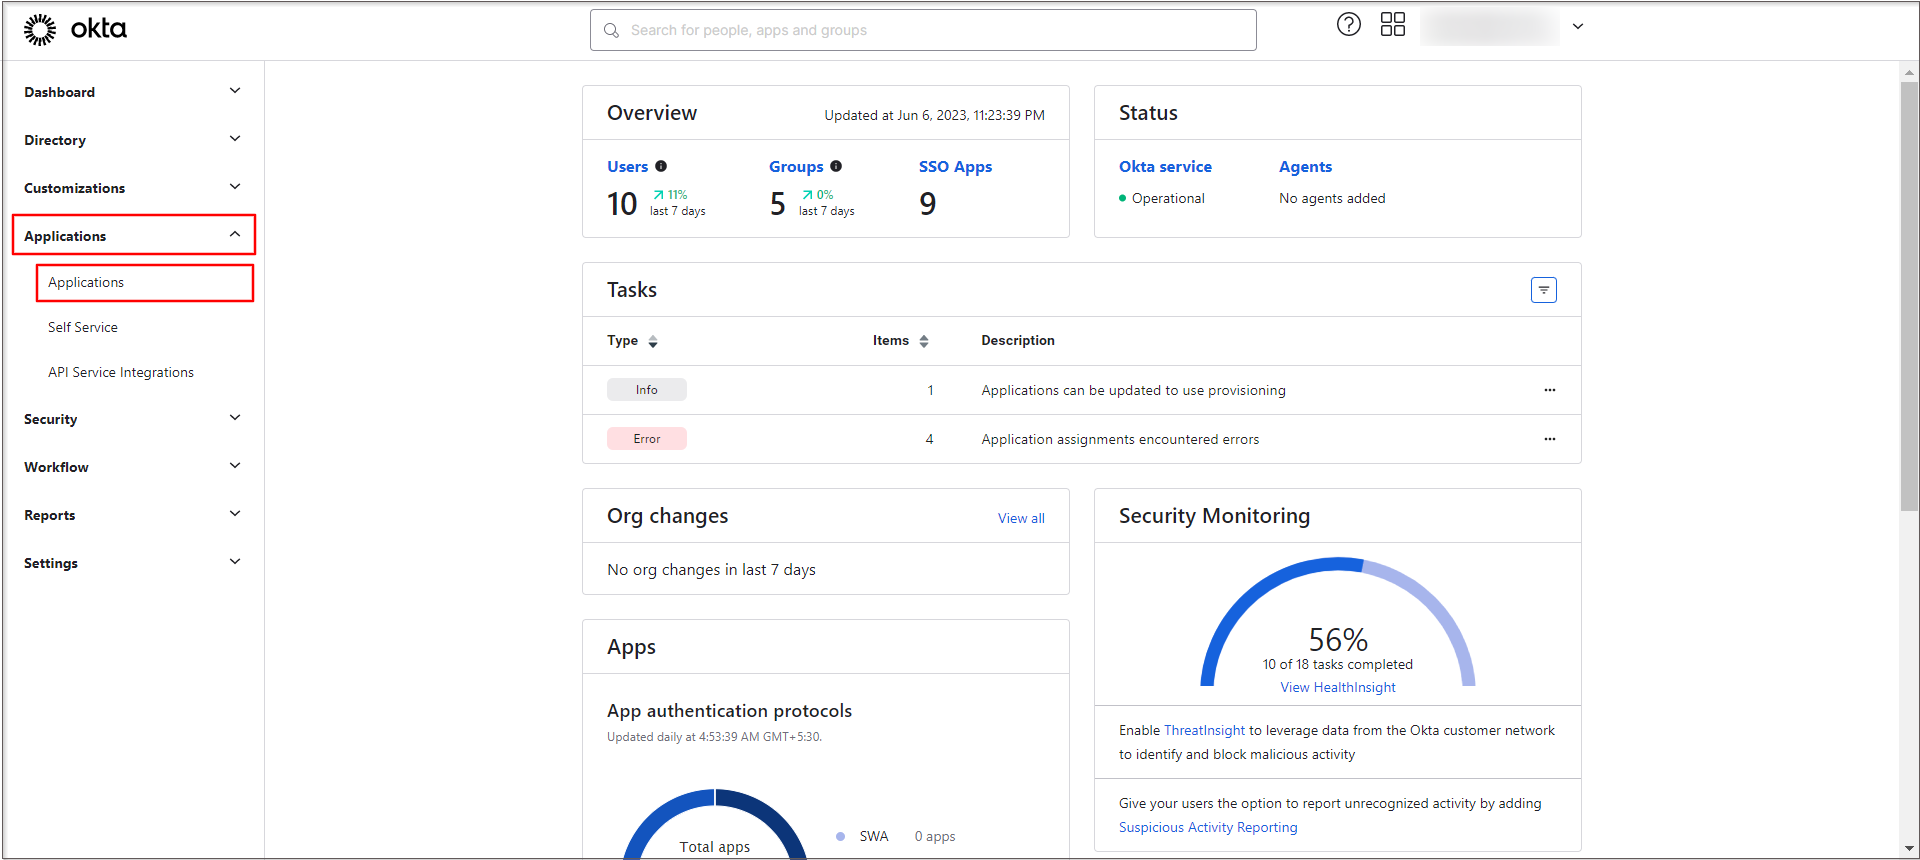
- Log in to your Okta admin console.
-
Navigate to Applications on the left side and click on the Applications.
-
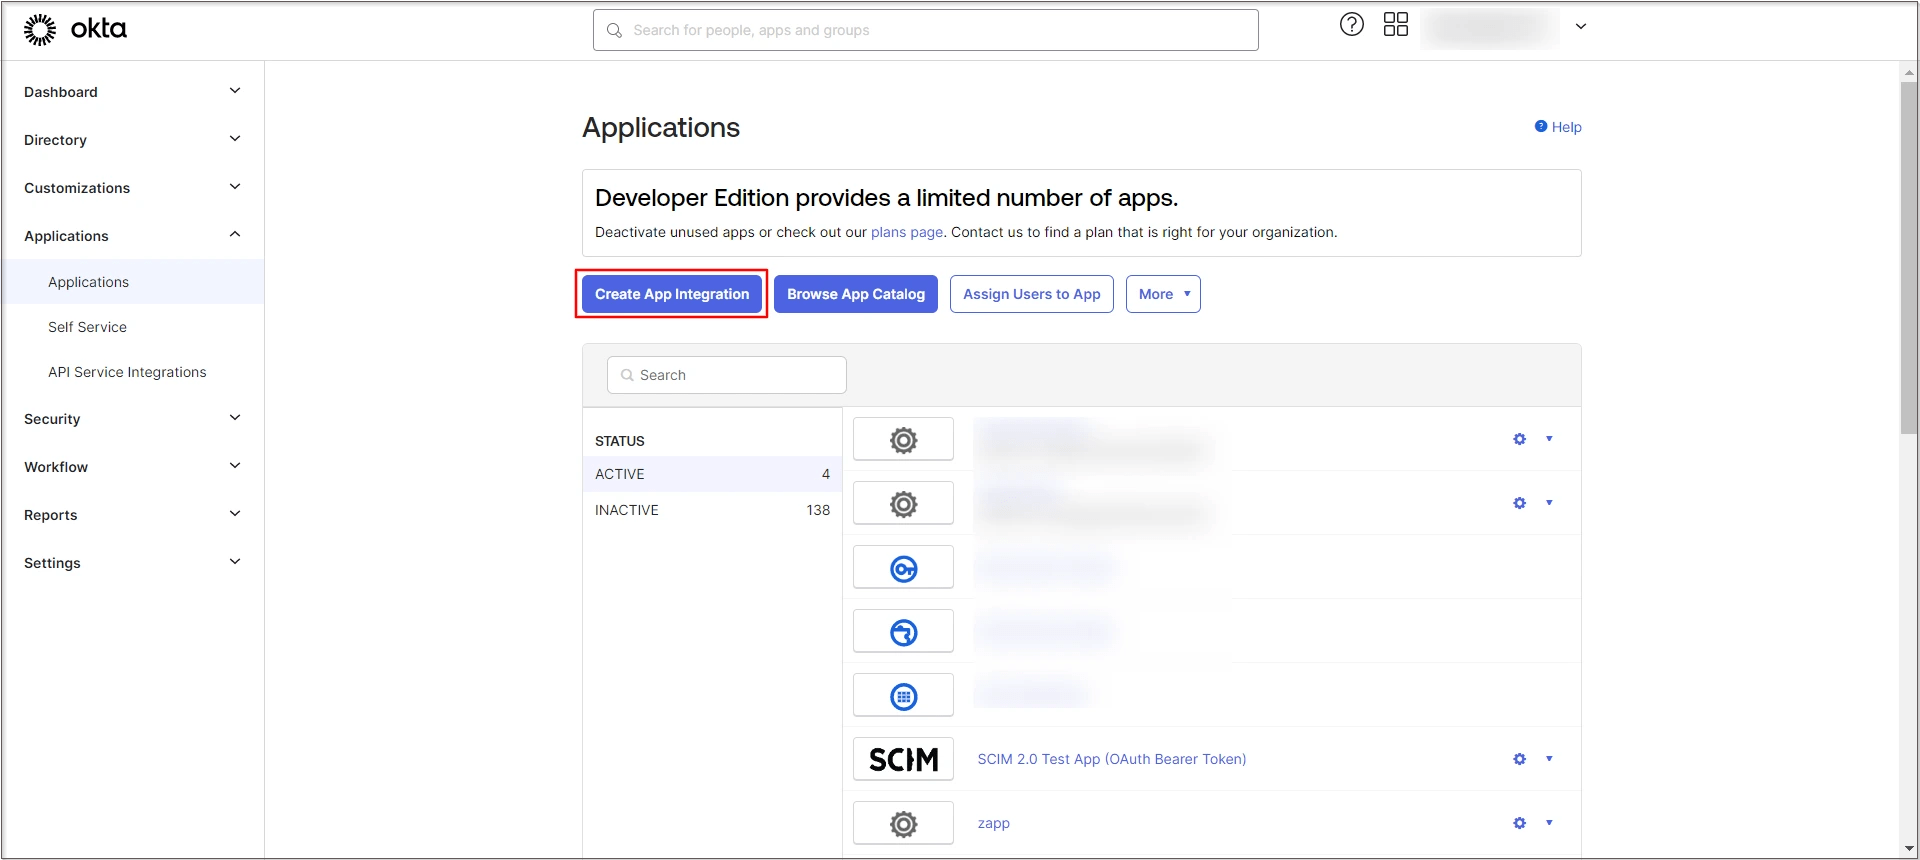
Under Applications, click on the Create App Integration button.
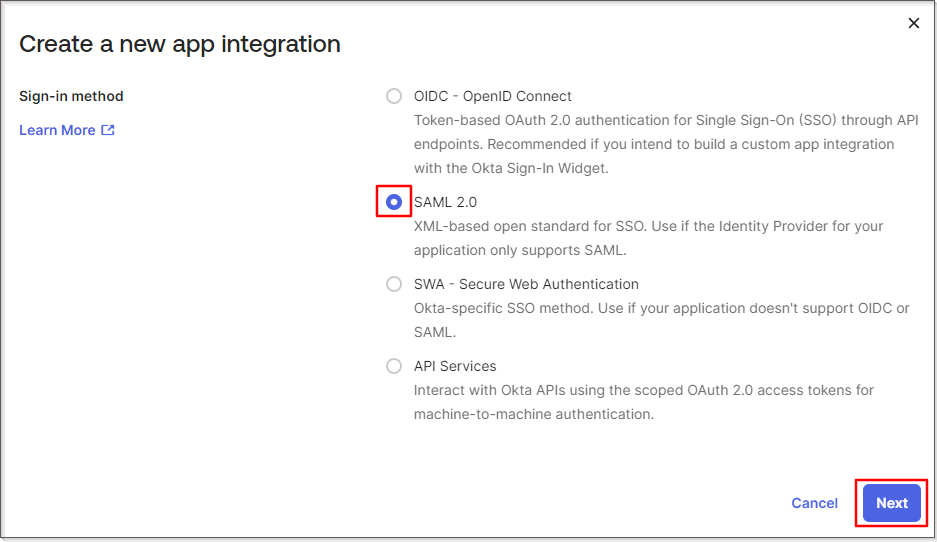
-
On the Create a new app integration popup, select SAML 2.0, and click on the Next button to proceed.
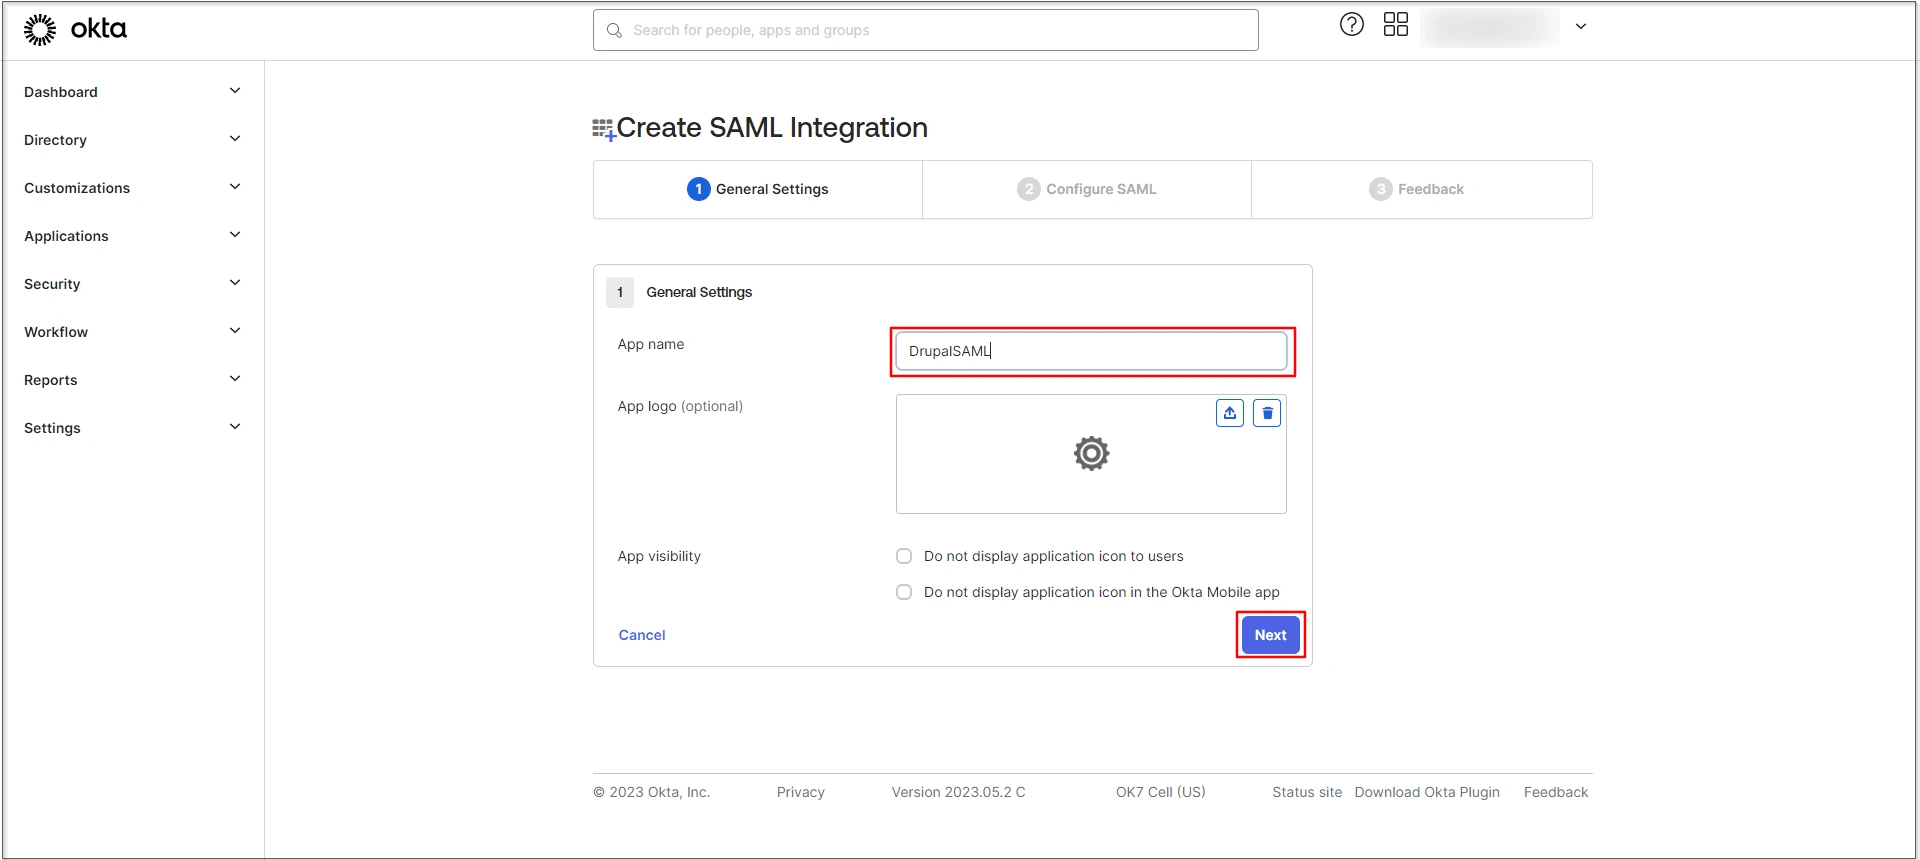
-
In the General Settings, enter the App Name and click on the Next button.
-
On the Configure SAML tab, under SAML Settings, paste the copied information from the Service Provider Metadata tab of the module into the corresponding text field.
Okta Field
Service Provider Information (Drupal)
Single sign-on URL
SP ACS URL
Audience URI (SP Entity ID)
SP Entity ID/Issuer
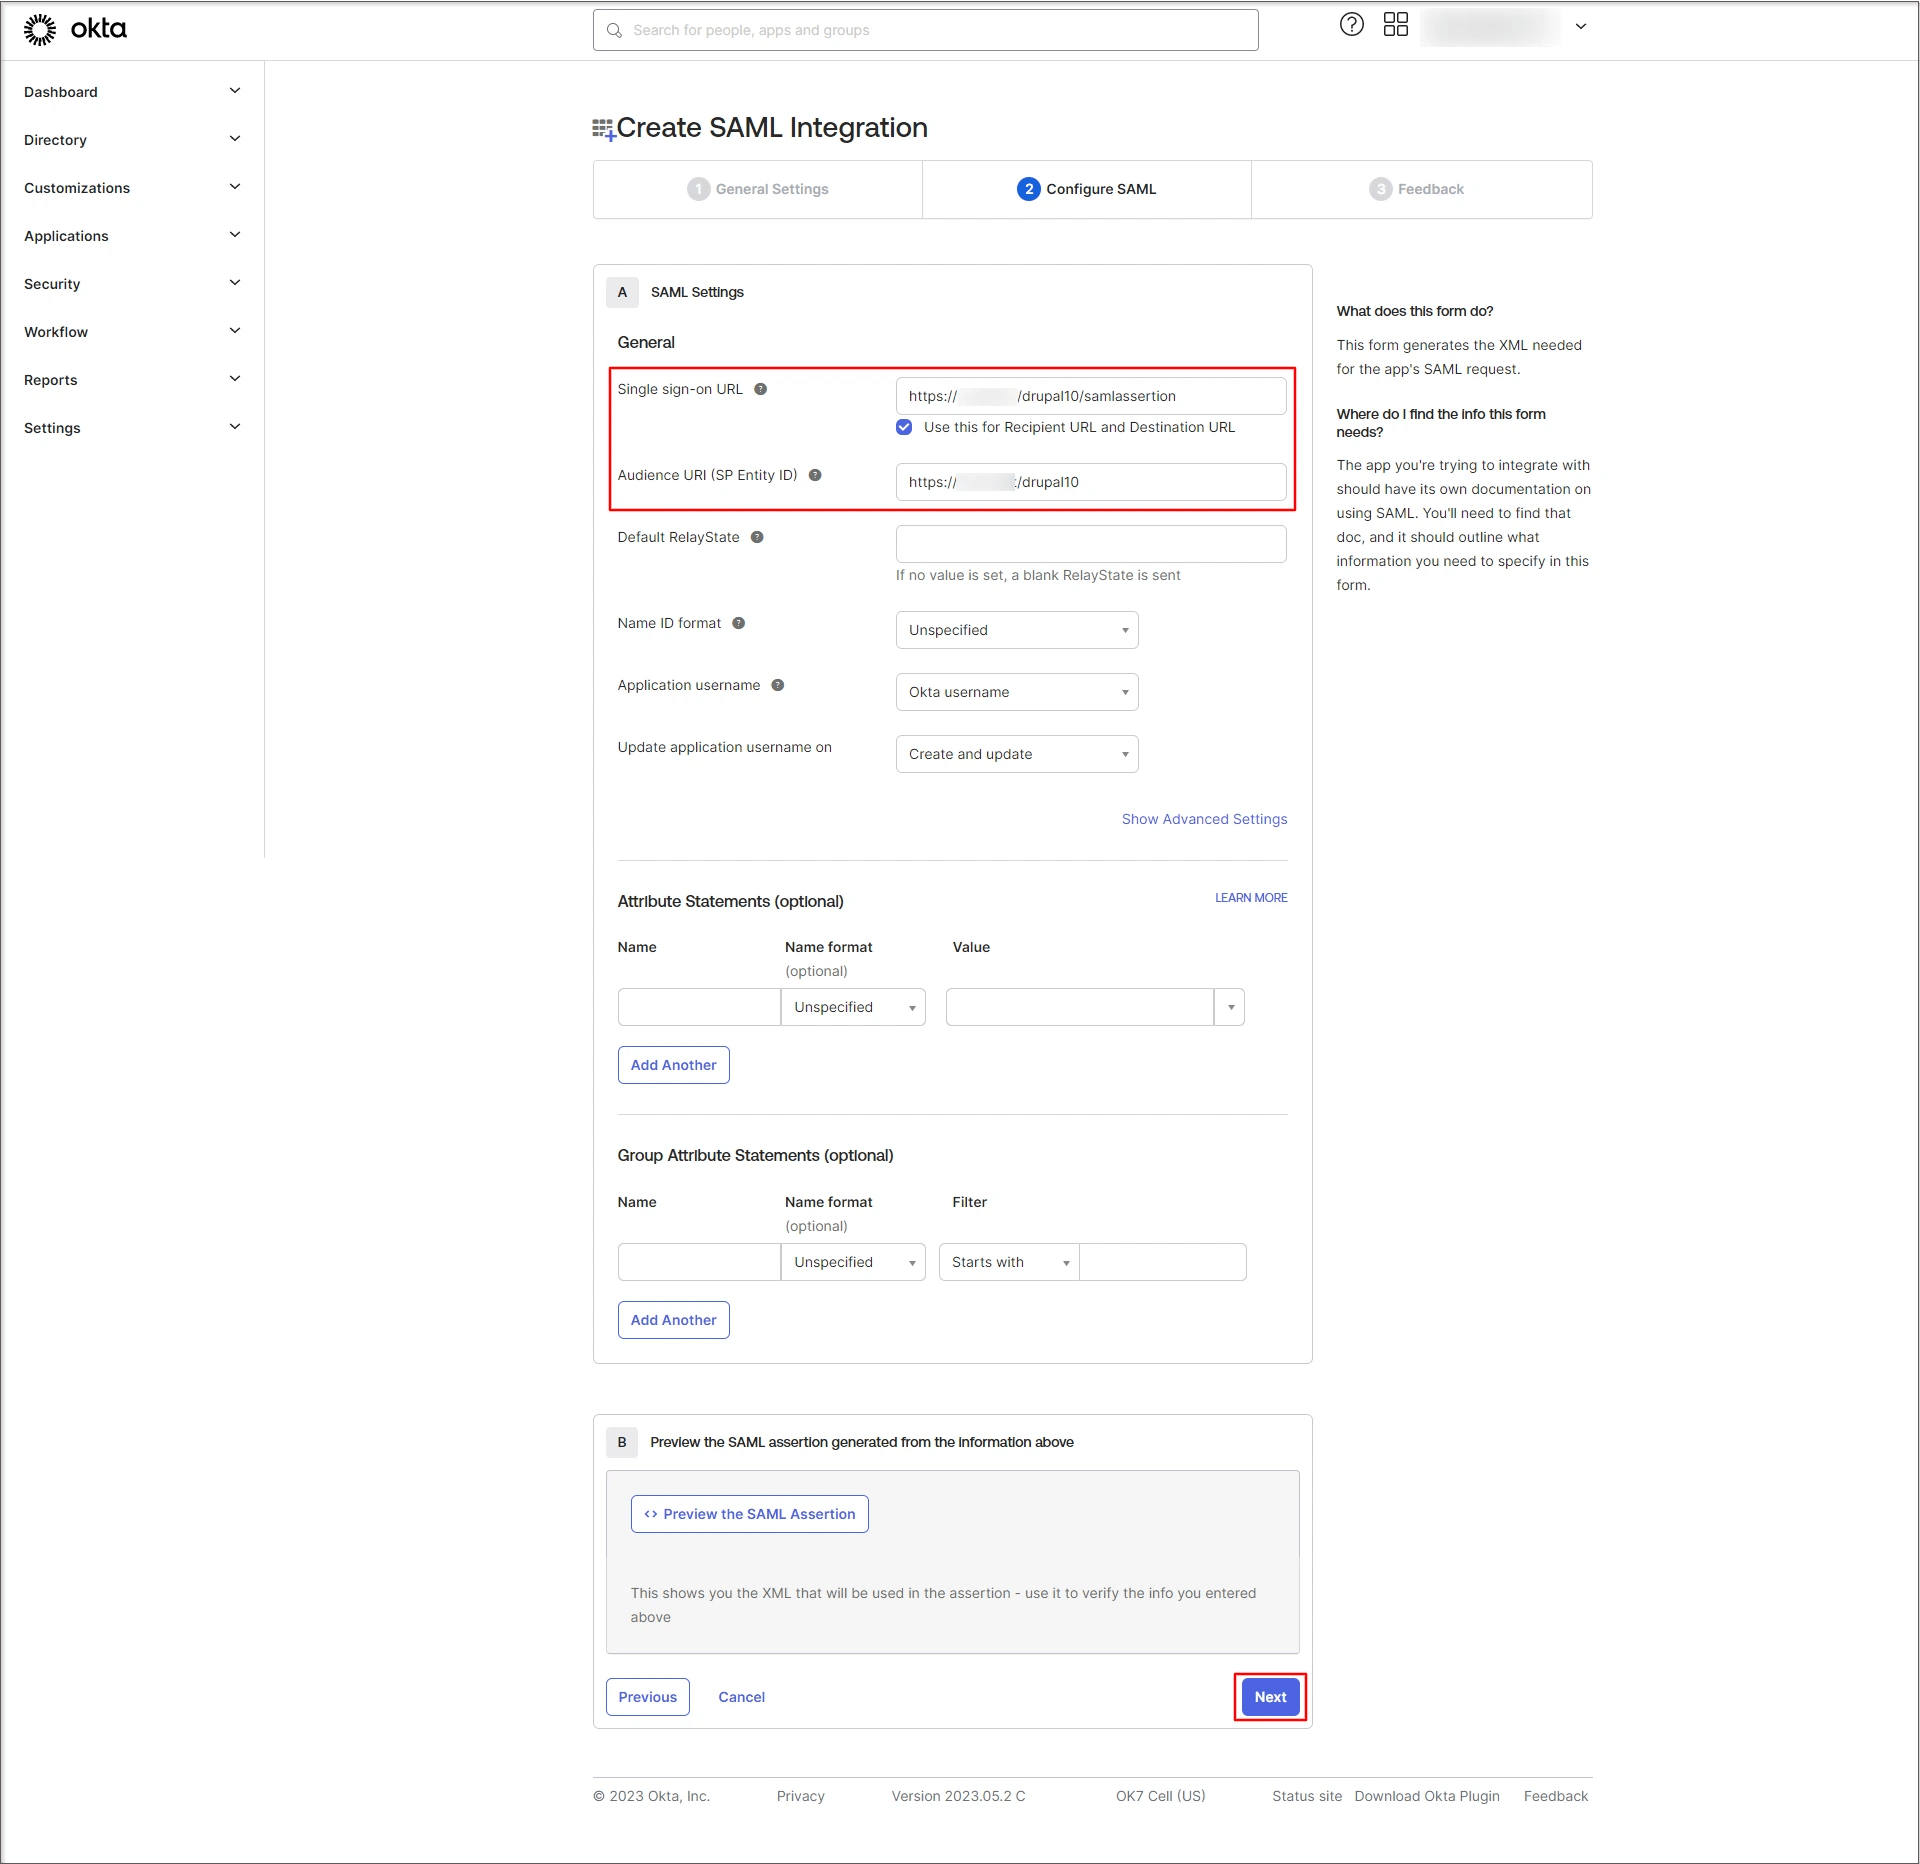
- Click on the Save button to proceed.
-
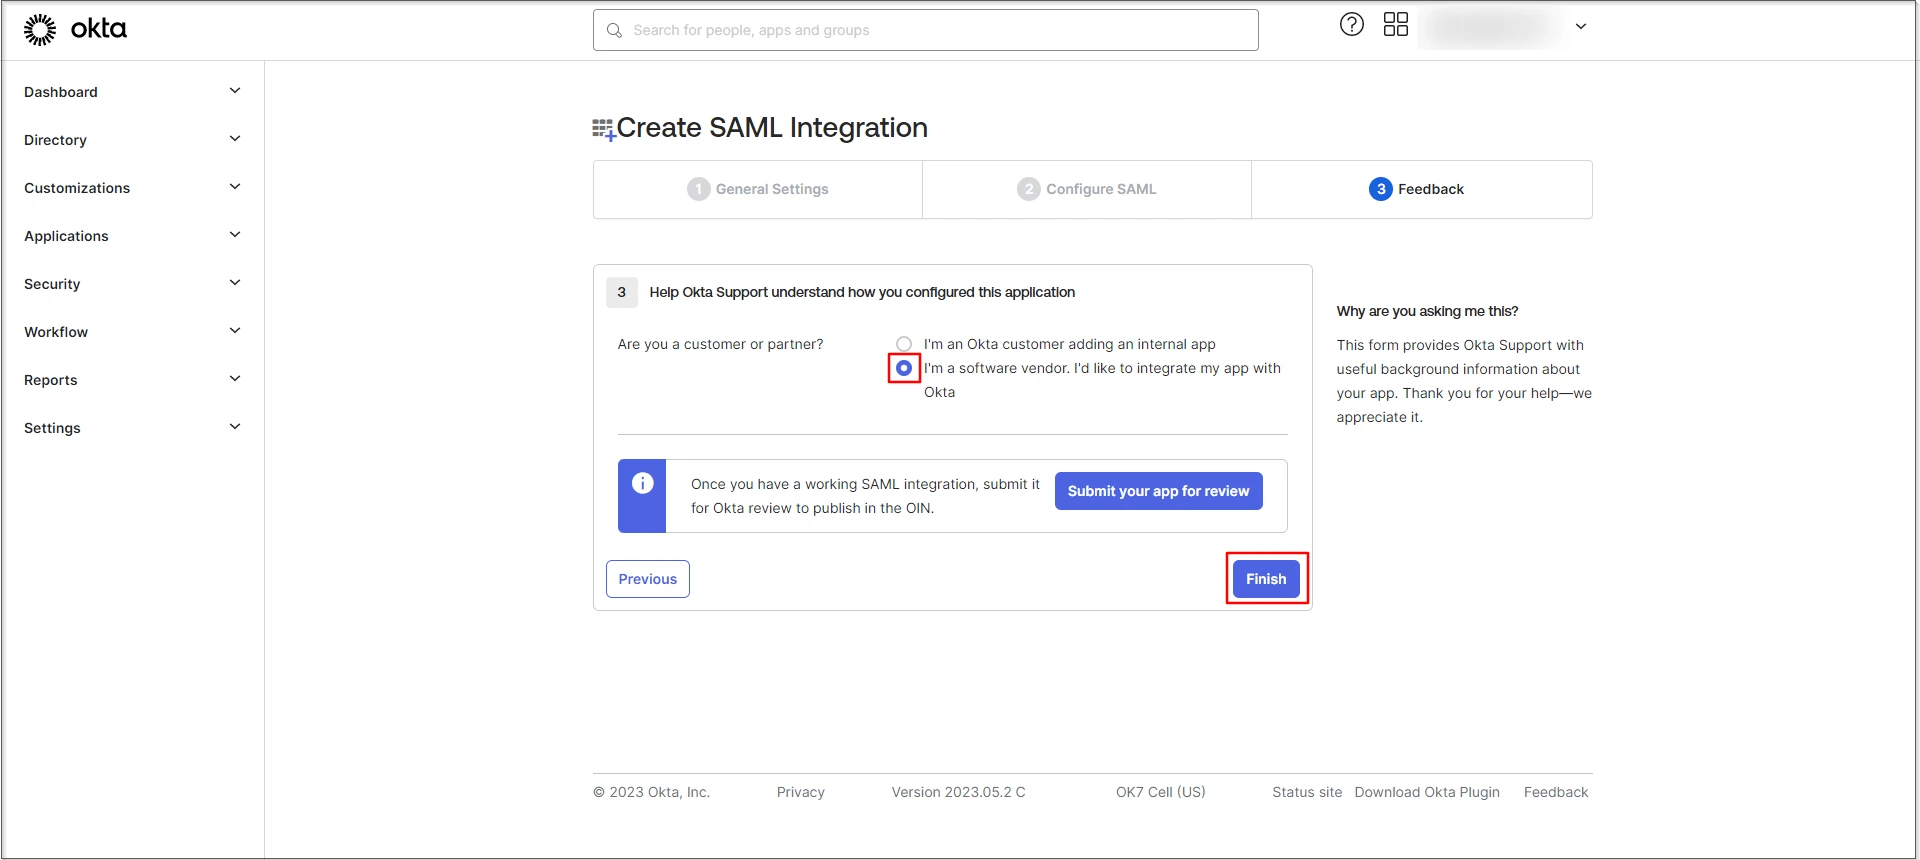
Select the appropriate option from Feedback. Are you a customer or a partner? Then, click on the Finish button.
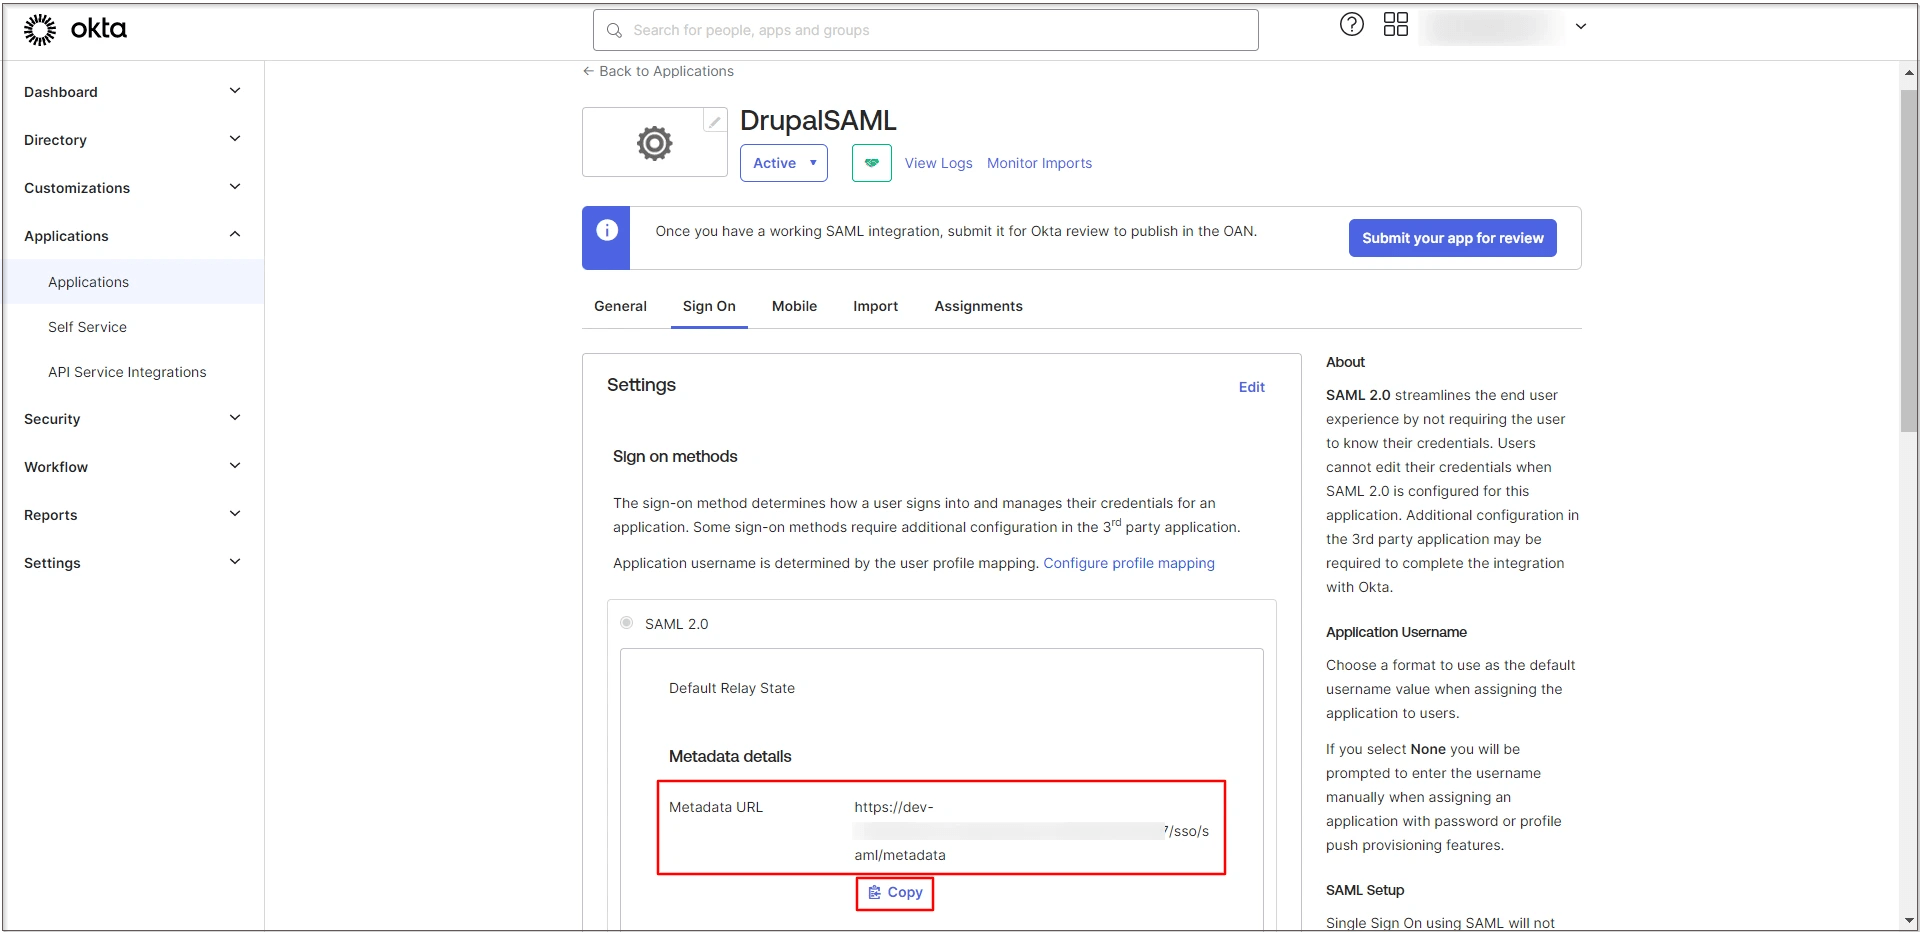
-
Under the Sign On tab, click on the Copy link to copy the Metadata URL from Metadata details. Keep it handy. This is required to configure Drupal as SAML SP.
Steps for Assigning Groups/People:
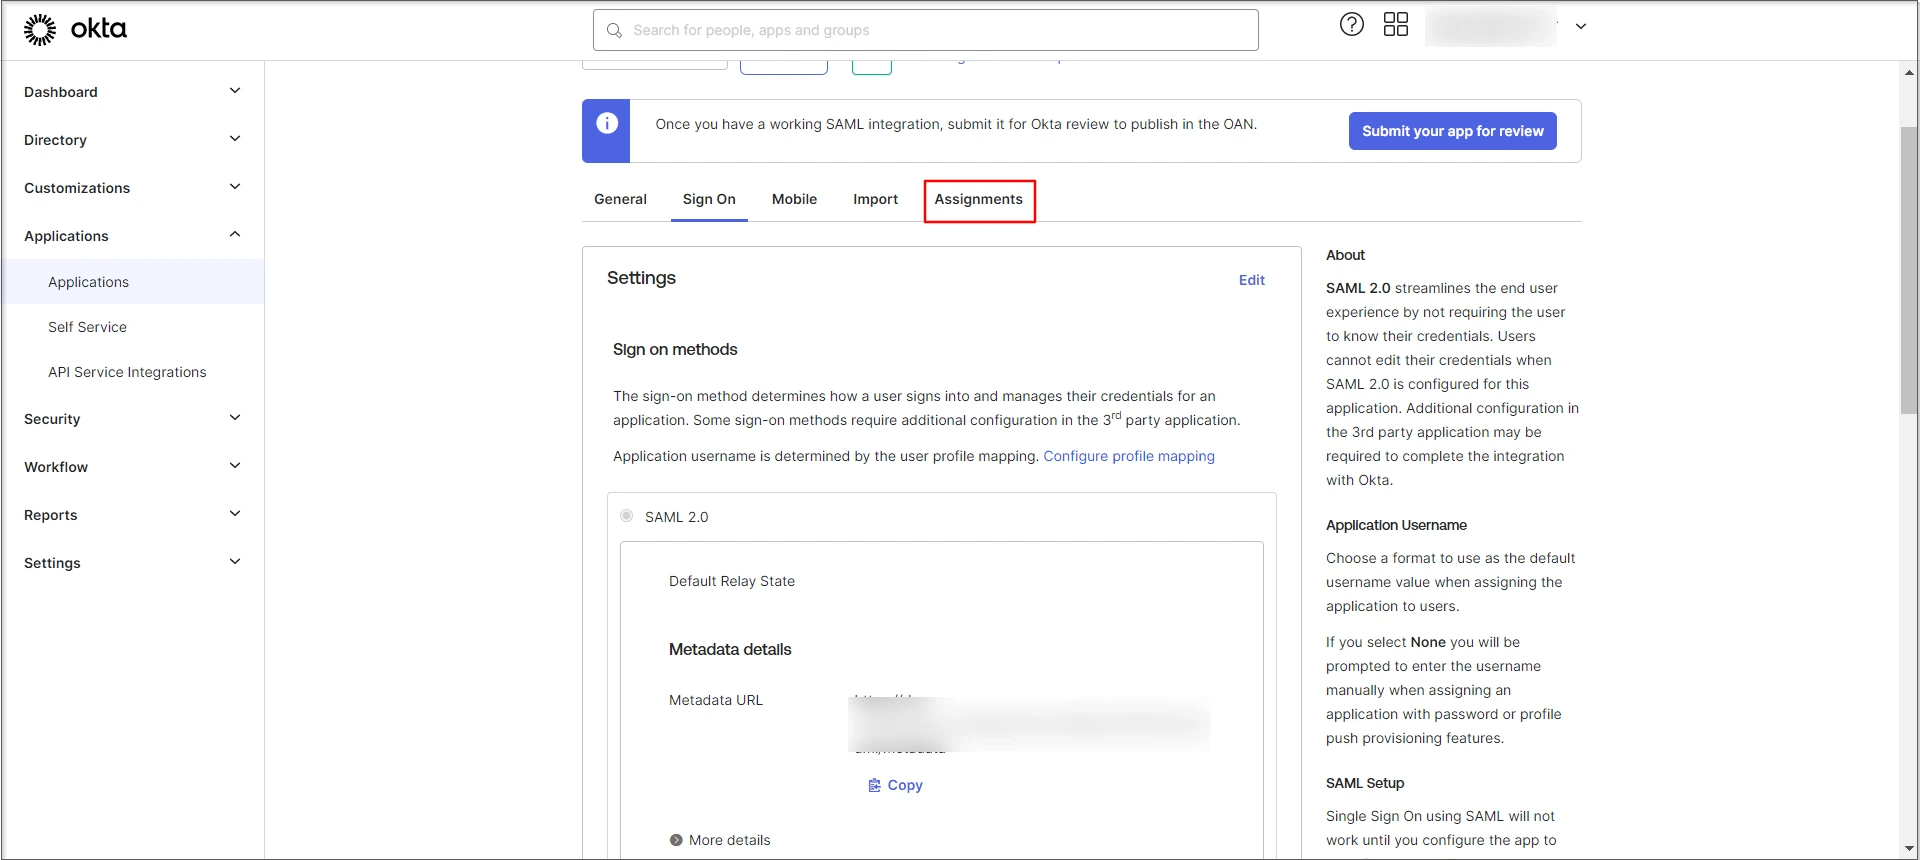
-
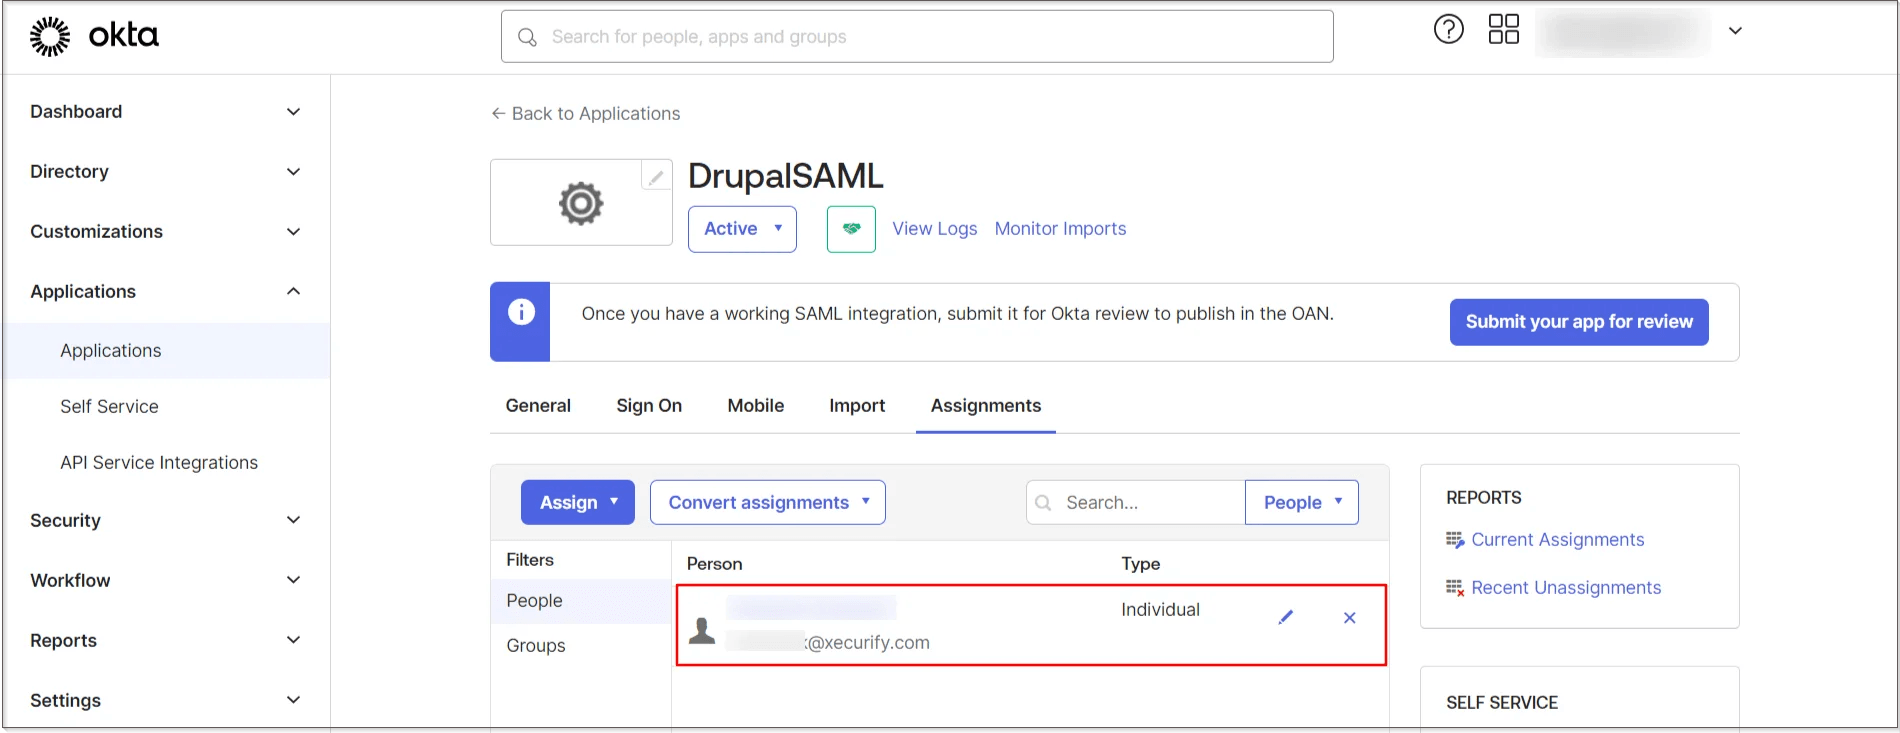
After creating and configuring the app go to the Assignments tab.
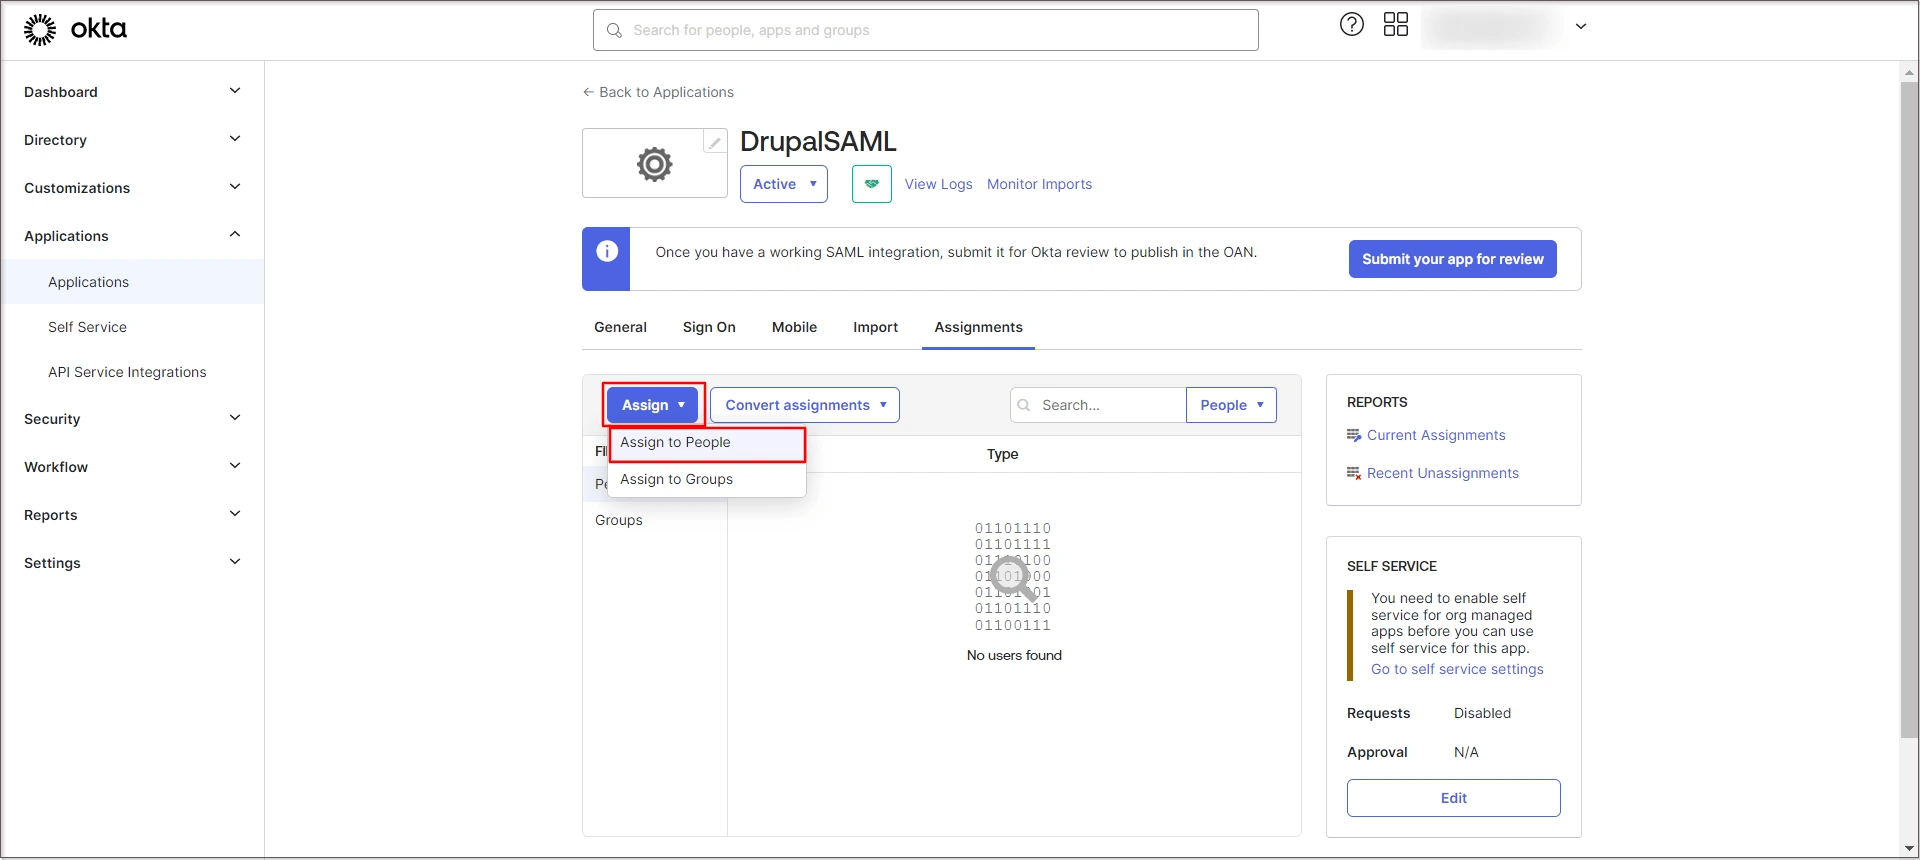
-
Now, click on the Assign button and select the Assign to People option.
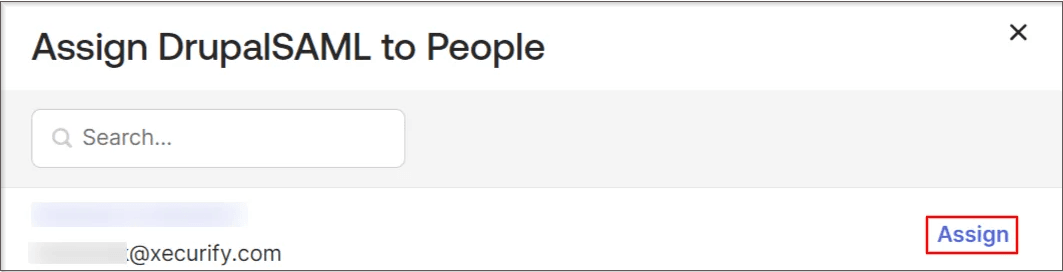
-
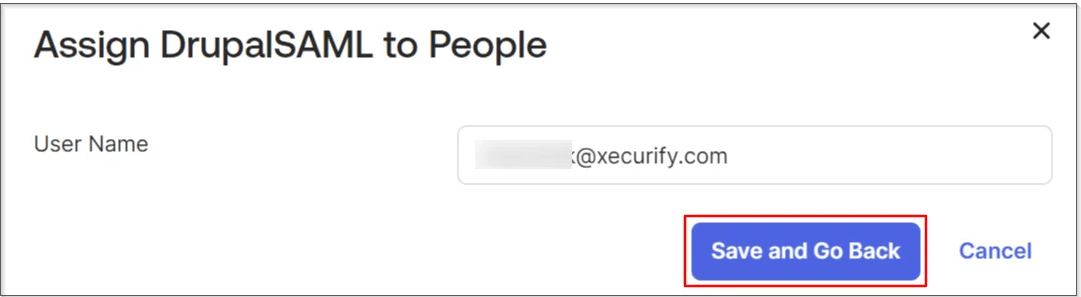
On the Assign Application (in this case, the application name is DrupalSAML) to People, select the people you want to give access to login through this app, and click on the Assign link.
-
Now, click on the Save and Go Back button to proceed.
-
The user has been successfully assigned to your application.
Configure Drupal as SAML Service Provider:
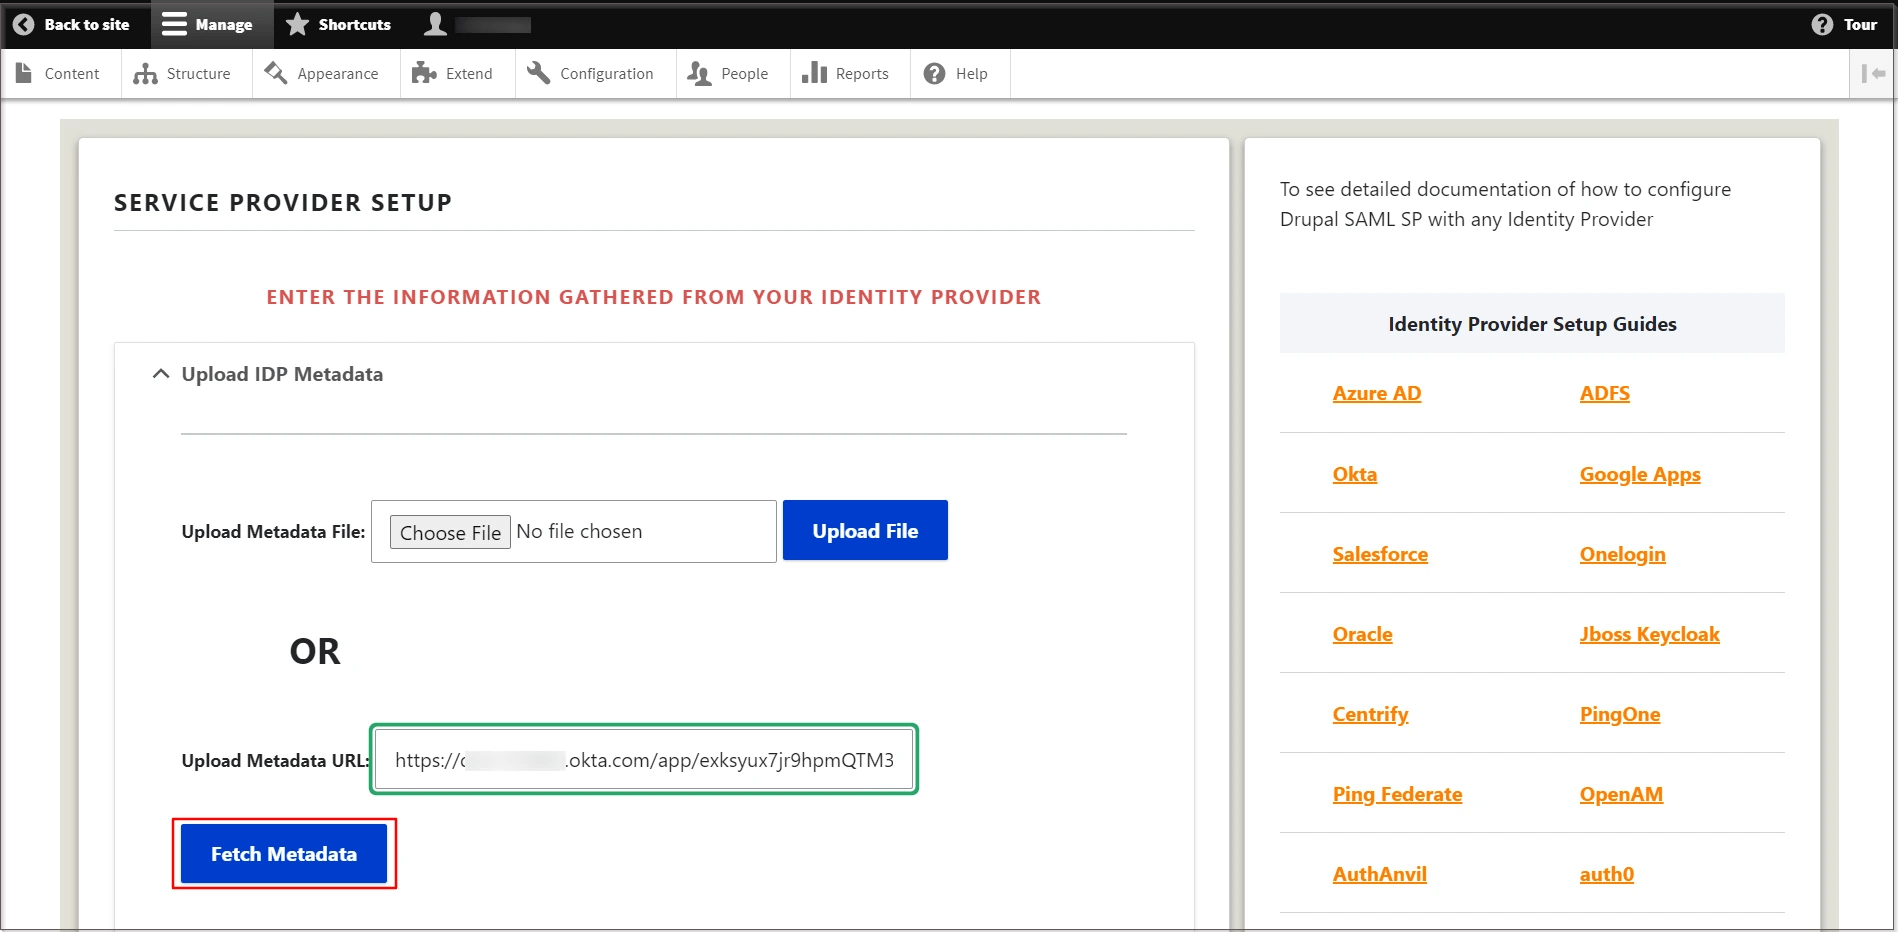
- Go to your Drupal site. Navigate to the Service Provider Setup tab of the module and click on Upload IDP Metadata.
-
Paste the previously copied Okta Metadata URL into the Upload Metadata URL text field. Click on the Fetch Metadata button.
-
If you need to update your Identity Provider Name, follow these steps:
- Under Action, select the Edit link.
- Enter Okta in the Identity Provider Name text field.
- After you have updated your Identity Provider Name, scroll down and click on the Save Configuration button.
-
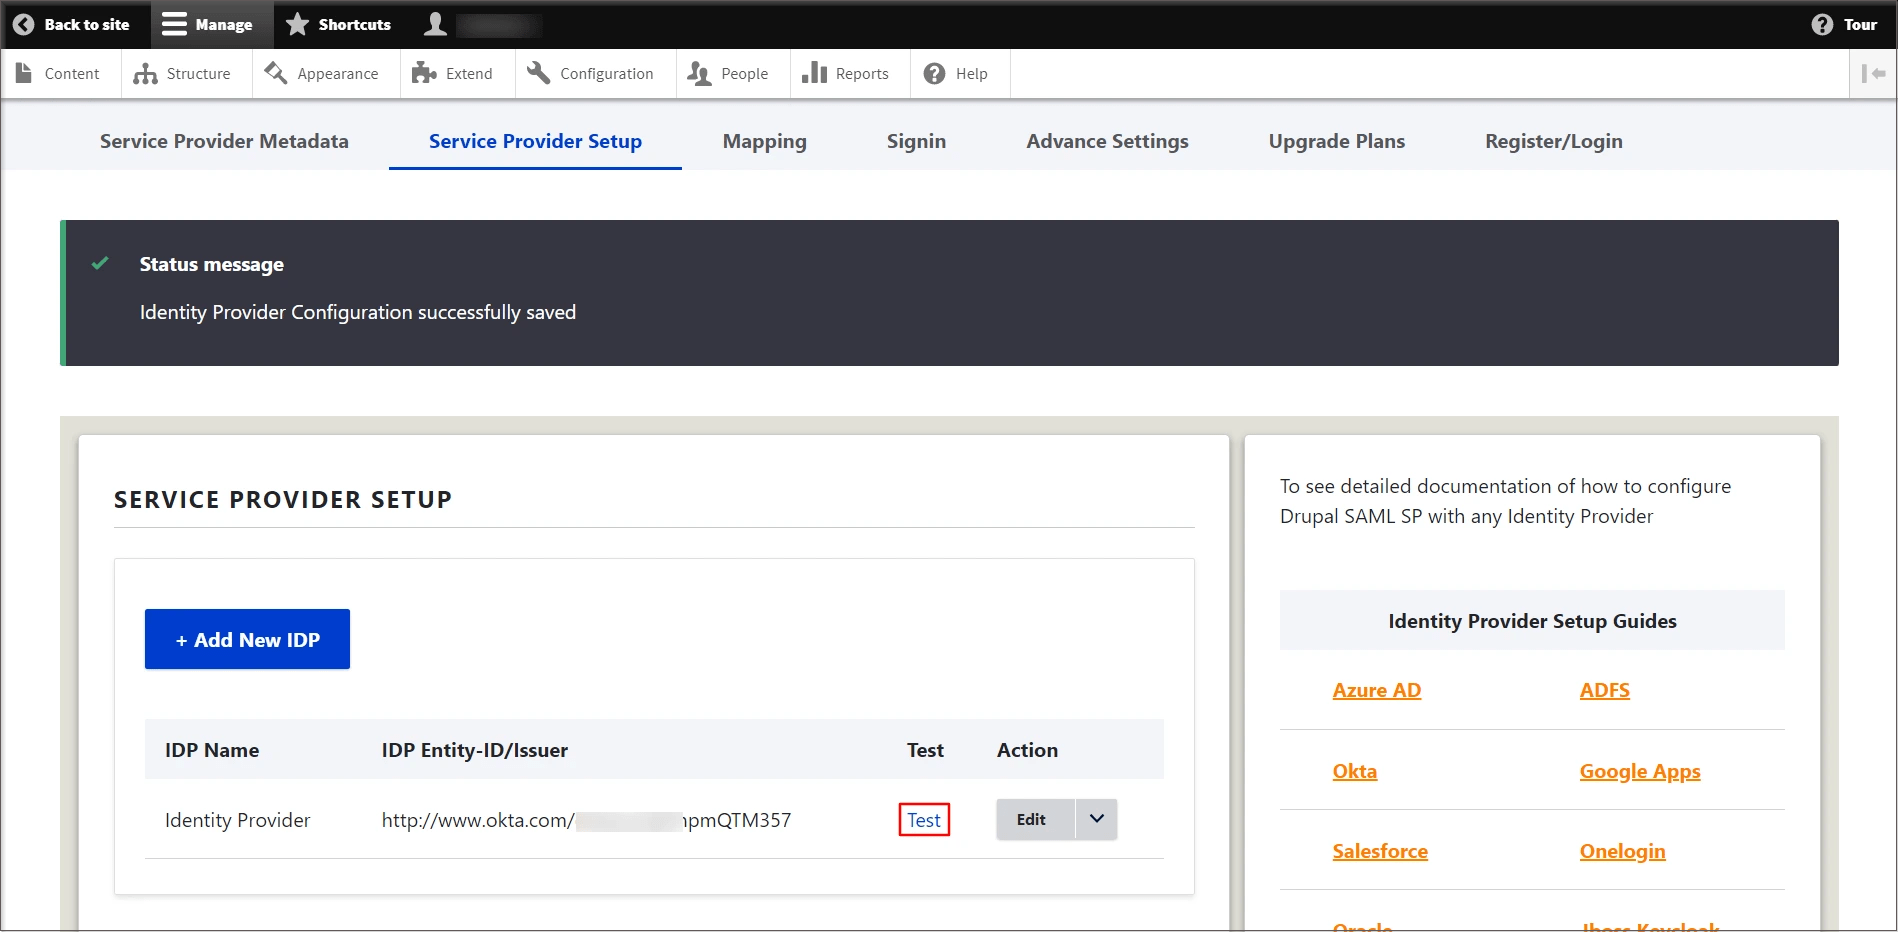
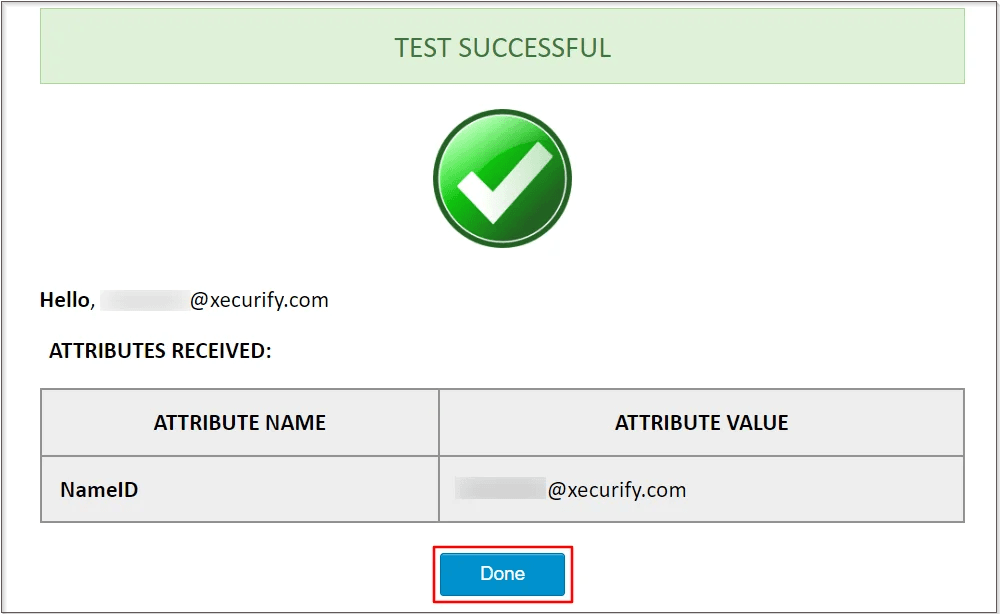
After successfully saving the configurations, click on the Test link to test the connection between Drupal and Okta.
- On a Test Configuration popup, if you don't have an active session in Okta on the same browser, you will be asked to sign in to Okta. After successfully logging into Okta, you will be provided with a list of attributes that are received from Okta.
-
Scroll down and click on the Done button.
Congratulations! You have successfully configured Okta as Identity Provider and Drupal as Service Provider.
If you face any issues in test configuration, you can reach out to us at drupalsupport@xecurify.com with a screenshot of the test configuration window.
How does SAML SSO login work?
- Open a new browser/private window and navigate to the Drupal site login page.
- For SP initiated SSO on your Drupal, click the Login using Identity Provider (Okta) link.
- You will be redirected to the Okta login page, wherein your Okta user will enter their Okta credentials. Once you have successfully logged in, Okta users will be able to access your Drupal site within a seconds.
Help improve this page
You can:
- Log in, click Edit, and edit this page
- Log in, click Discuss, update the Page status value, and suggest an improvement
- Log in and create a Documentation issue with your suggestion


