
Provides TinyPNG integration.
What does TinyPNG do?
TinyPNG uses smart lossy compression techniques to reduce the file size of your PNG files. By selectively decreasing the number of colors in the image, fewer bytes are required to store the data. The effect is nearly invisible but it makes a very large difference in file size!
Why should I use TinyPNG?
PNG is useful because it's the only widely supported format that can store partially transparent images. The format uses compression, but the files still can be large. Use TinyPNG to shrink images for your apps and sites. It will use less bandwidth and load faster. For more information about TinyPNG please visit https://tinypng.com/.
For more information about TinyPNG please visit https://tinypng.com/.
Drupal 8/9
Manual installation is not supported for Drupal 8/9 version of TinyPng. Please use composer to install TinyPNG for Drupal8 or 9!
Installation
- Install module with composer
cd $DRUPAL
composer require drupal/tinypng
- Enable as you would normally install a contributed Drupal module. See: https://www.drupal.org/node/895232 for further information.
Note: we are assuming that you have a Composer based Drupal installation, where the docroot (usually called www) is not the same as the site’s root directory but a subdirectory in that. For more info, see: https://www.drupal.org/docs/develop/using-composer/using-composer-to-manage-drupal-site-dependencies.
Configuration
Having installed the module, go to /admin/config/tinypng page and set your TinyPNG API key. On the same page you can select the mode you want to compress images.
With Compress on upload mode you will compress images when they are uploaded.
With Enable TinyPNG image action mode you will have the opportunity to keep your original image untouched and select the image styles you want to compress. When this mode is enabled you can add TinyPNG effect to any of your image styles.
Drupal 7
How does it work?
For Drupal 7 this module creates a new ImageToolkit which uses other toolkits in the background. The secondary toolkit could be the core GD or the ImageMagick toolkit provided by ImageMagick module. TinyPNG module just calls the functions of the secondary toolkit in the background but in the last step it sends the image to the TinyPNG API to compress it.
Requirements
- Libraries API
- A TinyPNG API key
You can request one for free at https://tinypng.com/developers. - Tinify PHP library >= 1.3.1
You can download it from https://github.com/tinify/tinify-php/
Requirements
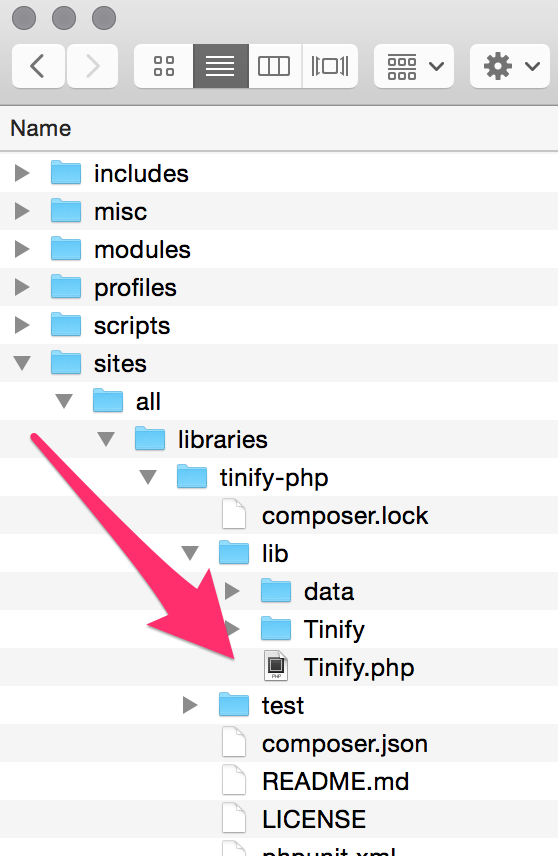
Download Tinify PHP (v1.3.1+) library from https://github.com/tinify/tinify-php/ and place it under $DRUPAL_ROOT/sites/all/libraries.
After Tinify PHP library installation the Tinfiy.php should be found at $DRUPAL_ROOT/sites/all/libraries/tinify-php/lib/Tinify.php
Then install the module as you would normally install a contributed Drupal module. See: https://drupal.org/documentation/install/modules-themes/modules-7 for further information.
Installation via Drush
If you install tinypng module via drush command: drush en tinypng, the library will be downloaded and placed the proper place. The module provides a separate Drush command for easy installation just of the Tinify-PHP library too: drush tinypng-library.
Configuration
- Having installed the module, go to admin/config/media/image-toolkit page and select TinyPNG as default Image toolkit and save the form.
- Then set your TinyPNG API key, select the secondary toolkit and save the form.
- Configure the secondary toolkit too.
Supporting organizations:
Project information
 Minimally maintained
Maintainers monitor issues, but fast responses are not guaranteed.- Maintenance fixes only
Considered feature-complete by its maintainers. - Project categories: Media, Integrations
 1,275 sites report using this module
- Created by yannickoo on , updated
 Stable releases for this project are covered by the security advisory policy.
Look for the shield icon below.
Releases
2.0.1
released 10 February 2026
Works with Drupal: ^10.3 || ^11
Install:
Development version: 2.x-dev updated 10 Feb 2026 at 07:01 UTC
8.x-1.4
released 5 July 2024
Works with Drupal: ^8 || ^9 || ~10.0 || ~10.1 || ~10.2
Install:
Development version: 8.x-1.x-dev updated 5 Jul 2024 at 10:14 UTC


