 Come together with the global Drupal community in Rotterdam, 28 Sept – 1 Oct 2026. Sessions, contribution, connection, and Early Bird savings until 8 June.
Panels 3: How to use variants and views to create node displays. (D7)
You can view your nodes in a custom layout using Panels without having to edit a node template file or use modules such as Content template.
The following example will create a product-page, displaying some of the products content-fields.
Using Panels we will build the node to display in node column.
Requirements for this example
I will asume you have an understanding of the following 3 modules:
Preparation
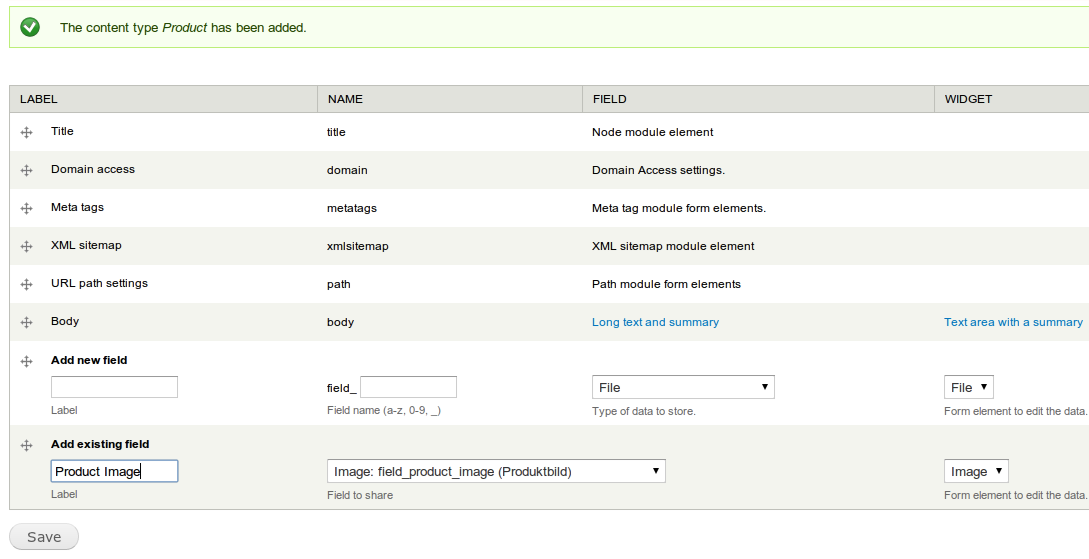
- Create a new node type called Product.
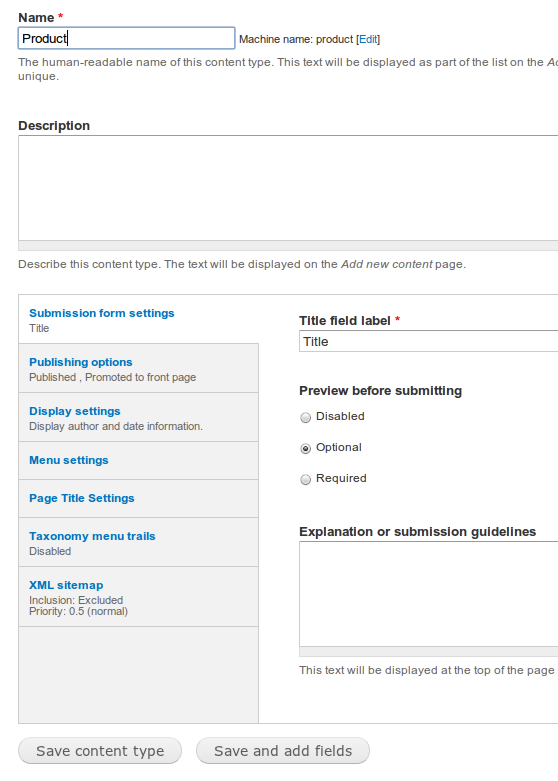
- Add the following fields:
- Product-Image: Use one of the various CCK image field widgets.
- Create an Imagecache preset to show the product-thumbnail in a suitable size.
- Now create some Product content.
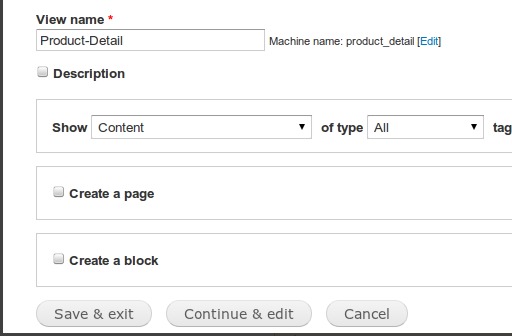
Creating a view to display product-fields
- Create a View that will show node-items.
- Add Field "Product Image".
- Add Filter-Criteria "Content: Type(=Product)"

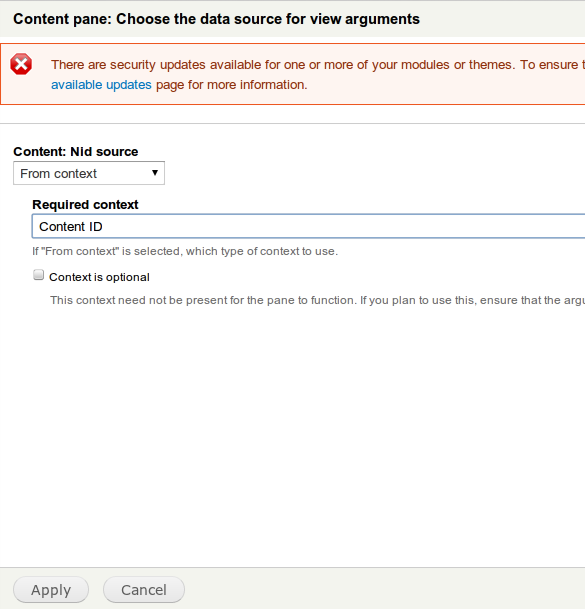
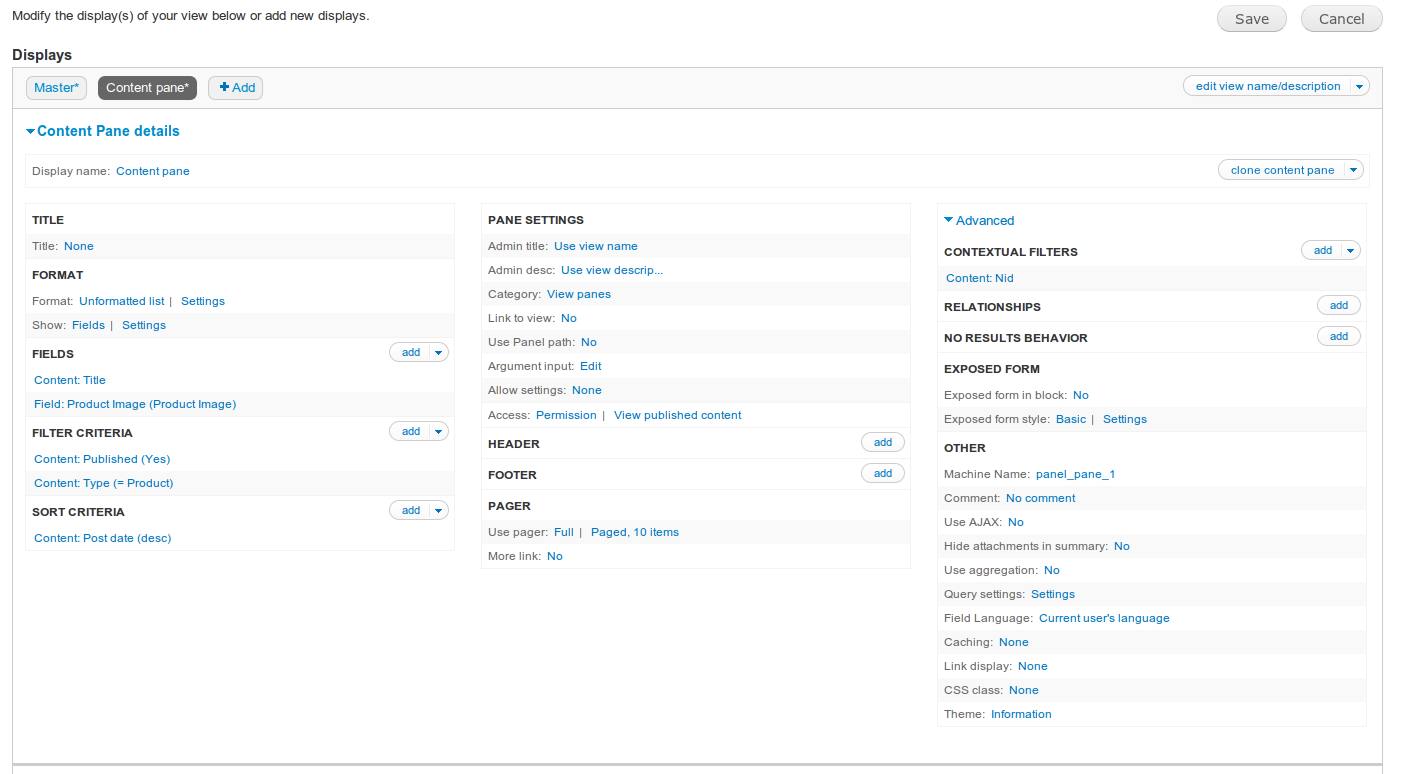
- Add "Content pane"-Display.

- Add Contextual Filter "Content: Nid".


- Edit Pane Settings "Argument input".
- Save View.
Creating a Panel, step by step:
- Go to /admin/structure/pages and enable the Node Template panel and click Edit.
- Add a variant.
- Enter a name ('Product Detail'). Click Selection rules and Contexts. (Contexts is optional and is not used in this example.)
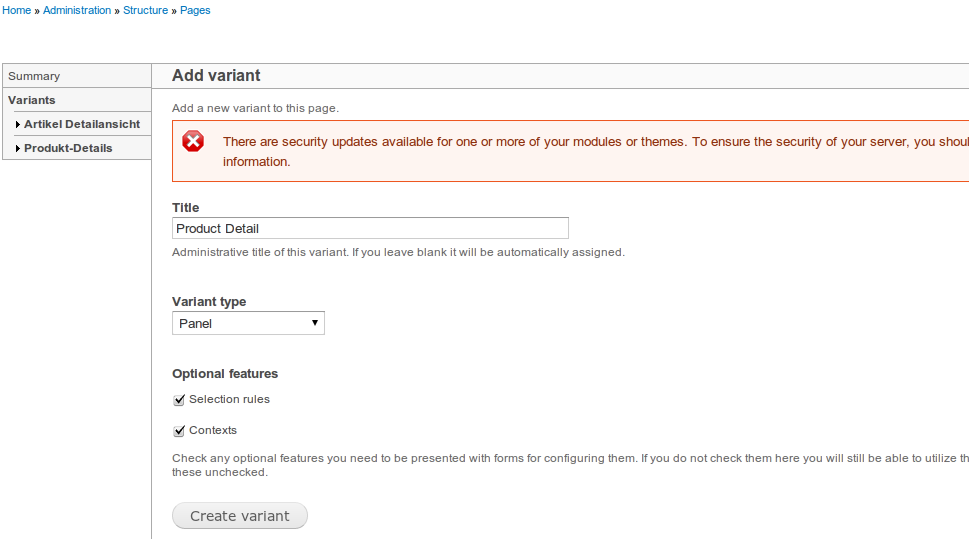
- Create variant.
- With Selection Rules you will tell that this variant must only be used for the Product content type.
- Select Node: Type from the drop down list and click add. A new window will appear where you can select the node type. Select Product and Save.

- Select Only one criteria must pass. We only use one anyway.
- Continue.
- "Summary of contexts" will already show Argument 1
- Continue.
- Choose a layout. I used the single column stacked in this example.
- Continue.
- Leaving "Panel settings" unchanged for now
- Continue.
- Now you can add Panel content. Click the icon on the top left of the Top region and select Add content. A pop-up window will open where you can add blocks and widgets to your Panel.

- Select "View panes" in the left bar.
- From the list, select "View: Product-Detail".

- "Content: Nid" is already "Node beeing viewed"
- Finish
- Click create variant.
- You will now see an overview where you can edit the content. Each content section now has an icon on the right hand side where you can do various operations such as changing the settings and disabling the particular content. You also see the CSS properties where you can add a CSS ID or CSS class for the particular content. More about styling later.
- Click Update if you made more changes.
- Click Save and you will be returned to the panel front end.
If you know the node ID of one of your Product nodes you create, you can use it here to do a Preview of your node.
Not a pretty sight yet, as the node is un-styled. You will also notice the original node is duplicated at the bottom of your preview. You need to go to the Display settings of your content type and disable all the fields.
The original node display is now over ridden. If you open any node of the Product type, it will show the way you set it up in the Panel.
Adding more nodes like this is just a matter of adding more variants, and redo the steps above. For many different nodes that have the same basic content, you can create a general variant and add all the node types to the selection rule. When you need to make changes to one of the node types, you remove it from the selection rule. Clone the general variant and make your changes. Rename the new variant and add the node type to the new variant's selection rules as the only node type.
Theming the Panel:
Panels makes it very easy to add custom CSS ID's and classes.
First you can create a CSS ID for the whole panel under the General tab on the Panel front-end. There is also a field here where you can enter quick CSS code, but it is not recommended to use. Better to stay with the Drupal theming rules.
And as mentioned above, you can also add ID's and classes to each of the content.
Help improve this page
You can:
- Log in, click Edit, and edit this page
- Log in, click Discuss, update the Page status value, and suggest an improvement
- Log in and create a Documentation issue with your suggestion
