On this page
- Prerequisite:
- Setup Video:
- Step 1: Setting up Google as OAuth Provider in Drupal:
- Configure OAuth Single Sign-On Application in Google:
- Step 2: Client ID and Client Secret setup in Drupal:
- Step 3: Scope and Endpoints setup in Drupal:
- Verify SSO Connection and Mapping:
- Support:
- Need assistance? Contact our 24*7 support team
Google SSO setup (miniOrange OAuth Client)
This document will assist you to configure Google as an OAuth / OpenID provider, making Drupal an OAuth Client. Following these steps will allow you to configure OAuth/OpenID SSO between Google and your Drupal site such that your users will be able to log in to your Drupal site using their Google credentials.
We provide the Drupal OAuth Login - OAuth OIDC SSO module which is compatible with Drupal 7, Drupal 8, Drupal 9, and Drupal 10.
You can check our modules feedback and ratings here.
Prerequisite:
- Install and activate the OAuth Login - OAuth OIDC SSO module on your Drupal site. Click here to check out the module installation step.
Setup Video:

Step 1: Setting up Google as OAuth Provider in Drupal:
-
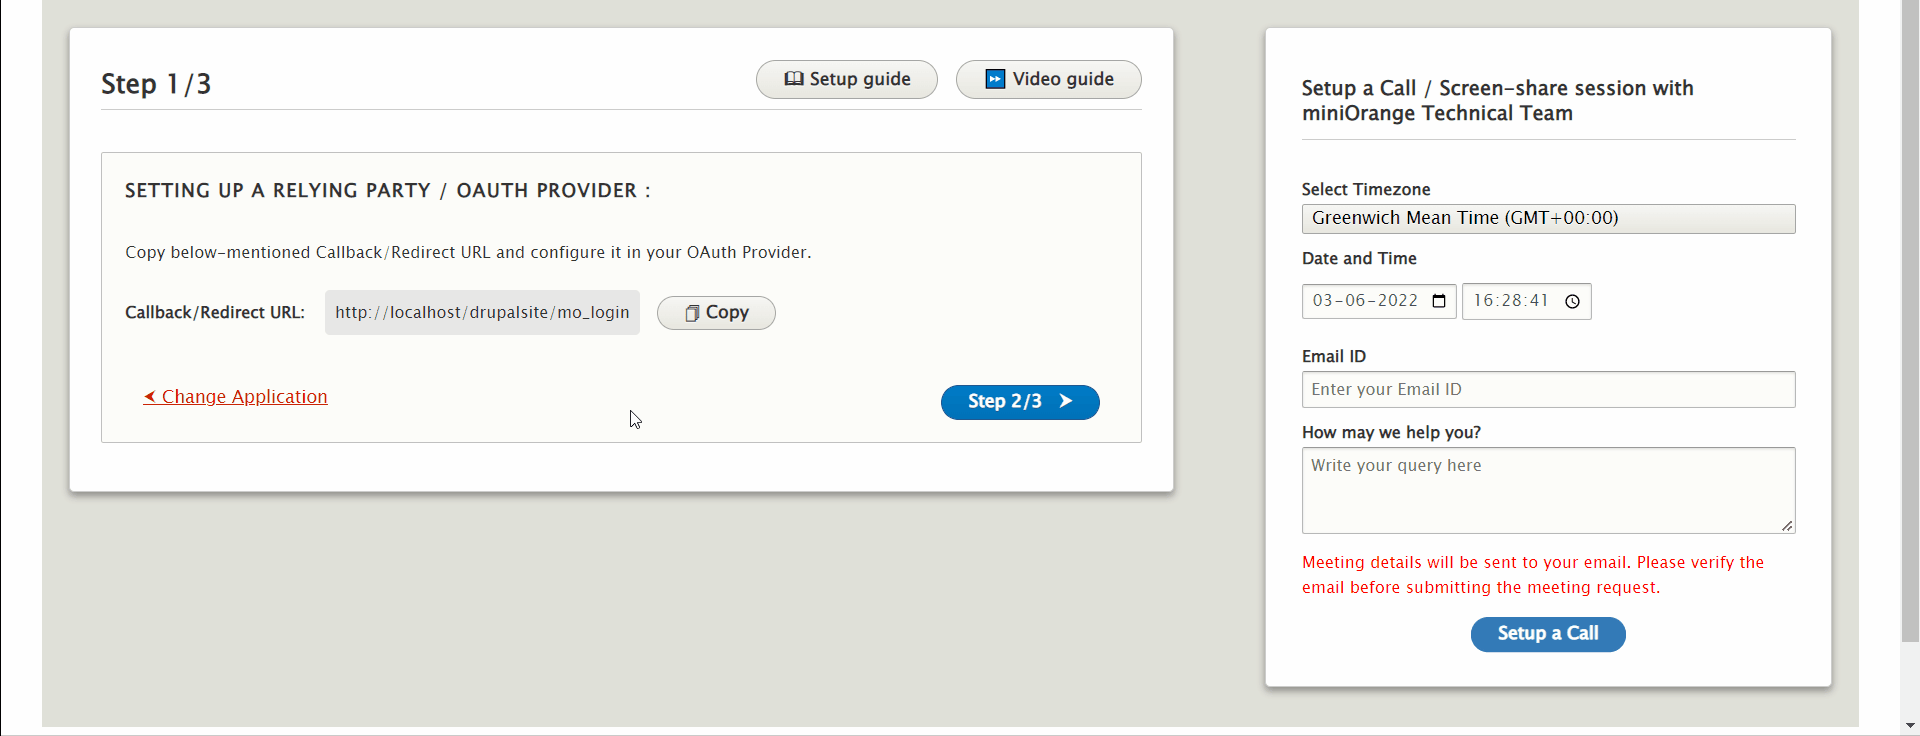
Navigate to the Configure Application tab and search for Google using the search box.

-
Now, click on the Copy button to copy the Callback/Redirect URL and keep it handy. After that, click on the Step 2/3 button.
Configure OAuth Single Sign-On Application in Google:
-
Go to the Google admin dashboard and sign up/log in to your account.
-
Click on Select a project and then select NEW PROJECT.

-
Enter Project name as your choice then click on CREATE button.

-
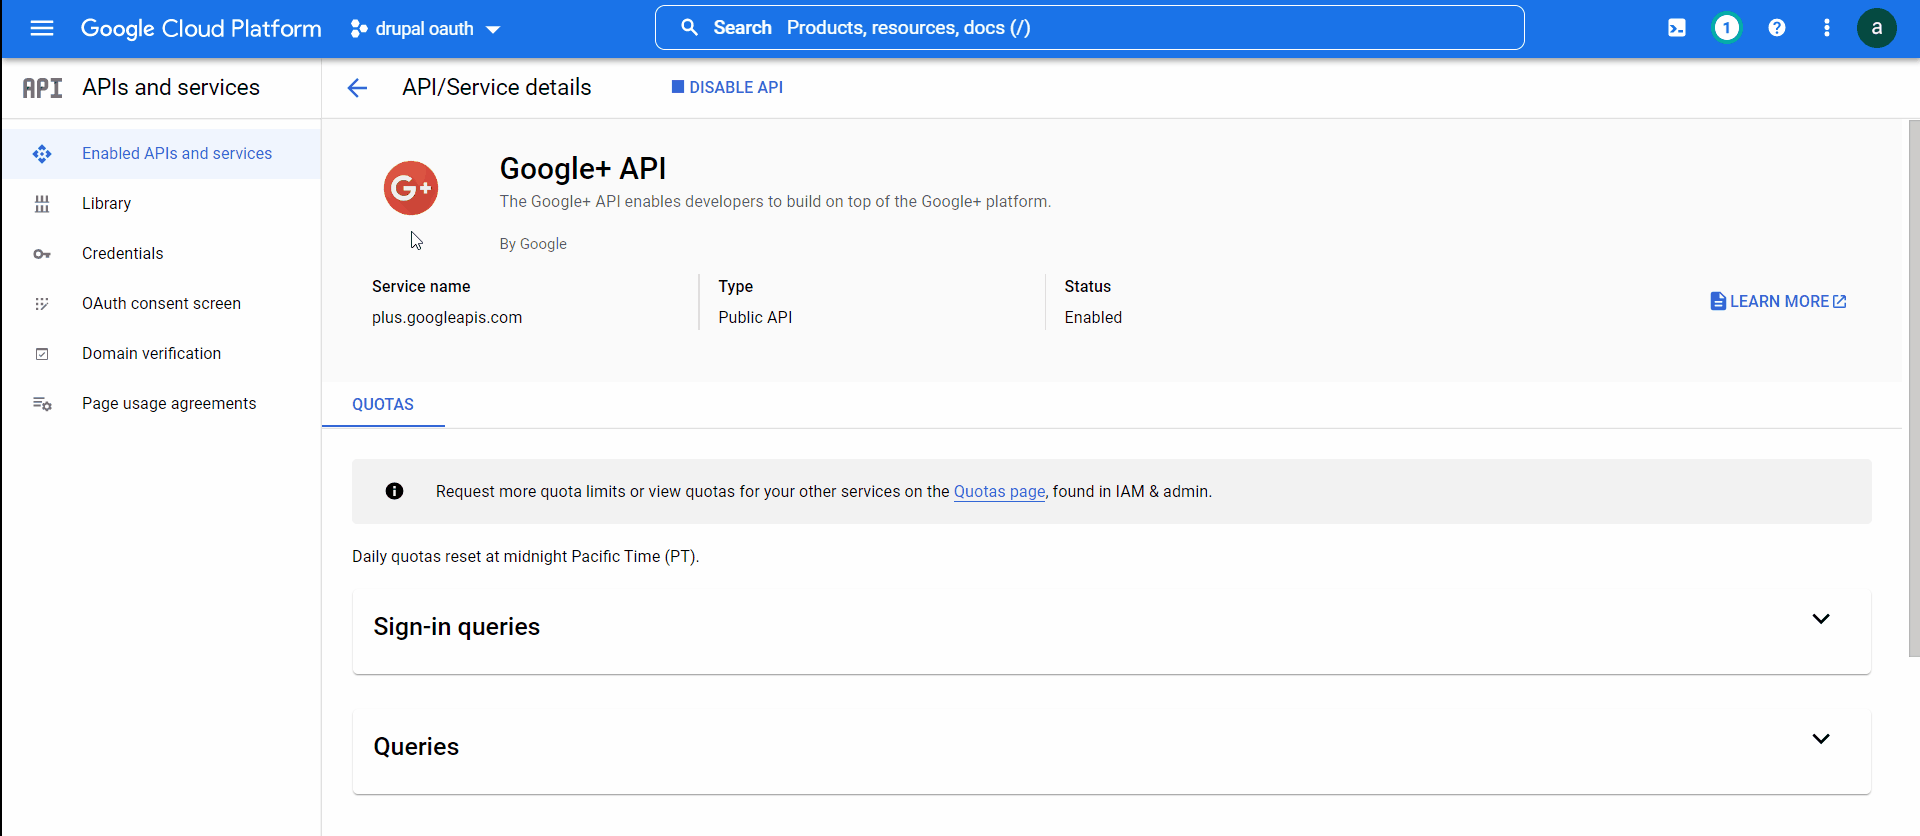
Click on ENABLE APIS AND SERVICES.

-
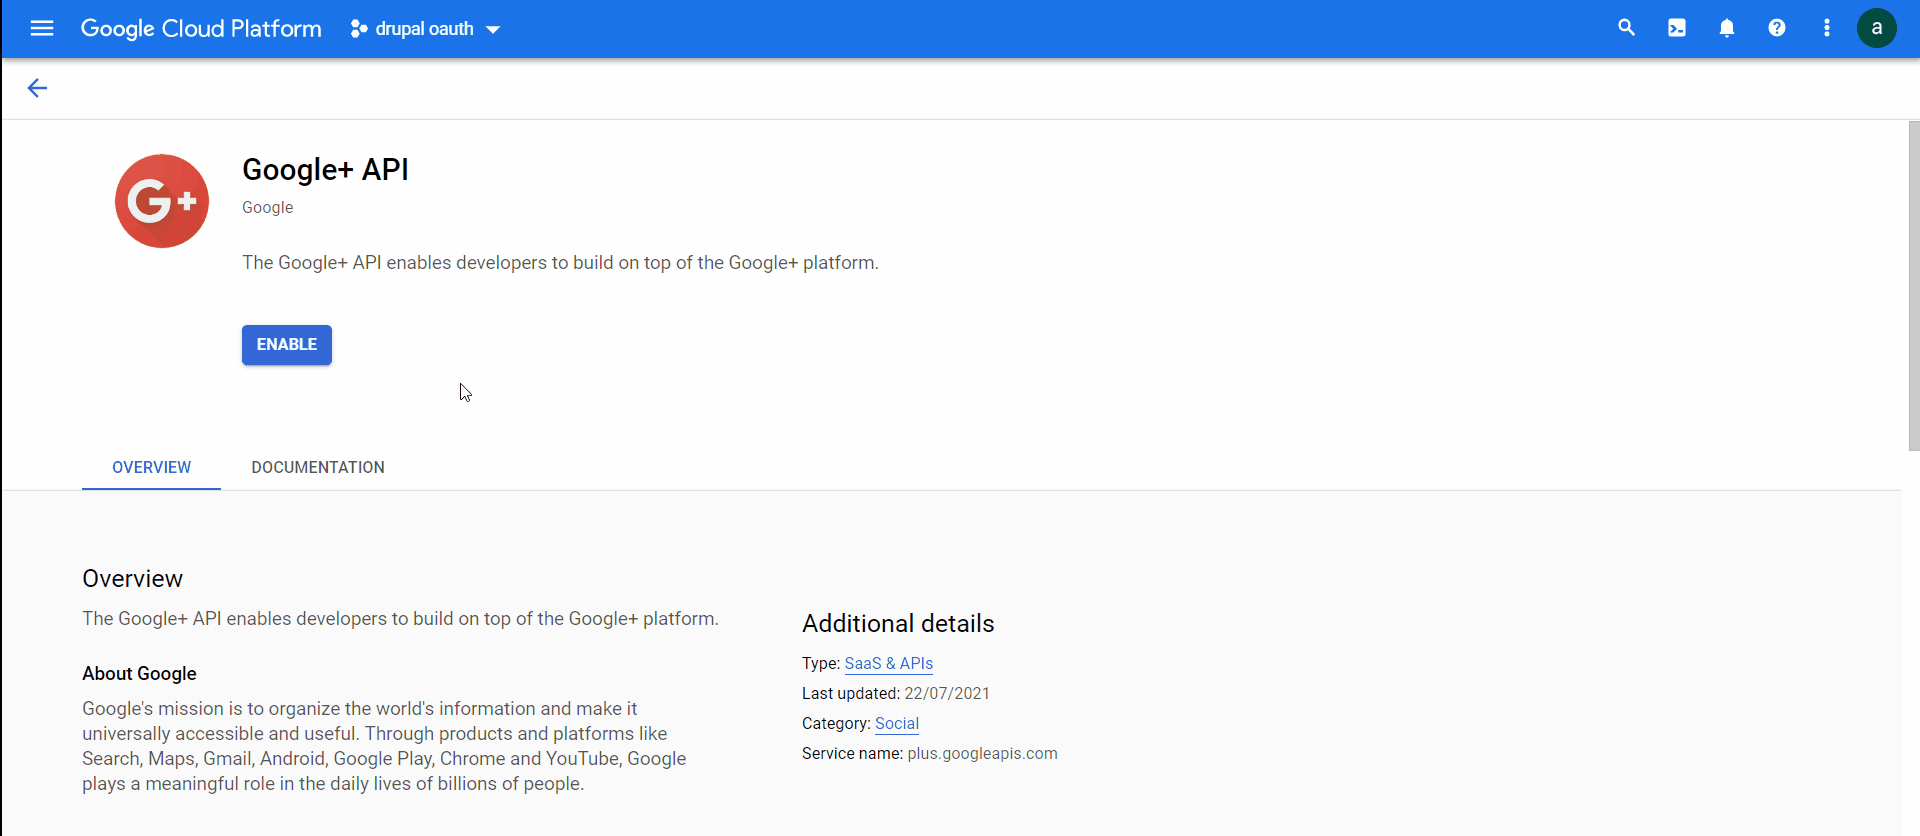
Search for Google PLUS API in the search bar and click on Google+ API from the search results.

-
Click on ENABLE button to enable Google+ API.
-
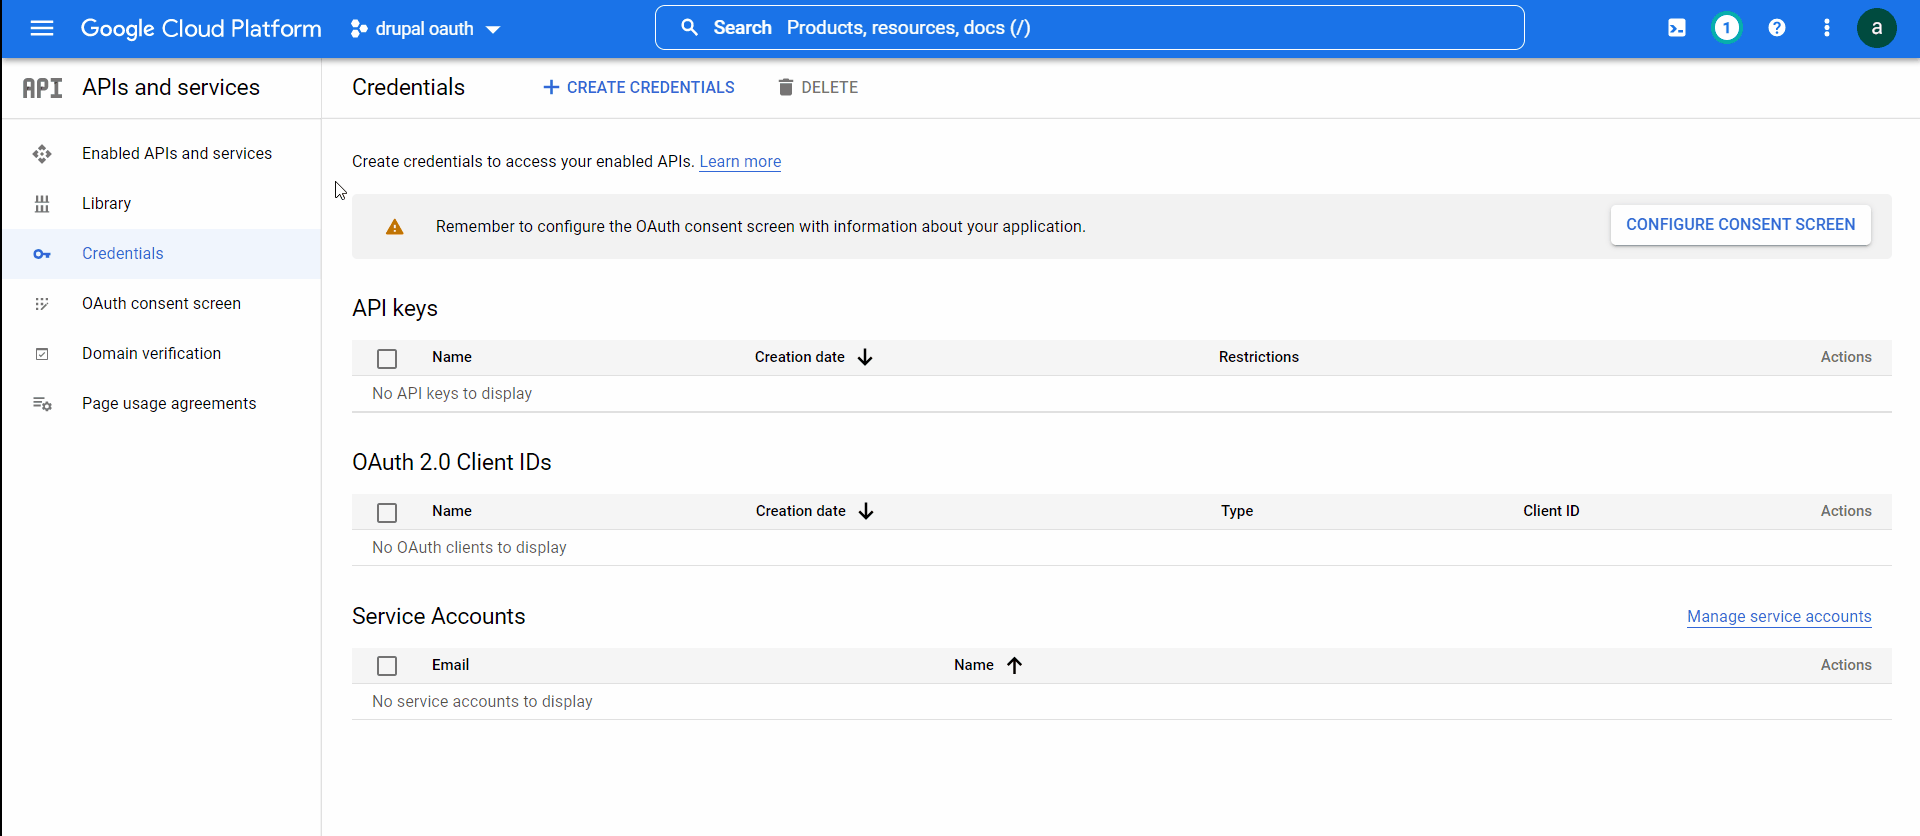
From left navigation bar, click on Credentials.
-
Click on CREATE CREDENTIALS button. Then, select OAuth Client ID from the options provided.
-
In case you are facing some warning saying that To create an OAuth Client ID, you must first set a product name on the consent screen (as shown in below gif). Click on the CONFIGURE CONSENT SCREEN button.

-
Choose how you want to configure and register your app and click on CREATE button.

-
Enter the required details such as App Name, User Support Email and click on SAVE AND CONTINUE button.

-
Click on the ADD OR REMOVE SCOPES button, then select the scopes that will allow your project to access specific types of private user data from their Google Account, and then click the UPDATE button.

-
Navigate to the Credentials tab, click the CREATE CREDENTIALS button, and then select OAuth client ID.

-
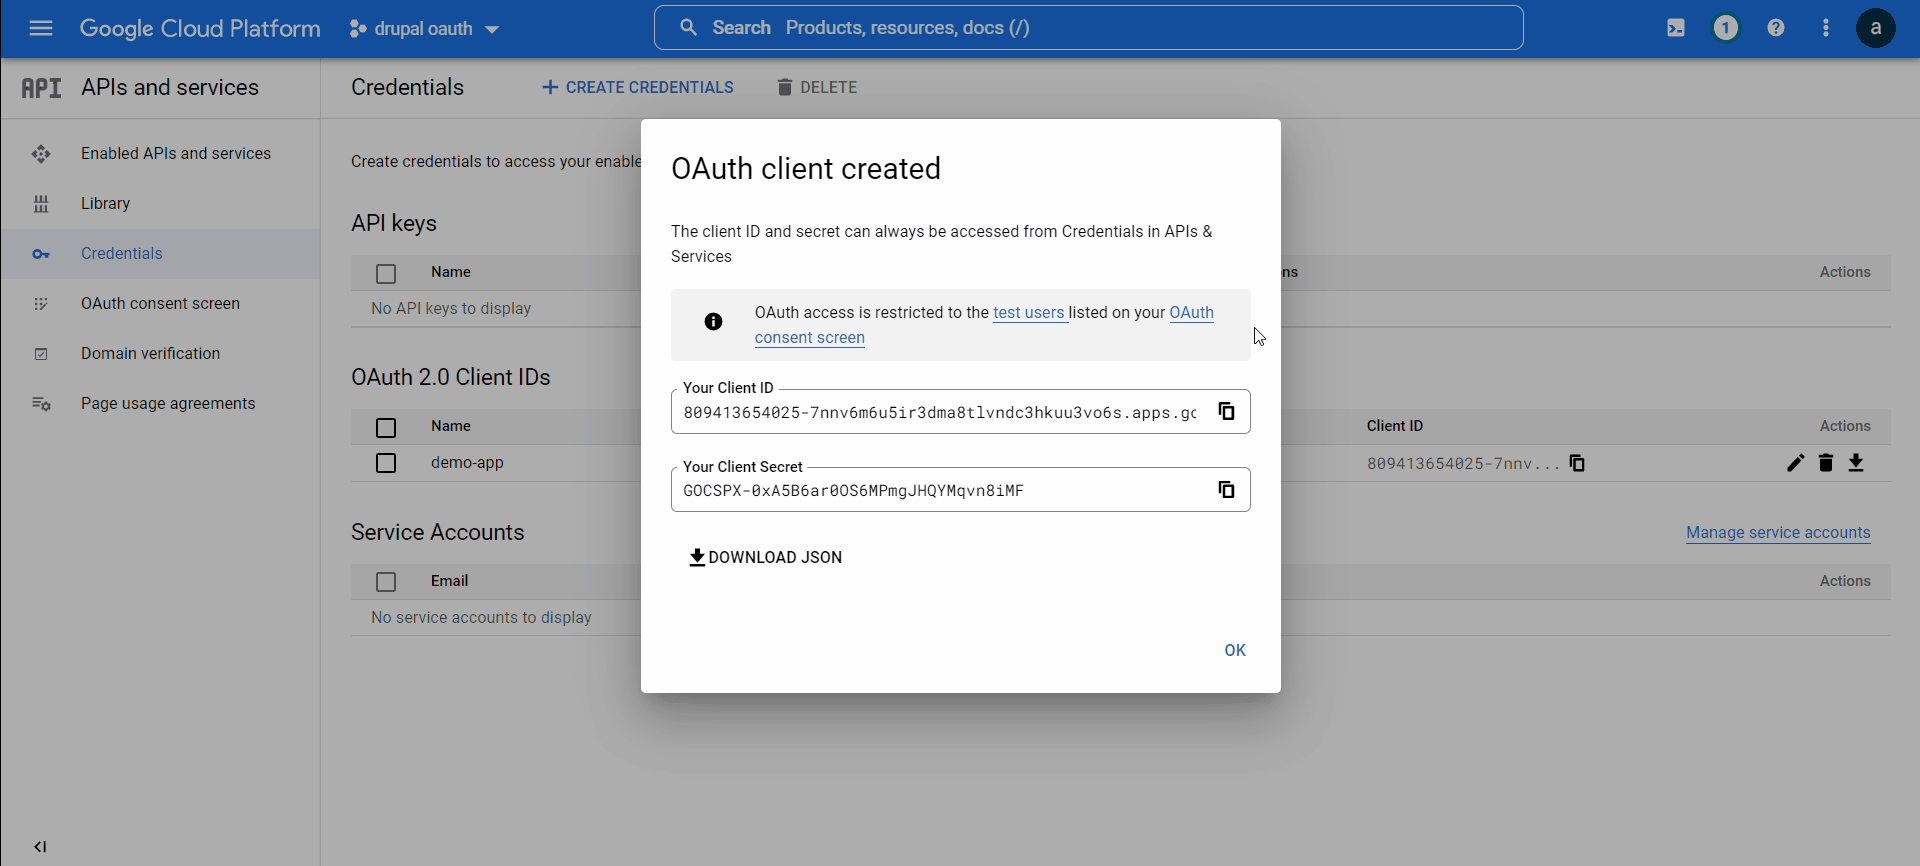
Select Web Application from the options below Application Type. Enter the name you want for your Client under the Name field and enter Callback/Redirect URL (Which we copied in the first step) in the Authorized redirect URIs text-field.

Step 2: Client ID and Client Secret setup in Drupal:
-
Copy Your Client ID from the Google application and paste it into Drupal OAuth Login's Client ID text field.

-
Then, copy Your Client Secret and paste it into the Drupal OAuth Login's Client Secret text-field.


- Once done, click on the Step 3/3 button.
Step 3: Scope and Endpoints setup in Drupal:
There are two ways using which you can set up the scope and endpoints:
- Discovery / Well-Known URL:
-
Copy the discovery or well-known URL provided by Google
and then paste it into the Metadata URL / Well-Known
Endpoint text
field.Well-Known URL: https://accounts.google.com/.well-known/openid-configuration
-
Click on the All Done! button.

-
- Manual Configuration:
-
Check the Endpoints and Scope. Click on the All Done! button.

-
Google Endpoints and scope:
| Scope | |
| Authorize Endpoint | https://accounts.google.com/o/oauth2/auth |
| Access Token Endpoint | https://www.googleapis.com/oauth2/v4/token |
| Get User Info Endpoint | https://www.googleapis.com/oauth2/v1/userinfo |
Verify SSO Connection and Mapping:
- In Summary, You will be able to review the configuration which you have done so far.
- Once verified, you can click on the Test Configuration button to check the connection between Drupal and Google.
-
After a successful connection, select the Email Attribute from the dropdown and click on the Done button.

- Congratulations! You have successfully configured Google as OAuth Provider and Drupal as OAuth login.
- Now, open a new browser/private window and go to your Drupal site login page.
- Click on the Login using Google link to initiate the SSO from Drupal.
Support:
Need assistance? Contact our 24*7 support team
If you require any help with installing or configuring this module, please feel free to reach out to us at our 24*7 Support by clicking on the Support Icon from the bottom right corner and send us a query. You can also join us on Drupal Slack in the #miniorange channel.
Help improve this page
You can:
- Log in, click Edit, and edit this page
- Log in, click Discuss, update the Page status value, and suggest an improvement
- Log in and create a Documentation issue with your suggestion

