Active Directory Login in Drupal
This document is designed to guide you through the steps that will allow you to integrate windows active directory with your LDAP & Active Directory Server to Drupal.
We provide Drupal LDAP / Active Directory Integration module which is compatible with Drupal 7, Drupal 8, Drupal 9, Drupal 10, and Drupal 11.
Installation of miniOrange Drupal LDAP/AD module:
- In order to integrate the Drupal using LDAP protocol, you are required to download the LDAP / AD Login module on your Drupal 7.x, Drupal 8.x, Drupal 9.x, or Drupal 10.x site.
- You can check out the installation steps:
Steps to configure LDAP:
-
Once you have enabled the module, navigate to Configuration ➔ miniOrange Active Directory / LDAP Integration as shown in the image below.

-
Now, click on the LDAP Configuration tab.

-
Enter your LDAP server URL in LDAP Server URL text field.

- Enter the Service Account Username which will be used to establish the connection. You can use the Service Account Username in two ways:
- First the Username at the rate domain name for Active Directory access the domain controller.
-
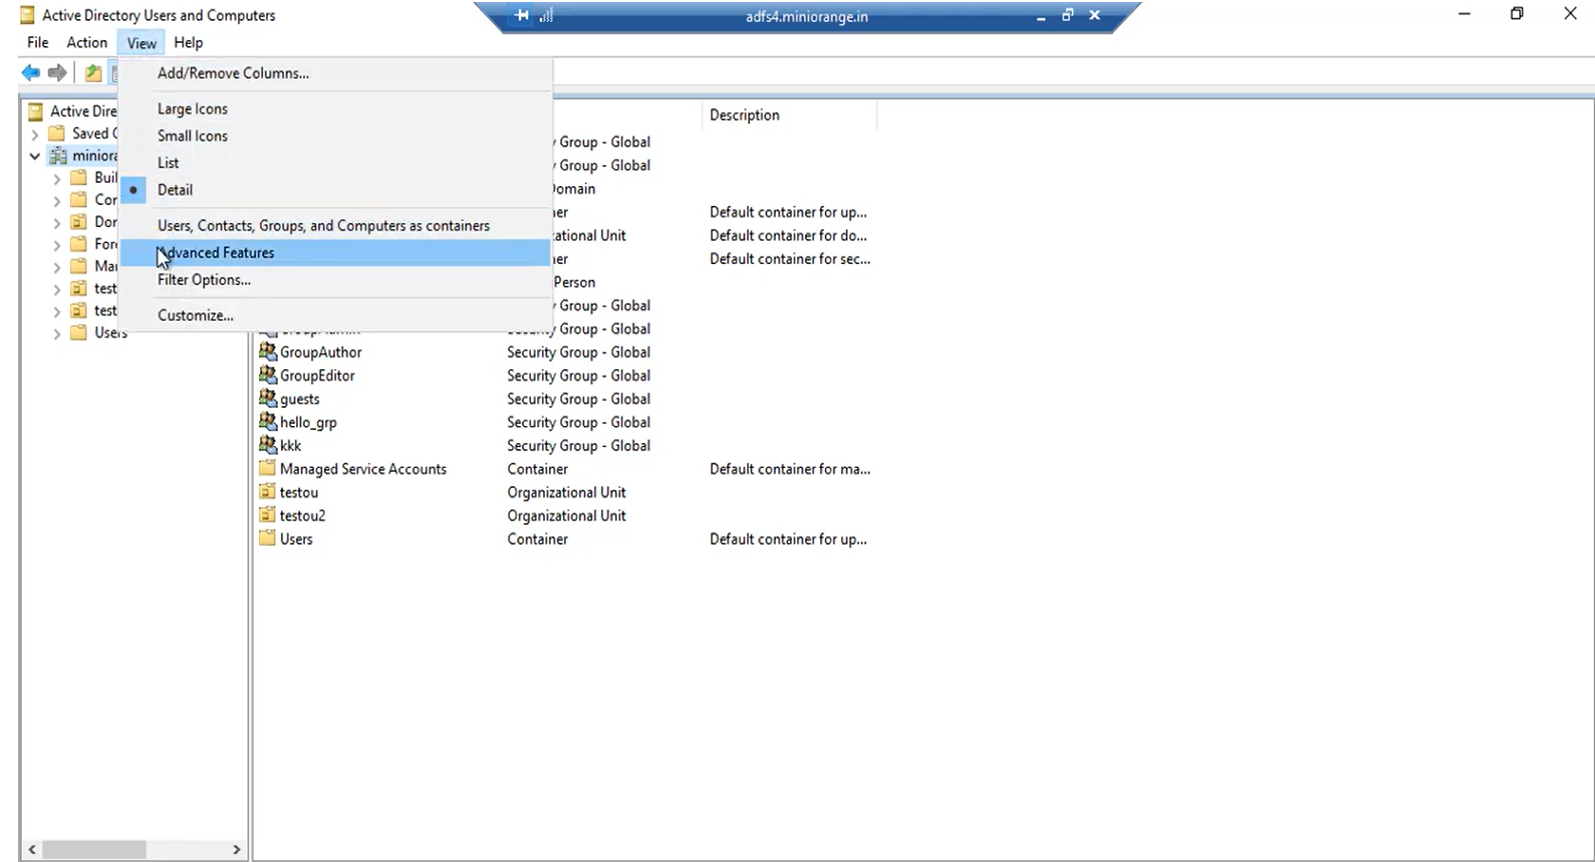
Go to the View option Enabled the Advanced Features.
- Then, go to the container in which your users are present to find the value username and rate domain name.
-
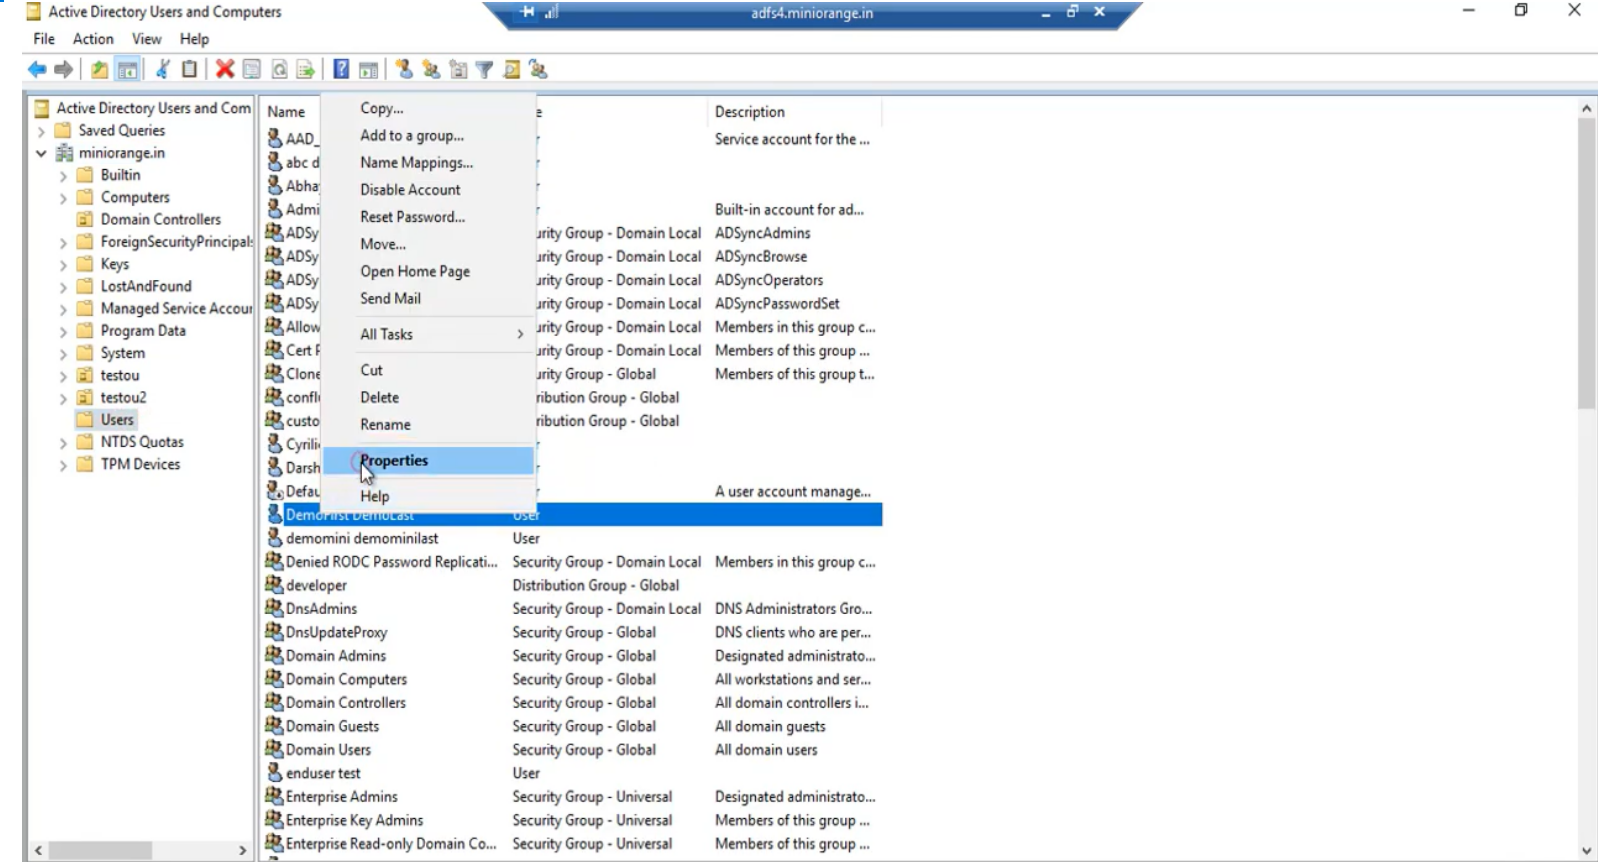
Click on the Users container folder.
-
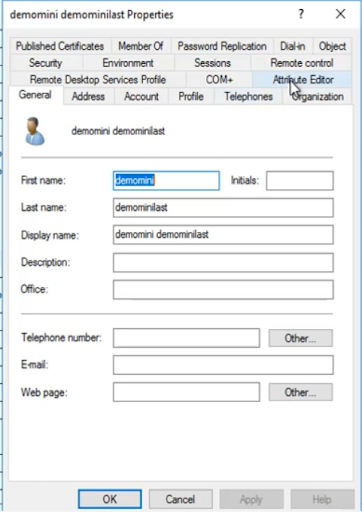
Select the demouser demolast and right-click and select Properties.
-
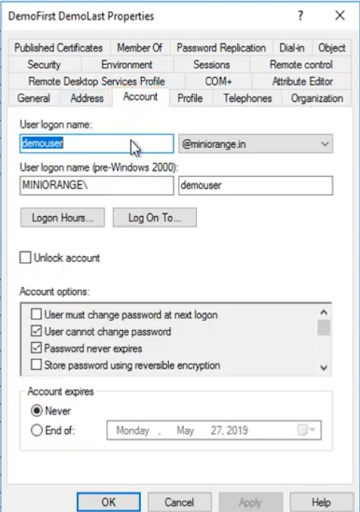
Click on the Account option and copy the User logon name and get the domain name itself.
-
Copy the User logon name in the clipboard and paste that value in the Bind Account DN text field with your domain name.

- Also, you can enter the value of the distinguished name as a Service Account Username and you can get the value of the distinguished name and User properties.
- Go to the Users container and select demouser demolast and right-click on Properties.
-
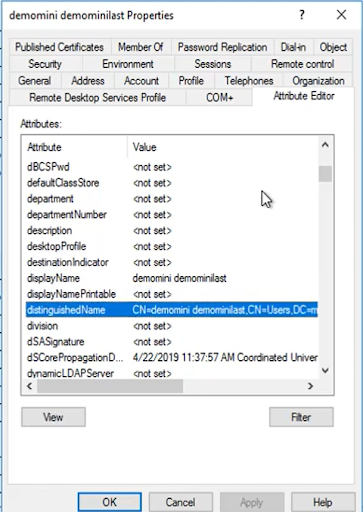
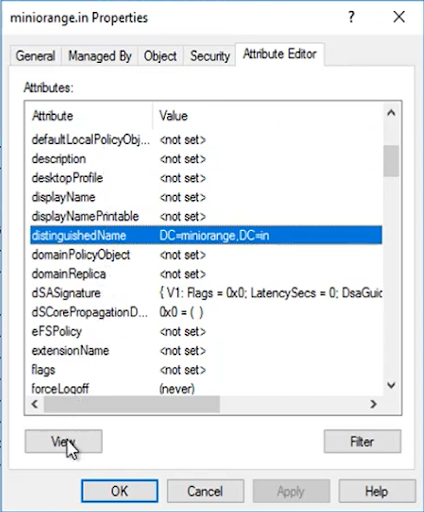
Click on the Attribute Editor button.
-
Search for a Distinguished Name in the given list.
-
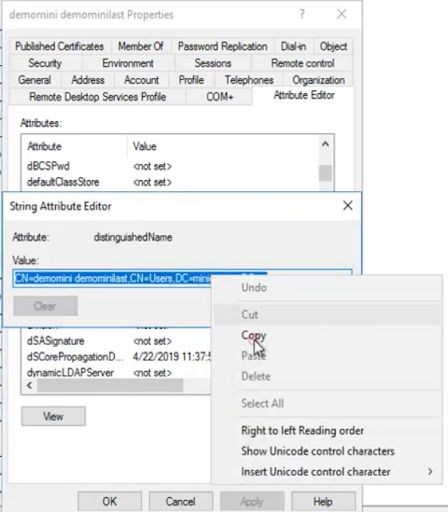
After finding the value click on View and copy the value of the distinguished name.
-
You can also specify the distinguished name value as Bind Account DN instead of username@domain name.

- Here we have used username@domain name as service account username.
-
Enter your account password for your AD server in the Bind Account Password text field and click on the Test Connection & Proceed button.

- In the next screen that you see, select the Search Base and the Search Filter/Username Attribute with which your users will be searched while logging in.
- Search Base: This is the LDAP hierarchy under which your users will be searched.
-
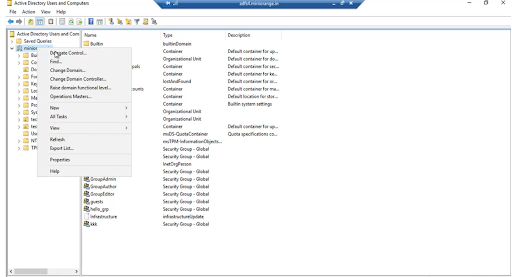
After that, you have to select the container in which your user is present. Now, we are selecting the whole directory to find the value of search base select container Properties.
-
Click on the Attribute Editor.

-
Search for a Distinguished name value in the given list and click on View and copy the value and paste the value into Search Base.
-
Enter the search base in the Search Base(s) text field and select user attribute/search filter from the LDAP Username Attribute / Search Filter dropdown.

-
Select the email attribute from LDAP Email Attribute drop-down and then click the Next button.

-
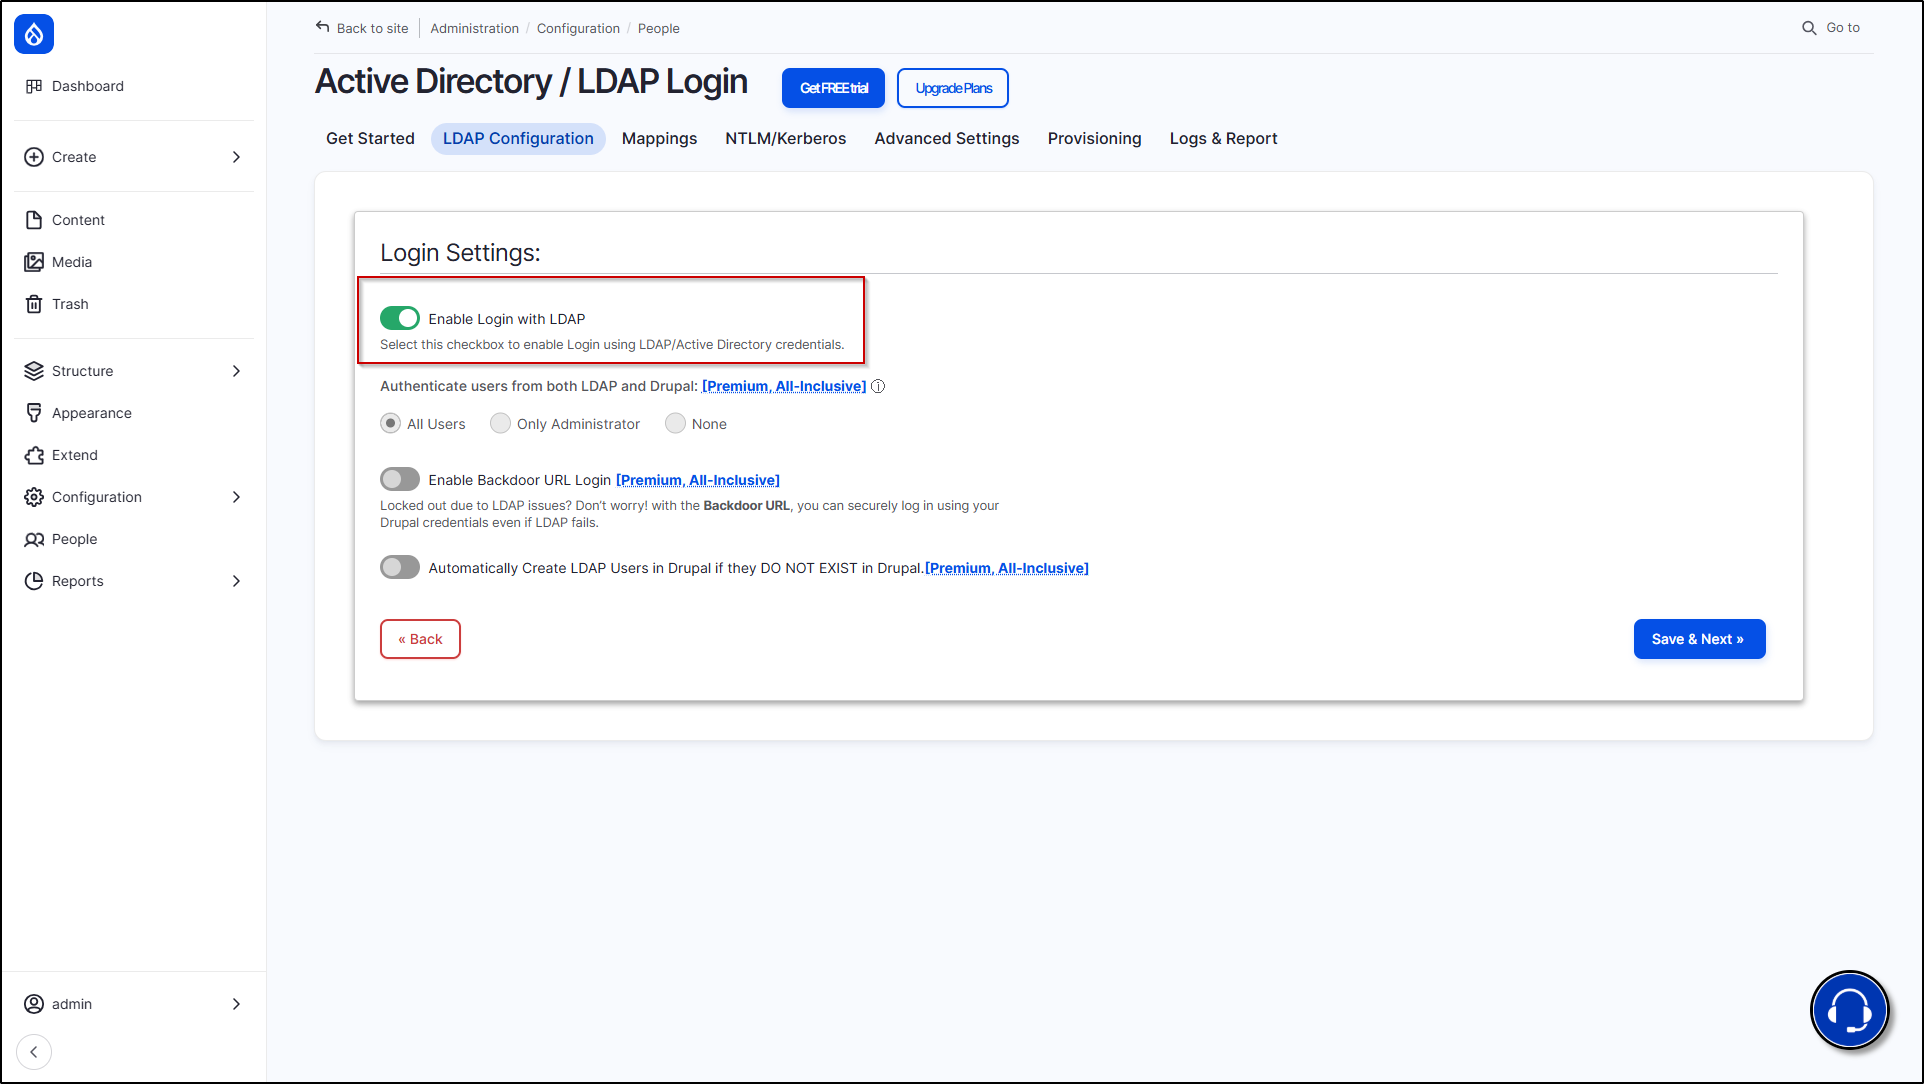
In the next window, turn on the button of Enable Login with LDAP. Then click Save & Next button.
-
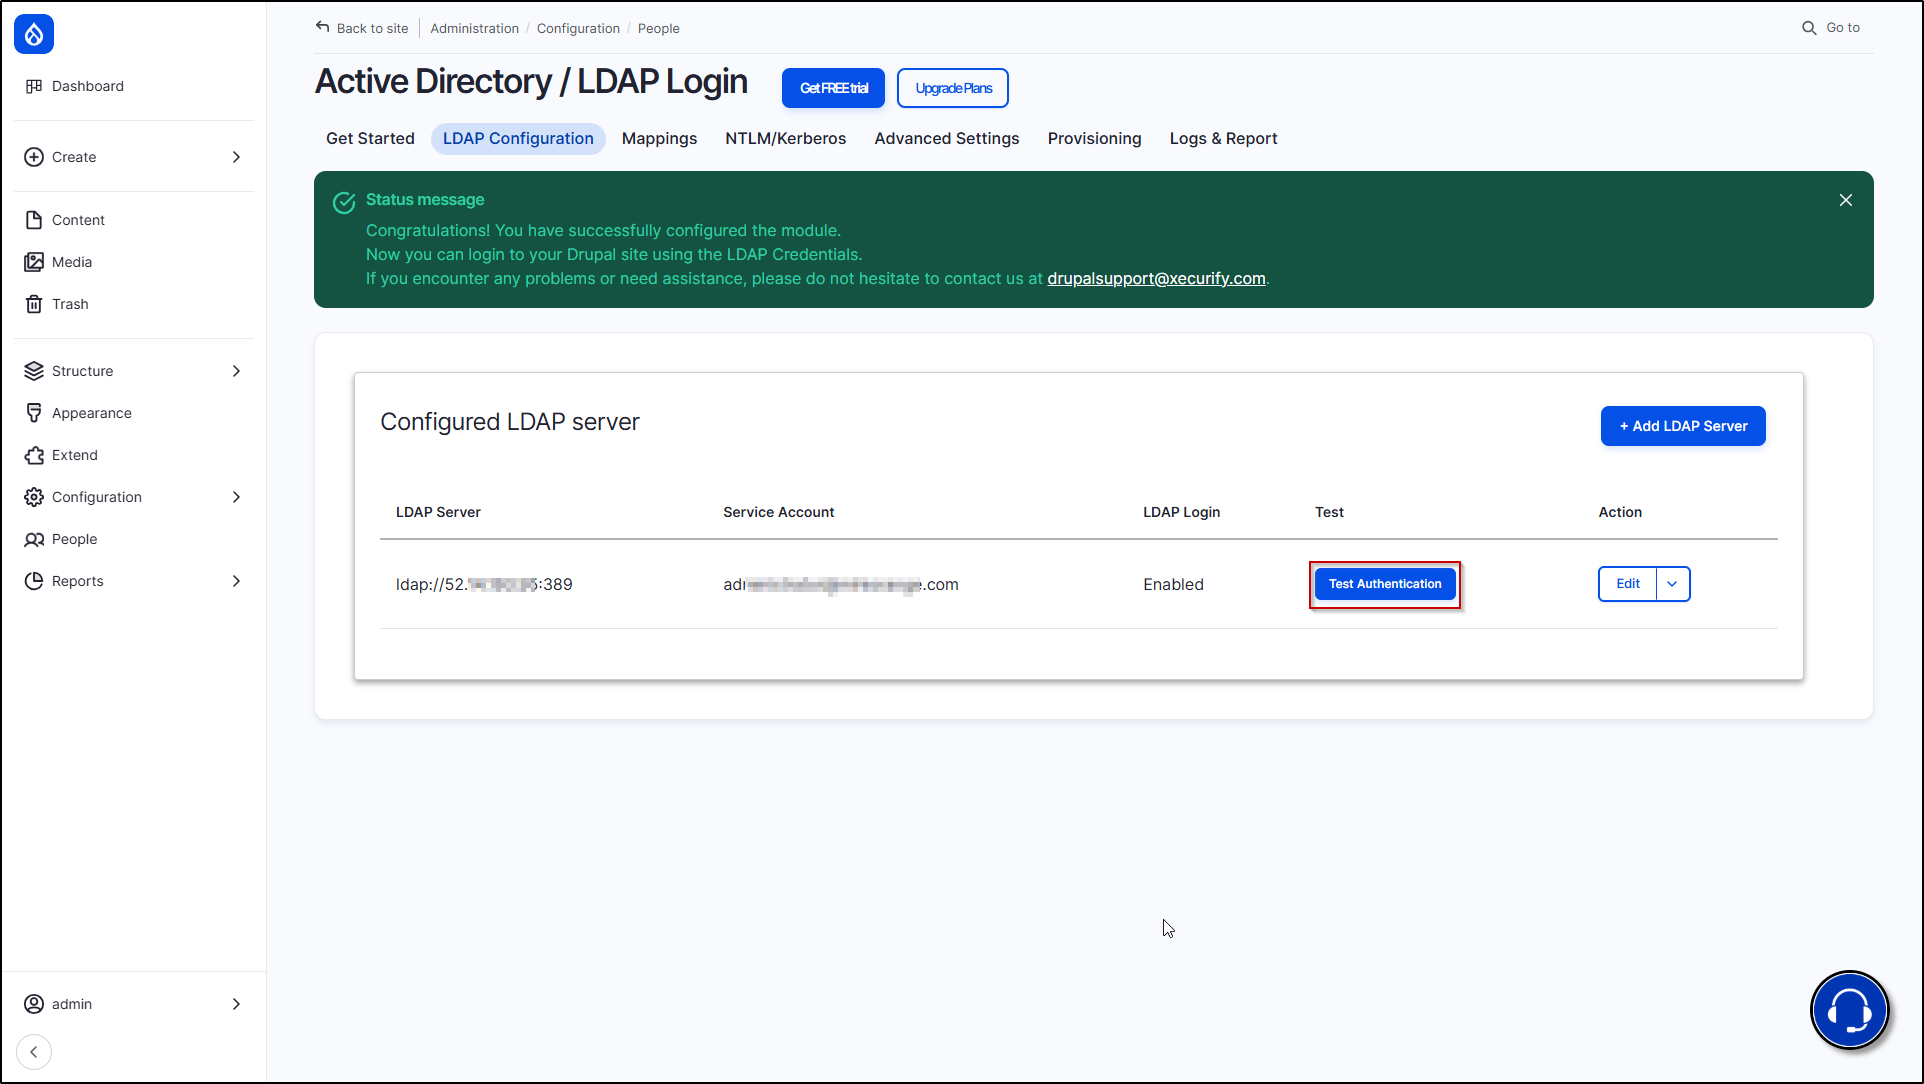
After successfully saving the configuration, click on the Test Authentication button.
-
Enter your LDAP user’s username and password, then click the Test Authentication button. Remember, the username should match the LDAP attribute value you selected in the search filter dropdown.
-
For example, if you selected 'uid' in the search filter, enter the 'uid' of your LDAP user as the username.

-
-
After successful authentication, you will receive a list of all LDAP attribute values associated with your user.

Help improve this page
You can:
- Log in, click Edit, and edit this page
- Log in, click Discuss, update the Page status value, and suggest an improvement
- Log in and create a Documentation issue with your suggestion

