 Come together with the global Drupal community in Rotterdam, 28 Sept – 1 Oct 2026. Sessions, contribution, connection, and Early Bird savings until 8 June.
LDAP Attribute Mapping
Attribute Mapping allows mapping user's information from LDAP Server to user attributes in Drupal. It allows you to map various user information coming from your LDAP server to your user attributes in Drupal. like Email Attribute, Username, any custom attributes, etc. The module is compatible with Drupal 8, Drupal 9, Drupal 10 as well as Drupal 11.
Prerequisites:
- Install the Drupal LDAP / Active Directory Integration module.
- Set up the module with your LDAP or Active Directory server information. You can also refer to this setup guide for assistance.
Basic Attribute Mapping :
-
Basic attribute mapping allows you to map the email and the username attributes present in Drupal with the user information stored in your LDAP server :
-
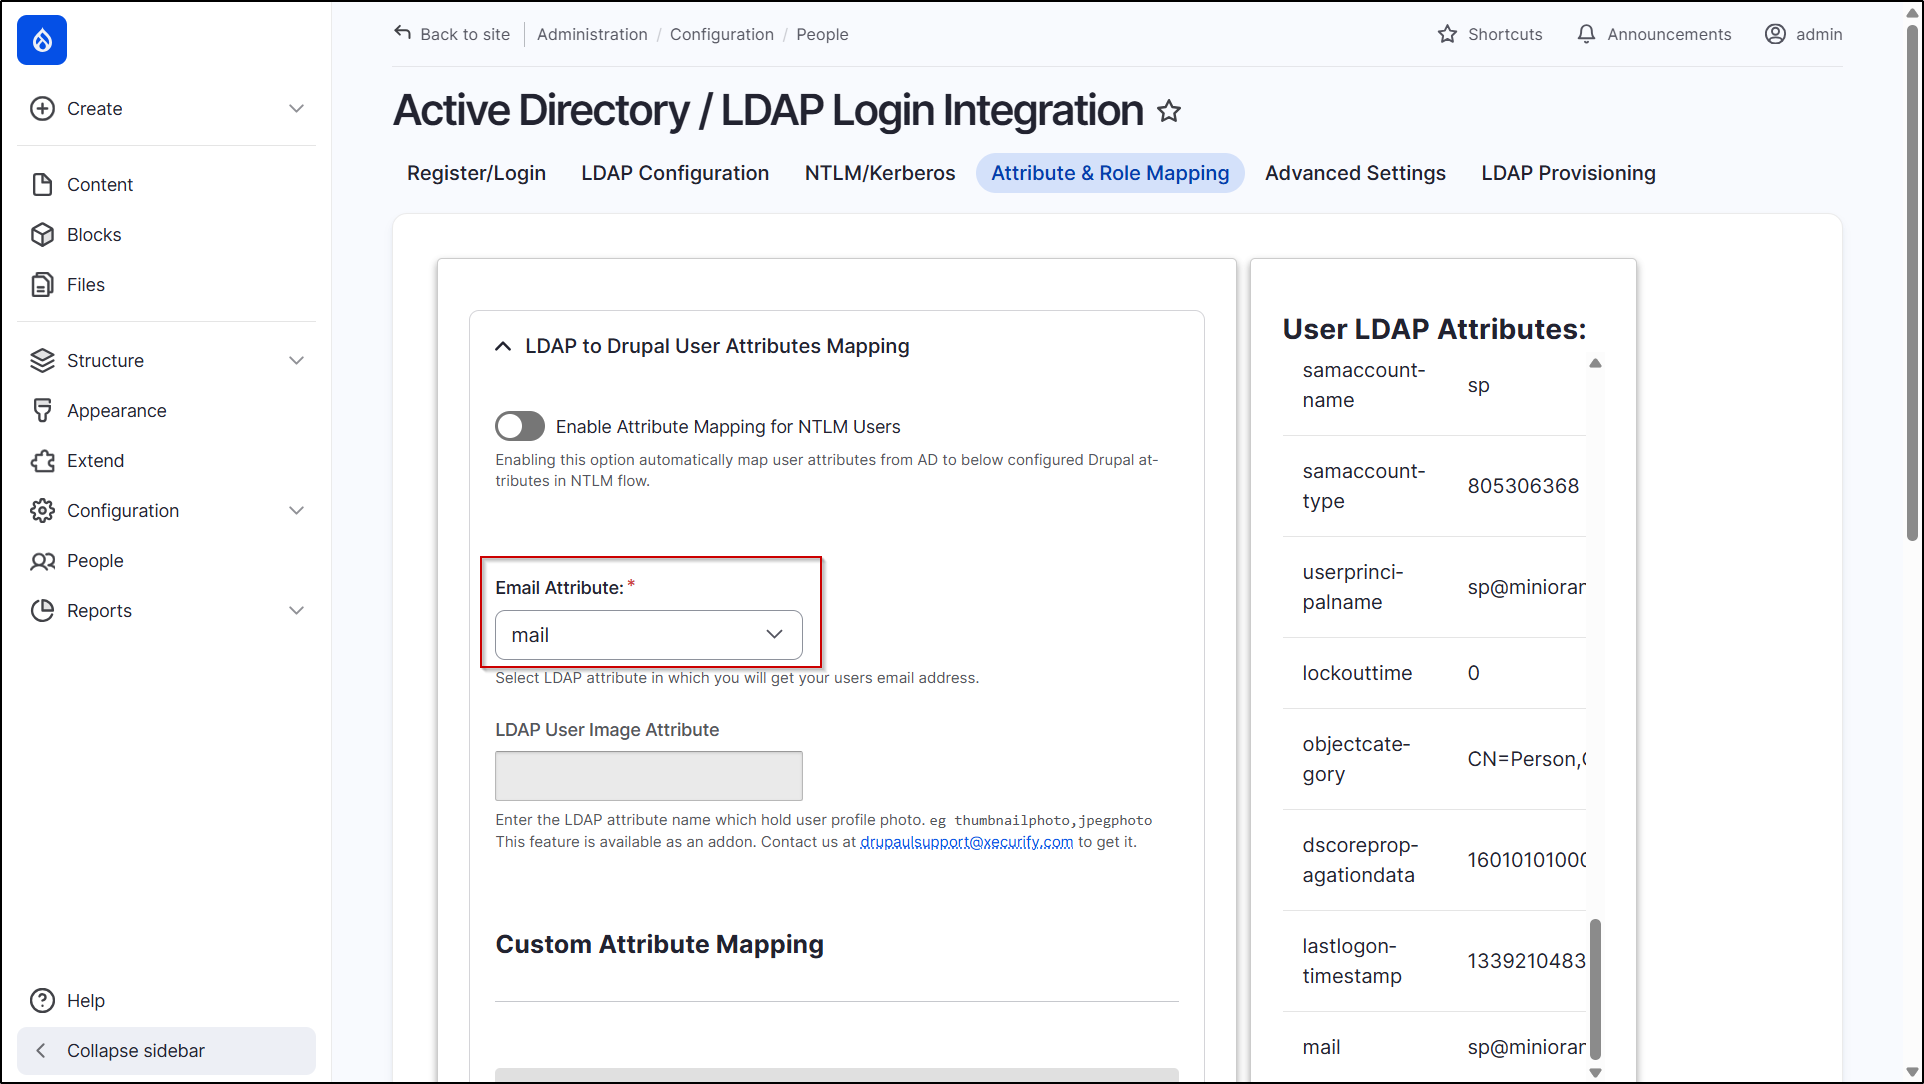
Please note: Mapping the Email attribute is mandatory for LDAP Login to work.
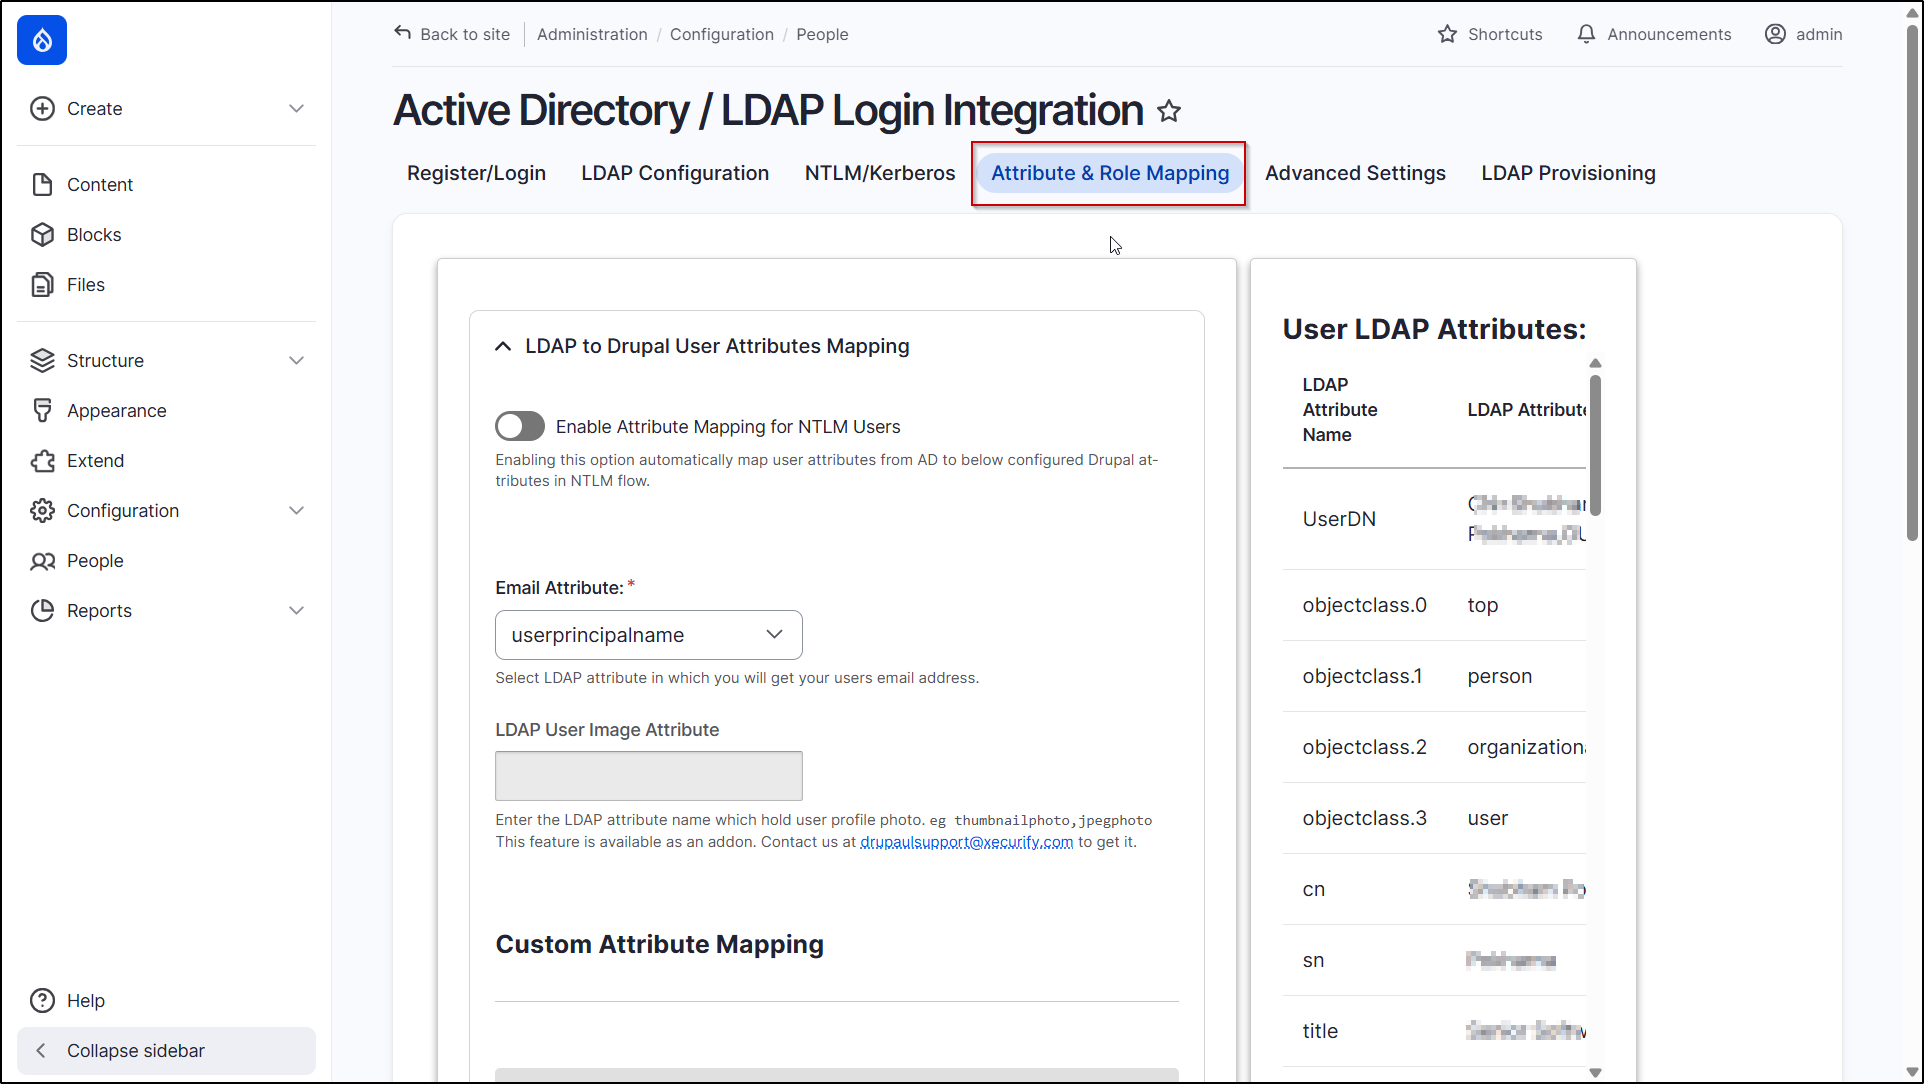
- After successfully configuring the module head towards the Attribute & Role Mapping tab (admin/config/people/ldap_auth/attribute_mapping) of the module.
-
Under the Email Attribute select the LDAP attribute name that contains your user's email address from the dropdown.
Custom Attribute Mapping :
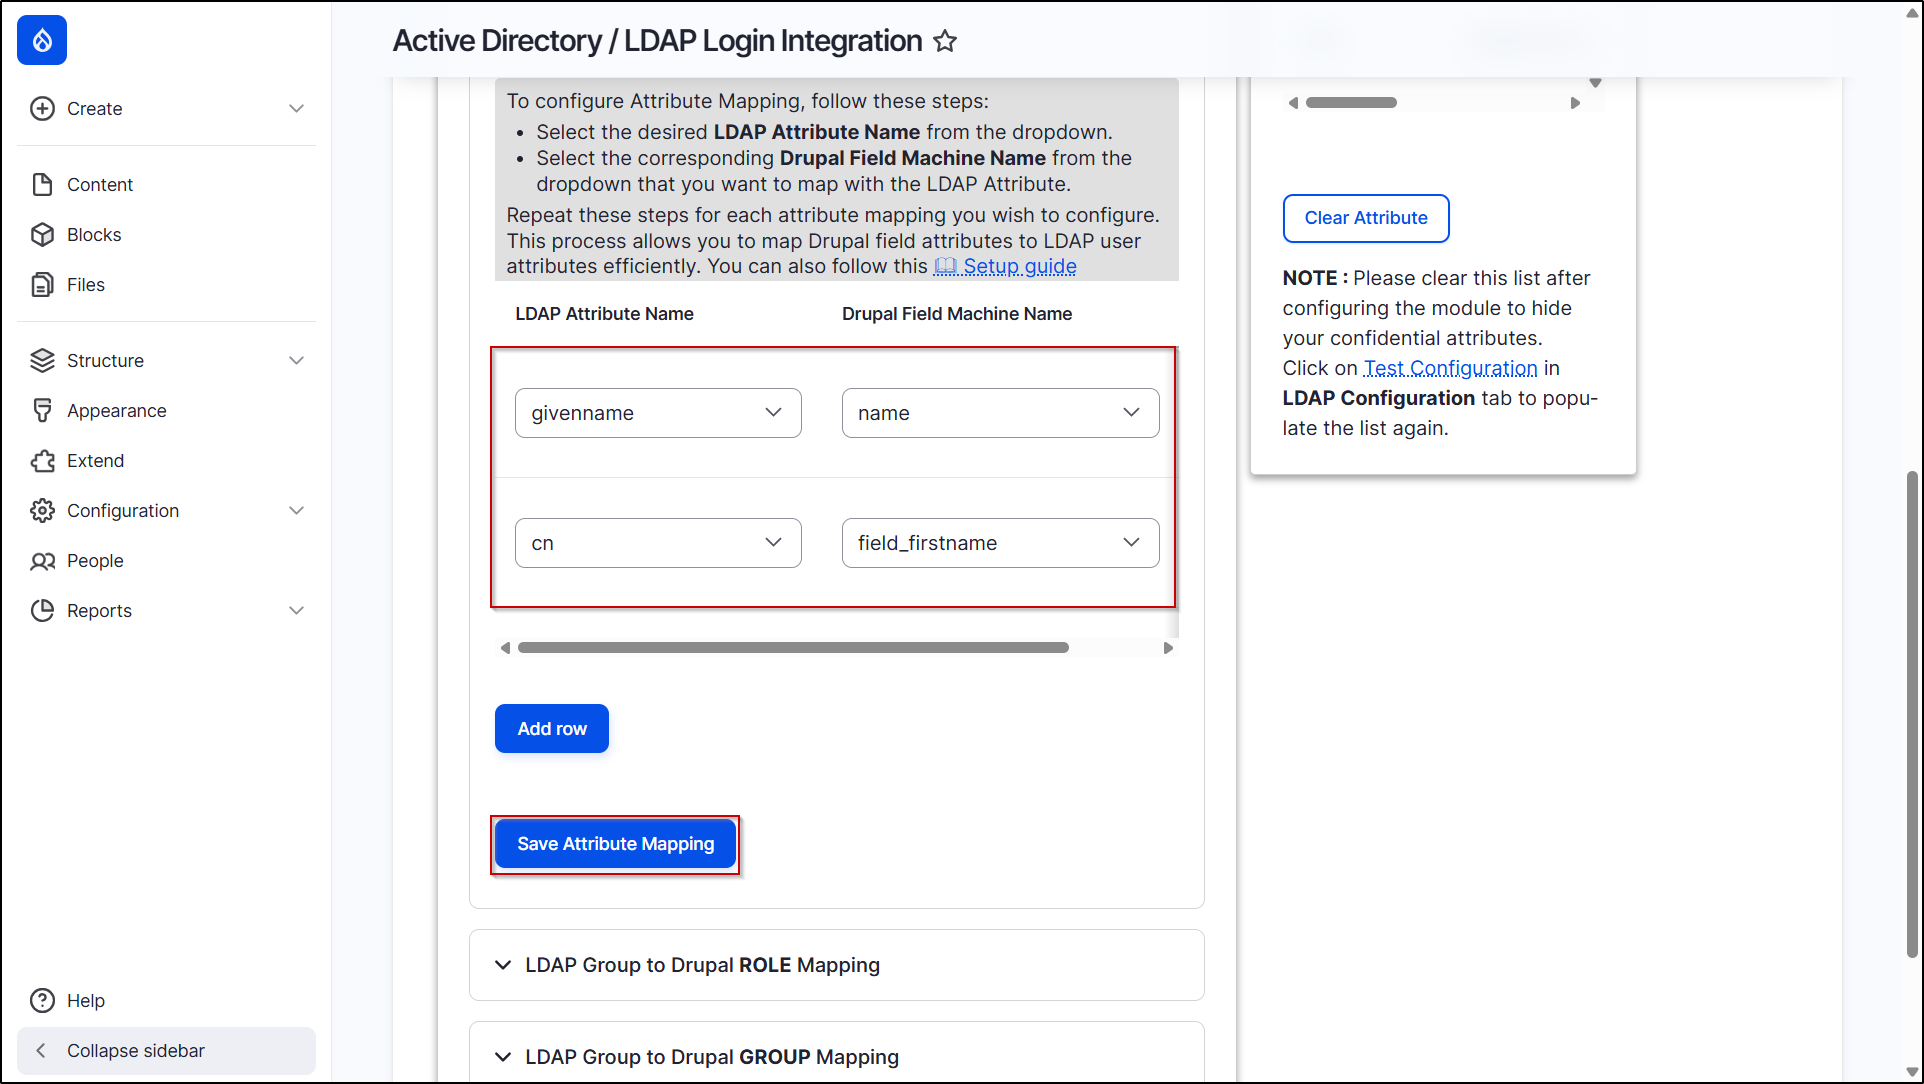
Custom attribute mapping helps you map all user fields (existing or custom fields) in Drupal with the user information from your LDAP server. To do this, follow the below steps:
-
Choose the LDAP Attribute Name form the dropdown and select the corresponding Drupal Field Machine Name which you want to map.
-
Click on the Add row button if you want to perform more than one mapping. And then click on the Save Attribute Mapping button to save your changes.
Creating Drupal Attribute Machine Name :
-
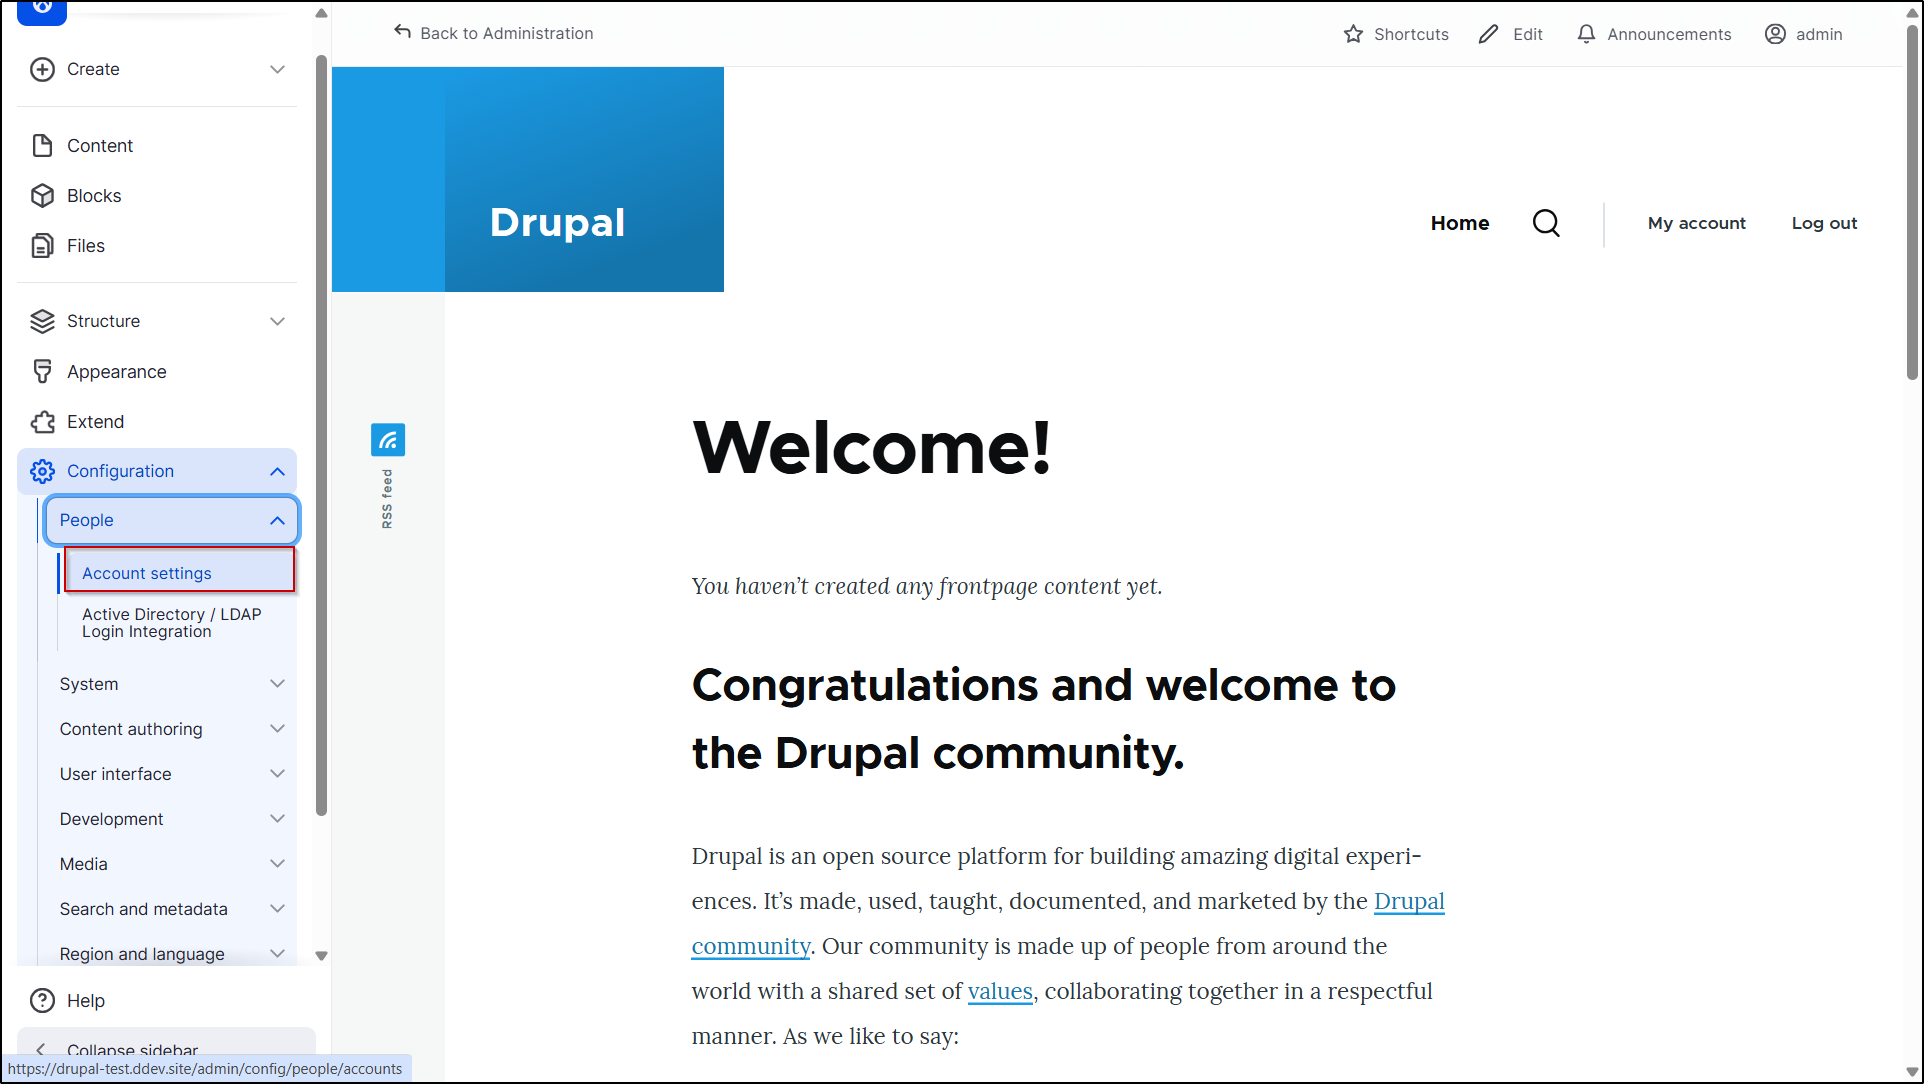
Navigate to the Configuration tab, Under the People section, select Account Settings. (admin/config/people/accounts)
-
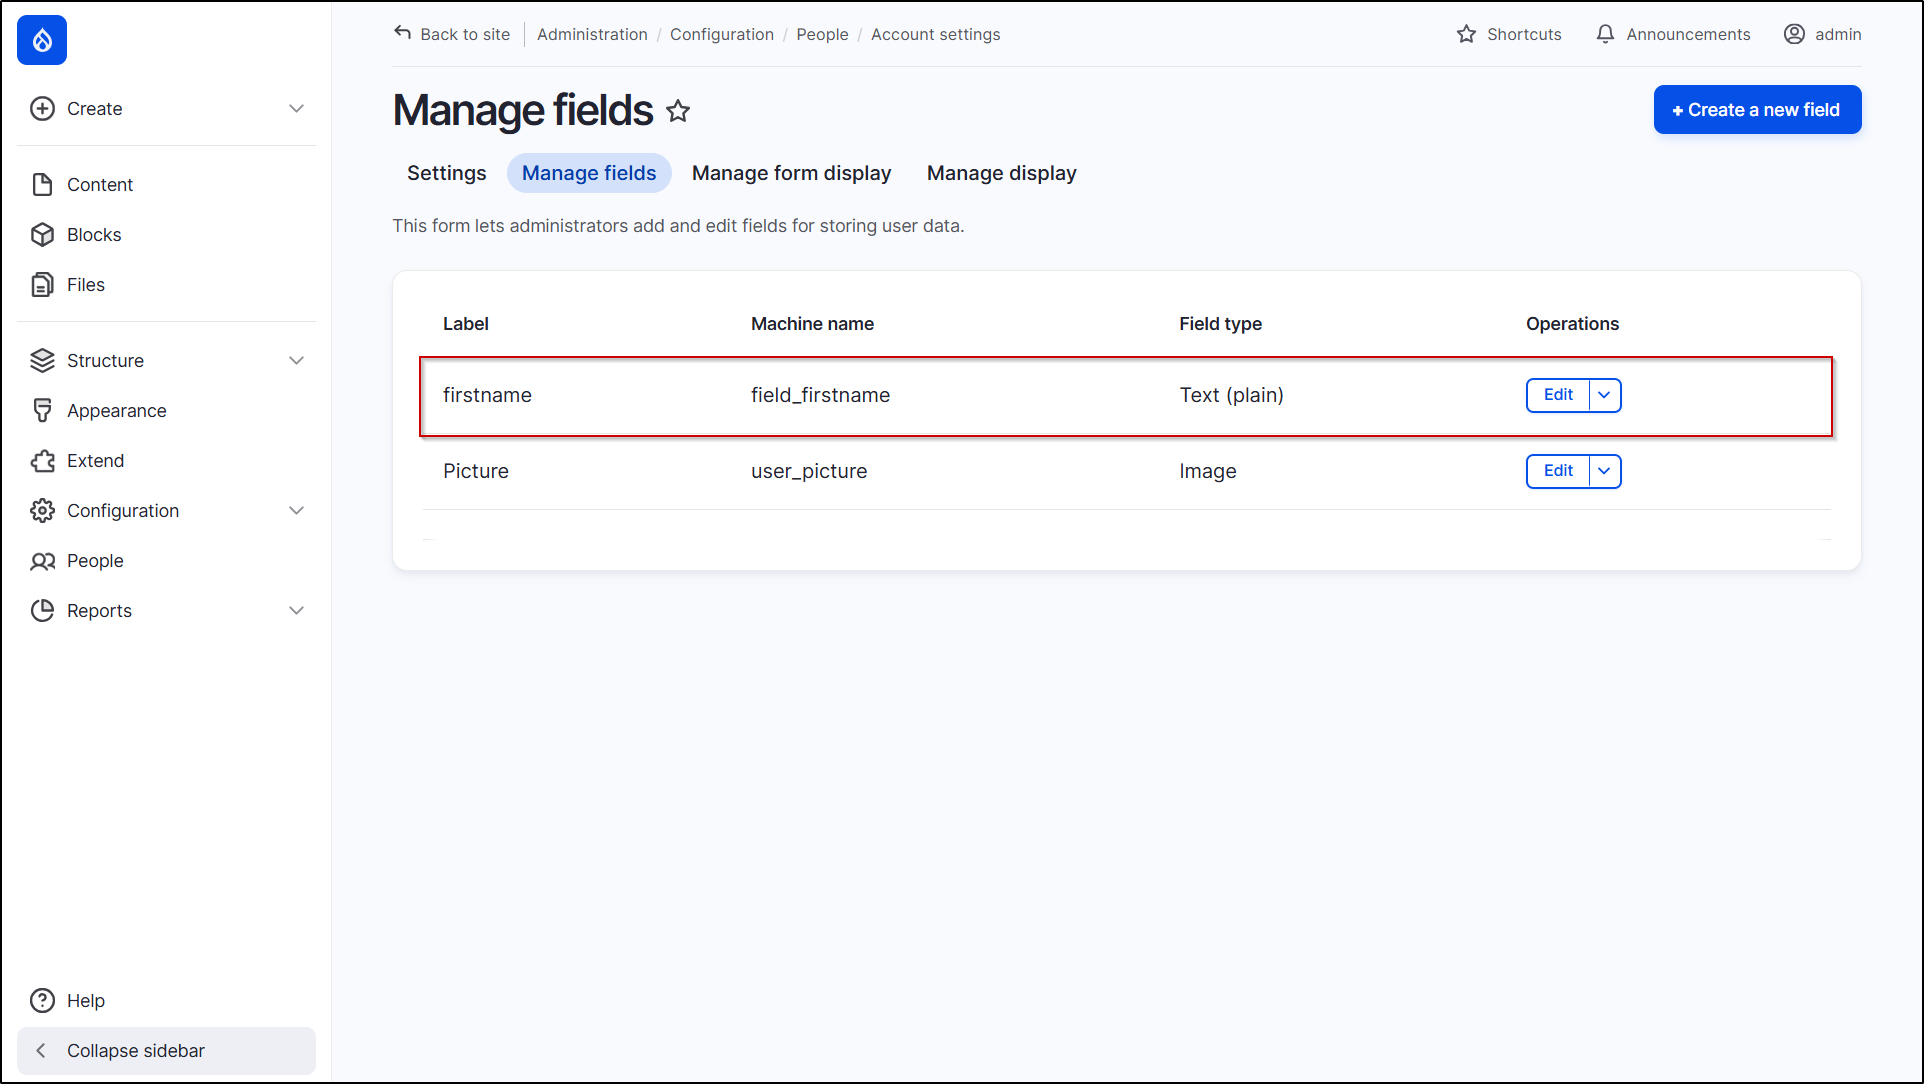
Go to the Manage fields Tab and click + Create a new field button.

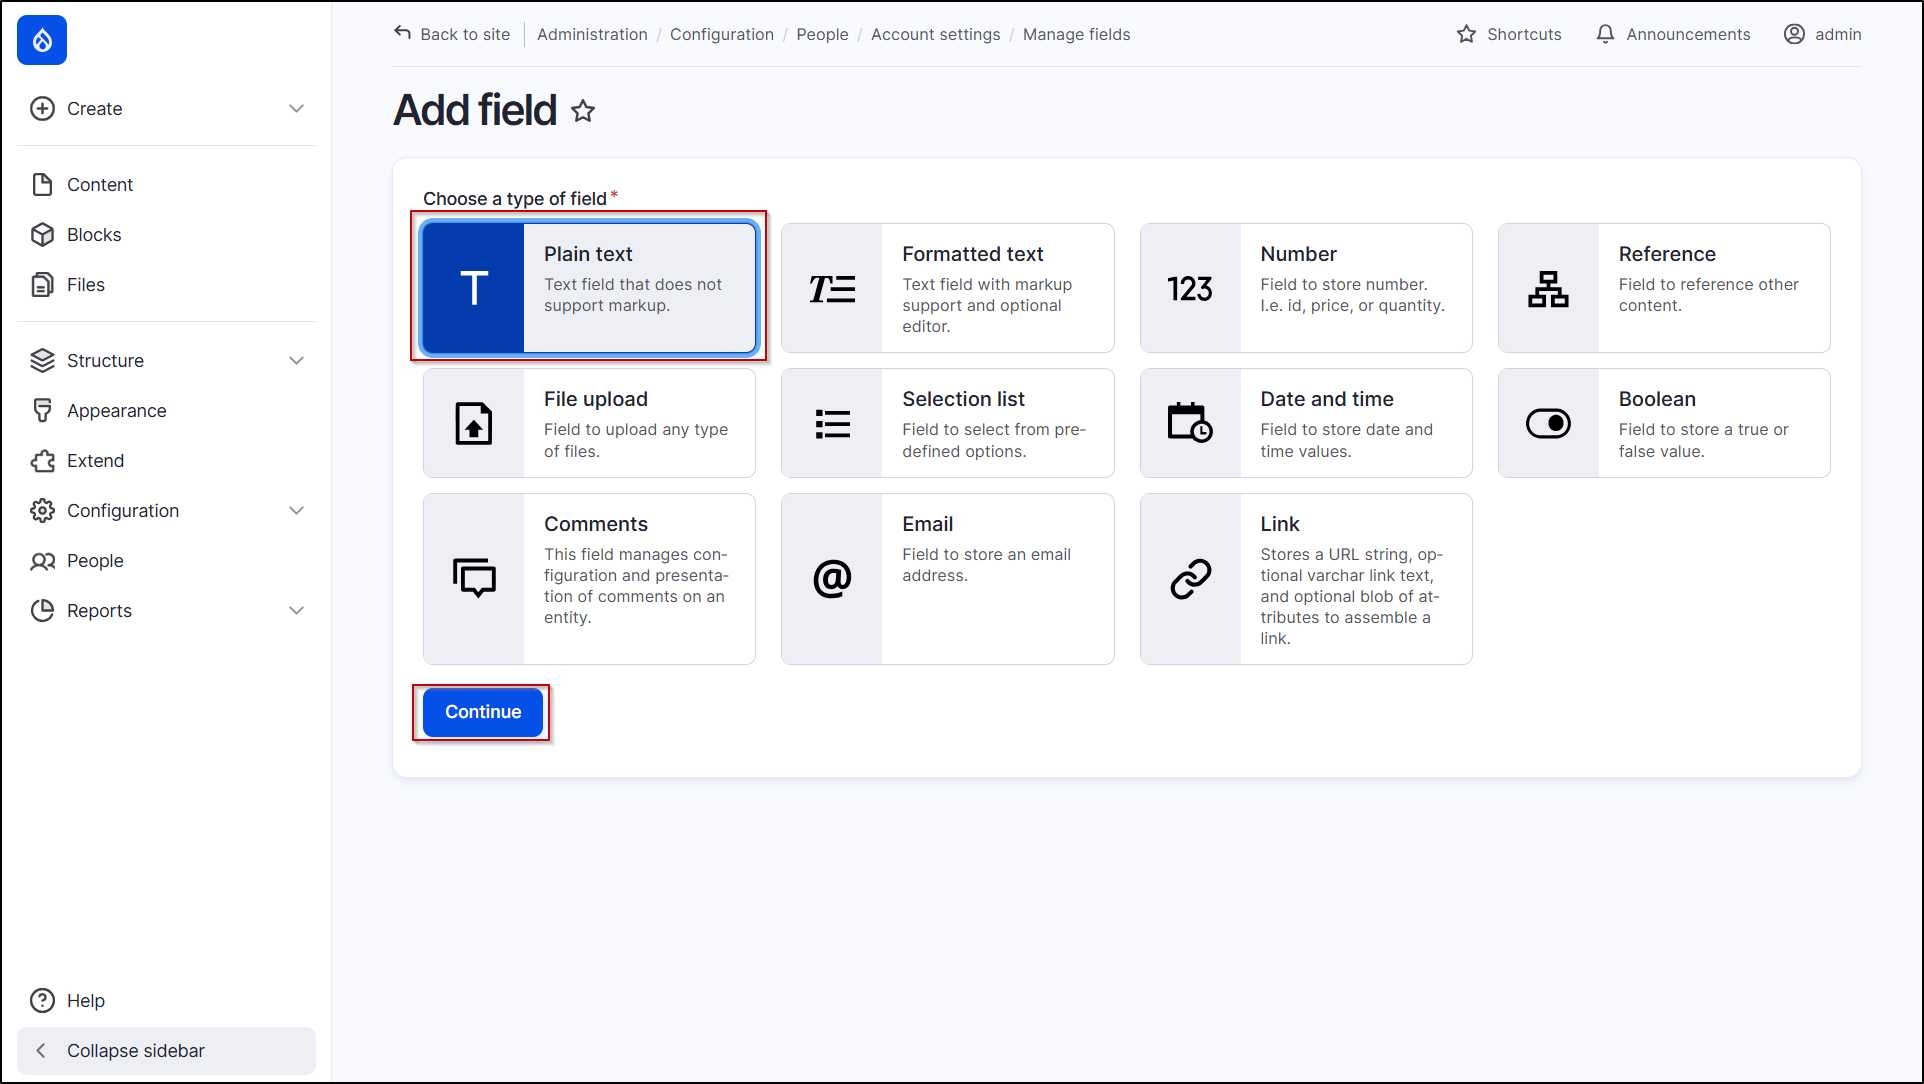
- In the Add field section, select the field type.
-
Click on the Continue button.
- In the next window, enter the label into the Label textfield and select Text (plain).
-
Click on the Continue button.

-
In the settings, scroll down and click on the Save settings button.

- You can use the Machine name generated here, in the Drupal attribute Machine name at the time of custom attribute mapping.
Now, let’s see how LDAP attribute mapping works:
- Open a private window or a new browser and visit the Drupal site's login page (/user/login).
- Log in using your LDAP credentials.
- After a successful login:
- Your Drupal username will be mapped with your LDAP given name.
- Your last_name in Drupal will be mapped with your LDAP common name (cn).
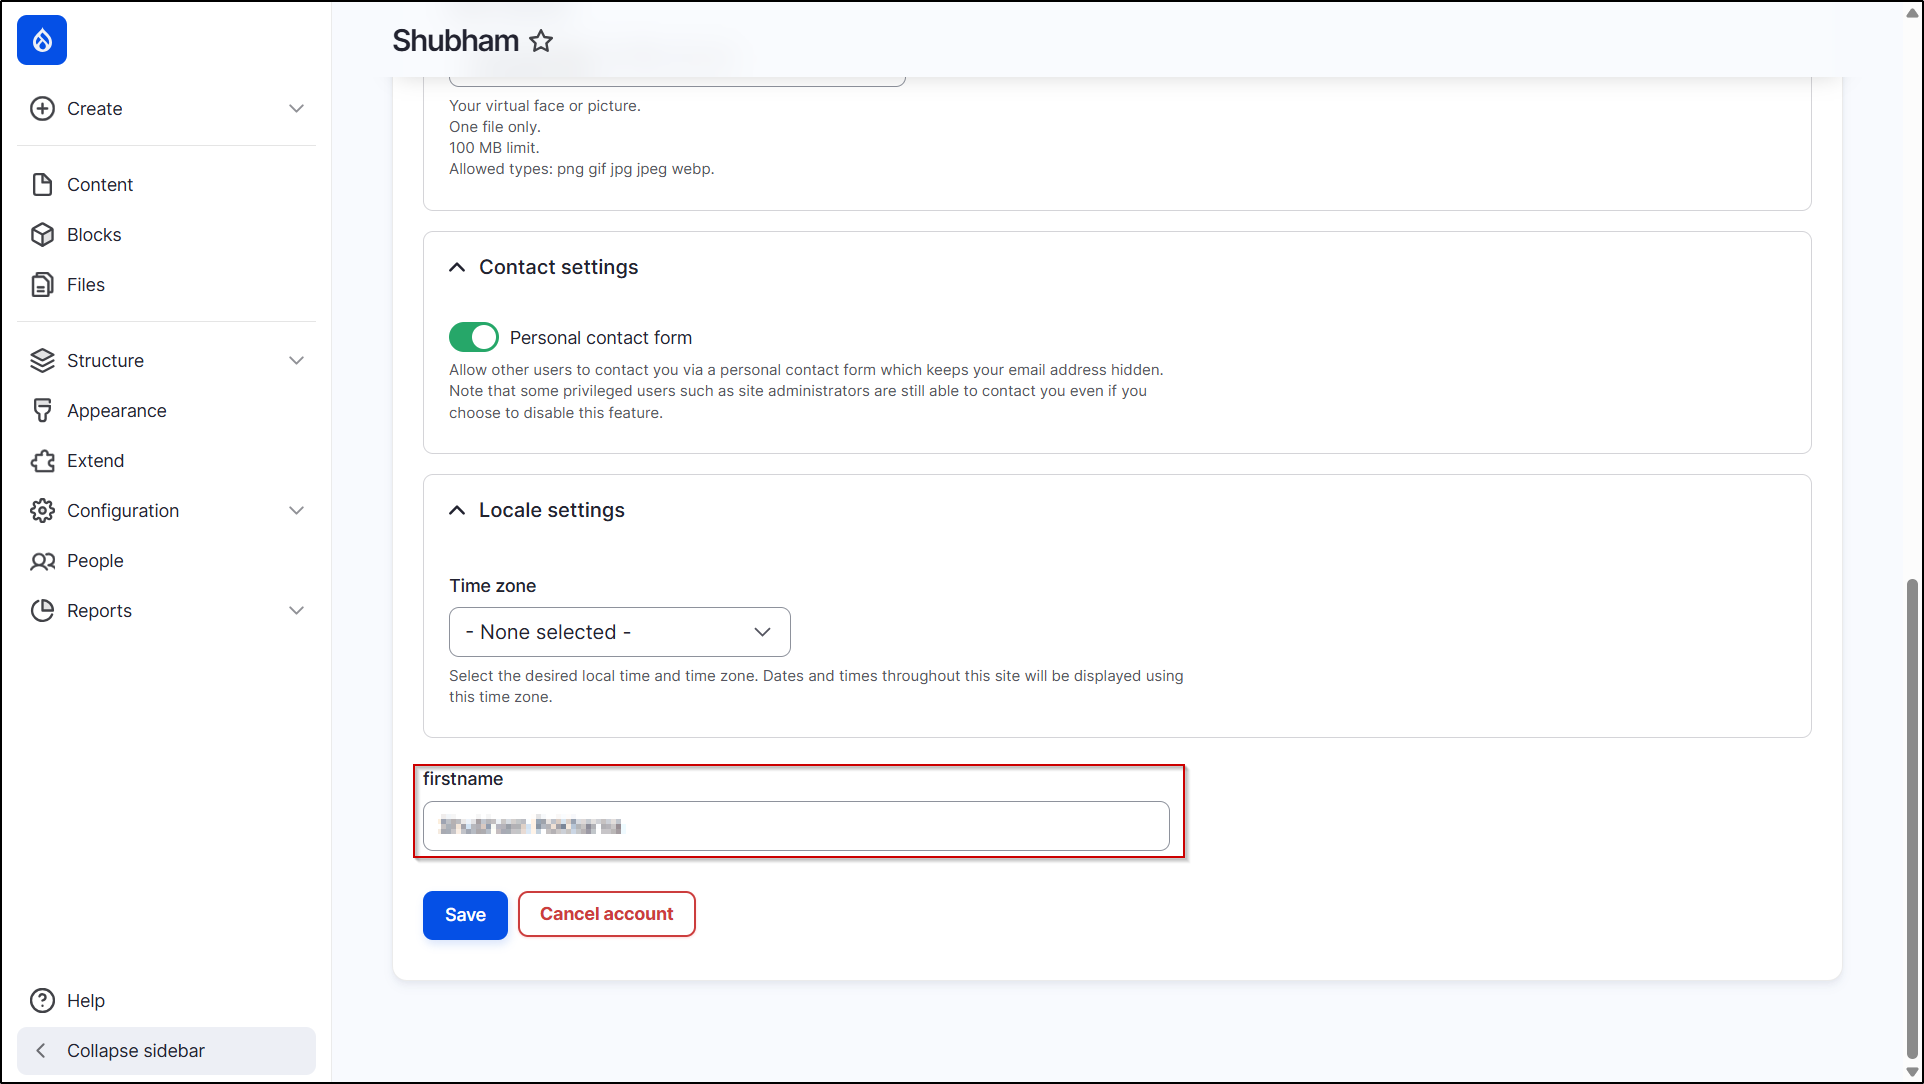
Check Mapped Attributes:
- Navigate to the People tab.
- Under the List section, click on the Edit button.
-
Scroll down to see the Drupal custom fields with the mapped LDAP attribute value.
Help improve this page
You can:
- Log in, click Edit, and edit this page
- Log in, click Discuss, update the Page status value, and suggest an improvement
- Log in and create a Documentation issue with your suggestion
