 Support for Drupal 7 is ending on 5 January 2025—it’s time to migrate to Drupal 10! Learn about the many benefits of Drupal 10 and find migration tools in our resource center.
When the file structure is in place, you do the actual Drupal installation by visiting your soon-to-be website. The server will find Drupal's index.php file and if no database environment is available, Drupal will run the installation wizard. The steps in the wizard are:
- Select an installation profile. Drupal core contains the Standard and Minimal profiles. (See figure A1.2) The standard profile contains a number of commonly used settings, while the minimal profile is as bare as it gets. There are a number of other installation profiles available at drupal.org, for example for building news sites or project management sites. The examples in this book all build on the standard profile.
- Choose language. By default only English is available, but if you (or the installation profile) have downloaded additional language packs, Drupal will recognize them and offer alternatives on this screen. (See figure A1.3) You can add new languages while building your site, as well as during the installation.
- When language settings are complete, Drupal will check that all requirements are met, such as the file and folder described in the previous section are writable. If anything is wrong, and Drupal can't fix it by itself, you will get an error message along with notes about how to fix the problem.
- Database configuration. This includes selecting the type of database and entering information necessary to access the database, database name, username and any password. (See figure A1.4) If you use a web hosting service only providing you with a single database, you may separate different installations by using a table prefix. This is short text added before all database tables created by Drupal (such as site1_ or site2_).
- When the database settings have been entered, Drupal will run the actual installation. This means that Drupal will be busy for a minute or so and displaying the different steps in the installation process as entertainment.
- Configure site. When the installation is complete, you will be asked for basic site information, such as site name and time zone settings. (See figure A1.5) You should also enter information for the first user account on the site. This account will be granted all permissions on the site and should only be used during development and system updates. (It should not be used as a personal account used to post content to the site.)
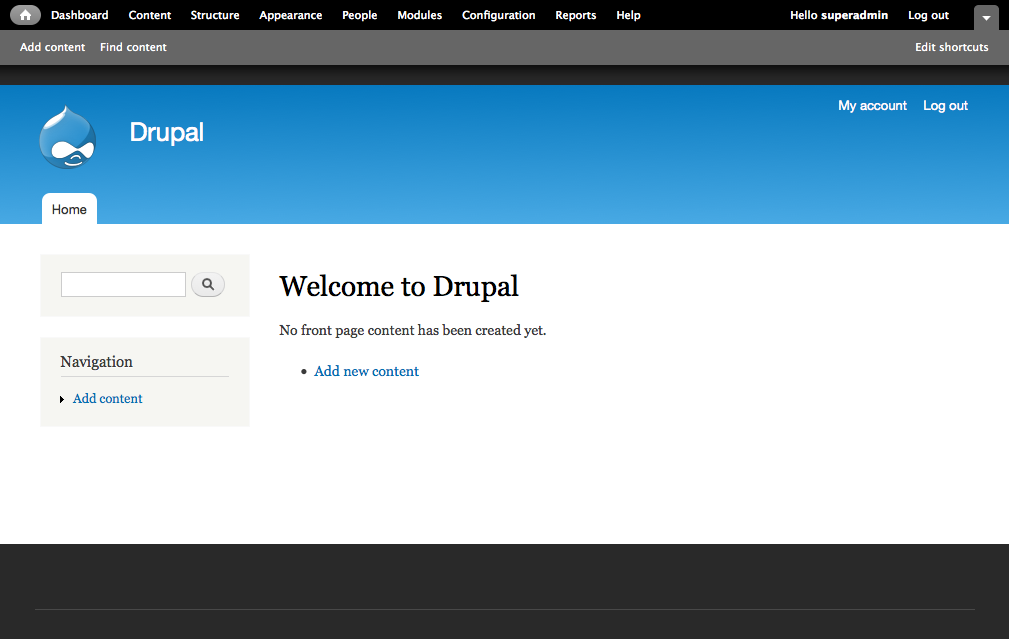
- When all these settings are made, your installation is complete. (See figure A1.6) You can now start the fun of experimenting with Drupal!

Figure A1.2: Professional Drupal developers tend to like the minimal installation profile. Others tend to like the standard profile.

Figure A1.3: By adding more languages you can use Drupal in non-English languages even during the installation.

Figure A1.4: Drupal needs database login information to work properly.

Figure A1.5. The last step is entering some basic site information, including information for user account 1.

Figure A1.6: A new Drupal website, fresh from the installation process.
| Attachment | Size |
|---|---|
| 13.2 Select an installation profile.png | 30.15 KB |
| 13.3 Choose language.png | 26.21 KB |
| 13.4 Database configuration.png | 73.63 KB |
| 13.5 Configure site.png | 102.75 KB |


