Setup SSO with Shibboleth
This document will help you configure Shibboleth 2 as an Identity Provider (IdP) making Drupal as your Service Provider (SP). Following these steps will allow you to configure SAML SSO between Shibboleth 2 and your Drupal site such that your users will be able to login to your Drupal site using their Shibboleth 2 credentials.
The Drupal SAML SSO - Service Provider module is compatible with Drupal 7, Drupal 8, Drupal 10, and Drupal 11.
Prerequisite:
- Install and activate the SAML SSO - Service Provider module on your Drupal site. Follow these steps to install the module.
Drupal SAML SP Metadata:
-
After installing the module on your Drupal site, go to the Administration menu and navigate to Configuration → People → miniOrange SAML SP (
/admin/config/people/miniorange_saml/idp_setup).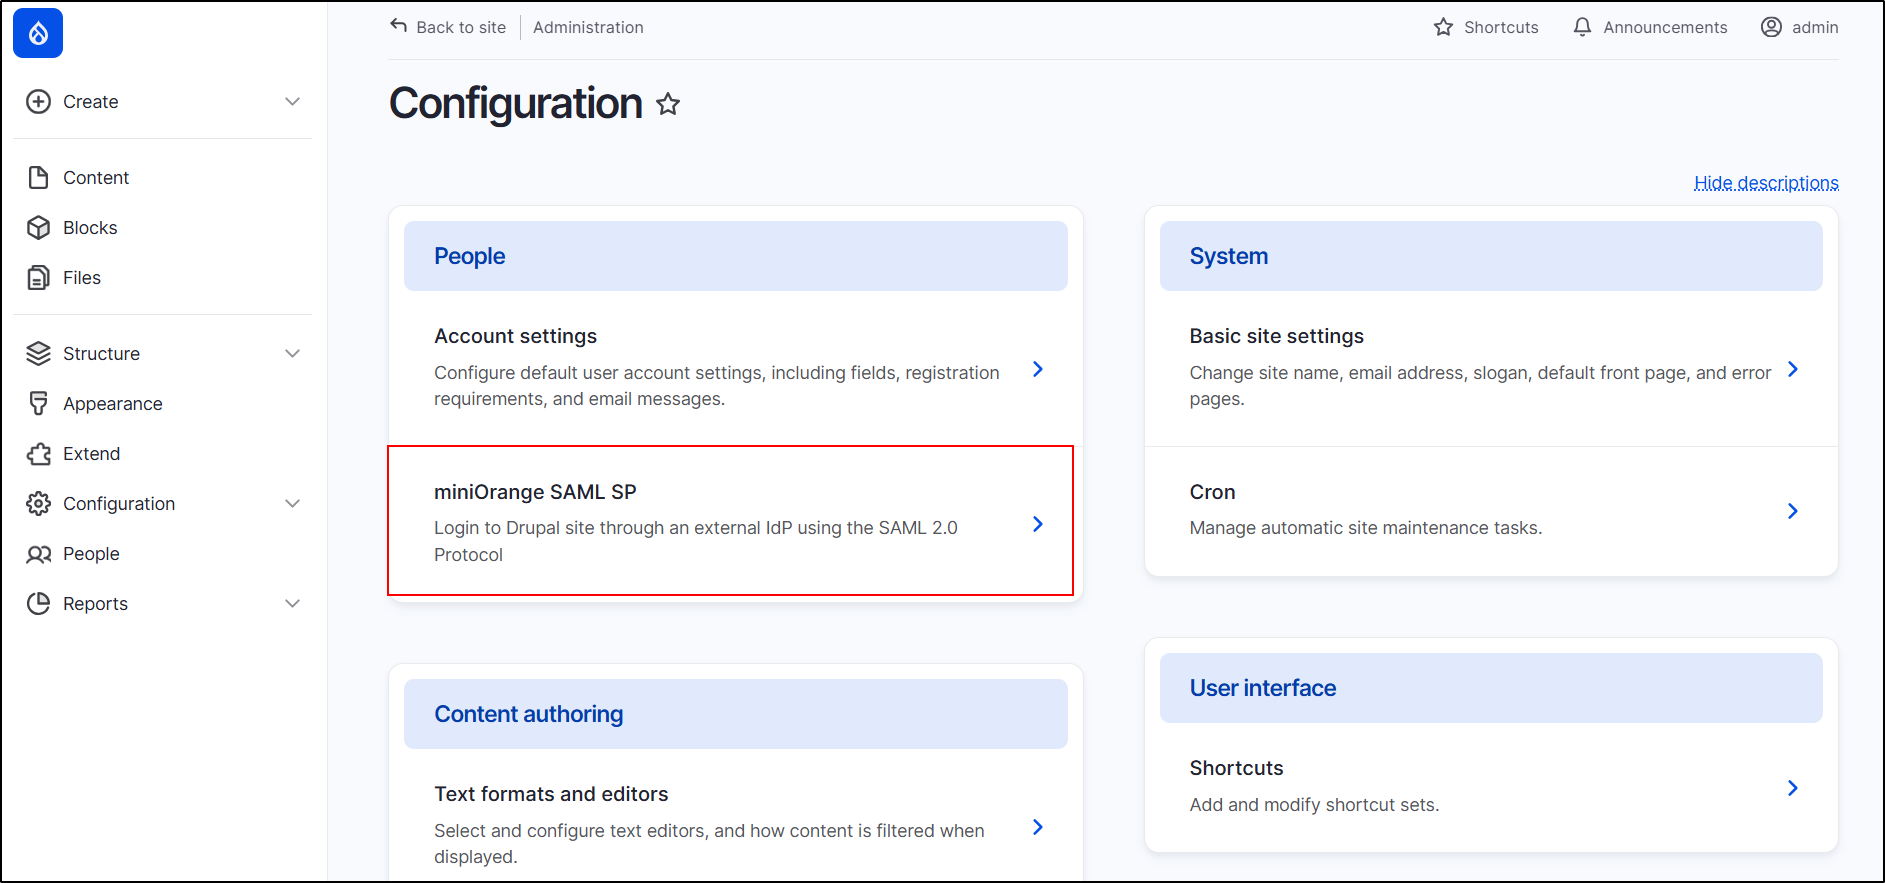
-
Under the Service Provider Metadata tab, copy the SP Entity ID/Issuer and SP ACS URL and keep them handy. These details are required to configure Shibboleth 2 as the Identity Provider (IdP).

Configure SAML Single Sign-On Application in Shibboleth 2:
- In the
conf/relying-party.xmlfile, configure the Service Provider as shown below: -
Paste the previously copied information from the module's Service Provider Metadata tab into the respective fields.
Shibboleth2 as SAML IdP Field Service Provider Information (Drupal) EntityDescriptorxmlns SP Entity ID/Issuer AssertionConsumerService SP ACS URL <MetadataProviderxsi:type="InlineMetadataProvider" xmlns="urn:mace:shibboleth:2.0:metadata" id="MyInlineMetadata"> <EntitiesDescriptorxmlns="urn:oasis:names:tc:SAML:2.0:metadata"> <md:EntityDescriptorxmlns:md="urn:oasis:names:tc:SAML:2.0:metadata" entityID=" <ENTITY_ID_FROM_Module>"> <md:SPSSODescriptorAuthnRequestsSigned="false" WantAssertionsSigned="true" protocolSupportEnumeration="urn:oasis:names:tc:SAML:2.0:protocol"> <urn:oasis:names:tc:SAML:1.1:nameidformat:emailAddress</md:NameIDFormat> <md:AssertionConsumerServiceBinding="urn:oasis:names:tc:SAML:2.0:bindings:https-POST" Location="<ACS_URL_FROM_Module>"index="1"/> </md:SPSSODescriptor> </md:EntityDescriptor> </EntitiesDescriptor> </MetadataProvider>
-
Make sure that your Shibboleth server sends the user’s Email Address as the NameID. In the
attribute-resolver.xmlfile, retrieve the email attribute as the NameID:<resolver:AttributeDefinitionxsi:type="ad:Simple" id="email"sourceAttributeID="mail"> <resolver:Dependency ref="ldapConnector" /> <resolver:AttributeEncoderxsi:type="enc:SAML2StringNameID"nameFormat="urn:oasis:names:tc:SAML:1.1:nameid-format:emailAddress"/> </resolver:AttributeDefinition>
-
In attribute-filter.xml, release the email attribute:
<afp:AttributeFilterPolicy id="releaseTransientIdToAnyone">
  <afp:PolicyRequirementRulexsi:type="basic:ANY"/>
     <afp:AttributeRuleattributeID="email">
        <afp:PermitValueRulexsi:type="basic:ANY"/>
     </afp:AttributeRule>
</afp:AttributeFilterPolicy>
- Restart the Shibboleth 2 Server.
Once the setup is complete, you will need to use the Shibboleth Identity Provider Metadata, which follows this format:
https://example123.com/idp/shibboleth
Keep this metadata URL handy, as it is required to configure Drupal as the SAML Service Provider (SP).
Configure Drupal as SAML Service Provider:
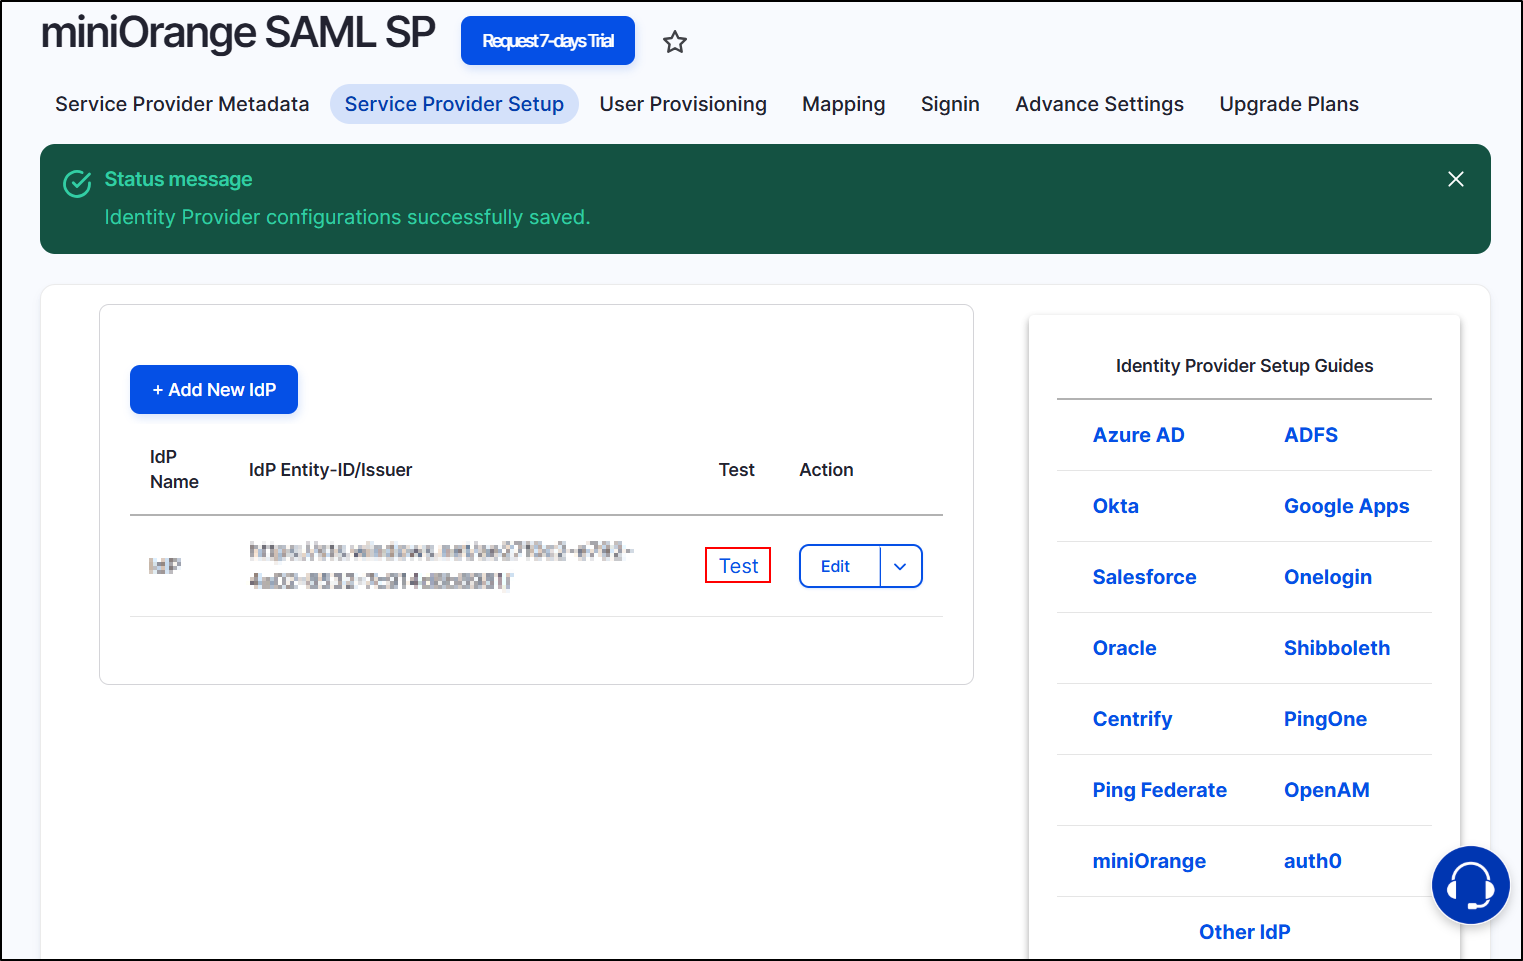
- Go to your Drupal site. Navigate to the Service Provider Setup tab of the module and click on Upload IDP Metadata.
-
Paste the previously copied Shibboleth 2 Metadata URL into the Upload Metadata URL text field. Click on the Fetch Metadata button.

-
After successfully saving the configurations, click on the Test link to check the SAML Single Sign-On (SSO) connection between Drupal and Shibboleth.
- In the Test Configuration pop-up, if there is no active session in the same browser, you will be prompted to sign in to Shibboleth 2. After successful authentication, a list of attributes received from Shibboleth 2 will be displayed.
-
Scroll down and click on the Done button.

Congratulations! You have successfully configured Shibboleth 2 as Identity Provider and Drupal as Service Provider.
If you face any issues in test configuration, you can reach out to us at drupalsupport@xecurify.com with a screenshot of the test configuration window.
How does SAML SSO login work?
- Open a new browser/private window and navigate to the Drupal site login page.
- For SP initiated SSO on your Drupal, click on the Login using Identity Provider (Shibboleth 2) link.
- You will be redirected to the Shibboleth login page, where the user will enter their credentials. Once successfully logged in, Shibboleth users will be able to access your Drupal site within seconds.
Help improve this page
You can:
- Log in, click Edit, and edit this page
- Log in, click Discuss, update the Page status value, and suggest an improvement
- Log in and create a Documentation issue with your suggestion

