On this page
- Adding CKEditor 5 Premium features module to Drupal 10
- Optional Composer Dependencies
- Install with Composer
- Install using admin UI (Drupal CMS)
- Enabling the features
- Adding license credentials
- Registering for Premium Features Free Trial
- Adding credentials to Drupal
- Self-hosted or EU cloud
- Configuring CKEditor 5 Premium features
- CKEditor AI settings
- On-premises server configuration
- Plugin configuration
- Custom Quick Actions
- Custom reviews
- Chat shortcuts
- Permissions
- Custom context
- Collaboration settings
- Export to PDF and Word settings
- Import from word
- Notifications settings
- Productivity pack settings
- Table of contents and Format painter
- Document outline and Slash commands
- Templates
- WProofreader spelling and grammar checker configuration
- WProofreader permissions
- AI Assistant
- Configuration
- Enabling plugins
- Permissions
- Custom commands
- Merge Fields
- Email editing
- Export inline styles plugin configuration
- Footnotes
- Line Height
- Configuring permissions
- General permissions
- Non-realtime Collaboration permissions
- Realtime collaboration permissions
- CKEditor 5 Version Override
- Adding CKEditor 5 Premium features to your editor
- How to use all of the plugins?
Configuration Guide
Adding CKEditor 5 Premium features module to Drupal 10
First, you must add the CKEditor 5 Premium Features Module to your Drupal installation.
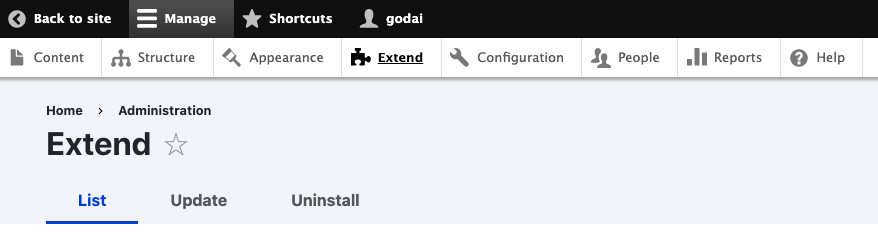
To do it, enter the Manage > Extend section first and use the Add new module button to provide the source for the CKEditor 5 Premium features module. You can fetch the module from https://www.drupal.org/project/ckeditor5_premium_features
Optional Composer Dependencies
These instructions are applicable only to CKEditor 5 Premium Features version 1.5.0 and newer.
Some features of this module require additional Composer dependencies. These are not strictly necessary for the module's core functionality but enable enhanced capabilities.
Previous versions included an explicit composer requirement for all dependencies. Therefore, these instructions apply only if you have installed or updated the module to version 1.5.0 or higher.
caxy/php-htmldiff: Used in Non-realtime collaboration and notifications.
firebase/php-jwt: Used in Realtime collaboration, Exporters and Import from Word.
openai-php/client: Used in AI Assistant for OpenAI and AzureAI.
aws/aws-sdk-php: Used in AI Assistant for AWS Bedrock.
Install with Composer
To install optional dependencies, use Composer in your project's root directory:
composer require caxy/php-htmldiff firebase/php-jwt openai-php/client aws/aws-sdk-php
You can install only specific packages you need for the features you intend to use.
If warnings about missing dependencies persist after installation, execute the command composer dump-autoload -o.
Install using admin UI (Drupal CMS)
If you use Drupal CMS, you can install dependencies directly from the CKEditor 5 Premium Features settings page: /admin/config/ckeditor5-premium-features/settings
Scroll to the "Dependencies installation" section and click the install button for the dependency required for the feature you intend to use.
Remember not to leave the page during the installation process to avoid errors.
Enabling the features
Having added the module, scroll down to the new CKEditor 5 Premium section and check all the features you would like to enable.

Refer to the Feature Guide to learn how to use each feature included in this module.
Adding license credentials
Once the features are enabled, move to the Configuration section and scroll down to CKEditor 5 Premium features in the Content authoring section.

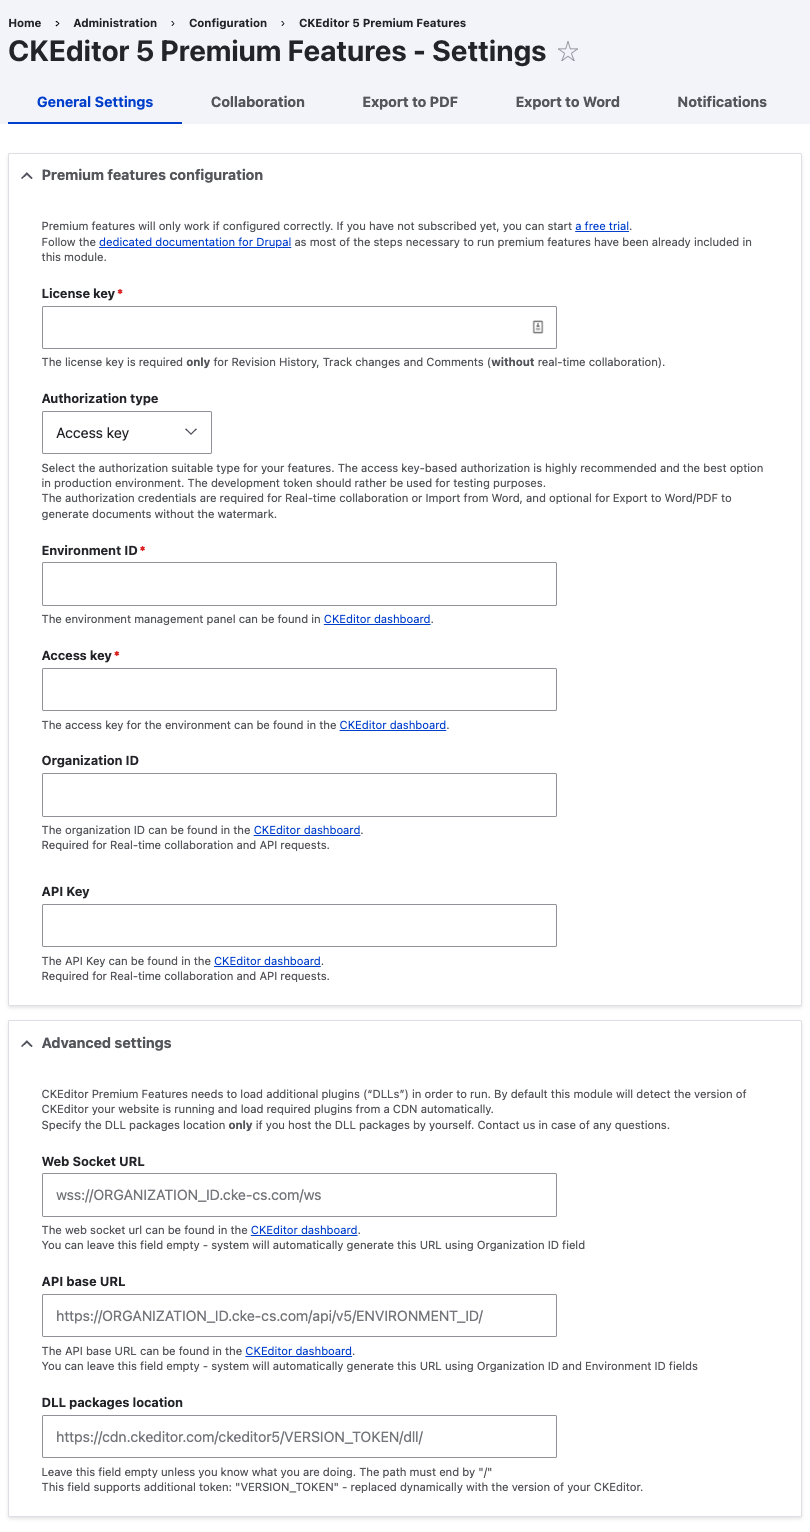
First, in the General setting section, you need to provide the credentials to run the module. If these are not entered correctly, the editor will not work and will remain inactive.
To obtain license keys and credentials, you may either inquire about them right at CKSource (https://ckeditor.com/contact/) or use the CKEditor 5 Premium Features Free Trial (https://ckeditor.com/pricing/). The free trial is a special 14-day offer that allows you to test Premium features without any cost and any obligation whatsoever. For simplicity, we will follow the Premium Features Free Trial path in this tutorial. However, using a commercial license and credentials is virtually the same.
Registering for Premium Features Free Trial
Start your free 14-day Premium Features trial by registering for the CKEditor Free plan. For the trial duration you'll have access to all paid features for free.
Start your registration process by providing basic information, we won't ask you for anything more for your trial.
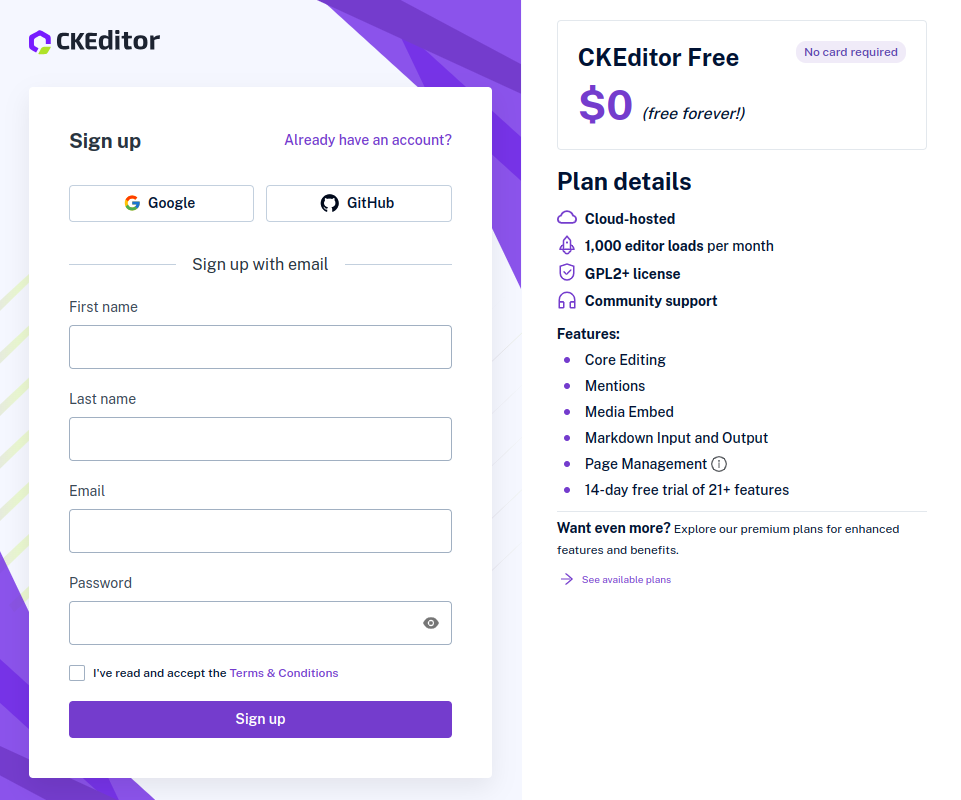
In the second step, we'll ask you whether you want to add CKBox - a file management solution to your free plan. During the trial period it is available for free, however as for now there is no integration module for Drupal.
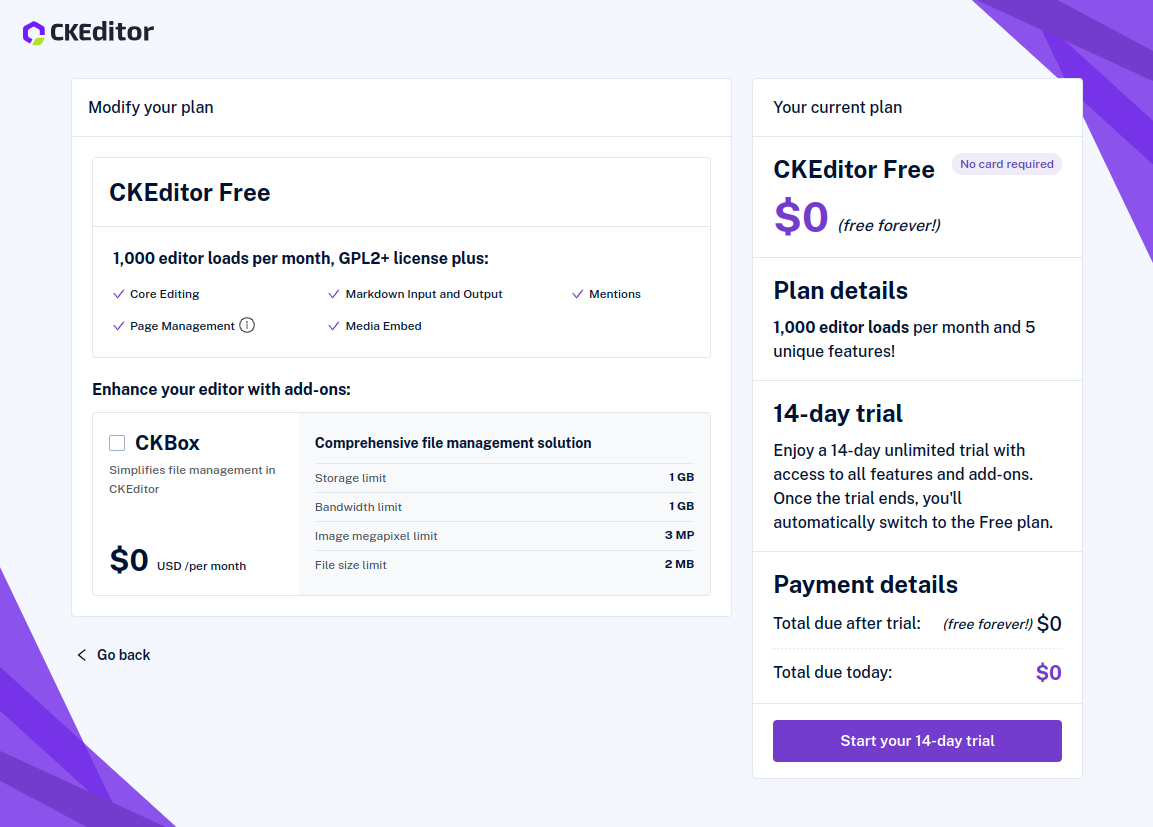
Confirm your registration by clicking on the "Start your 14-day trial" button. You will get a confirmation email.
Once the process is done you'll be able to log in to the CKEditor Customer Portal, where you will find all that you need to run the CKEditor 5 Premium features module in your Drupal installation. Please note that the dashboard may differ slightly between trial and commercial users.

Adding credentials to Drupal
Please note that the keys and access numbers shown in this tutorial are not complete. Trying to use them will result in an authentication error.
You can get your Trial license key in the Subscription -> License keys tab within the CKEditor Customer Portal. The production and development keys will be also available there in case you decide to continue using our premium plugins.

Copy the Trial license key and enter it at the General Settings of the CKEditor 5 Premium Features module. The description of the field will inform which versions require a key (There is information for which versions a key is valid in the CKEditor Customer Portal).
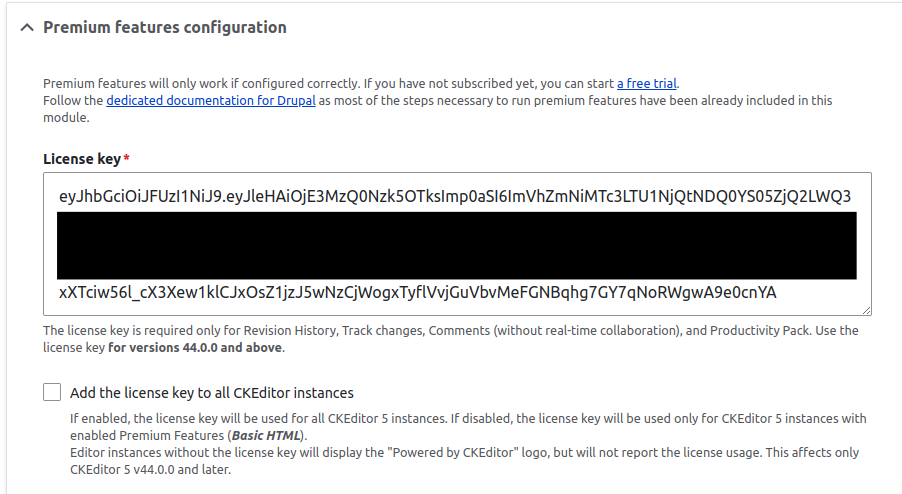
Please be aware that trials started since December 2nd, 2024 require CKEditor 5 in version 44.0.0 or later whereas currently, Drupal core comes with earlier versions. To use the trial in Drupal 10.3.x or 11.0.x, please enable and configure the CKEditor 5 Version Override submodule. Drupal versions prior to 10.3.0 are not supported.
Since CKEditor 5 v44.0.0 the license key will be used by default only for text formats with premium plugins enabled in order to not charge for use of CKEditor instances which uses free plugins only. If you have a license with unlimited usage you can enable the "Add the license key to all CKEditor instances" to hide the "Powered by CKEditor" label in all instances.
Next, comes the Authorization type section. You can leave it as "Not set" and omit the fields below if you don't intend to use Realtime collaboration or Import/Export plugins.
There are two ways to authenticate the module to work with real-time collaboration, Import from Word and Export to PDF/Word features: the access key and development token. The access key is a production environment solution that allows for controlling the users, permissions, etc. CKEditor Premium features module creates an endpoint required by the access key to work. Additionally, real-time collaboration requires providing an Organization ID and API key. These values would be used for generating proper endpoint URLs and interacting with Cloud Services REST API.
For testing purposes, we suggest using the development token URL instead. It is an easy and fast solution, ideal to try the features out. This choice will not affect the user experience and the way the module works. In production environments, the access key is advised to be used with collaboration features rather. However, the token is required by the Export to PDF/Word and Import from Word converters. While these will work, when it is not supplied, the generated file will contain a watermark. The development token URL can also be used only in SaaS solutions.
To obtain the required values, use the Cloud environments tab in the Subscription section of the CKEditor Customer Portal and click on the Default environment label.
The Development token URL is available in the default tab within the environment info section:
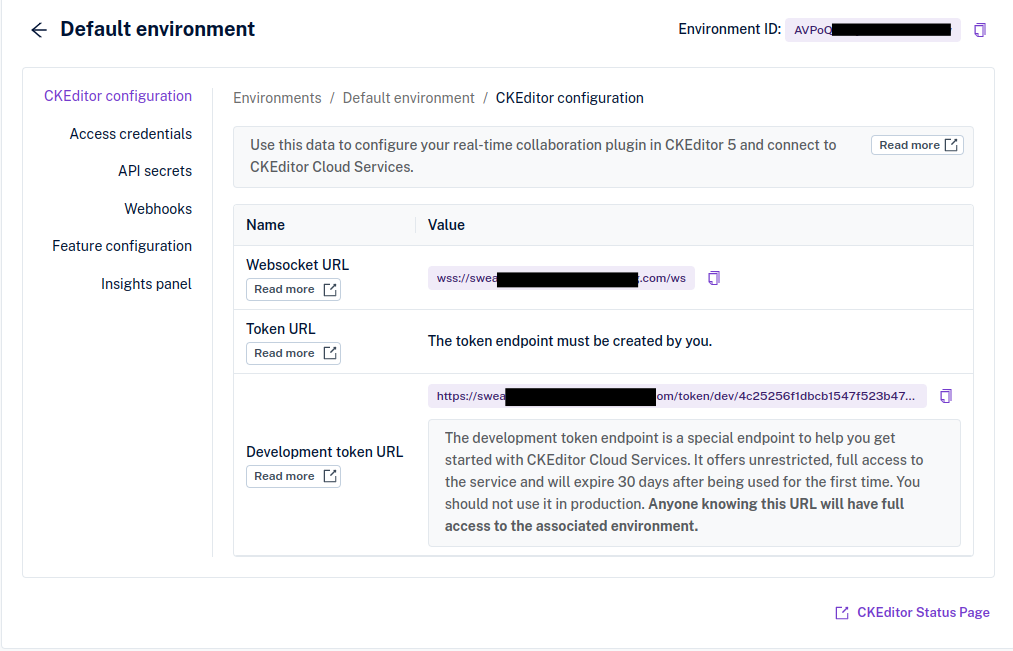
While using the Development token URL for testing purposes, in connection with CKEditor 5 Premium Features Free Trial is fine and advised, please remember you should rather use the Access key for production implementations due to limitations of the development token URL (https://ckeditor.com/docs/cs/latest/guides/collaboration/quick-start.htm...).
If you decide to use the access key, you will need to generate it first. You will find the key generator in the Access credentials tab of the Environment section. Simply use the Create a new access key button in the Access credentials tab. Choose a unique name for the key for easy access.

Copy the access key and enter it in your Drupal configuration page for the CKEditor 5 Premium features module. Put in the Environment ID, too. The Environment ID is available in the header of each tab within the Environment information section.
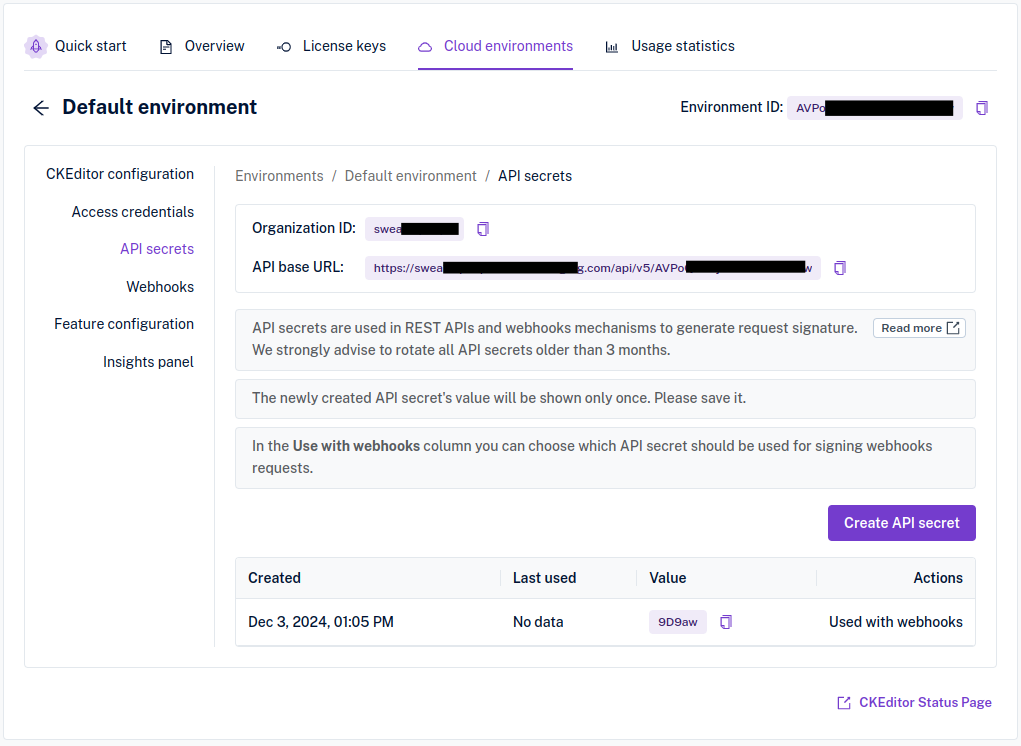
Finally, an Organization ID and API Key fields are also required for Realtime collaboration. Leave them empty if you won't use this feature. The values can be found in the API secrets tab. The Organization ID is available right away whereas the API Key (API secret) has to be created first (it will be fully shown only once)
Self-hosted or EU cloud
The "Advanced settings" tab allows you to change the cloud services used for Realtime Collaboration and document converters. If you have a self-hosted server, please change the "Web Socket URL" and "API base URL" endpoints to match those on your server. For EU cloud users, you just need to add an "-eu" suffix to the domain, for example
https://ORGANIZATION_ID.cke-cs.com/api/v5/ENVIRONMENT_ID/to
https://ORGANIZATION_ID.cke-cs-eu.com/api/v5/ENVIRONMENT_ID/Configuring CKEditor 5 Premium features
Having activated the collaboration features, you may now take time to configure them. Most of this is self-explanatory and will not require any input on the user's part.
CKEditor AI settings
To mitigate a known issue related to the General HTML Support and CKEditor AI plugins, we have disallowed the data-id attribute on all elements in case CKEditor AI is enabled.
On-premises server configuration
CKEditor AI connects to the cloud server by default. In order to use CKEditor AI with your on-premises server, go to the AI configuration page /admin/config/ckeditor5-premium-features/ai and set the "On-Premises Service URL" field.
Plugin configuration
The plugin comes with configuration options that are available in the text format configuration page in the “CKEditor AI” tab.
AI interface type
The AI Chat window can be displayed either as an embedded sidebar, or as an overlay. The sidebar can be expanded to the overlay position when using the editor. If Overlay mode is selected by default, extending will broaden the chat window.
Customize models list
Cloud version of CKEditor AI has a predefined list of available AI models. By default, all of them are available. To customize the list of available models, you have to specify a list of models that you want to be available and select the default one.
A model called "Auto" is recommended for most cases. It uses a pre-defined set of AI models selected by the CKEditor team for optimizing speed, quality, and cost.
You can hide the model selector if you don't want users to be able to change it. Permissions can be used to have more granular control over which AI models should be available to users.
Additional context allowed in AI Chat
If enabled, users will be able to add additional context to the chat as urls and/or files. More customization scenarios are available through permissions.
Translation languages
CKEditor AI has a predefined set of languages that users can select from. To add more languages, simply enter the language name in this field. Enter one language per line.
Custom Quick Actions
In addition to the predefined Quick Actions a custom set can be defined. They can be managed at /admin/structure/ckeditor5-ai-custom-actions page.
A single Quick Action form requires:
- A human readable label
- A machine name
- The prompt to be sent to the AI model
- The type of action - ACTION is used to selected text transformation and CHAT sends prompt through the chat, not necessarily editing the content
- The model used for a prompt
- Text formats in which added/edited action will be available.
Custom Quick Actions will be displayed in the “Custom” category within the Quick Actions dropdown.
Custom reviews
Similarly to the Custom Quick Actions, you can define custom reviews. The management page is available at /admin/structure/ckeditor-ai-custom-reviews
- A single Review form requires:
- A human readable label
- A machine name
- The prompt to be sent to the AI model
- The model used for a prompt
- Text formats in which added/edited action will be available.
Custom Reviews will be displayed in the Reviews tab of the Chat window below the default ones.
Chat shortcuts
You can define the most commonly used AI tasks as a shortcut which will be displayed at the beginning of the AI conversation.
The management page is available at /admin/structure/ckeditor-ai-chat-shortcuts
A single Shortcut form requires:
- A human readable label
- A machine name
- Type of the shortcut
- Text formats in which added/edited action will be available
Depending on the type of the shortcut, additional fields will appear:
- The Chat shortcut is a simple predefined prompt that will work as a custom chat message. You'll need to define the prompt and select whether it should use reasoning and/or web search.
- The Review shortcut will require a Command Id either of the predefined or custom one.
- The Translate shortcut does not require any additional fields. It simply opens the translate tab in the Chat window.
Permissions
A basic set of permissions is available at /admin/people/permissions/module/ckeditor5_premium_features_ai page.
They provide an ability to set access to specific functionalities of the AI Chat and Quick Actions.
You can set access to various functionalities of the CKEditor AI plugin separately or use the “Full access to all CKEditor AI functionalities” permission for full experience.
The more detailed permission control is available through hook_ckeditor5_premium_features_ai_permissions_alter().
Using the hook allows setting up more fine-grained permissions, for example access to use specific providers/models and a limited set of context file types.
You can find more information on the hook implementation in ckeditor5_premium_features_ai.api.php file and the information about CKEditor AI permissions format and possibilities in the CKEditor 5 documentation
Custom context
CKEditor AI chat has the currently edited field content as a context by default. Depending on configuration and permissions, additional urls or files can be provided as context.
Another possibility is to define a custom context source via the hook_ckeditor5_premium_features_ai_context() function.
This allows you to add a context directly from the database or any custom source. The custom context is not automatically added to the conversation. It is added to the context selection menu in the chat.
You can find more info about hook implementation in ckeditor5_premium_features_ai.api.php file.
Right now the context data is added to the editor configuration, so large texts may increase editor load time. We’ll be working on adding the possibility to load data on-demand when the context is added to the conversation.
Collaboration settings
The collaboration settings let you make several basic decisions.
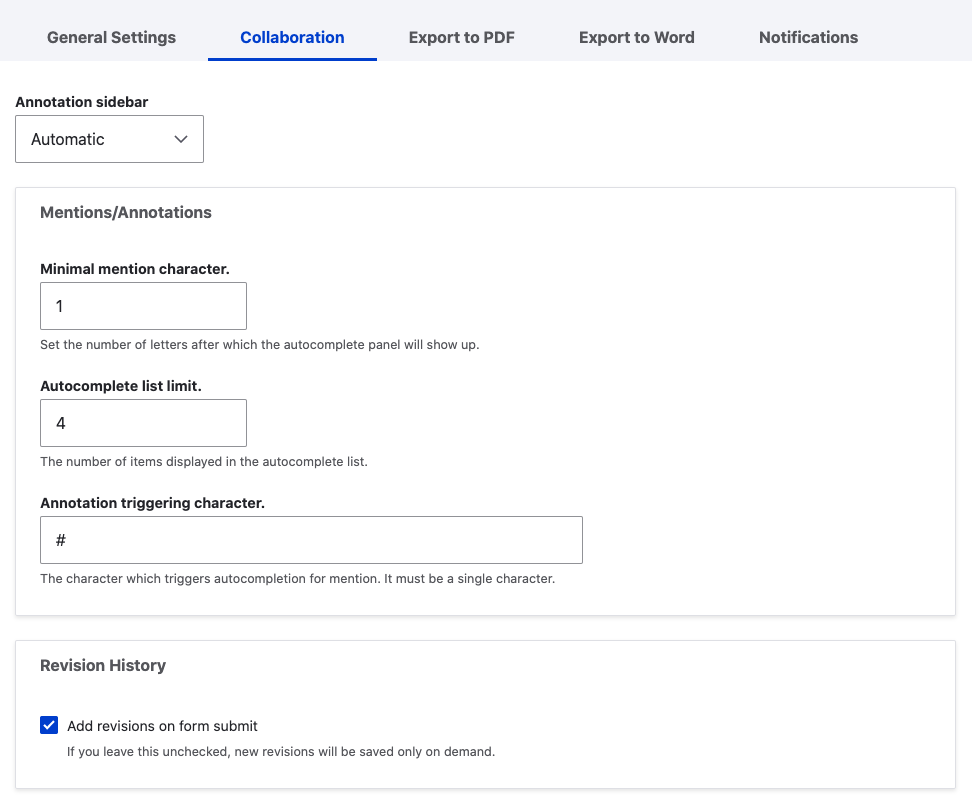
The Annotation sidebar drop-down allows you to choose the annotations display mode (https://ckeditor.com/docs/ckeditor5/latest/features/collaboration/annota...), which affects the way comments and track changes notices are displayed within the document. You may choose between automatic - which is default and fine, as it will determine the right way to display annotations based on the screen setup. There is also a choice between inline balloons that will display inside the content and the narrow and wide sidebars. This is greatly a question of personal preference and the environment - a wide sidebar would be great for desktop solutions, while mobile devices and tables will benefit from using a narrow sidebar rather.
The second section deals with mentions (https://ckeditor.com/docs/ckeditor5/latest/features/mentions.html) and allows one to choose the triggering character for a mention, the number of characters that are needed to display the available mention items and the number of suggestions displayed at once.
The last section is related to CKEditor 5 revision history (which is separate from Drupal's revisions).
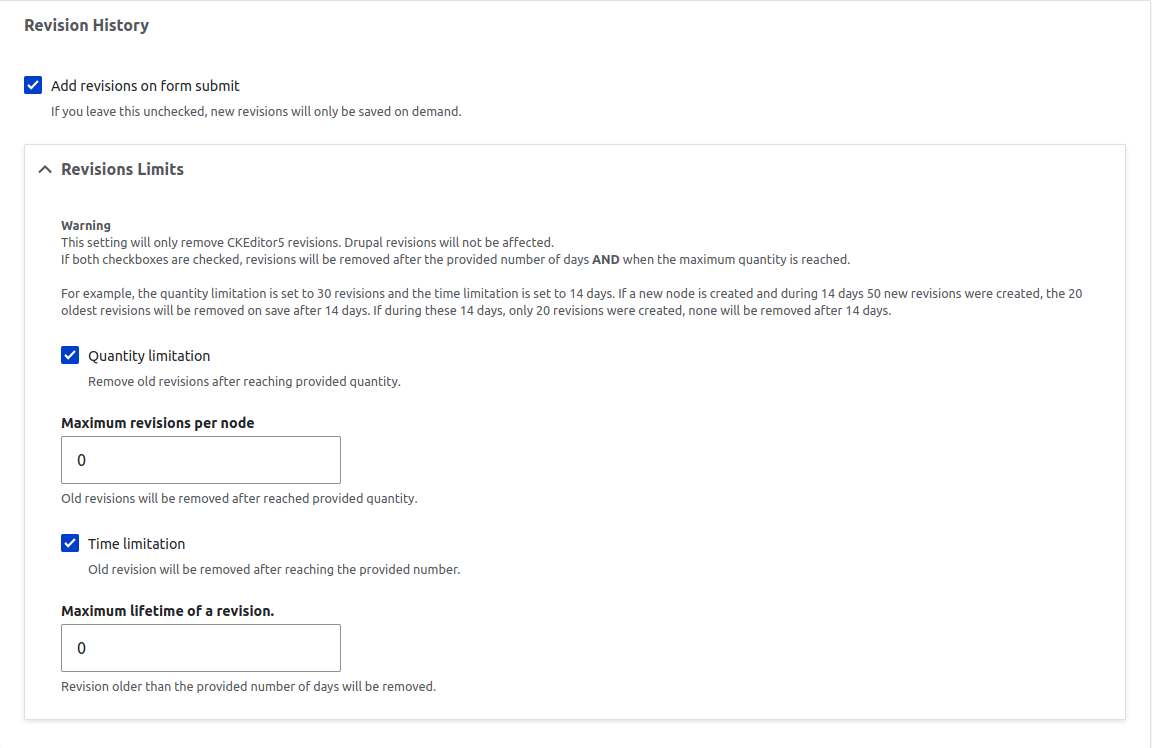
You can decide whether the revisions of the document should be saved only on demand or automatically on document save. Please note that identical revisions won't be saved (for example in case where fields other than handled by CKEditor 5 were changed)
Sites with large amounts of nodes/languages can quickly grow their revisions database table to huge values. To avoid that there is option to automatically delete revisions exceeding given amount threshold and/or time since were created.
Revision amounts when using quantity limitation are examined for each field item separately.
When using both limit types at once deleted will be only revisions that exceeds both limits.
Export to PDF and Word settings
The two following sections are almost identical. One bears the settings for the Export to PDF converter, while the other lets you do the same for the Export to Word converter. Here, you have the chance to choose the default paper format from several popular predefined formats. The next section deals with the margins that are set for the whole exported document. The only setting that applies solely to the Export to PDF converter is the page orientation which may be either horizontal or vertical.

Next, there is the ability to define a custom header and footer - both the content (in HTML) and the styling. The difference between the converters is that the Export to Word converter can use different CSS styling for headers and footers. For the Word converter, you can also decide whether the footer and header should appear on all pages, only the first one, on odd or on even pages.

The final section enables users to set a watermark image. This can be done either by providing a URL to a publicly accessible image or by uploading an image directly from the disk. The watermark will appear centered on every page of the exported document.
You can specify the Width and Height of the watermark using CSS units, including px, cm, mm, or in.
Minimum accepted values are: 96px, 2.54cm, 25.4mm, or 1in. Using a lower value or an incompatible unit will result in a conversion error.
The Washout checkbox can be selected to render the image with reduced opacity.

There is also an option to configure the link to the converter, however, this is only used if you are using an On-Premise installation of the feature. For this tutorial, using the Premium Features Free Trial license all features are working as SaaS only anyway.
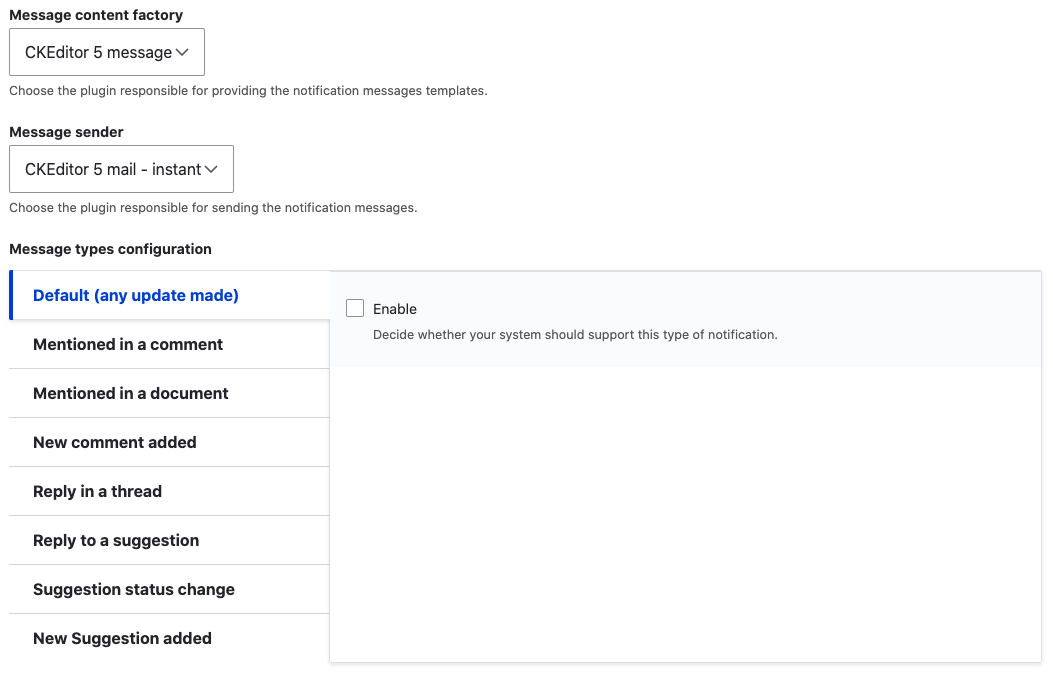
The last setting section lets the users choose what kind of collaboration notification will be sent to them via email. These messages can be sent individually, immediately after a change is made, or in bulk email. The users can also choose which events should they be notified about.
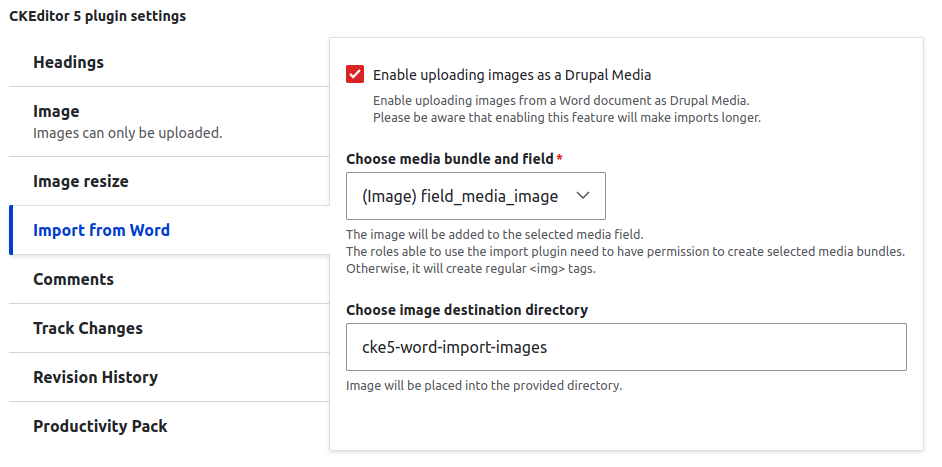
Import from word
The Import from Word plugin by default imports the images in base64 format. This behavior can be changed in two ways:
- Import as regular filesystem images. To achieve this simply turn on the “Enable image uploads” in the “Image” CKEditor 5 plugin settings.
- Import as media entities. Requires the “Enable uploading images as a Drupal Media” checkbox in the “Import from Word” CKEditor 5 plugin settings. Then you can select which media bundle and its image field should be used to store imported images and the destination directory in the file system.
Notifications settings
Productivity pack settings
The Productivity Pack submodule requires CKEditor 5 v37.1.0 or higher. Version 38.0.1 was introduced in Drupal 10.1
Currently, the Document outline and Table of contents plugins cannot be used together within a single text format - this will break the editor.
The Productivity Pack submodule adds a new option to the “General Settings” tab. In the “Advanced settings” section, there is now a checkbox that allows altering the Claro’s theme styles, enhancing the node edit form’s width. This option was added as enabling the Document outline and Collaboration plugins and their respective sidebars was reducing space available for the editor to an unreasonably small value.

Table of contents and Format painter
These plugins don’t require any additional configuration. Their toolbar buttons can be enabled in a text format configuration form.
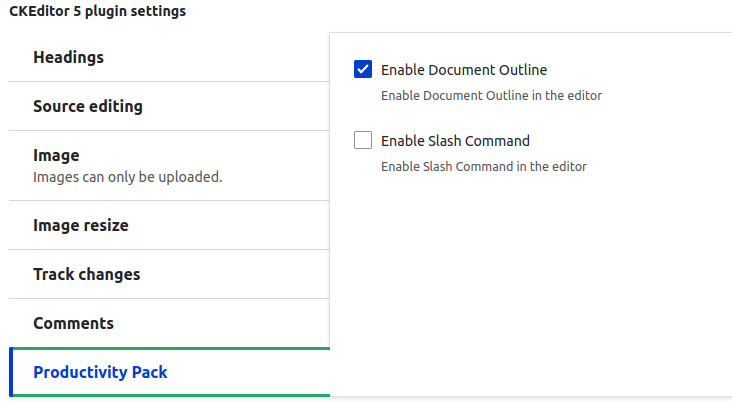
Document outline and Slash commands
Both plugins don’t have toolbar buttons. They can be enabled in a text format configuration form, “Productivity Pack” tab of the “CKEditor 5 plugin settings” section.
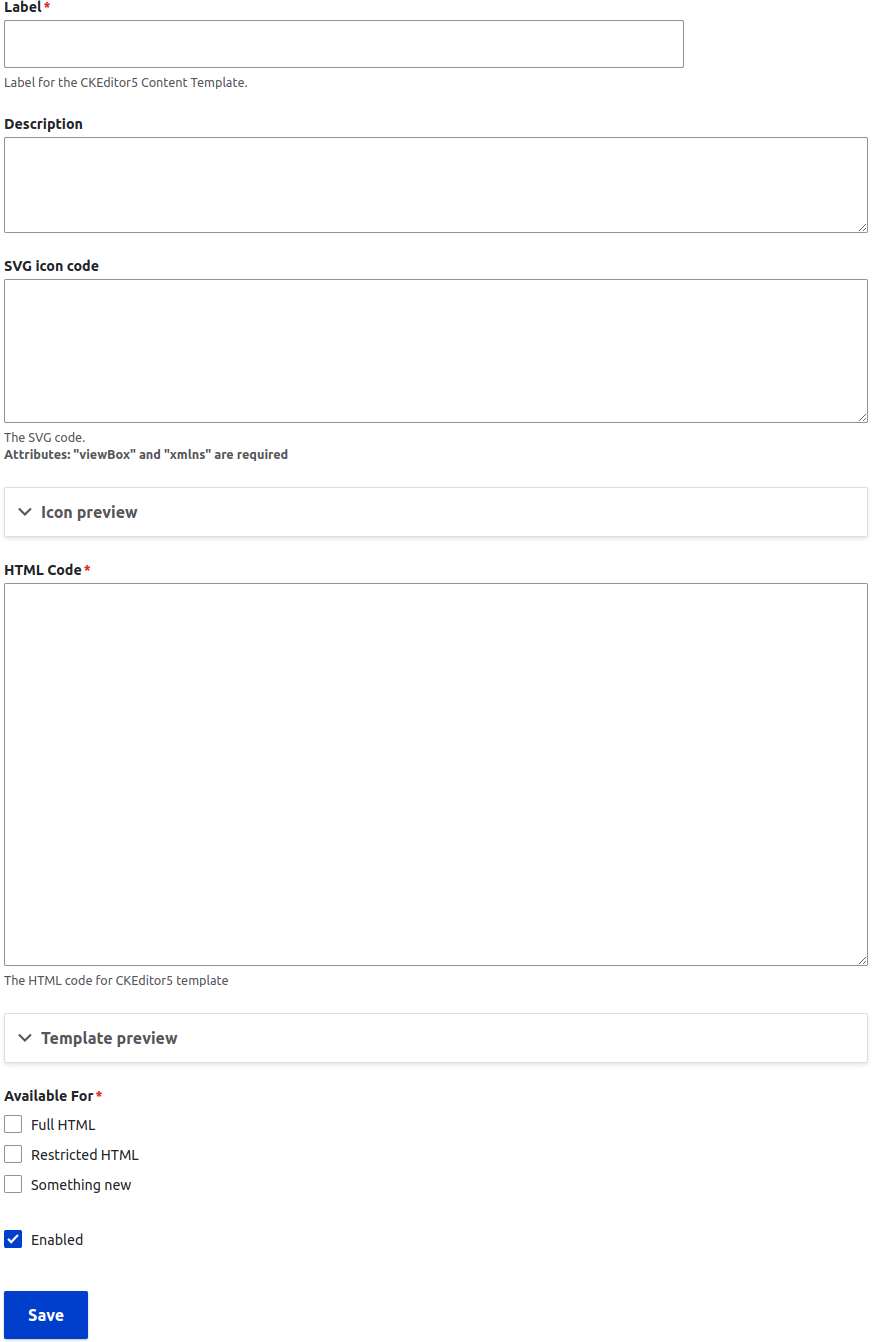
Templates
Templates can be defined at /admin/config/ckeditor5-premium-features/productivity-pack/content-templates
The overview page allows you to add, edit and delete individual templates.
The template edit form allows you to specify all the details. Each template can be assigned to various text formats that have CKEditor 5 as the editor.
Please note that the Templates toolbar button must be set to active for a text format to be able to insert templates.
WProofreader spelling and grammar checker configuration
WProofreader does not require a CKEditor 5 license key or the main CKEditor 5 Premium Features module enabled.
The module configuration is available at /admin/config/ckeditor5-premium-features/wproofreader
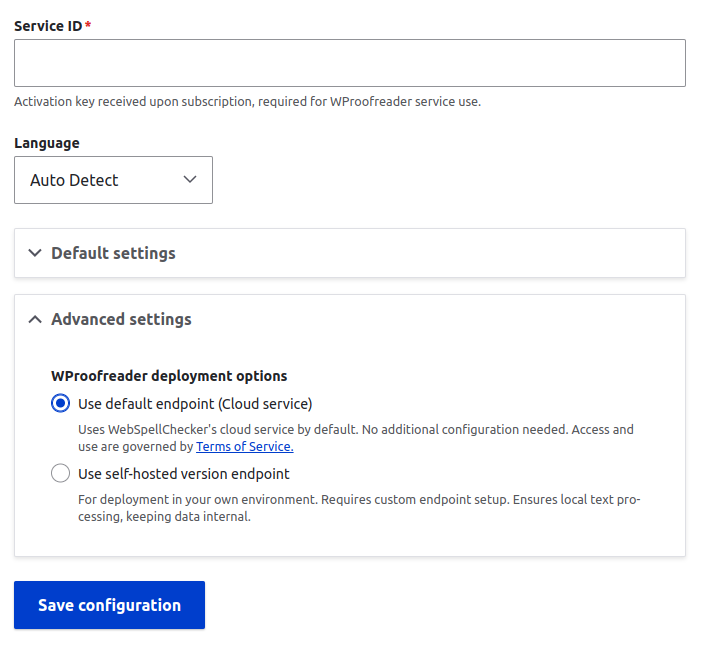
Enter your service ID and click somewhere outside the text field to initiate validation. After successful validation, you will be able to select the default language.
In case you are using a self-hosted service please select the proper deployment option in the advanced settings and provide your endpoint information.
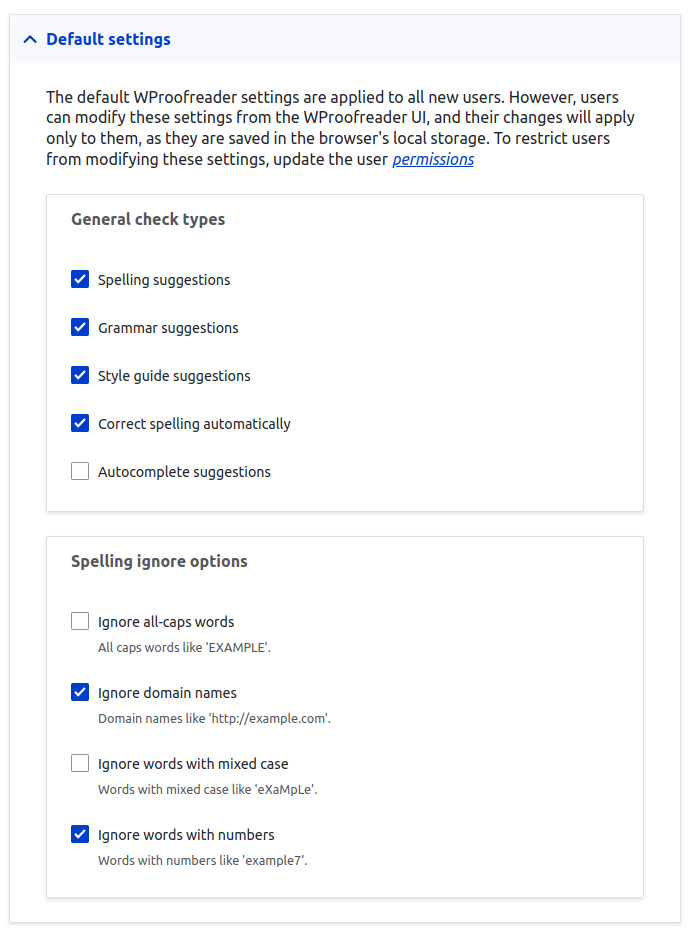
WProofreader provides the content editors UI to change spellchecking options (user choices are stored in the browser's local storage and doesn't affect other users). Possibility to change options is granted with proper permissions.
Site administrators are able to set the default values for those options in the Default settings section:
WProofreader permissions
All roles that are meant to use proofreading should have the "Access to the CKEditor 5 WProofreader proxy API" permission granted.
Additionally you can grant permissions to allow roles to override default proofreading settings and language individually, use user-level custom dictionary and turn spellchecking off.

AI Assistant
The AI Assistant module brings the official CKEditor's AI plugin support to Drupal. This module requires CKEditor 5 v40.x which was introduced in Drupal 10.2.
Currently, only text models are supported, but more functionalities are planned in the future. You can read more here.
New AI features will be added after they become available in the CKEditor 5 AI plugin and the proper CKEditor 5 version becomes available in Drupal Core.
Configuration
The main configuration is available at /admin/config/ckeditor5-premium-features/ai-assistant

You can select AI provider service here and enter the Auth key. Some providers may require additional configuration.
More providers will be available in the future versions for the CKEditor 5 AI plugin and this module.
By default, the plugin has a distinctive violet tint for its UI components. If you prefer the regular color scheme you can select the "Disable the feature's default theme" checkbox.
The Manage commands groups section contains a redirect button to the custom commands configuration panel (more about them in the next chapter).
The Advanced settings section allows the definition of a custom proxy endpoint. Use this section only if you really need it.
There is already a built-in proxy endpoint in the module.
The proxy endpoint is used to communicate with the AI provider without exposing the Auth key in the CKEditor configuration. It can be accessed with the browser's console. If you want to provide your own proxy endpoint, please be aware that Auth Key will be exposed in the CKEditor configuration.
Enabling plugins

The module provides two CKEditor 5 plugins, which can be added to the toolbar:
- AI Assistant - allows to write any prompt.
- AI Commands - allows for execution of one of predefined prompts
The AI Commands plugin contains some predefined prompts. You can disable them in the AI Assistant tab of CKEditor 5 plugin settings.
You can find the list of default plugins [here](https://ckeditor.com/docs/ckeditor5/latest/api/module_ai_aiassistant-AIA...).

Permissions
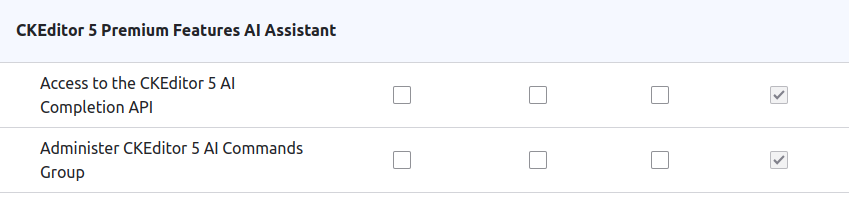
The module brings two available permissions:
- Access to the CKEditor 5 AI Completion API - which grants access to the proxy endpoint, so all user groups that should have access to the plugin should this permission need to be enabled
- Administer CKEditor 5 AI Commands Group - allows to manage predefined groups and prompts
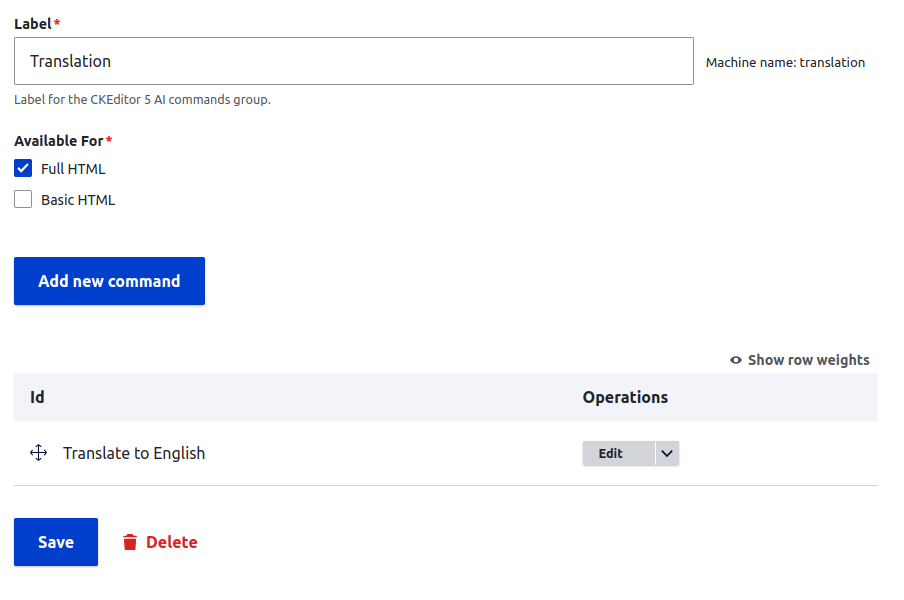
Custom commands
You can add your own commands to the AI Commands plugin starting at /admin/config/ckeditor5-premium-features/ai-assistant/ckeditor5-ai-command-group.
First, you need to create a commands group, then within a group, you can create specific prompts.
You can specify which text format can use the given group.

Merge Fields
The Merge Fields module integrates with the Token API, providing a user-friendly interface in the editor. To display the replacements in the entity view, the Token Filter module can be used.
To use Merge Fields, you'll need to configure available items at /admin/config/ckeditor5-premium-features/merge-fields. Each item represents a single token. Tokens may be grouped (or the default group will be used). The integration works by replacing Drupal tokens with the Merge Fields placeholders when the content is loaded into the editor, and vice versa when the content is saved. The replacement is only done for the configured tokens, other tokens are left untouched.
Each merge field can have a default value. Content editors will be able to toggle between viewing the merge field name and its default value. If a default value is not provided, the token name will be displayed instead.
The default type of Merge Field item is simple text replacement. The Block type should be used for tokens that will be replaced with rendered HTML, and the image type in case of tokens that contain image URLs.
In the text format configuration, you'll need to add the "Merge Fields" button to the active toolbar. The Merge Fields plugin settings allow you to configure the available groups and items for a given text format. If nothing is selected, all configured items will be available. Selecting a group will make all items in the group available. Selecting individual items will make only those items available.

Email editing
Export inline styles plugin configuration
The feature is configurable per text format. The settings are available in the "Email Editing" tab of the CKEditor 5 plugin settings.
The Export Inline Styles plugin allows saving the content with inline styles to another field (the conversion is done on form submission).
This is useful when the content is sent via email to achieve broader compatibility with email clients. In such a case, the original field is used for editing and displaying the content on the site, while the field with inline styles is used for email sending.
The inline styles are generated based on the styles provided as CSS files listed in the "Stylesheets" field or the "Inline CSS" field. By default, classes are preserved. If you want to remove them, you can use the "Strip CSS classes" option.
Footnotes
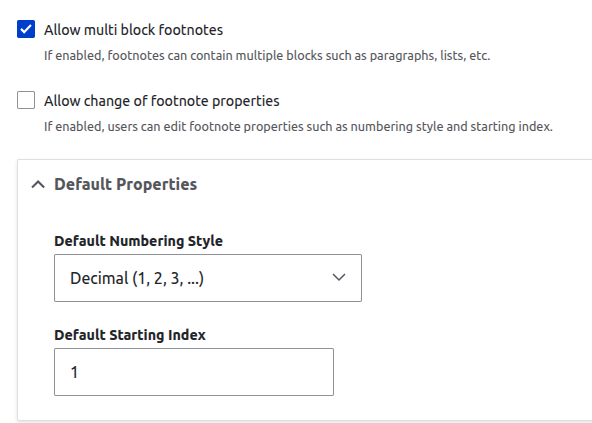
The configuration settings for the CKEditor 5 Footnote plugin are located within the “Footnotes” tab in the "CKEditor 5 plugin settings" section in the text format settings page.
Available options include:
"Allow multi block footnotes"
This option allows including multiple block-level elements (such as lists or images) within a single footnote.
"Allow change of footnote properties"
Selecting this grants users the ability to override the configured default numbering style (e.g., 1, 2, 3... or I, II, III...) and starting index within the editor.
"Default properties"
This section allows you to set the default starting index and numbering style for footnotes. If the "Allow change of footnote properties" option is disabled, these default values will be applied universally to all CKEditor instances.
Important Note: Changing these default values will not affect any existing content.
Line Height
The configuration settings for the CKEditor 5 Footnote plugin are located within the “Line height” tab in the "CKEditor 5 plugin settings" section on the text format settings page.
The available options include:
"Options"
A set of options available for content editors. Enter one option per line. Options can be numeric values, either with or without units (px, em, rem, etc.). Values without units will be added to the formatted text as a style attribute.
Alternatively, you can enter text values, which will be converted to classes prefixed with line-height-. However, you'll need to add custom styles to both the administration and frontend themes.
The default option will always remove a previously set line height.
Important Note: When the “Limit allowed HTML tags and correct faulty HTML” filter is enabled, all style attributes will be removed upon entity save, making class-based formatting the only option.
"Default option label"
The label for the default option.

Configuring permissions
General permissions
"Use premium features access token" has to be granted to each role that will use real-time collaboration and/or export plugins.
Non-realtime Collaboration permissions
Each filter format that uses CKEditor 5 with collaboration features will have a set of permissions available.
With those permissions, you can set up for example the comments-only and/or suggestions-only mode.
Please be aware that if no permission is set then the editor will be loaded in a read-only mode.
Realtime collaboration permissions
To enable the permissions system for the Real-time collaboration feature you have to enable it on the main Realtime Collaboration settings page at /admin/config/ckeditor5-premium-features/realtime

During the form submission, a copy of the editor build with current settings and plugins will be sent to the cloud (only text formats using collaboration plugins).
The reason for that is there is a possibility that two editors with different sets of permissions may edit the content at the same time and in case a user with lower permissions saves the content they would get an error with backend validation. In the real-time mode, permissions are passed directly to the editor instance and during submission, the content is retrieved from the cloud instead of the form element. The bundle sent to the cloud allows the conversion of the CKEditor model to the HTML output on the server.After the form submission, you will be informed about the successful bundle upload or whether there were any errors during the process.
The problems with uploading may be caused by some plugins or configuration. In such a case, a detailed plugin list and configuration will be available in the Recent log messages page. In case of problems please reach out to the support team with the log details.

The editor bundle upload process will also take place after any changes in the test format settings (unless the given text format does not contain collaboration features)
The permissions themselves will be available at /admin/people/permissions/module/ckeditor5_premium_features_realtime_collaboration
or on the main permissions page in the "CKEditor 5 Premium Features Real-time Collaboration" section. Please note that currently, real-time collaboration permissions do not support suggestions-only mode.
CKEditor 5 Version Override
The module allows to override the CKEditor 5 version delivered in the Drupal core.
Go to /admin/config/ckeditor5-premium-features/version-override , you only need to enable a checkbox and select a version from the list.
The override will affect the main CKEditor 5 library and official plugins. Drupal custom plugins will remain the same as provided by the current core version. This may in some cases lead to incompatibility issues, so please test the changes on your development environment first. Once the default version provided by Drupal core is the same or newer than the overridden, it is advised to disable the override.
Adding CKEditor 5 Premium features to your editor
Once all the features are configured, they need to be added to the editor UI. In the Configuration tab go to the Text formats and editors section. Once there, choose the desired editor you want to equip with Premium features.
Drag and drop the available toolbar items to add them to your editor UI. Arrange them any way you like and find comfortable to use.

How to use all of the plugins?
Refer to the Feature Guide to learn how to use each feature included in this module.
Help improve this page
You can:
- Log in, click Edit, and edit this page
- Log in, click Discuss, update the Page status value, and suggest an improvement
- Log in and create a Documentation issue with your suggestion
