On this page
- Digital Sandbox
- Check out the Installation steps:
- How to configure User Provisioning Module with miniOrange?
- Configure Drupal as SCIM Server:
- Create an Application in miniOrange:
- Configure miniOrange as SCIM Client:
- Create Group
- Assign users to the Group
- Create a new Policy:
- Additional Features:
- Contact our 24*7 support team
User sync changes from miniOrange to Drupal
This document will assist you to configure Drupal as SCIM Server and miniOrange as SCIM Client. You will be able to push users and groups from miniOrange to Drupal.
The Drupal User Provisioning and Sync module is compatible with Drupal 8, Drupal 9, Drupal 10 as well as Drupal 11.
Check out the Installation steps:
How to configure User Provisioning Module with miniOrange?
Configure Drupal as SCIM Server:
- Once the module is installed, navigate to the Configuration tab of the Drupal site and select miniOrange User Provisioning.
-
Navigate to the User Provisioning tab of the module and click on the Configure button under the Changes from Provider to Drupal (SCIM Server) section.

Create an Application in miniOrange:
- Login to the miniOrange dashboard.
-
From the left navigation menu navigate to the Apps section.

-
Click on the Add Application button.

-
Now, select Provisioning.

-
Click on the SCIM Server (Destination).

-
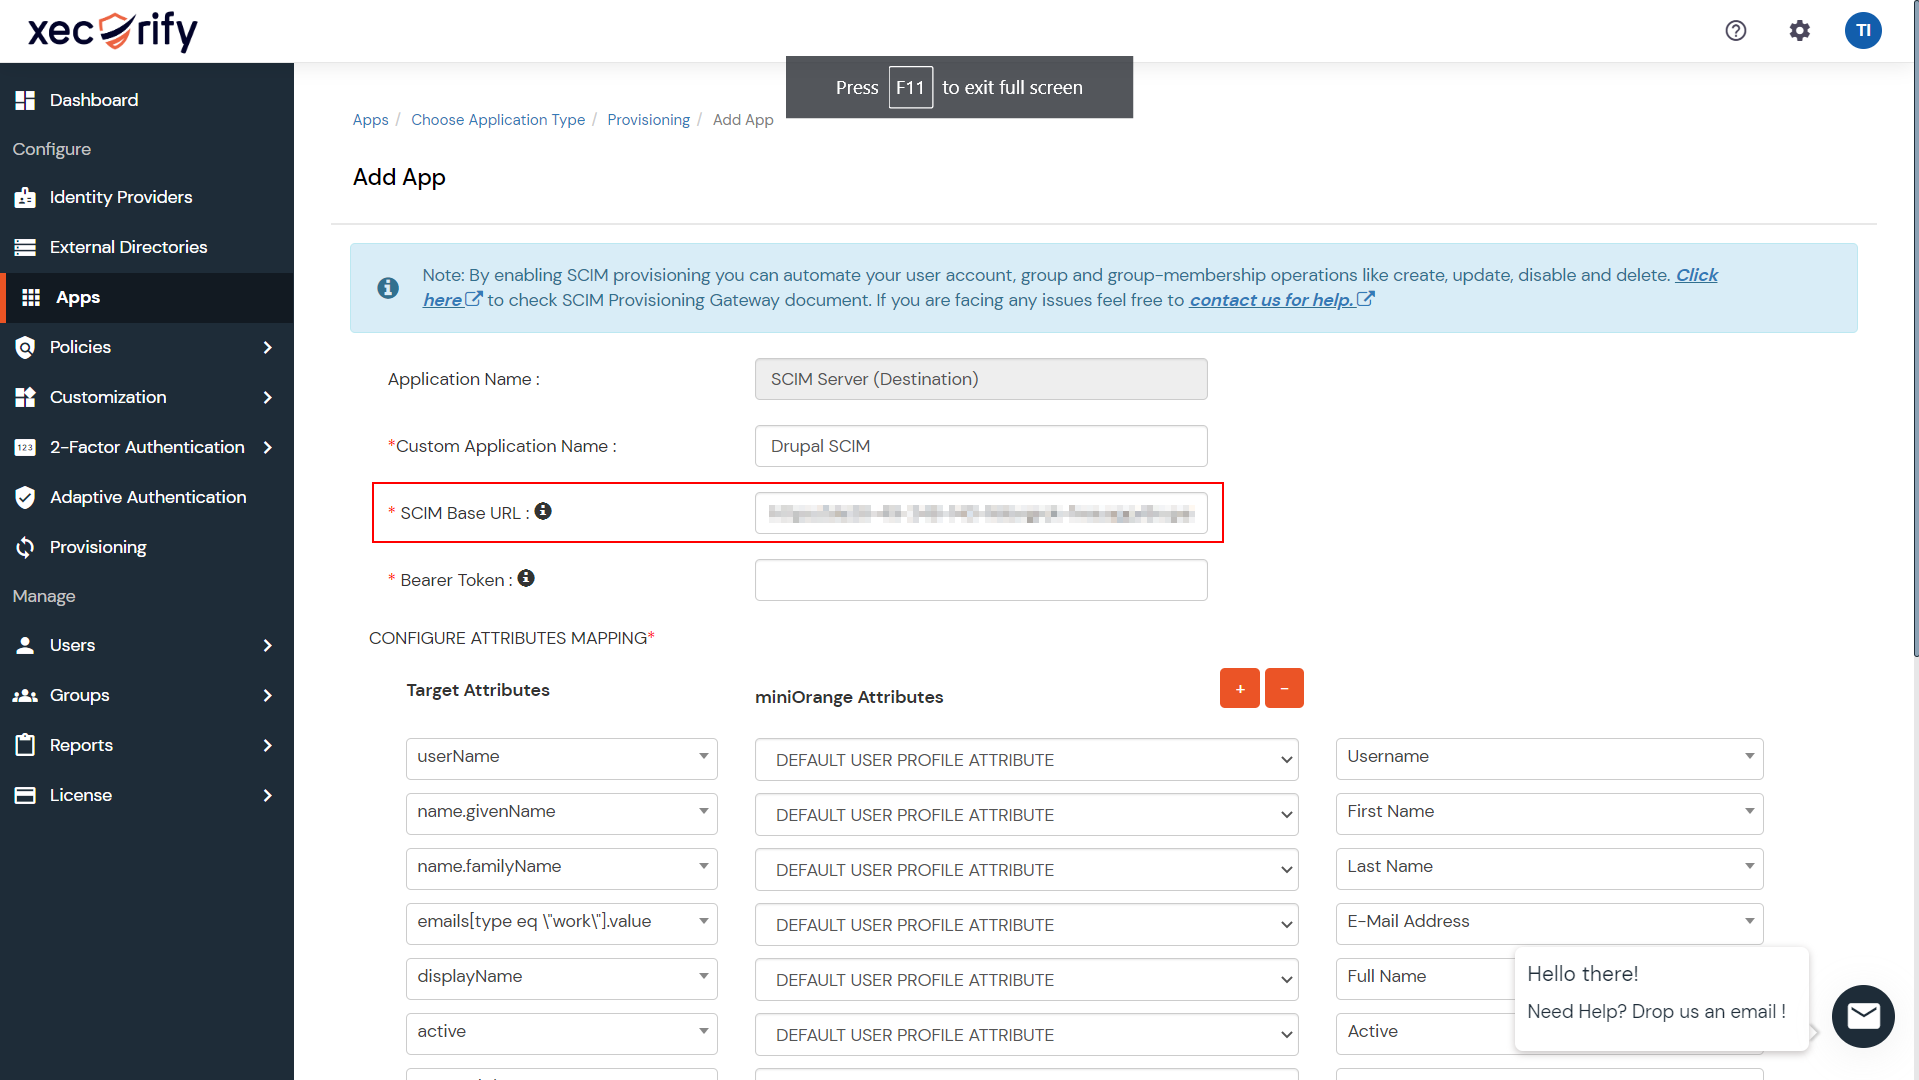
Enter the Application name under the Custom Application Name text field.

Configure miniOrange as SCIM Client:
- Navigate to the Drupal site.
-
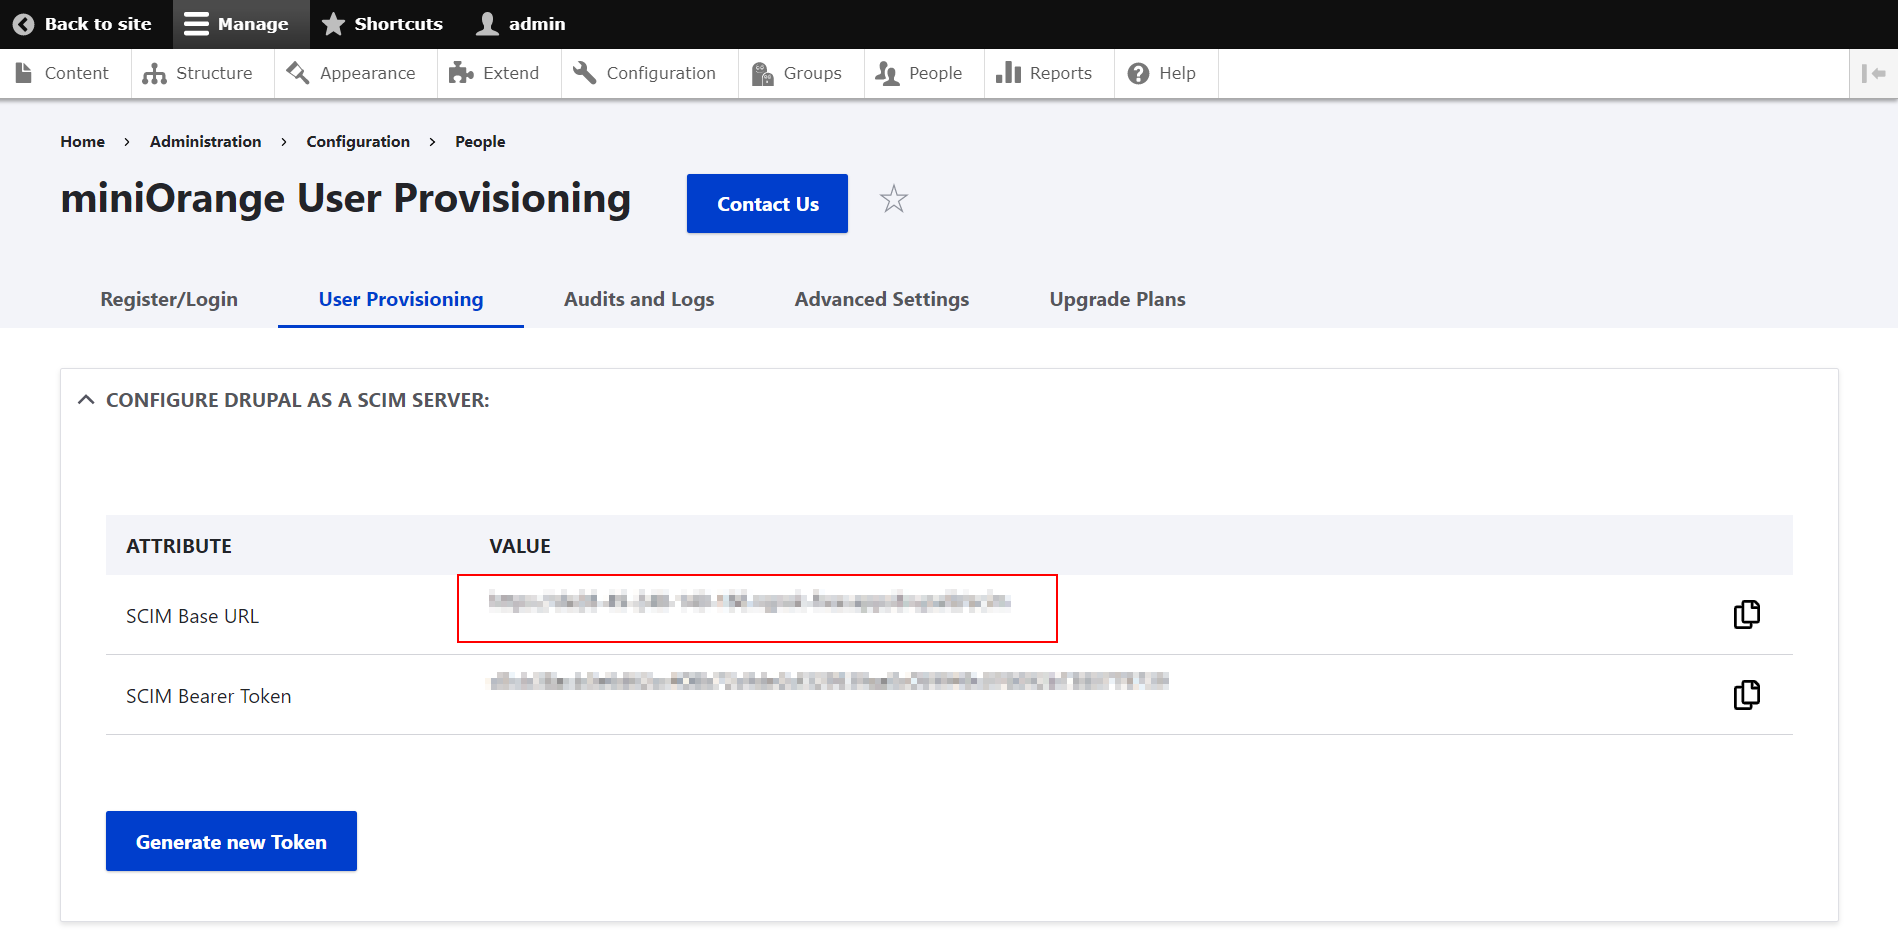
Under Configure Drupal as a SCIM Server section, copy the SCIM Base URL.
-
Navigate back to the miniOrange dashboard and paste the copied SCIM Base URL under the SCIM Base URL text field.
-
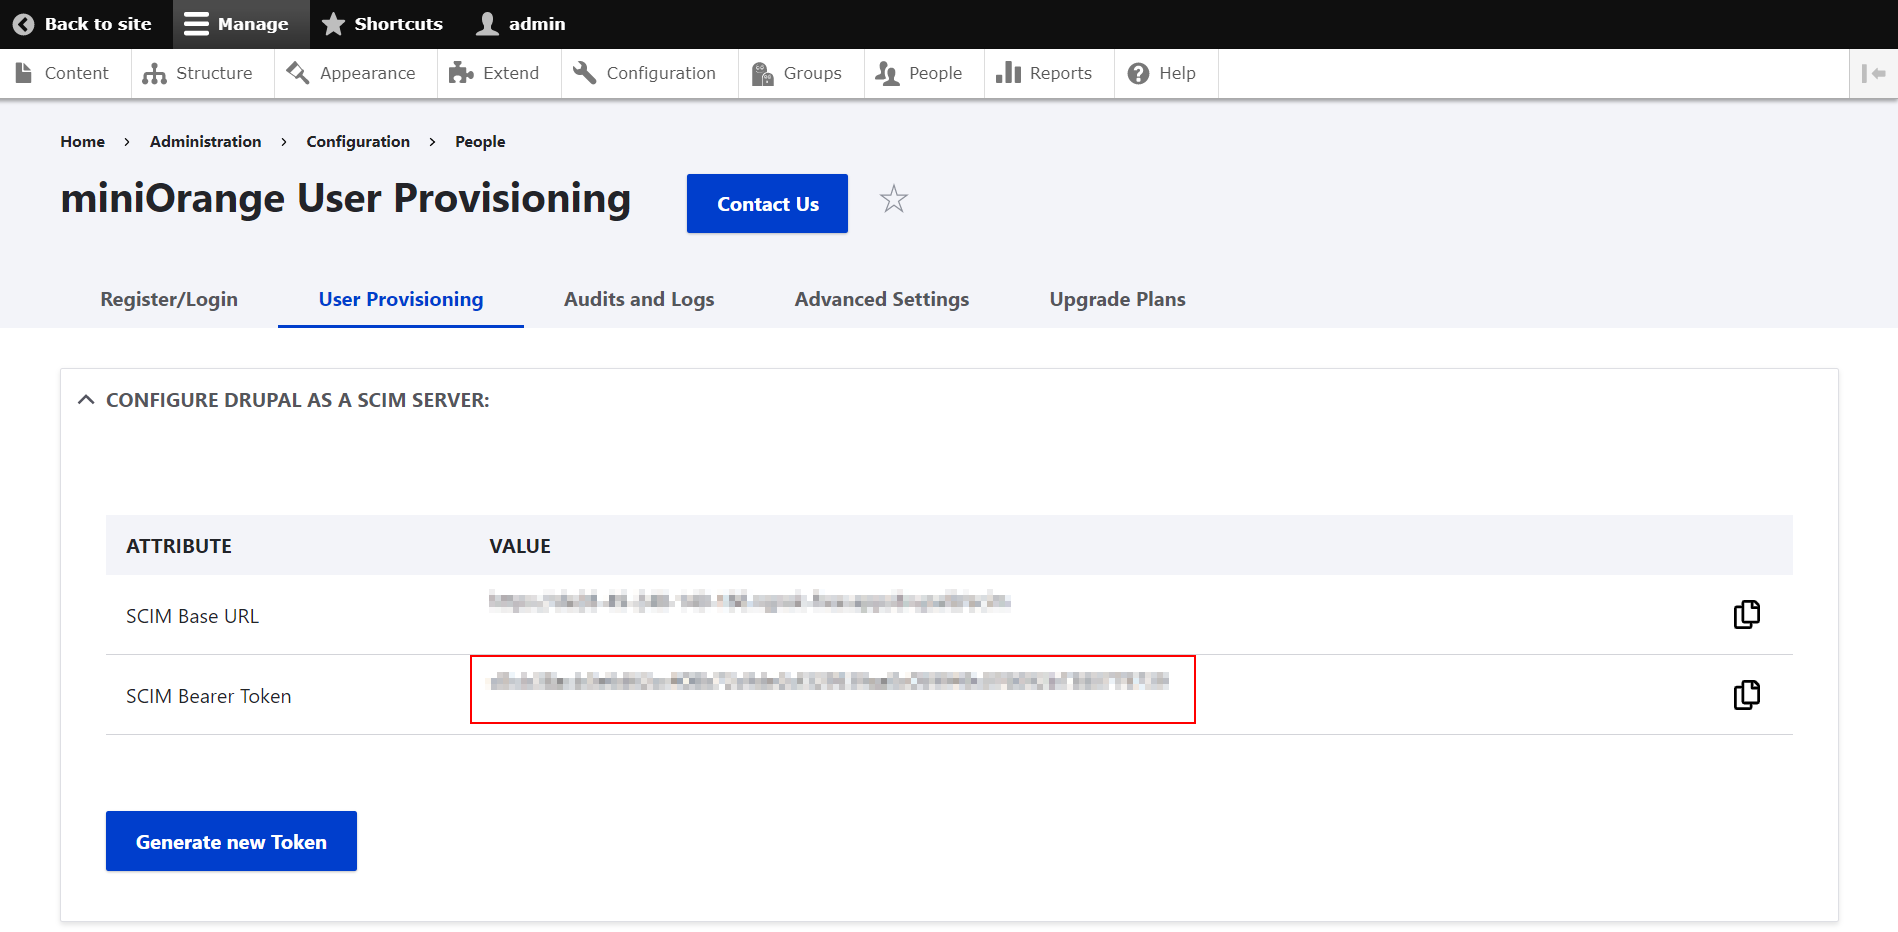
Again, navigate to the Drupal site and copy the SCIM Bearer Token.
-
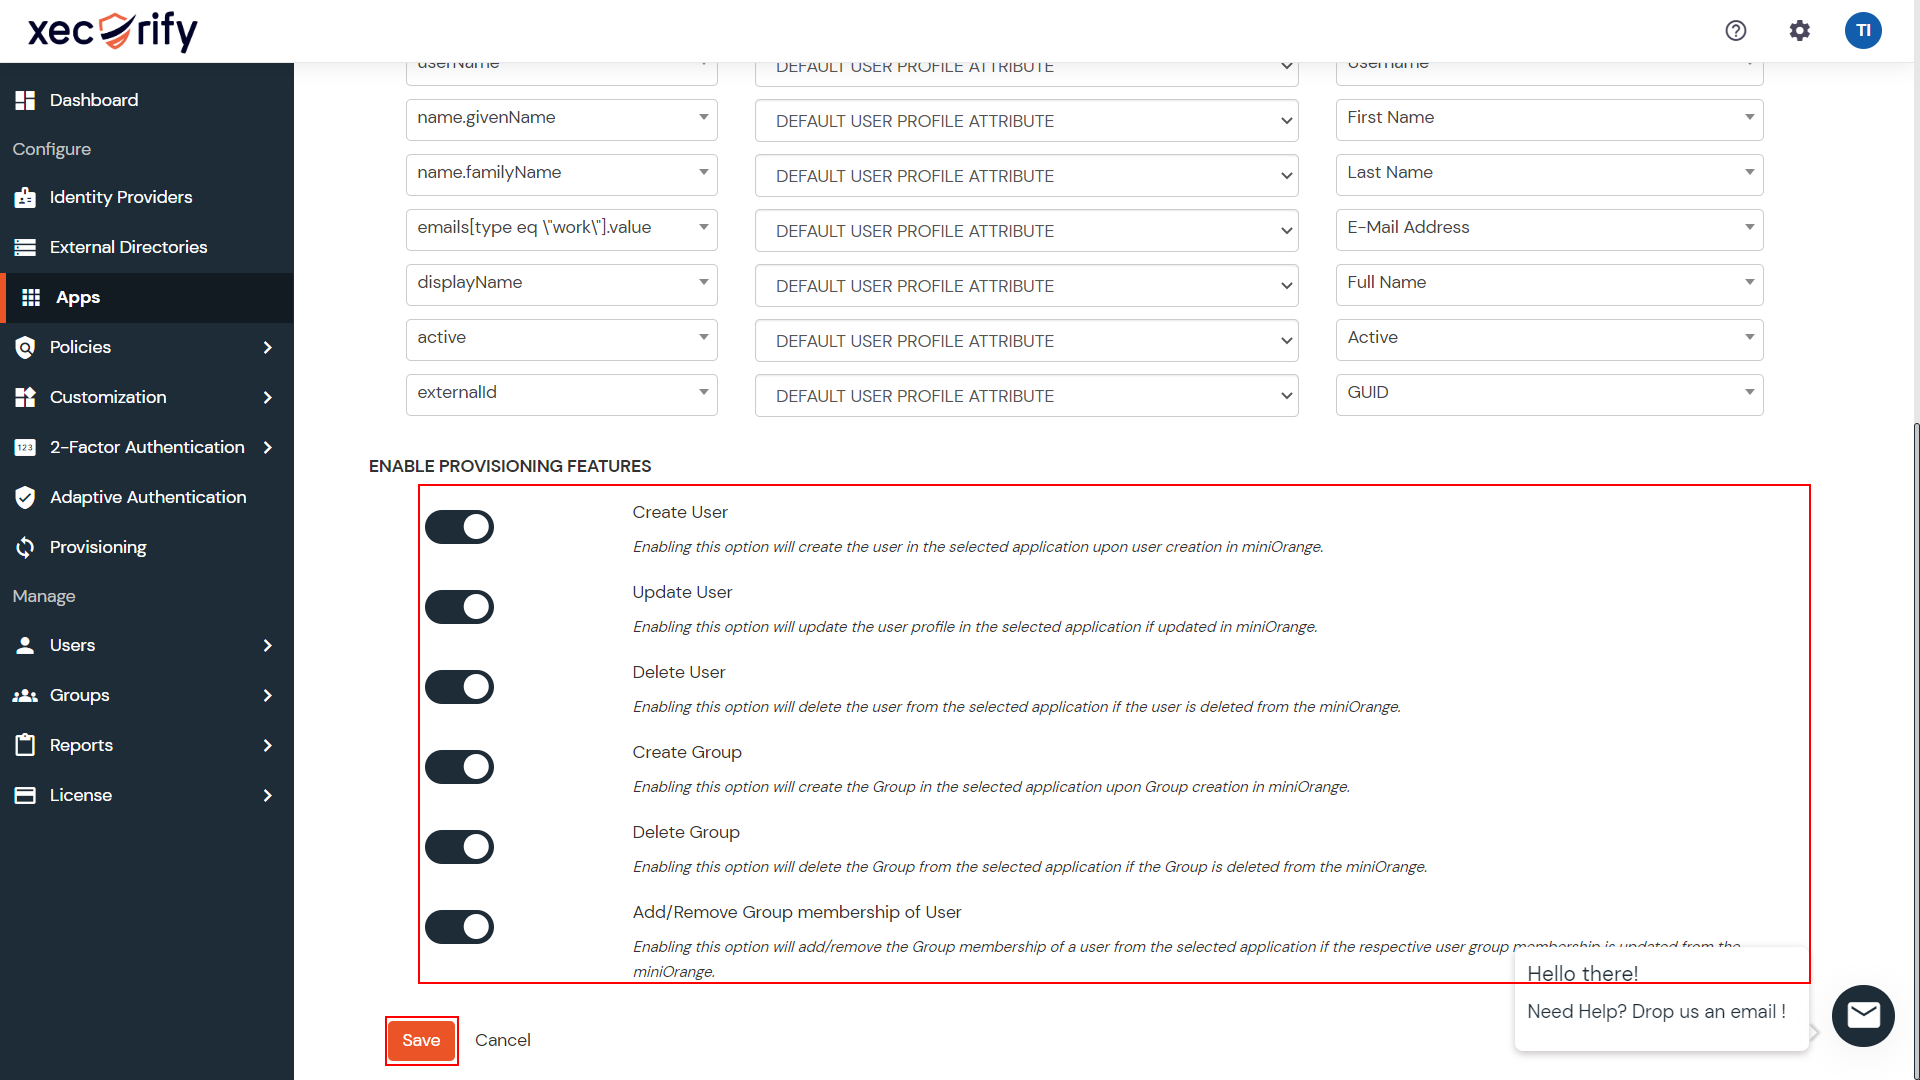
Navigate back to the miniOrange dashboard and paste the copied SCIM Bearer Token under the SCIM Bearer Token text field.

-
Scroll down to Enable Provisioning Features section. Enable the operations (Create/Update/Delete) that you want to allow and click on the Save button.
Create Group
-
Navigate to the Manage Groups tab under Groups from the left navigation menu.

-
Click on Create Group button.

-
Enter the Group name and click on Create Group button.

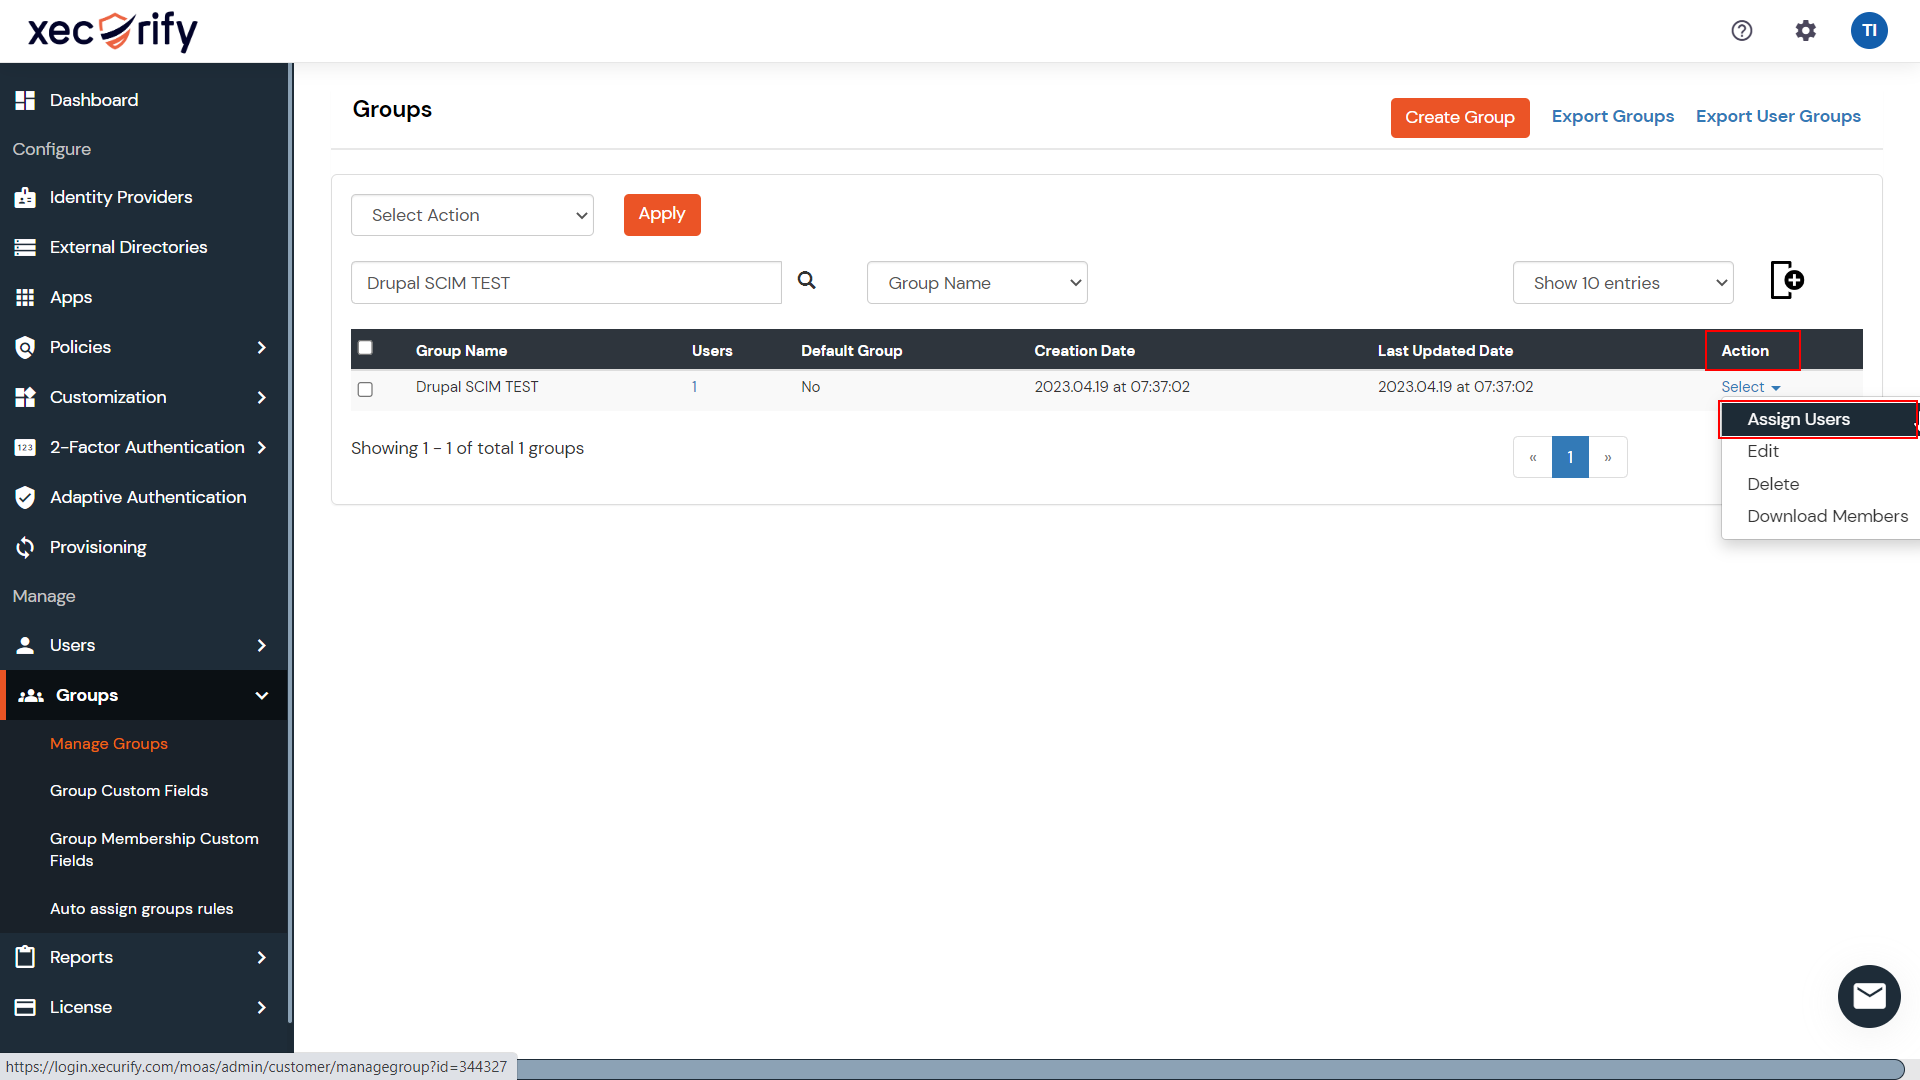
Assign users to the Group
-
Now, search for the Group created.

-
For the corresponding Group under the Actions, click on Select. From the Select dropdown click on Assign Users.
-
Search for the user(s) to assign.

-
Select the user(s), from the Select Action dropdown select Assign to Group, and click on the Apply button.

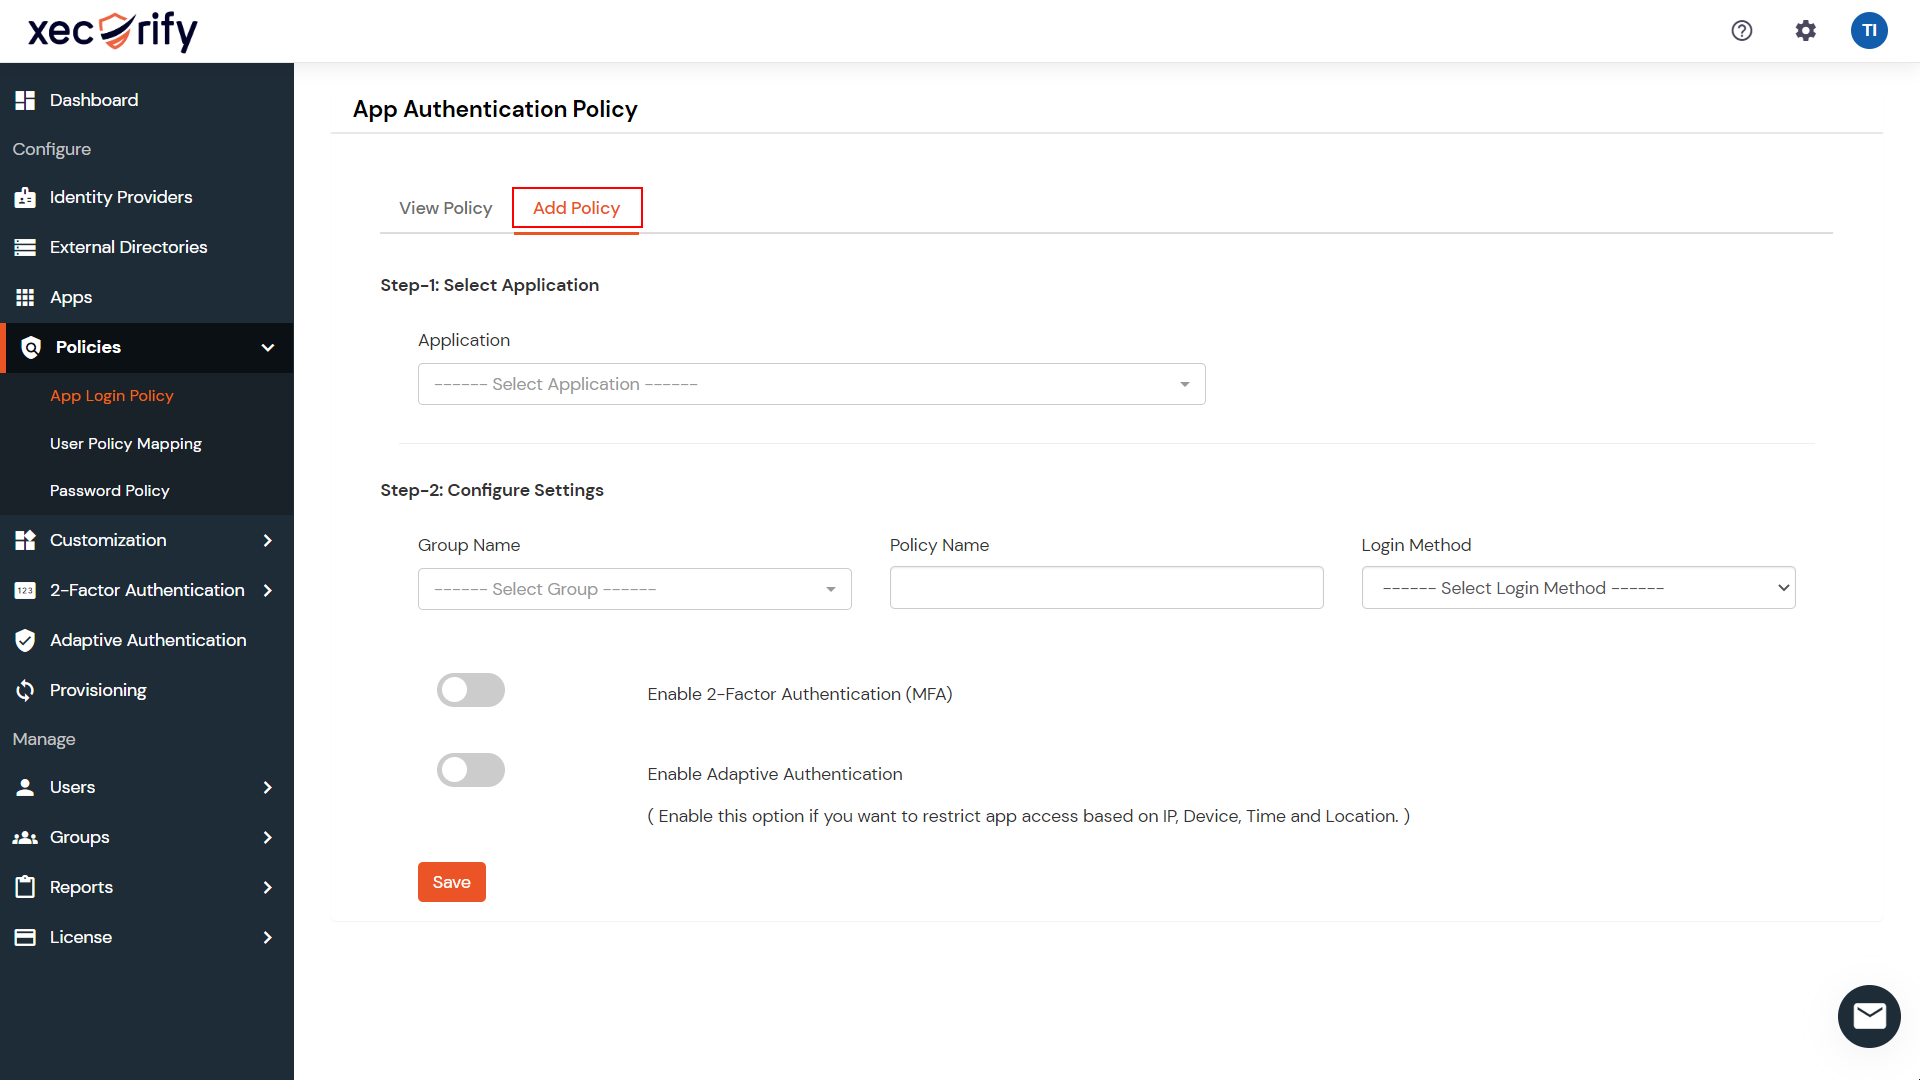
Create a new Policy:
-
Navigate to the App Login Policy tab under the Policies section from the left navigation menu.

-
Switch to the Add Policy tab.
-
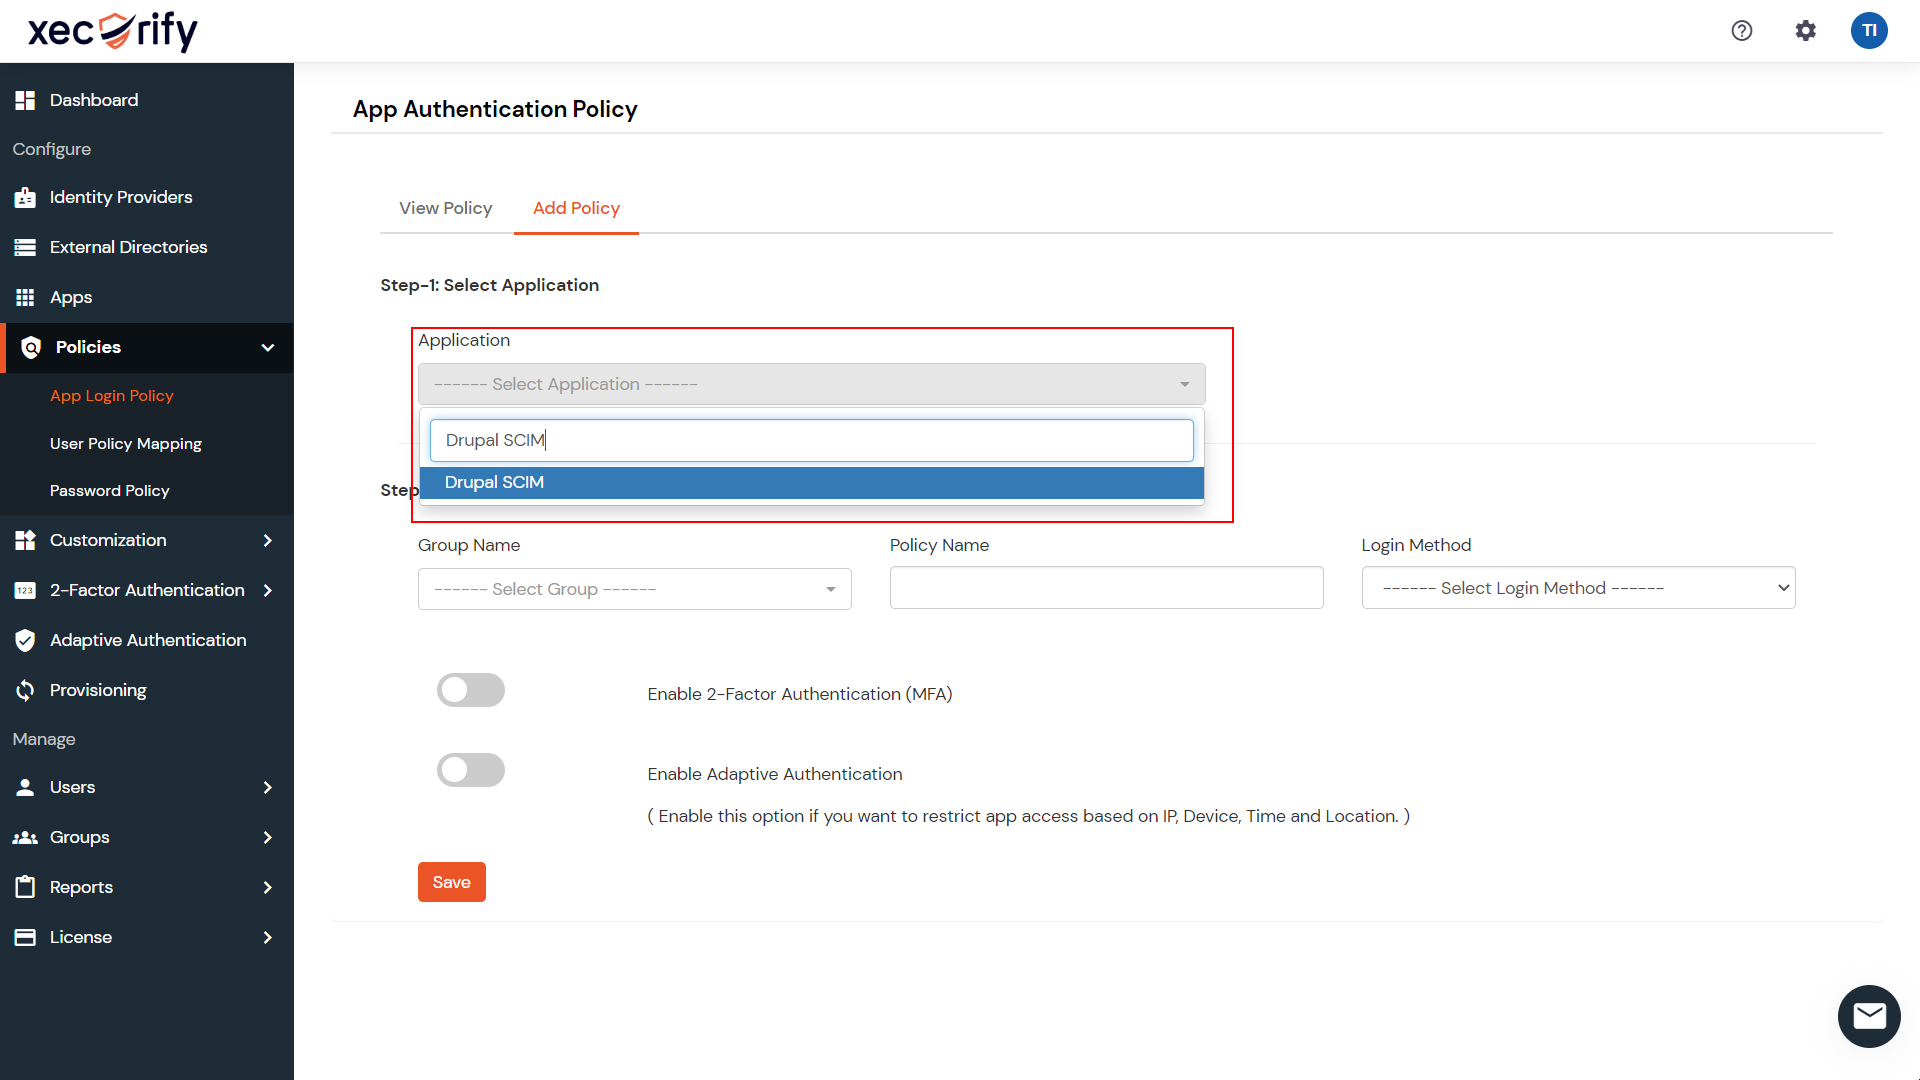
From the Select Application dropdown, select the SCIM Client Application that we just created.
-
From the Group Name dropdown, select the Group which we created in the above step.

-
Enter the policy name under the Policy Name text field and from the Login Method dropdown, select Password.

-
Click on the Save button.

The user(s) present in the group is provisioned from the miniOrange SCIM Application to the Drupal site.
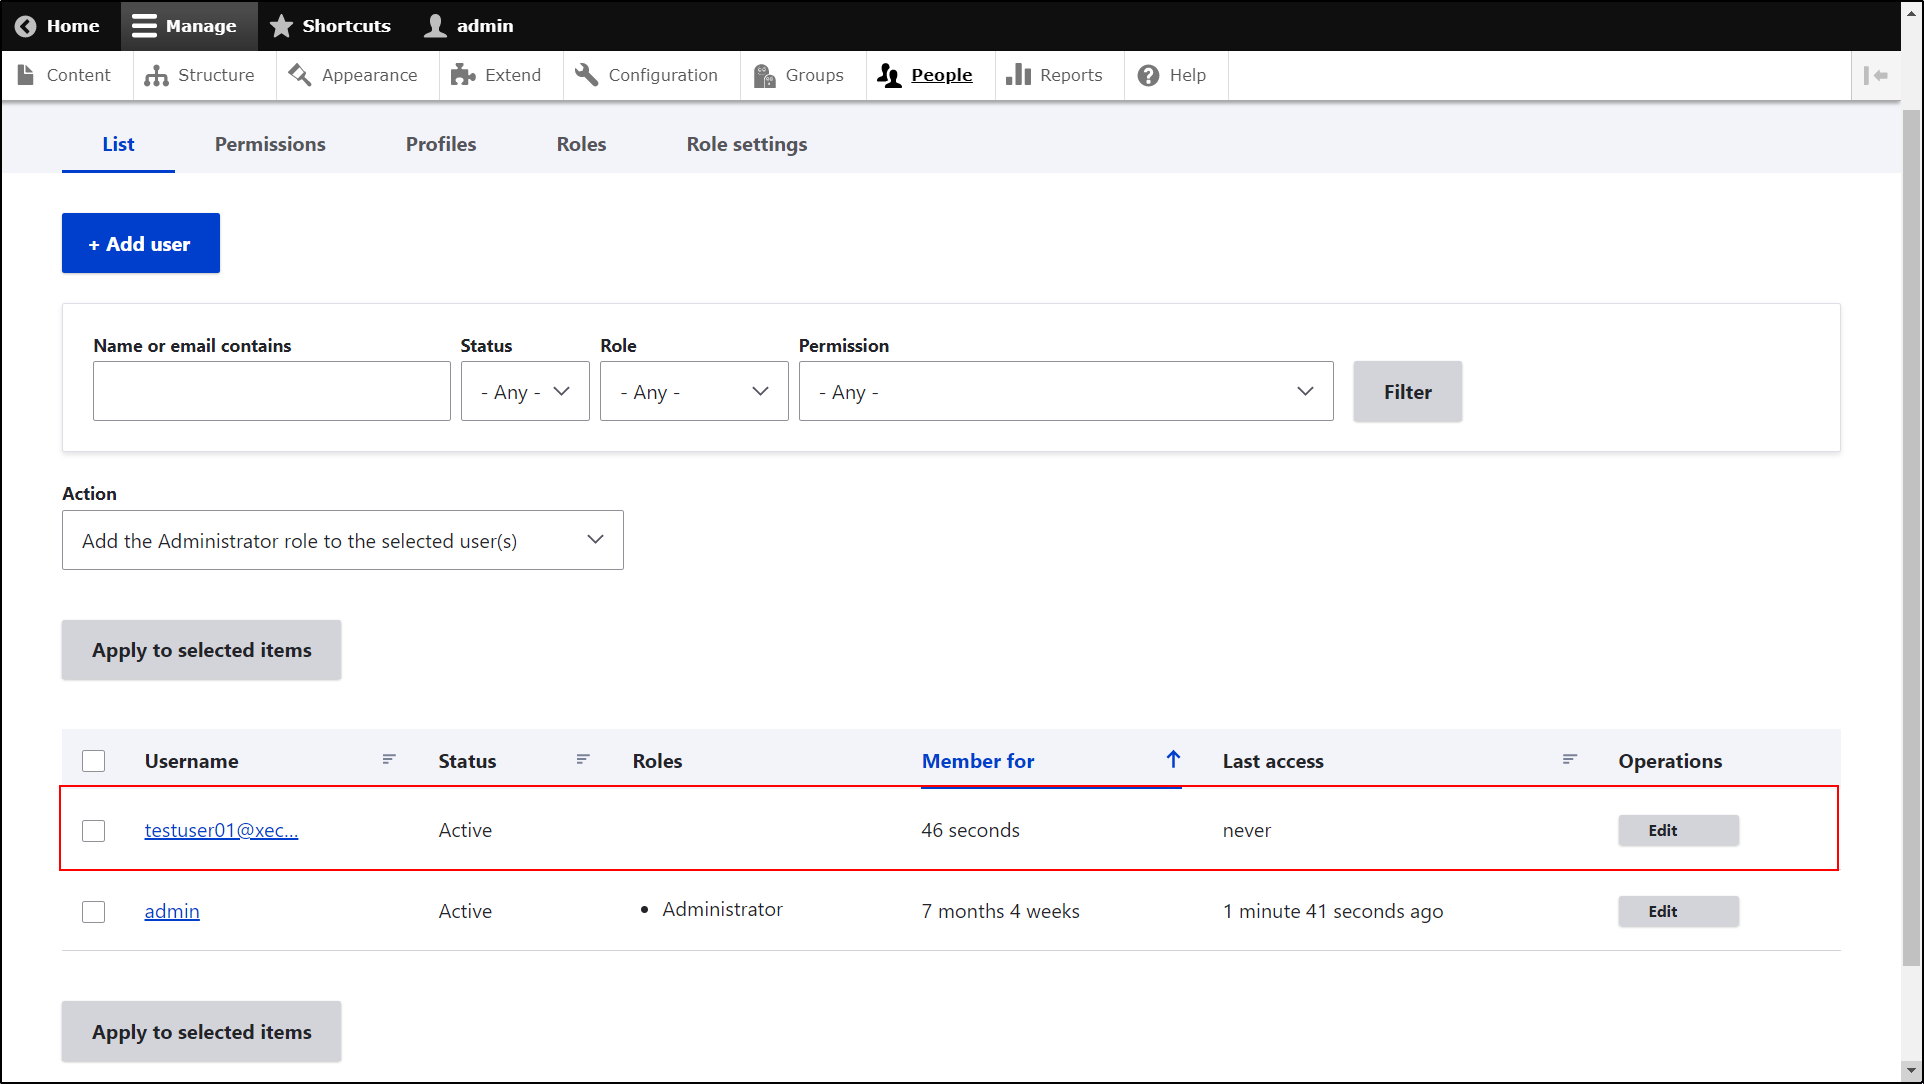
Let’s check if the user(s) are provisioned to the Drupal site:
-
Navigate to the Drupal site and click on the People tab from the top navigation panel. As we can see, the user has been successfully created on the Drupal site.
Congratulations, you have successfully set up Drupal as the SCIM server and miniOrange as the SCIM client.
If the Provision was not successful, please contact us at drupalsupport@xecurify.com. Please send the screenshot of the error window, and we will assist you in resolving the issue and guiding you through the setup.
Additional Features:
Contact our 24*7 support team
Feel free to reach out to our Drupal experts if you need any sort of assistance in setting up Drupal User Provisioning and Sync module on your Drupal site.
Help improve this page
You can:
- Log in, click Edit, and edit this page
- Log in, click Discuss, update the Page status value, and suggest an improvement
- Log in and create a Documentation issue with your suggestion
