Configure Laravel Passport as OAuth / OpenID Connect provider for Drupal login
This document will help you configure Laravel Passport as an OAuth provider making Drupal as an OAuth client. Following these steps will allow you to configure OAuth/OpenID SSO between Laravel Passport and your Drupal site by allowing your users to login to your Drupal site using their Laravel Passport credentials.
We provide Drupal OAuth & OpenID Connect Login - OAuth2 Client SSO Login module which is compatible with Drupal 7, Drupal 8, Drupal 9, and Drupal 10.
You can check our module reviews and ratings here.
Prerequisite:
- Install and activate the OAuth & OpenID Connect Login - OAuth2 Client SSO Login module on your Drupal site. Click here to check out the module installation step.
Steps to configure Drupal as OAuth Client:
-
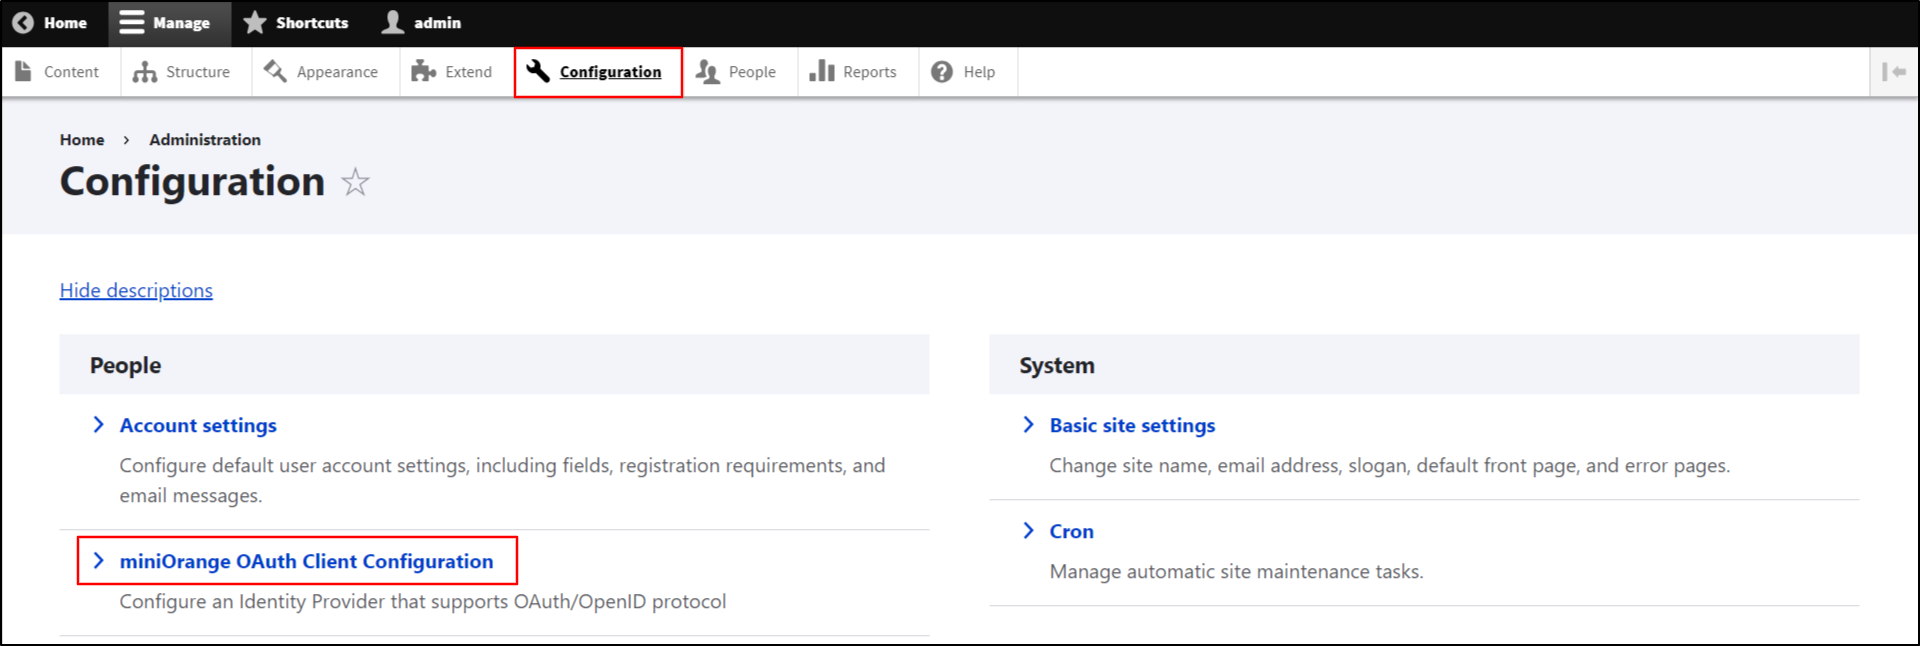
Once you have installed the module, go to the Configuration tab, and click on the miniOrange OAuth Client Configuration.
- Provide the following information into the Configure OAuth tab:
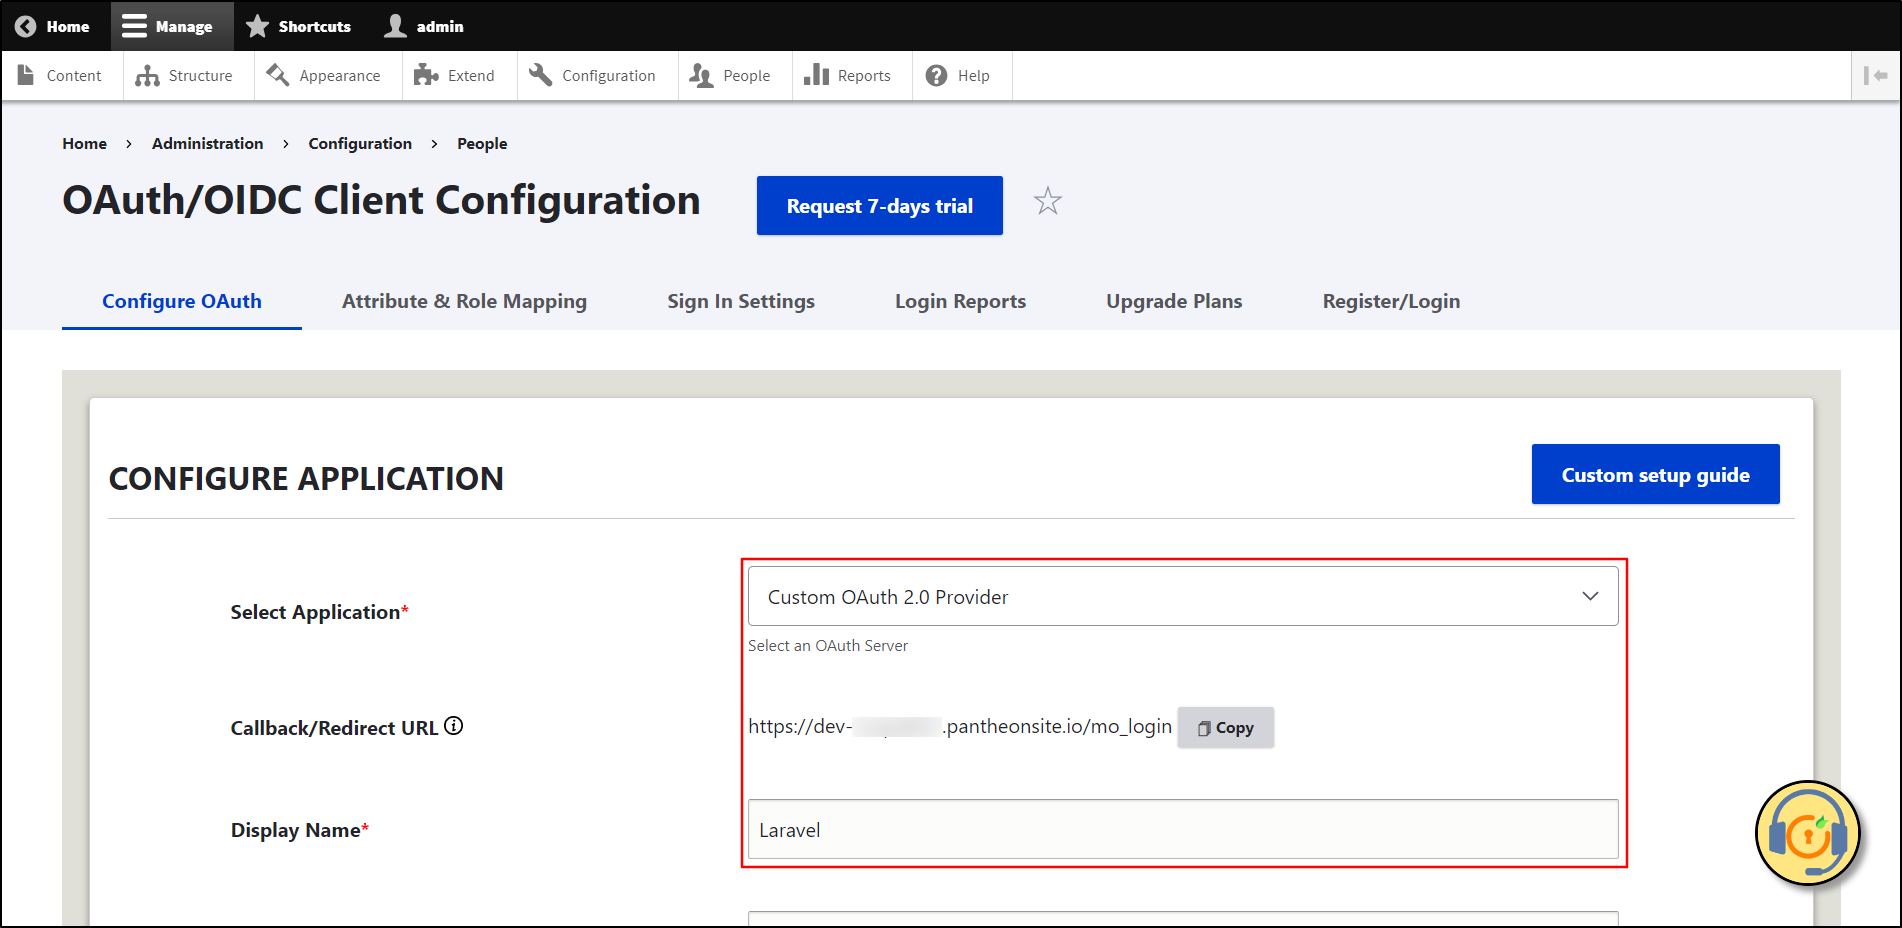
- Select Laravel as the OpenID Provider from the Select Application drop-down. Also, if you don't see your Application/Provider in the Select Application drop-down, you can select Custom OAuth 2.0 Provider.
- Copy the Callback/Redirect URL and keep it handy.
If your provider only supports HTTPS Callback/Redirect URLs and you have an HTTP site, please make sure to enable the 'Enforce HTTPS Callback URL' checkbox at the bottom of the tab.
-
Enter Laravel as the Application name in the Display Name text-field.
Configure OAuth/OpenID SSO Application in Laravel Passport:
-
Create a Laravel project on your local machine using command and set it up:
composer create-project --prefer-dist laravel/laravel blog
-
Change the directory to blog using cd blog command. Install laravel passport.
composer require laravel/passport
-
Go to config/app.php and add below provider
Laravel\Passport\PassportServiceProvider::class
-
Run command
php artisan migrate
php artisan passport:install
-
Go to app/User.php model class, add HasApiTokens trait to the code:
namespace App;
    use Laravel\Passport\HasApiTokens;
    use Illuminate\Contracts\Auth\MustVerifyEmail;
    use Illuminate\Foundation\Auth\User as Authenticatable;
    use Illuminate\Notifications\Notifiable;

    class User extends Authenticatable
    {
      use HasApiTokens, Notifiable;


        /**
         * The attributes that are mass assignable.
         *
         * @var array
        */
        protected $fillable = [
            'name', 'email', 'password',
        ];

        /**
         * The attributes that should be hidden for arrays.
         *
         * @var array
         */
        protected $hidden = [
            'password', 'remember_token',
        ];

        /**
         * The attributes that should be cast to native types.
         *
         * @var array
         */

        protected $casts = [
            'email_verified_at' => 'datetime',
        ];
    }
-
Go to app/Providers/AuthServiceProvider.php, add use Laravel\Passport\Passport; , Passport::routes(); routes to the service code is given below:
namespace App\Providers;
    use Laravel\Passport\Passport;
    use Illuminate\Foundation\Support\Providers\AuthServiceProvider as ServiceProvider;
    use Illuminate\Support\Facades\Gate;

    class AuthServiceProvider extends ServiceProvider
    {

        /**
         * The policy mappings for the application.
         *
         * @var array
         */
        protected $policies = [
            // 'App\Model' => 'App\Policies\ModelPolicy',
        ];

        /**
         * Register any authentication / authorization services.
         *
         * @return void
         */
        public function boot()
        {
            $this->registerPolicies();
            Passport::routes();
            //
        }
    }
-
Go to config/auth.php and change the API driver token to the passport as we are going to use the Passport library.
    'guards' => [
            'web' => [
                'driver' => 'session',
                'provider' => 'users',
            ],
            'api' => [
                'driver' => 'passport',
                'provider' => 'users',
                'hash' => false,
            ],
        ],
Drupal integration with Laravel:
- Navigate to the Laravel portal.
-
To get Client ID and Client Secret run following commands: php artisan passport:client It will ask you the following questions:
 Which user ID should the client be assigned to?:
     > 1

     What should we name the client?:
     > Demo OAuth2 Client Account

     Where should we redirect the request after authorization?
     [http://localhost/auth/callback]:

      > http://localhost/oauth2_client/callback.php

    New client created successfully.

    Client ID: 1
    Client secret: zMm0tQ9Cp7LbjK3QTgPy1pssoT1X0u7sg0YWUW01

(Then, copy the Client ID and Client secret value. Keep it handy. It is essential in the next steps to configure Drupal as an OAuth Client.)
-
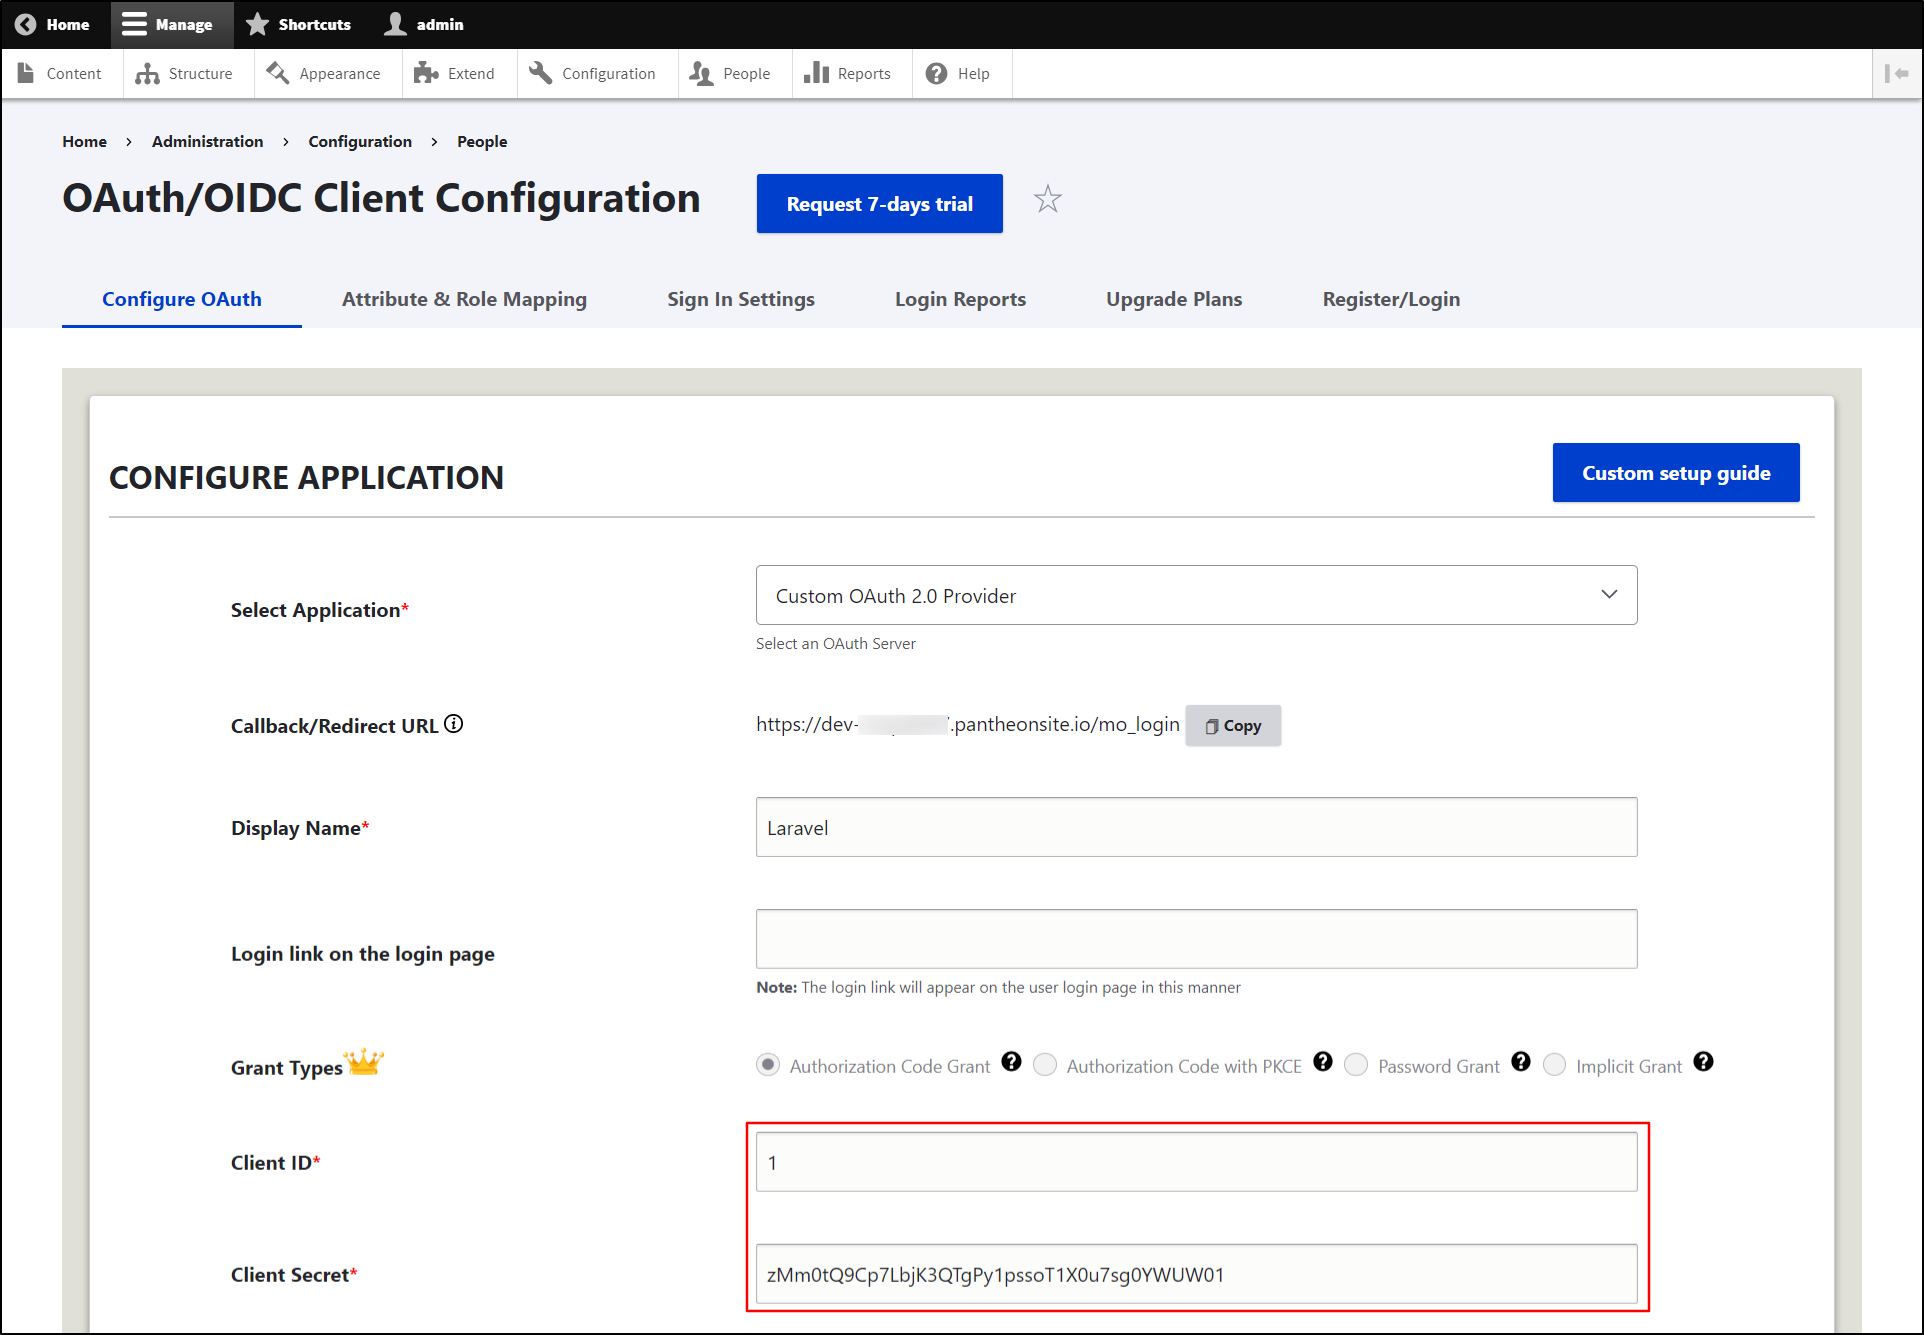
In Drupal's Configure OAuth tab, paste the copied Client ID into the Client ID text-field and the Client secret into the Client Secret text-field.
-
To create a UserInfo endpoint manually, in the app/Http/Controllers, create a file UserController.php:
<?php namespace App\Http\Controllers; use App\Http\Controllers\Controller; use Illuminate\Http\Request; use App\Models\User; use Auth; class UserController extends Controller { public function get(Request $request) { $user_id = Auth::id(); $user = User::find($user_id); return $user; } } -
Also, register the API route by adding the below line in routes/api.php file:
//For Laravel below 8 and migrated to the 8 version:
    Route::middleware('auth:api')->get('/user/get', 'UserController@get');


                                     OR


//For Laravel 8 new users:
    use App\Http\Controllers\UserController;
     Route::middleware('auth:api')->get('/user/get', 'App\Http\Controllers\UserController@get');
-
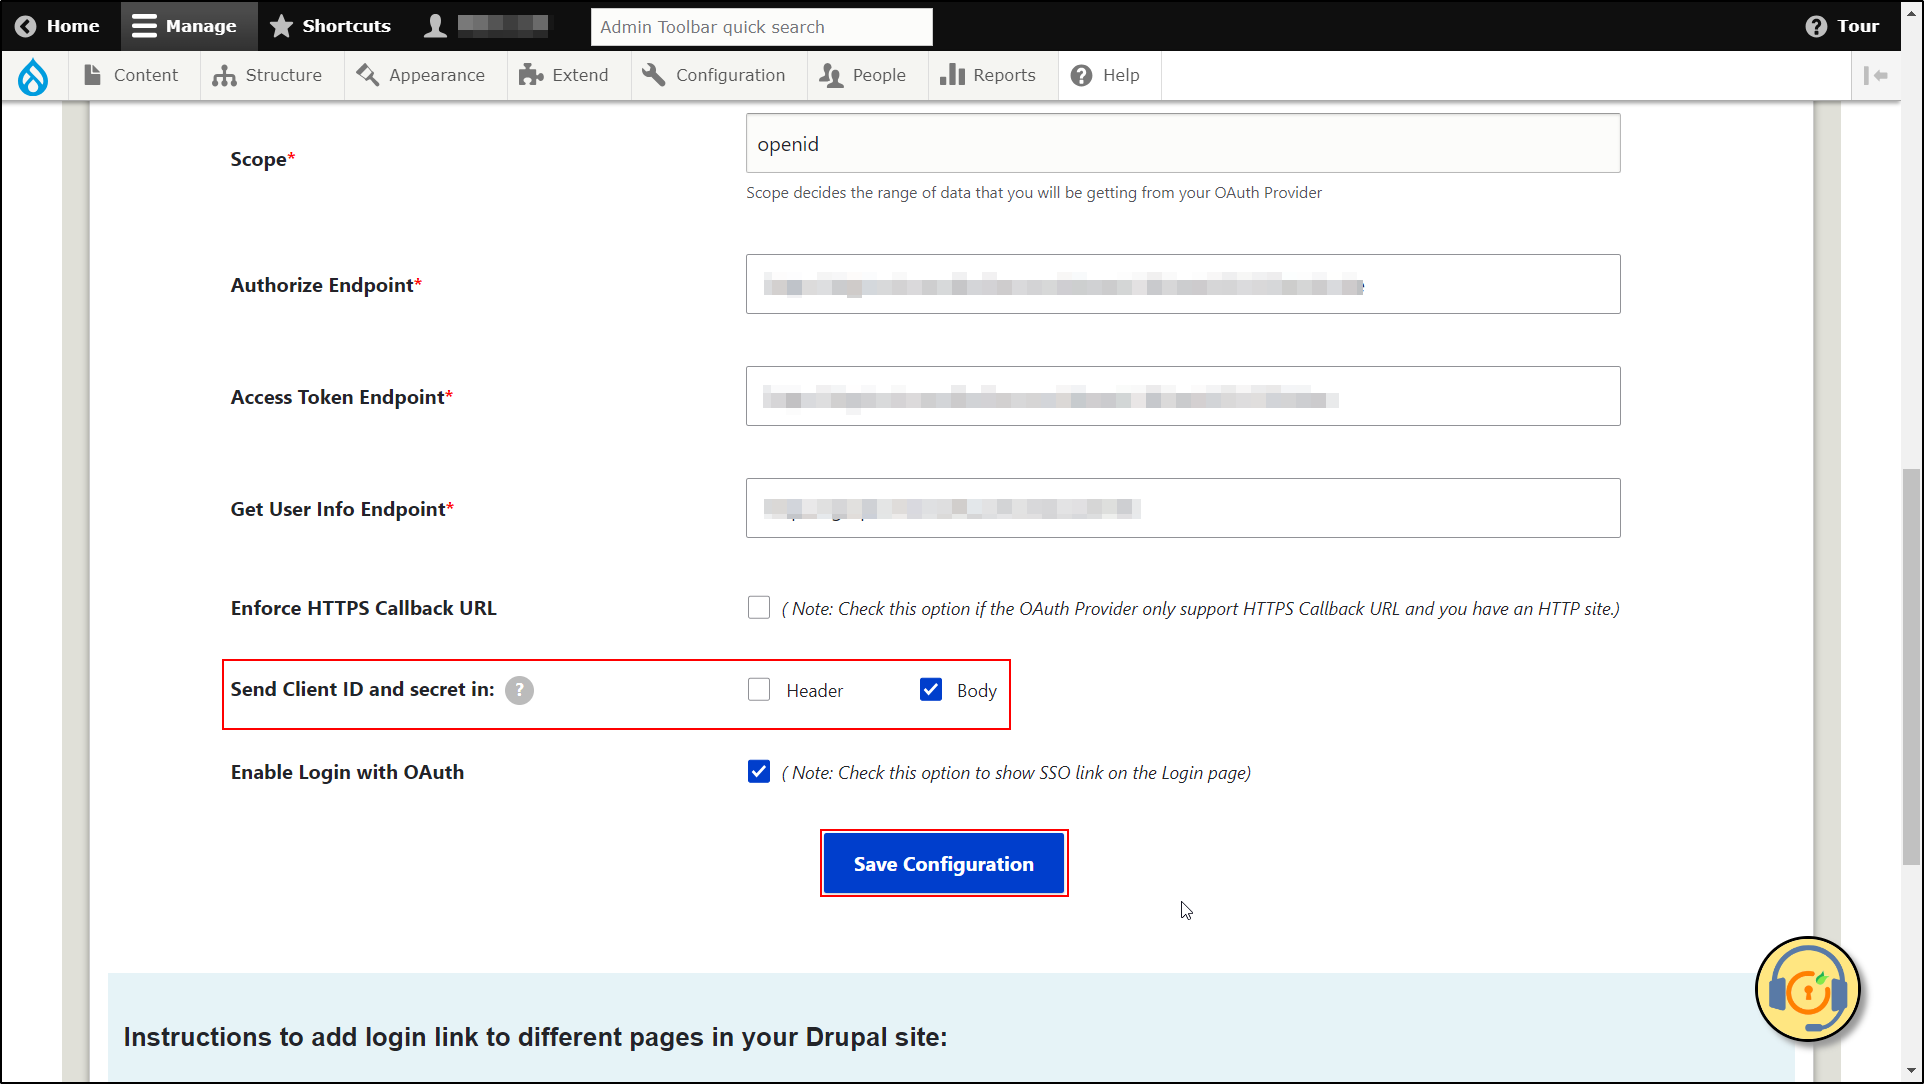
Enter the following URLs in Drupal's Configure OAuth tab. Click on the Save Configuration button.
Scope openid email profile Authorize Endpoint http://your-laravel-site-url/oauth/authorize Access Token Endpoint http://your-laravel-site-url/oauth/token Get User Info Endpoint http://your-laravel-site-url/api/user/get 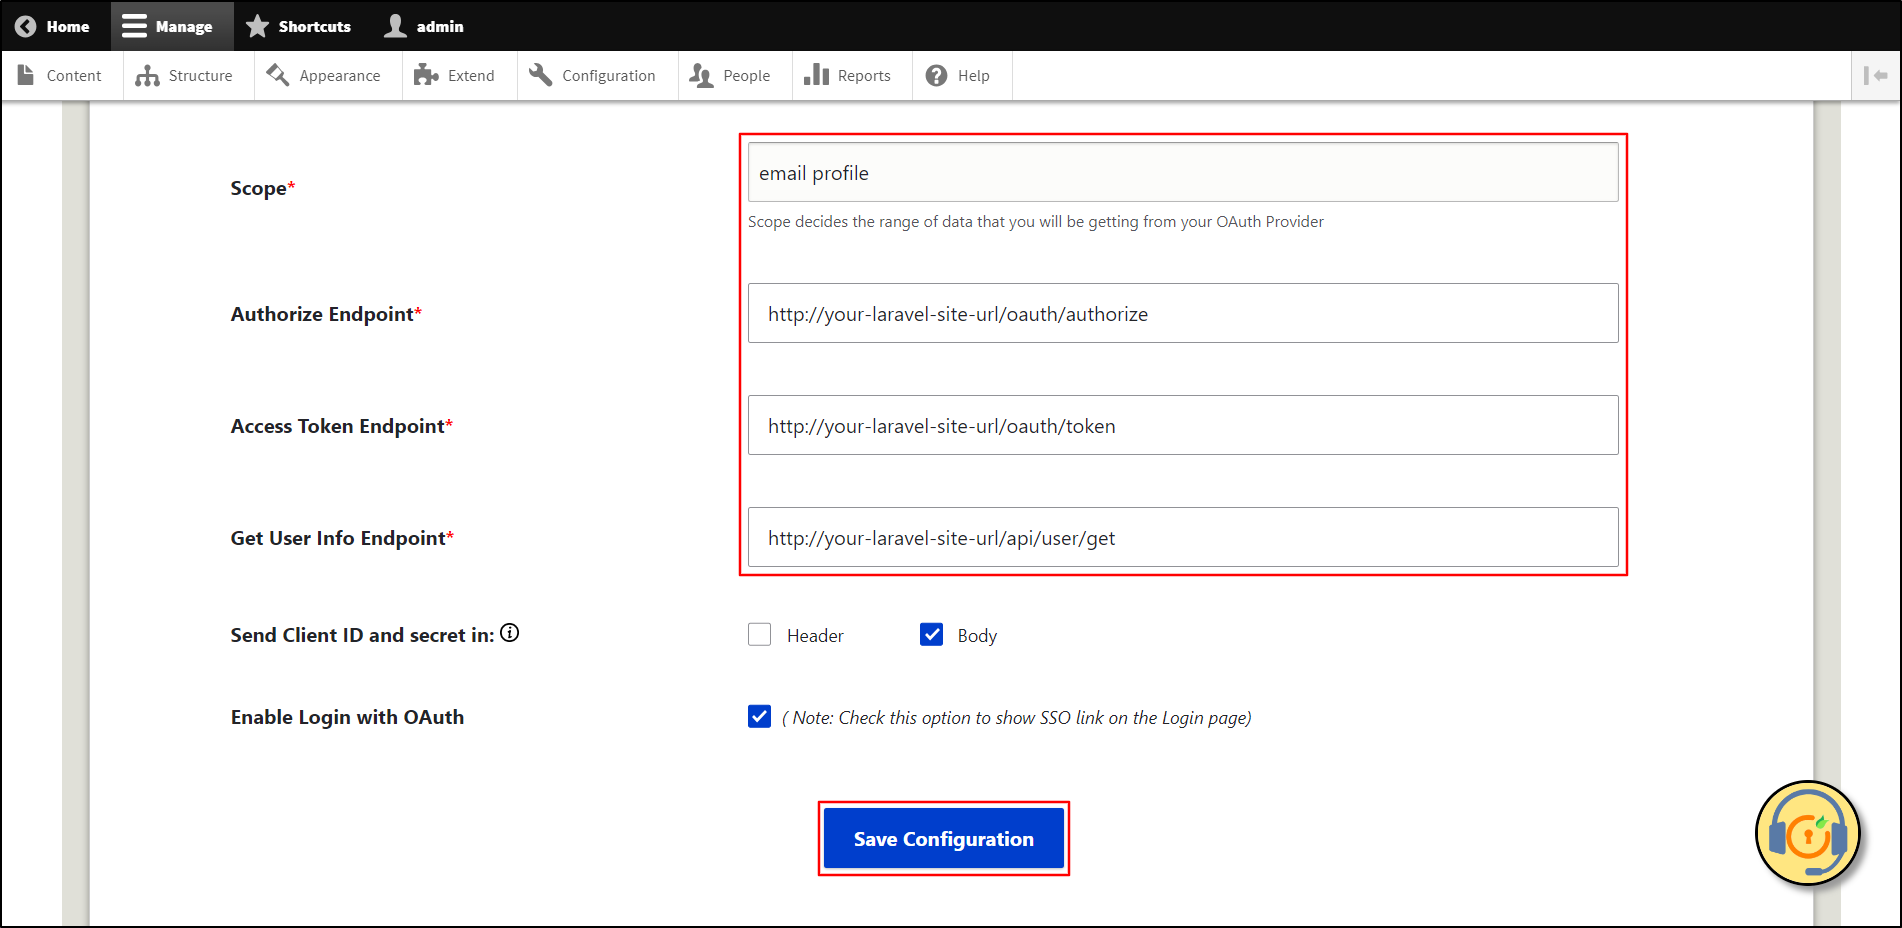
-
The Send Client ID and Secret in checkbox allow you to specify whether the Client ID and Secret should be included in the header or the body of the Token Endpoint Request. If you're unsure which option to select, you can stick with the default settings. Click on the Save Configuration button.
Test Configuration of Drupal with Laravel:
-
After successfully saving the configurations, now click on the Perform Test Configuration button to check the Single Sign-On (SSO) connection between Drupal and Laravel.
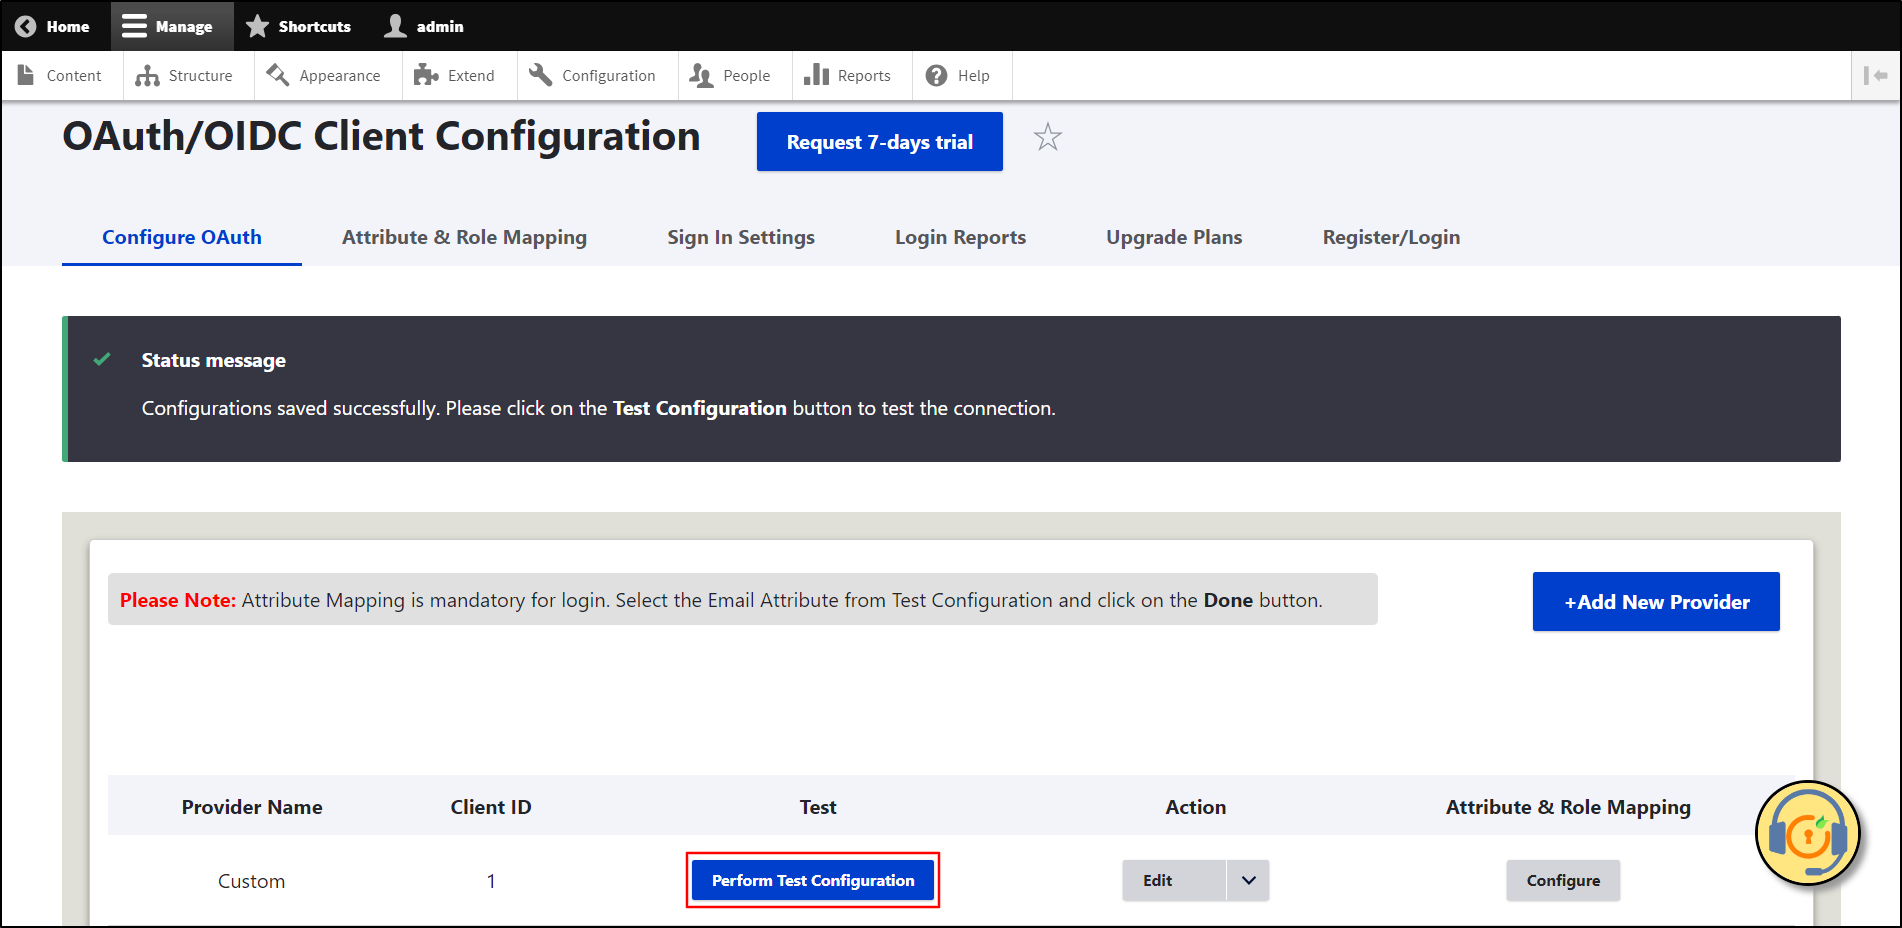
- On a Test Configuration popup, if you don't have an active session in Laravel on the same browser, you will be asked to sign in to your Laravel account. After successfully logging into Laravel account, you will be provided with a list of attributes that are received from the Laravel Passport.
-
Select the Email Attribute from the dropdown menu in which the user's email is obtained and click the Done button.
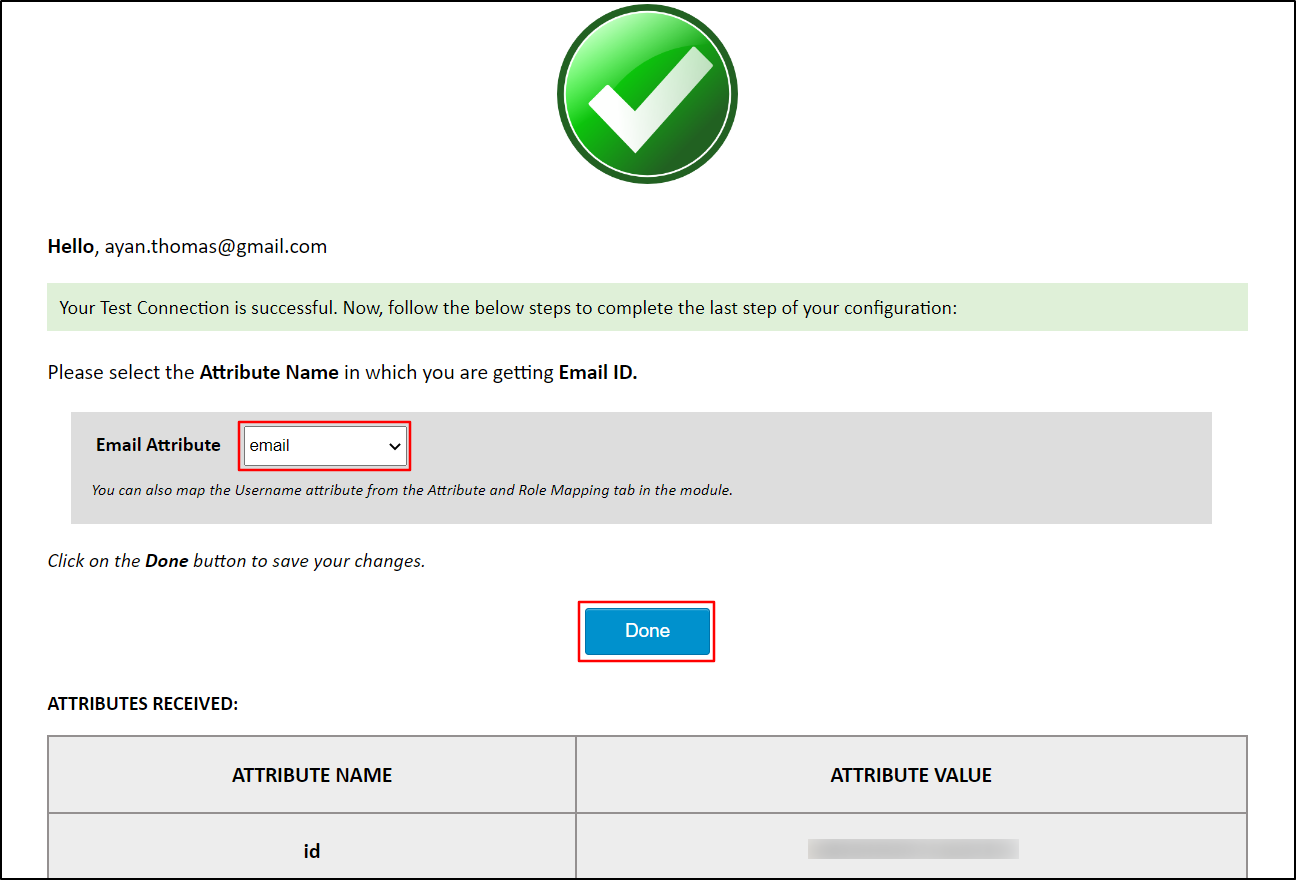
Please note: Mapping the Email Attribute is mandatory for your login to work.
Congratulations! You have successfully configured Laravel Passport as OAuth/OpenID Provider and Drupal as OAuth Client.
How to perform the SSO login?
- Now, open a new browser/private window and go to your Drupal site login page.
- Click on the Login using Laravel link to initiate the SSO from Drupal.
-
If you want to add the SSO link to other pages as well, please follow the steps given in the image below:

Help improve this page
You can:
- Log in, click Edit, and edit this page
- Log in, click Discuss, update the Page status value, and suggest an improvement
- Log in and create a Documentation issue with your suggestion
 Support for Drupal 7 is ending on 5 January 2025—it’s time to migrate to Drupal 10! Learn about the many benefits of Drupal 10 and find migration tools in our resource center.


