 Come together with the global Drupal community in Rotterdam, 28 Sept – 1 Oct 2026. Sessions, contribution, connection, and Early Bird savings until 8 June.
File module overview
Drupal 7 will no longer be supported after January 5, 2025. Learn more and find resources for Drupal 7 sites
The File module enables you to upload and attach files to content and to manage these uploads if you have the appropriate permissions. This module is responsible for validating file content and managing uploaded files. It also provides options for displaying file content.
As a site administrator you will be able to control what type of files can be uploaded and their maximum size.
File module provides its functionality by defining a File field type for the Field module. File attachments are defined at the content type level (or other entities). To learn how to define a field and add it to a content type, see Working with Field UI.
Uses
Adding a file field to a content type
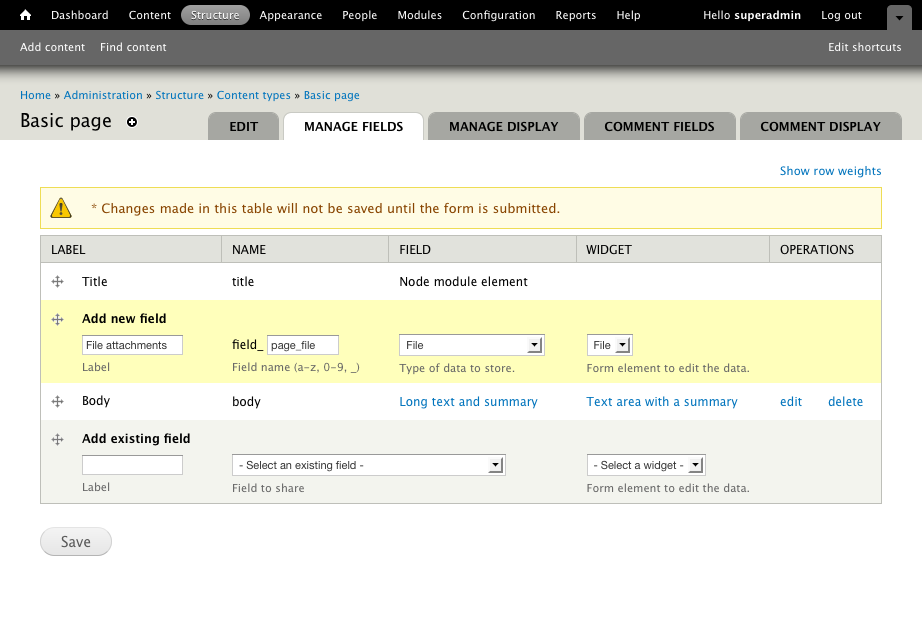
Navigate to the "Manage fields" tab of the content type to which you wish to add the file field (Administer > Structure > Content types, and the link manage fields for your specific content type).
Select the field type file, give the field a label and machine name, click-and-drag it to the place you want to have it among your fields, and hit the save button.
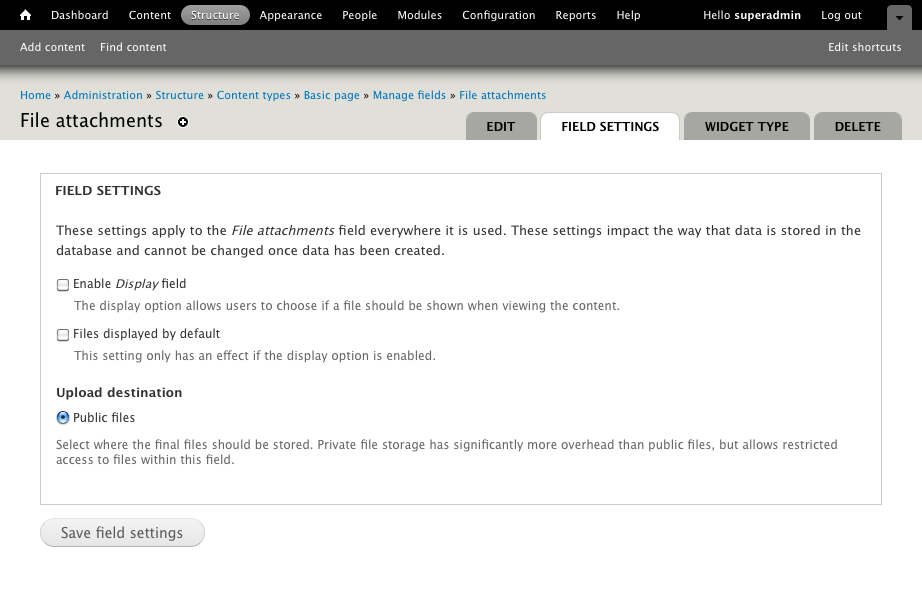
As when adding any new field, you are first required to set the field specific settings. These apply for all places where you use the field. These cannot be changed per entity.
- When checked, the Enable Display field option allows users to choose if a file should be shown when viewing the content.
- The Files displayed by default option makes the display file option checked by default, when users upload files to this field.
- The Upload destination by default only has the public files option available – making the files available right from the server (without Drupal checking any access). If you want to use private files, you must first change some settings at the file system administration page (Administer > Configuration > Media: File system). See below for details.
The next step is to set the field settings for this instance only. This can be changed between different content types (or other entities).
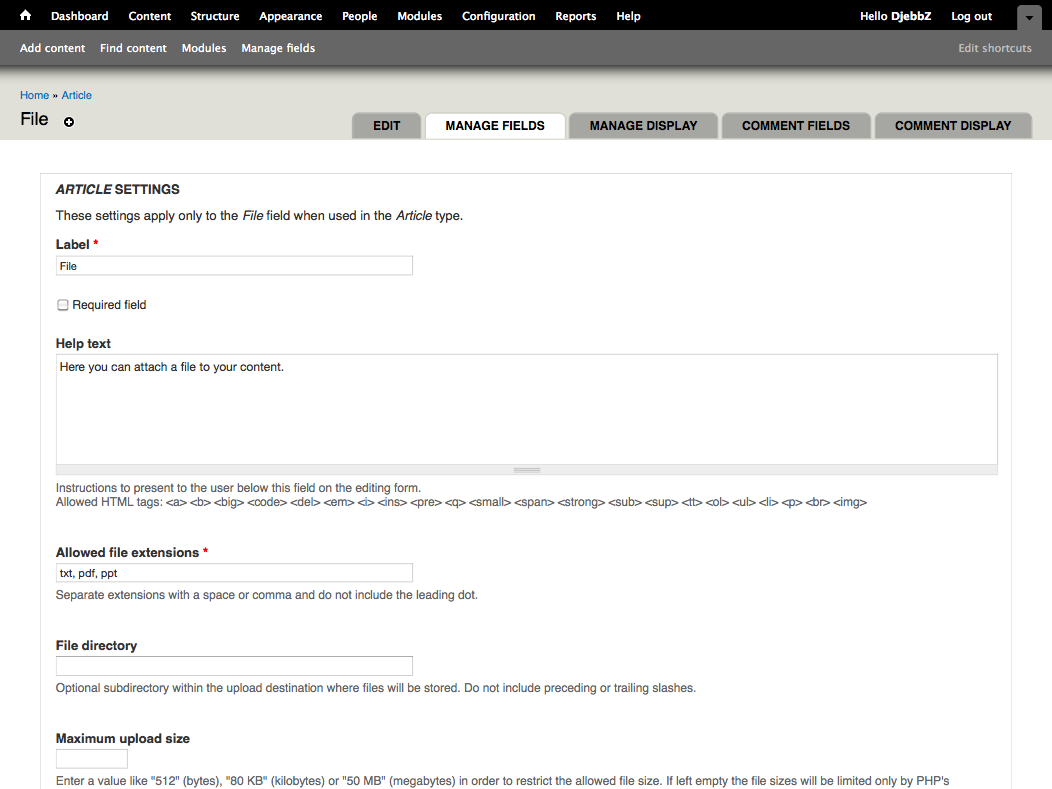
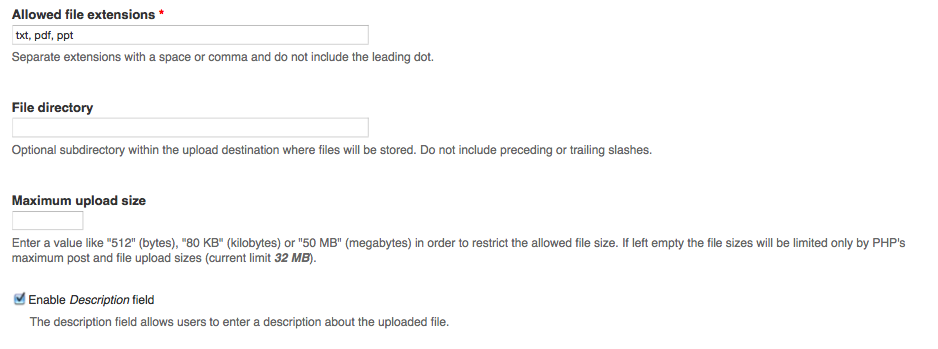
You can add validation options for the File field when you configure the content type. You must list all of the file extensions that the final user will need to be able to upload. The optional file directory where the files will be uploaded is a sub-directory of the file system path defined in the file system administration page (Administer > Configuration > Media: File system). You may specify a maximum file size for each file uploaded.
Managing attachment display
Once a file has been attached to content, you can specify whether it will be displayed in the list of attached files or not. Listed files are displayed automatically in a section at the bottom of the content; non-listed files can for example be embedded in your content, but are not included in the list. (Embedding a file in your content means you copy the path of the file and manually embed it where you want, for example, to insert in the content as a link tag. Note that the text format "Filtered HTML" by default refuses any image tags..)

Additional options for managing the display of the file list are available in the "Manage display" tab of the specific content type's administration page (Administer > Structure > Content types and the link field display for your content type).
Managing file locations and access
When you create a file field, you can specify the sub-directory of the site's file system where uploaded files for this content type will be stored. The site's file system paths are defined on the File system page (Administer > Configuration > Media: File system).
You can also specify whether files are stored in a public directory or in a private file storage area. Files in the public directory can be accessed directly through the web server; when public files are listed, direct links to the files are used and anyone who knows a file's URL can download the file. Files in the private directory are not accessible directly through the web server; when private files are listed, the links are Drupal path requests (for example, "/system/files/name-of-the-file.pdf"; here, "system/files/" is not an actual folder in the filesystem whose contents are served by the web server, but instead is a virtual URL managed by Drupal through which the private files can be downloaded). This adds to server load and download time, since Drupal must resolve the path for each file download request, but allows for access restrictions to be added.
The best practice for public files is to store them in the multi-site directory like:
sites/default/files
The default way to securely add a private directory for your files is to use a directory that can not be accessed directly by your web server, but can be accessed by Drupal. Ideally this directory should be located outside of your Drupal root folder.
The simple way to add a private directory for your files is to create a sub-directory under the public directory like:
sites/default/files/private
When you specify the private directory in admin/config/media/file-system it will automatically create the sub-directory & create a simple .htaccess file with Deny from all. This stops Apache from serving files from this directory. Make sure that you test this by adding a file to that directory and verifying that you can't browse there directly. If this isn't working, all files in this directory will be accessible to anyone who can guess the URL! Note that non-Apache web servers may need additional configuration to secure private file directories.
Whenever possible it's recommended that you choose a directory located outside of your Drupal root folder (or actually outside your web root), which may be tricky if you are on a shared host. If you do have access though, you can choose a private directory which will be on the same level as your web root directory (often called public_html or www or similar) using:
../private
Accessing Private Files
It is important to understand that just because a file field is configured to use the private file system, that does not mean Drupal will prevent anyone from viewing files uploaded via that field. The files will be served by Drupal (via a URL like "/system/files/name-of-the-file.pdf"), but Drupal will only block users' access to download the file via that URL if there is a specific reason to do so.
For example: you have created a new content type with a file field which stores files in your site's private file directory. Next you create a node from this new content type and attach two new files. When the node is published links to both attached files are visible and anyone who can view the node may download the files. Now, if you unpublish the node so that your site's end users can no longer access it, all attached files become inaccessible for download by those users also, even if they use the direct link to the files that worked when the node was published.
For finer grained control of who can see/download attached files you will need an additional access control module. You may write a module yourself, or use a contributed module such as Content Access.
Technical Details
PHP configuration
For file uploads to work, PHP must be configured properly. The following PHP configuration variables may need to be set or configured, in your PHP php.ini file, .htaccess file, or settings.php files.
file_uploads = Onmust be set to "On"upload_max_filesize = 24Mcan't be larger thanpost_max_sizemax_input_time = 300small values may cause timeouts for large file uploadsmemory_limit = 64Msmall values may cause out of memory errors for large file uploadsmax_execution_time = 180small values may cause timeouts for large file uploadspost_max_size = 24Mlimits the size of input submitted to the website (including attached files)
Further Reference
Help improve this page
You can:
- Log in, click Edit, and edit this page
- Log in, click Discuss, update the Page status value, and suggest an improvement
- Log in and create a Documentation issue with your suggestion
