
 Come together with the global Drupal community in Rotterdam, 28 Sept – 1 Oct 2026. Sessions, contribution, connection, and Early Bird savings until 8 June.


Basic CSV Data import facility is provided by this module.
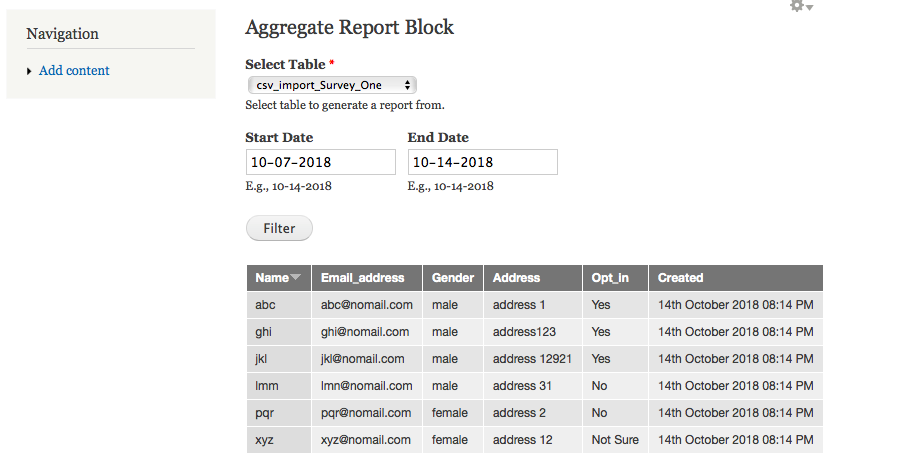
Module Import CSV Data also provides a standard default block with form to filter to display the Imported Records.
Default standard permissions are set and handled.
For Version 7.x-1.x -
1. Option to define the fields is provided so it gives a easy import as and how its required.
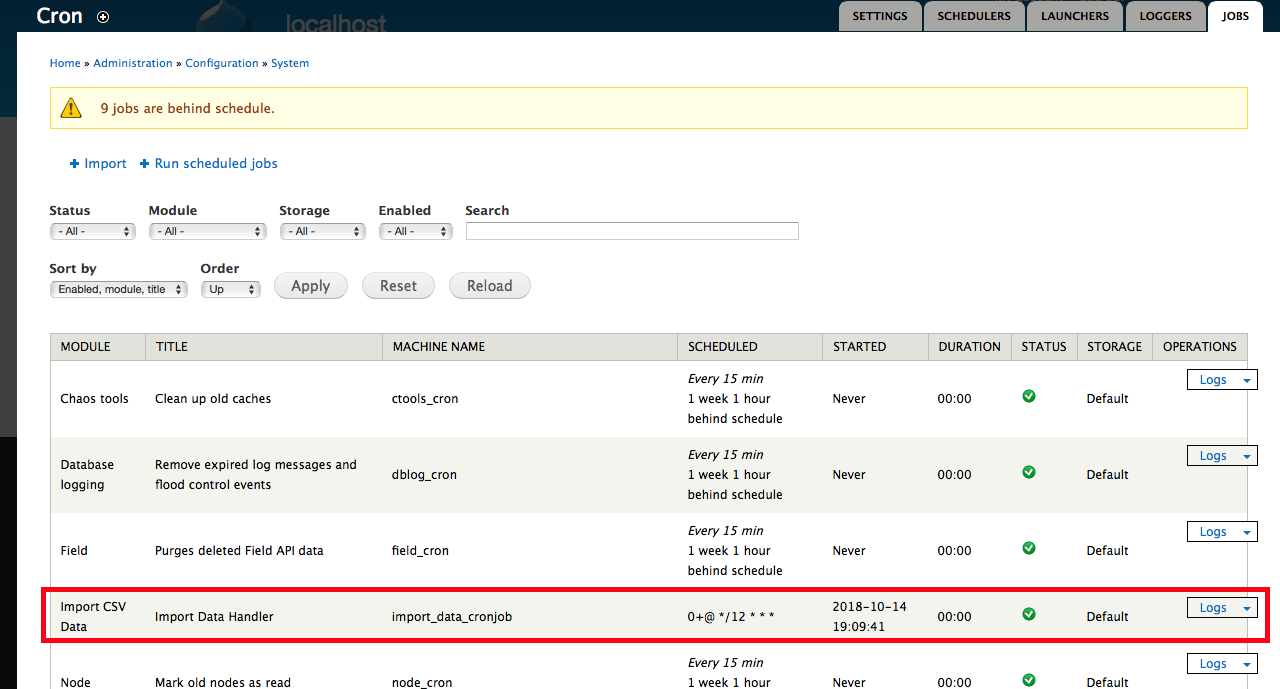
2. Configuration for Fields defining and file upload to schedule for cron is provided under New tab created in admin with title 'Import Data'.
For Version 7.x-2.x -
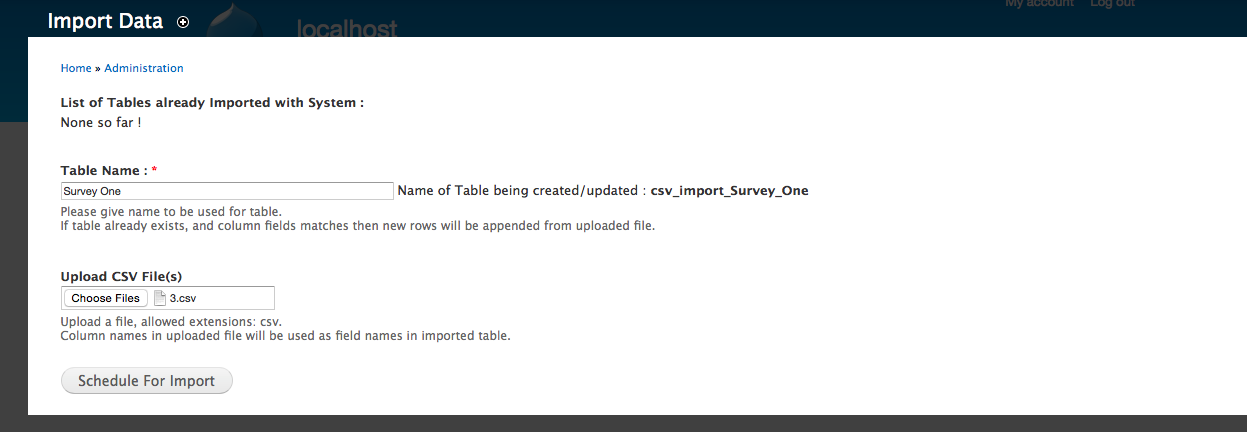
1. Option to define the table name is provided instead of field names, so it gives a easy way to import multiple files with single module.
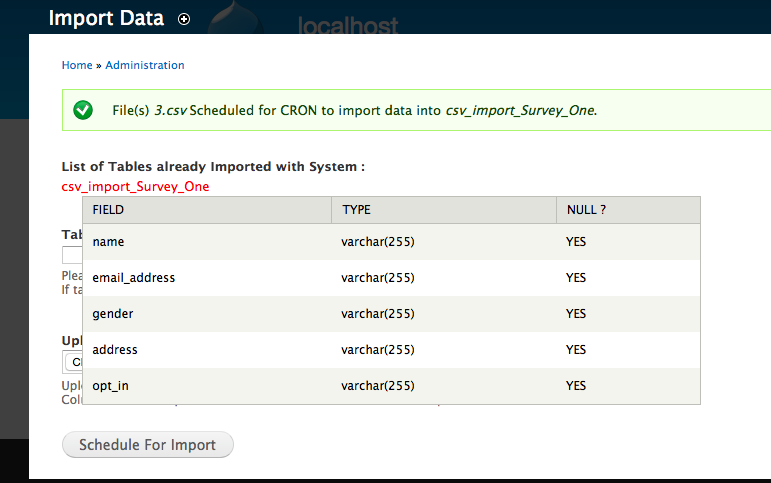
2. All imported records are stored in respective individual tables as entered.
3. A new table is created for each NEW import file.
4. First Row from uploaded file will be used for Columns to create table for the import.
5. If table already exists, and column fields matches then new rows will be appended from uploaded file otherwise a new Table is created for import.
6. List of all Tables which are already imported with System along with its Table Structure is displayed for easy clarification for future import.
7. Taken care of Sanitization of Special Characters in Table Name and/or Column Names in CSV File.
8. Configuration for Table defining and file upload to schedule for cron is provided under New tab created in admin with title 'Import Data'.
Upon Module installation, data in database is kept under backed-up table for emergency case or to refer later.
Installation
1. Copy the module directory in to your Drupal 'modules' directory and install it as usual.
2. No need to Set / Modify the permissions separately.
3. Simple block for Display Records that imported by CRON.
That's it! You are all set to use the module.
Usage
1. Use Form Block as per your choice.
2. You can even modify the block or create your own one as per your choice and needs.
Configuration Settings
1. Configurations of module can be found under
Home » Administration » Import Data
Additional Note(s) :
Considering security issues with 'LOAD DATA LOCAL INFILE' (See https://dev.mysql.com/doc/refman/5.6/en/load-data-local.html), Module has already taken care of this Risk, and is using 'LOAD DATA INFILE' in code. However, if your Server Provider thinks otherwise, and giving you trouble with 'LOAD DATA INFILE' then, there is a work around for the issue.
Changing the query in code to:
$query = "LOAD DATA LOCAL INFILE '" . drupal_realpath('public://') . '/imports/' . $file_details->filename . "'
And in order to make this work, you would also need an extra line of code in site's settings.php file:
'pdo' => array(PDO::MYSQL_ATTR_LOCAL_INFILE => 1),
(See https://www.drupal.org/docs/7/api/database-api/database-configuration)
This would solve the issue with upload.
Project information
- Project categories: Content editing experience, Media, Import and export
 15 sites report using this module
- Created by sandip27 on , updated
 Stable releases for this project are covered by the security advisory policy.
There are currently no supported stable releases.

