Customizing Maps
On this page
- Setting a different color for the base map layer
- Overriding a map or layer preset
- Set the default zoom and center point on a map to a local range
- Enabling or disabling layers
- Importing (and removing) locations
- Adding new base layers (i.e. maps)
- See also
Setting a different color for the base map layer
Managing News comes with a base map layer called World Glass, which is transparent, enabling a background color to show through. This layer is enabled by default. To change the background color:
- Go to Admin > Theme settings
(admin/build/themes/settings/jake) - Under the Colors section, click the box for the Maps setting to open up a color selector.
- Click on the color you like and click the Save configuration button to save the settings.
Before:
After:

Overriding a map or layer preset
The maps you see on Managing News are driven by presets. Presets contain a number of settings for the map including layers, features such as zoom and boundaries, layers and more. To modify a preset, you have two choices:
- Clone the layer or preset. Cloning will override the original and allow you to make changes or revert back to the original.
- Export the layer or preset and import it to create a new layer or preset. Doing this will allow you to export it later into a feature module, but it will also add complexity to your override to by requiring that you alter the views that use the preset with hook_views_pre_build().
Once we have a cloned or imported a new preset, you can modify it by going to Administer > Site Building > Openlayers > Presets (admin/build/openlayers/presets) and clicking the Edit link next to the preset you would like to change. On this page, you'll see a number of tabs to the left:
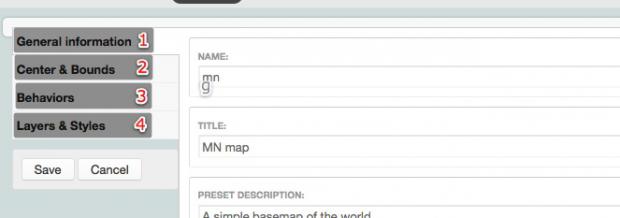
- General information (1) contains some basic settings such as the title, width and height of the map.
- Center & Bounds (2) contains settings for the default zoom level and centering point, as well as where the edges of the map should be when panning.
- Behaviors (3) contains a number of settings regarding the kinds of features available on the map as well as how certain features work.
- Layers & Styles (4) contains settings regarding which base layer and which overlay layers to display, as well as the style in which the overlay layers will display in.
Most of the following sections involve making adjustments to one or more of these areas.
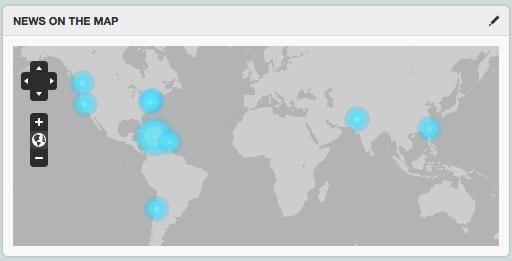
Set the default zoom and center point on a map to a local range
Let's say your Managing News site is only going to cover news in a particular country or city. It would make sense then to limit the scope of your maps to just that area. To do so, you will need to adjust the preset and the base layer you are using.
First, navigate to the edit screen of the preset you wish you adjust (see here) and click on the Center & Bounds tab to the left.
You will see a map which you can use interactively to adjust the settings.
- Set the bounds by shift-click and dragging a box on the map. Feel free to zoom in or out to get a more useful area of the map. This will mark the edges of the map that can be panned to.
- Next, play with the zoom until you have an idea of how far out you want the map to be viewable. When you've found the zoom you like, take note of the number in the Zoom level input for use in a later step.
- Zoom to the level and pan to the spot where you would like the map to display by default and save.
- If stories you import get geo-tagged for regions outside of the range of your map, you may also need to go to the Behaviors tab and disable the Zoom to layer option.
You will also need to adjust the base layer to limit the zoom options, which is why we took note of the number above. The zoom number goes up the closer you get to the surface, and down as you go out, with 0 displaying the entire globe.
- When editing the preset, click the Layers & Styles tab and scroll through the Base layers section to see which base layer is being used. Take note of the name of the layer.
- Click on the Layers item in the sub-navigation (see screenshot below) and find the layer you took note of. Click the Edit link next to it (if there's no edit link, you will need to clone or copy the layer).
- Holding down the shift key, select the minimum and maximum zoom for the Zoom level range input. You should use the zoom number you took note of above for the low number.

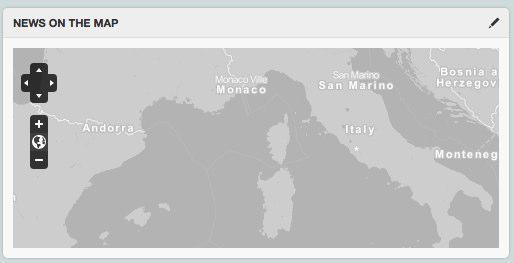
Save the layer settings to complete the process. Now wherever the map preset is being used you will now see it restricted to the boundaries and zoom you set. You may also want to adjust the other presets being used by maps in Managing News to match.
At this point, you may also want to import a custom list of locations so the pinpoints on the map will be more specific.
Before:
After:
Enabling or disabling layers
There are two types of layers: base and overlay. There can only be one base layer visible at one time, but you can set the map to display a selector so the user can choose which base map to display. Multiple overlay layers can be visible at once.
- Begin by either cloning or copying the preset you wish to adjust.
- Click Edit next to the preset
- Click the Layers & Styles tab on the left.
- Browse through the the layers and select which layers you would like to display.
If you select multiple base layers, you should make sure that the layer switcher button is available so that users can interactively set a different base layer than the default:
- While editing a preset, click on the Behaviors tab on the left.
- Click on the box the enables the Layer switcher option.
Before:
After:

Importing (and removing) locations
By default, Managing News comes with a global set of geo-taxonomy (locations). However, if you your site covers a narrower area, you can import your own set of locations. To do so:
- Go to Admin > Import locations
(admin/import/locations). - You can see the structure of the existing CSV file by clicking on the file name under the File label. The import columns are "Name", "Lat" and "Lon", but other columns can also be added which are listed in the instructions on this administration page.
- Optionally remove the existing locations by clicking on the Delete locations tab and clicking Delete.
- To import a new locations CSV file, click on the Browse button and find the file you wish to import.
- Click the Import button to import the file.
Adding new base layers (i.e. maps)
Mapbox base maps
- To add a Mapbox base map, navigate to the tile set on Mapbox.com and copy the Layer name:

- Go to Administer > Site Building > Openlayers > Layers
(admin/build/openlayers/layers)and click the Add sub-tab. - Click the Mapbox link.
- Paste the name you copied from the above step and set the zoom level range by shift-clicking.
- Save the form.
- Navigate to the preset you would like to change and click the Layers & Styles tab.
- Find the layer you just added and enabled it and optionally set it as a default.
If you set the new layer as a default, your map should now display with this newly added base map.
Before:
After:

See also
Related pages
External resources
Help improve this page
You can:
- Log in, click Edit, and edit this page
- Log in, click Discuss, update the Page status value, and suggest an improvement
- Log in and create a Documentation issue with your suggestion
