
 Come together with the global Drupal community in Rotterdam, 28 Sept – 1 Oct 2026. Sessions, contribution, connection, and Early Bird savings until 8 June.
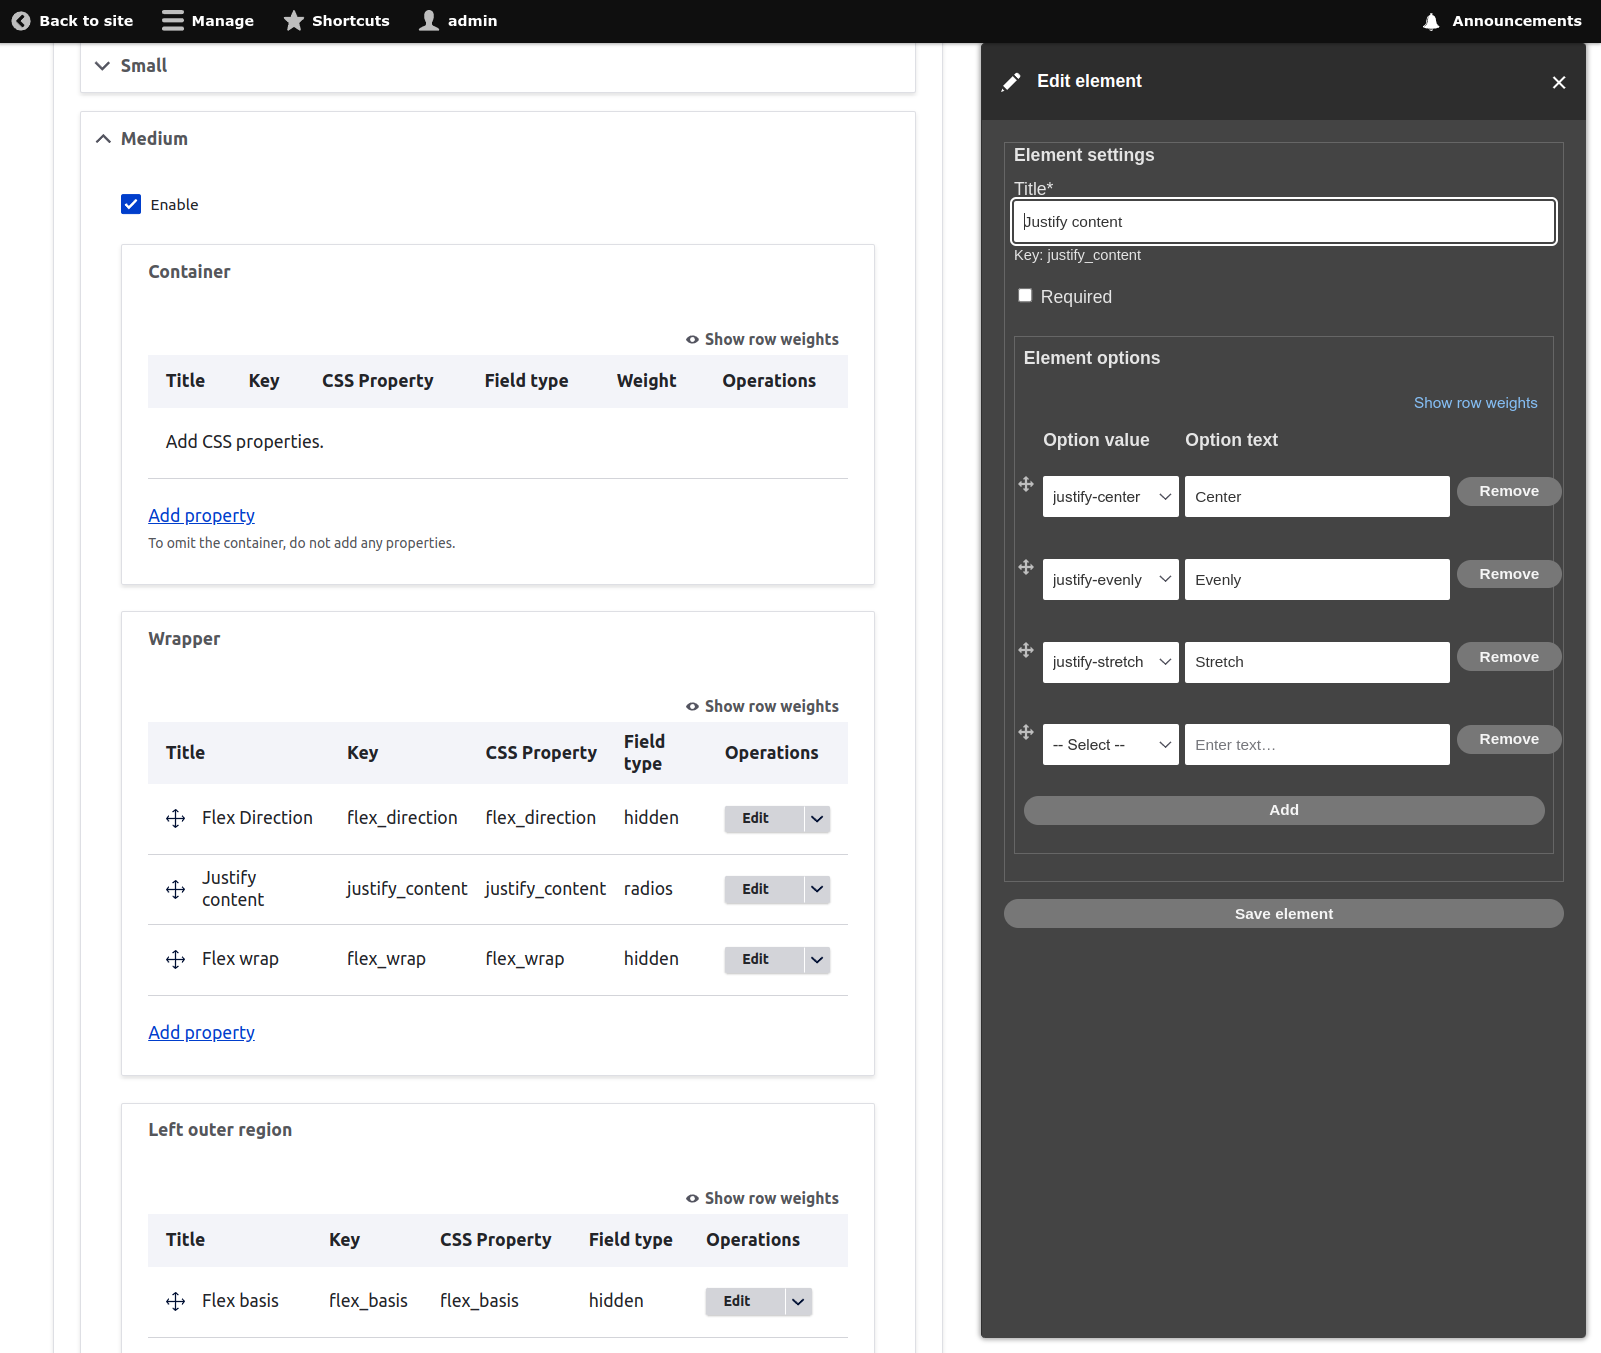
This project is not covered by Drupal’s security advisory policy.
A configurable set of layouts with utility classes in mind, particularly TailwindCSS.
The main idea of this module is to use Tailwind utility classes to create layout variants. It includes a form builder for creating fields that will inject Tailwind classes into layouts. Using the form, a site builder can give editors as much or as little control over the variants as desired.
Special thanks to the Webform team, this module borrows heavily from Webform for the form builder.
Features
The primary features of this module is the configurable layouts specifically designed to work with TailwindCSS classes.
There are 5 layouts:
- 1 Column
- 2 Column
- 3 Column
- 4 Column
- 5 Column
For each layout, you can create one or more "variants". The variant defines configurable form fields for the editor
Post-Installation
Initial configuration
Enable the submodule, breezy_layouts_ui for all configurations. This does not need to be enabled in production.
After enabling the module, visit /admin/config/content/breezy-layouts/settings. Here you can select registered layouts the layouts the for variants.
If you are just getting started, select all the Breezy Layouts.
Next, you'll select a breakpoint group. Again, any breakpoint group should work, but if you want to use Tailwind, the Breezy Layouts breakpoint group is mirrors the breakpoints of Tailwind.
After you select a breakpoint group, fields for prefixing your breakpoint-based classes are displayed. See the [TailwindCSS Responsive Design docs](https://tailwindcss.com/docs/responsive-design).
Lastly, for prototyping / testing, you can include a CDN. TailwindCSS uses https://cdn.tailwindcss.com.
The CDN should not be used for production, as there is a performance penalty, and it does not support all TailwindCSS features.
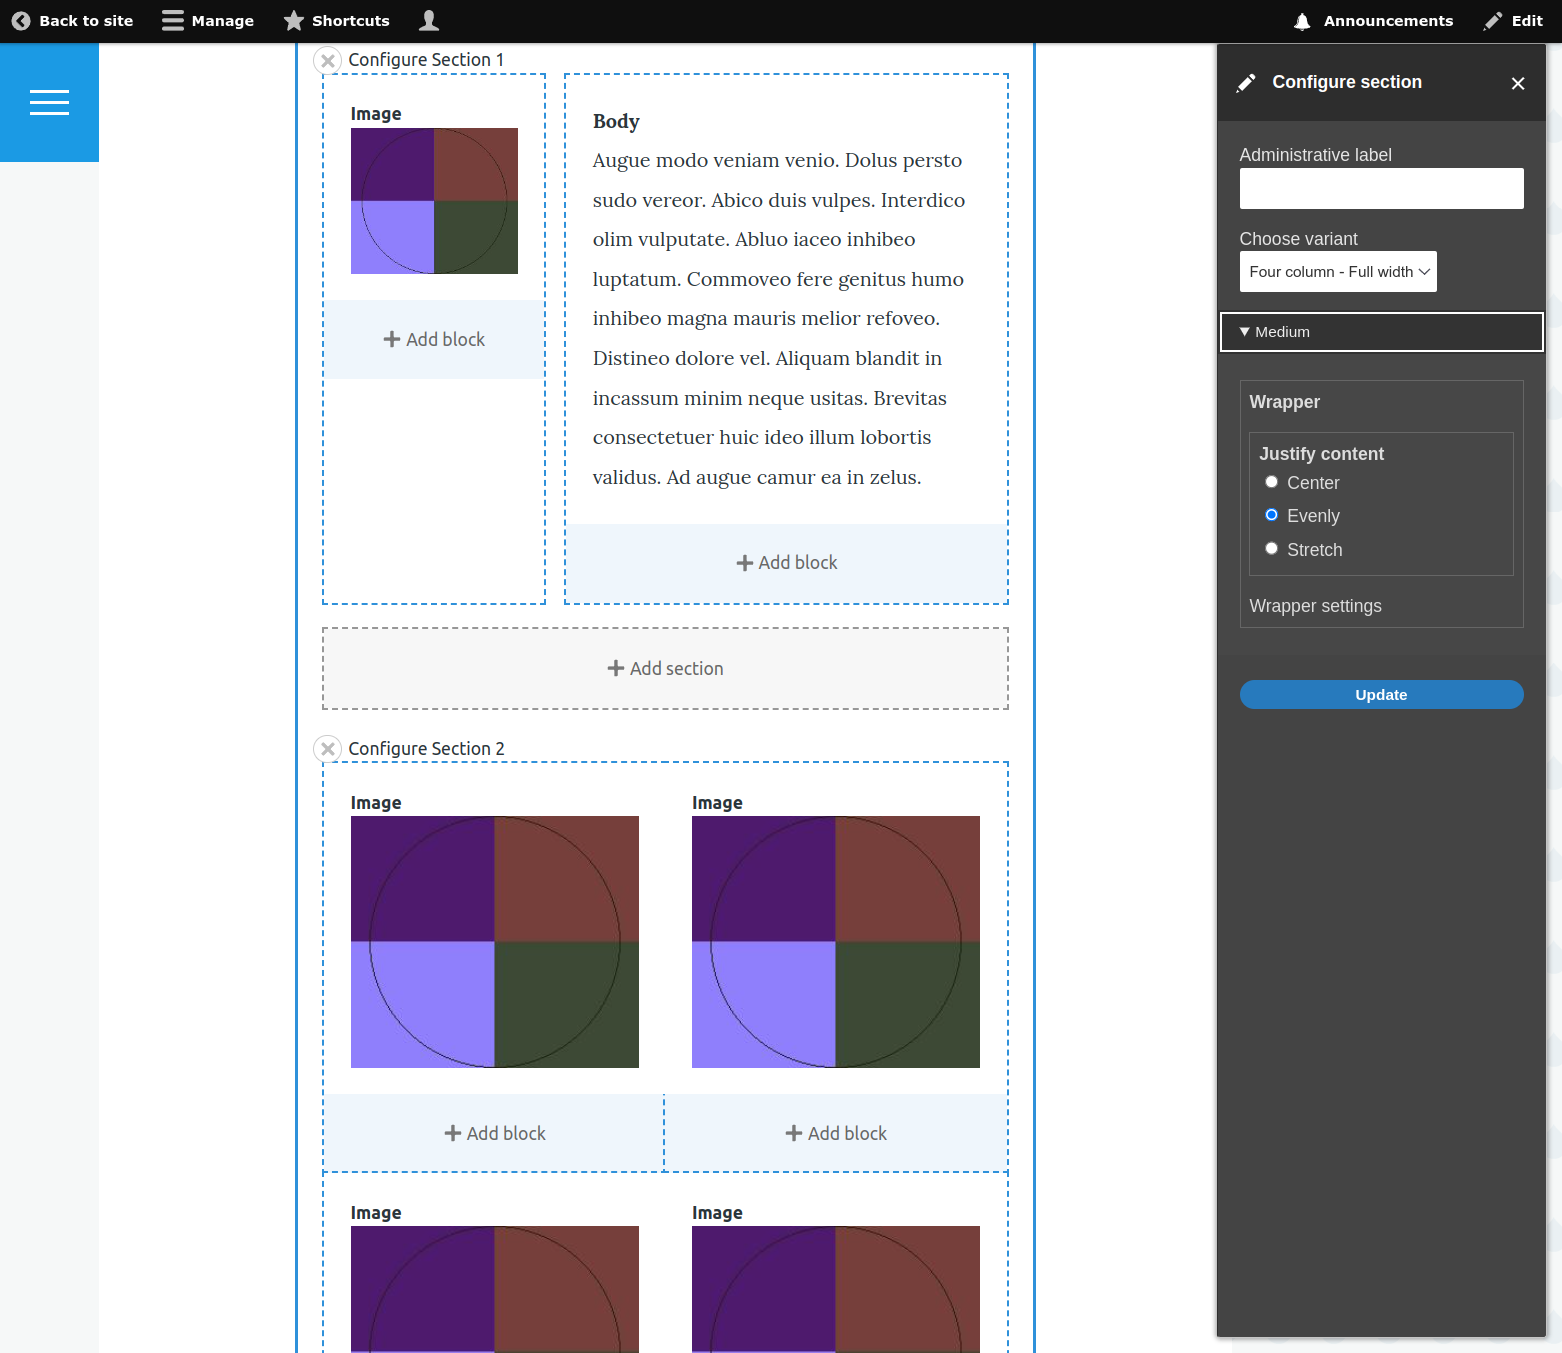
Creating layout variants
When you are ready to create a variant, visit /admin/config/content/breezy-layouts/variants and click "Add variant".
Give the variant a meaningful name, as this is the label the editor will see when the layout is selected.
Next, choose a layout and click Create. You should be redirected to the variant edit screen.
The edit screen is organized by the breakpoints defined in the initial configuration.
Enable each breakpoint to see the configurable portions of the layout. Breezy Layouts have optional configurations for:
- Container
- Wrapper
- Each region
For example, the Two Column layout:
<div class="..."> <!-- Container -->
  <div class="..."> <!-- Wrapper -->
    <div class="..."> <!-- Left -->
    </div>
    <div class="..."> <!-- Right -->
    </div>
  </div>
</div>
Adding a property to the layout markup:
Breezy Layouts are organized by CSS properties. You can add as many properties as you desire, even add the same property multiple times.
- Click "Add property". This opens a modal where you can select a CSS property.
- Select a property. This reveals different form elements.
Field types
Currently, Breezy Layouts supports four field types:
- Select
- Hidden
- Checkboxes
- Radios
Hidden
Choose "Hidden" when you want the CSS class to always be selected.
Checkboxes
Choose "Checkboxes" when you want the editor to choose multiple options.
Radios
Choose "Radios" when you want the editor to choose only one of the options AND the list of options is relatively short.
Select
Choose "Select" when you want the editor to choose only one of the options AND the list of options is relatively long.
Which field type you choose depends on your strategy for how you want your editors to configure the property.
Configure the field.
Enter a descriptive label.
This is important for both your editors to understand what they are configuring as well as your own sanity.
The label will generate a "key" for the property. This key must be unique for the breakpoint / portion.
Hidden
Hidden fields support adding a single class. Choose from the available classes and save.
Radios, Checkboxes, and Select
Radios, Checkboxes, and Select all have a similar configuration, create options for the field. Each option represents a single CSS class.
Required or not
This will make the field required. If you find you are adding a lot of required fields, maybe consider adding these properties as hidden fields.
Add some options
For each option, select a class and add a label. The labels can be text. Think about your users.
NOTE This module makes no assumption about the classes you select. It is totally possible to create conflicting or useless options. You should have a solid understanding of CSS.
Save
This closes the model and you should see your newly configured field. There is no need to save at this point.
Once you've added some properties, you can move the fields around within the portion of the layout. Changing the field order or any other changes requires saving.
You will repeat this process for each layout for which you would like to create a variant.
Additional Requirements
Dependencies:
- Core layout_discovery
- Core breakpoints
- Breezy Utility
Similar projects
The main differences between this module and the excellent [Layout Builder Styles](https://www.drupal.org/project/layout_builder_styles):
* Layout Builder Styles works on Layouts, Sections, and Blocks. Breezy Layouts only works on Layouts.
* Layout Builder Styles is unopinionated as to what CSS classes are added. Breezy Layouts only works with TailwindCSS (see roadmap). UPDATE: Since the introduction of Breezy Utility, classes are now provided by plugins and should work with most utility class based framework, with some limitations.
* Breezy Layouts has hidden fields so the site builder can enforce classes to be applied via layout variants.
* Breezy Layouts organizes variants around breakpoints and CSS properties for an intuitive interface.
Project information
 Minimally maintained
Maintainers monitor issues, but fast responses are not guaranteed.- Project categories: Content display, Content editing experience
- Ecosystem: Breezy Utility
- Created by scottsawyer on , updated
 This project is not covered by the security advisory policy.
Use at your own risk! It may have publicly disclosed vulnerabilities.
