 Come together with the global Drupal community in Rotterdam, 28 Sept – 1 Oct 2026. Sessions, contribution, connection, and Early Bird savings until 8 June.
GitHub OAuth SSO Setup
This document will help you configure GitHub as an OAuth Provider making Drupal as an OAuth Client. Following these steps will allow you to configure OAuth / OpenID SSO between GitHub and your Drupal site such that your users will be able to login to your Drupal site using their GitHub credentials.
We provide Drupal OAuth & OpenID Connect Login - OAuth2 Client SSO Login module which is compatible with Drupal 7, Drupal 8, Drupal 9, Drupal 10, and Drupal 11.
Prerequisite:
- Install and activate the OAuth & OpenID Connect Login - OAuth2 Client SSO Login module on your Drupal site. Follow these steps to install the module.
Setup Video:

Steps to configure Drupal as OAuth Client:
-
After installing the module in your Drupal site. Navigate to the Configuration tab and click on the miniOrange OAuth Client. (admin/config/people/mo-oauth-client/mo-client-config)

-
In the Manage section, under the Client Configuration tab, click on the + Add New button to configure the desired OAuth Client.

- Provide the following information in the Client Configuration -> Add tab:
- Select Discord from the Select Application dropdown.
- Enter the Custom App Name as the GitHub.
- Copy the Callback/Redirect URL, and keep it handy.

Configure OAuth SSO Application in GitHub:
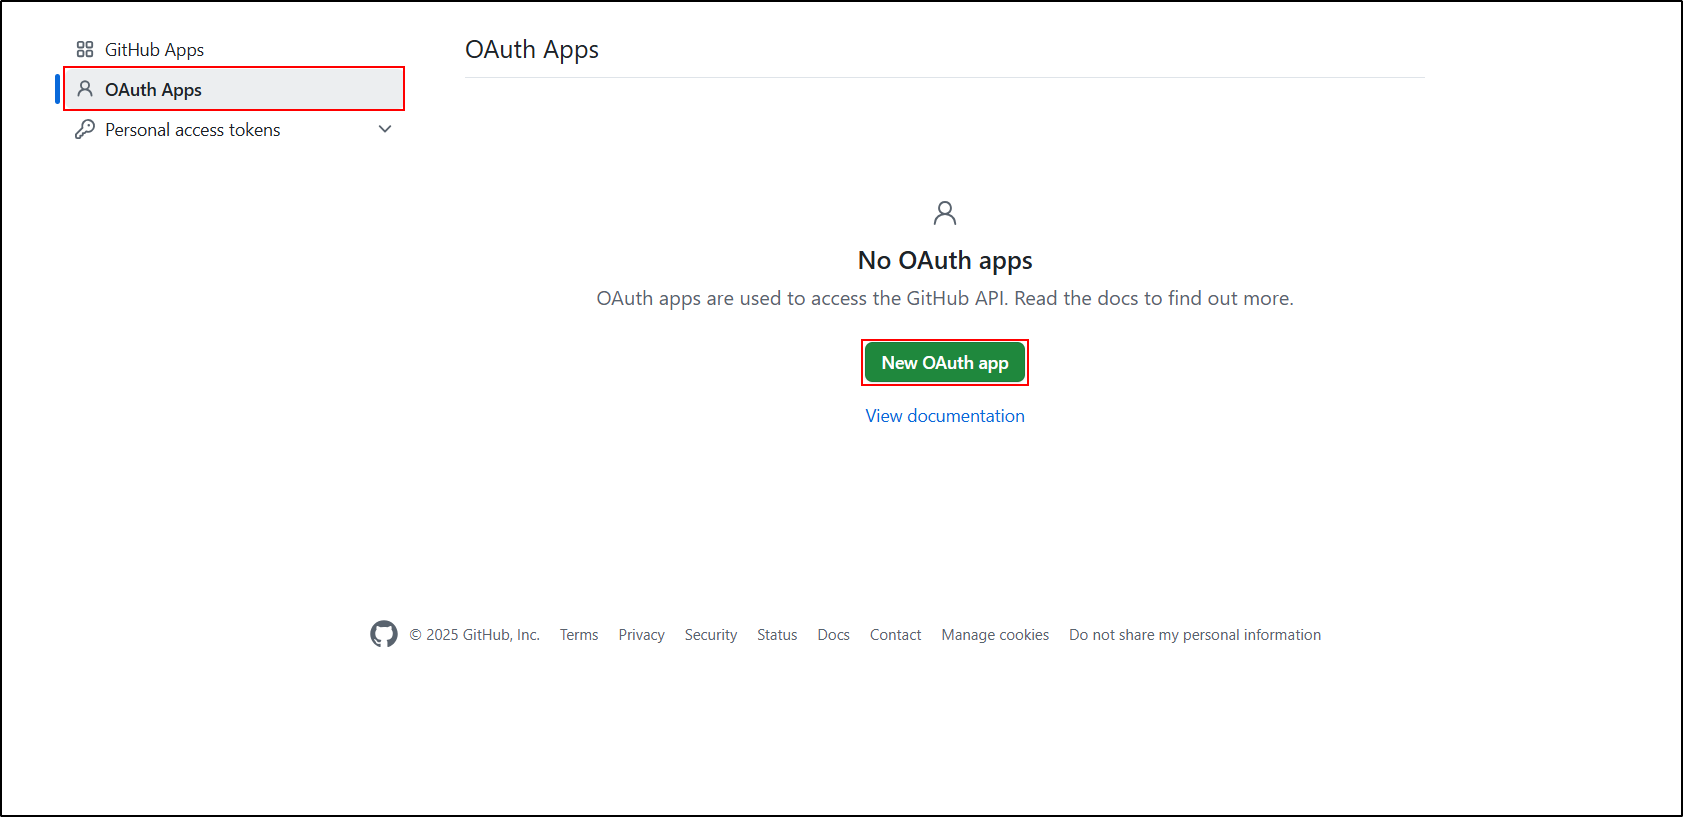
- Login or create a new GitHub Developer account.
-
Click on the New OAuth app button.
- Provide the following information in the Register a new OAuth application screen:
- Enter the app name in the Application name text field and provide the Homepage URL.
-
Paste the previously copied Callback/Redirect URL into the Authorization callback URL text field, and then click on the checkbox to Enable Device Flow.
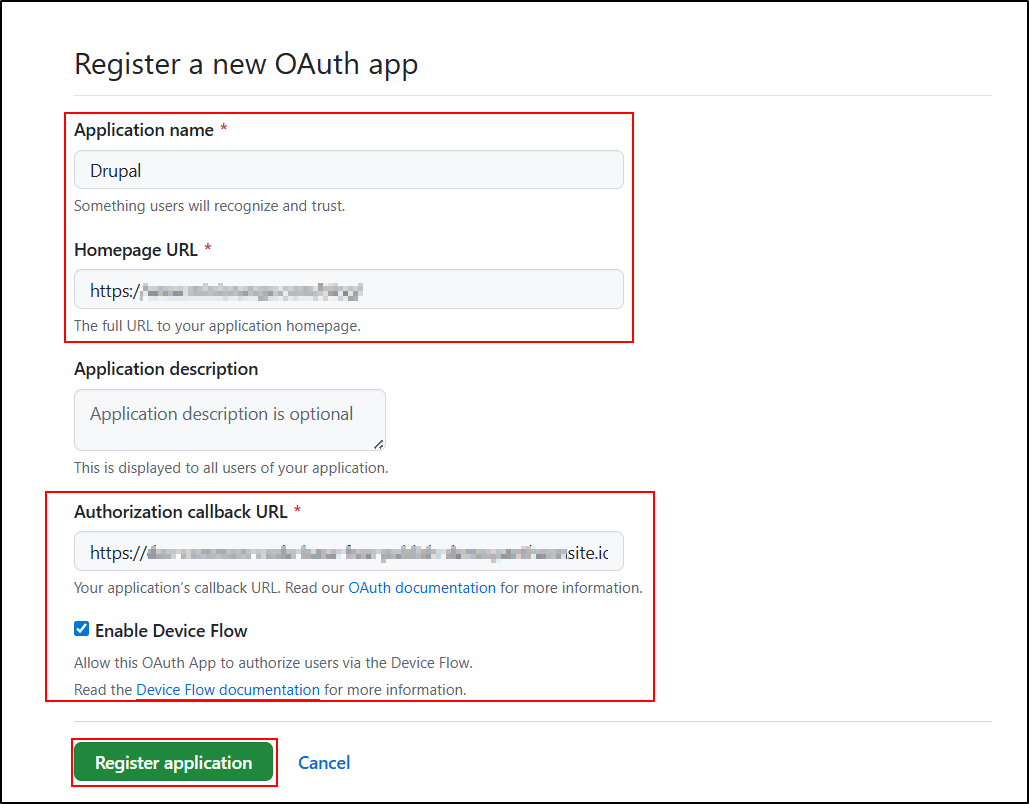
- Click on the Register application button.
Integrating Drupal with GitHub:
-
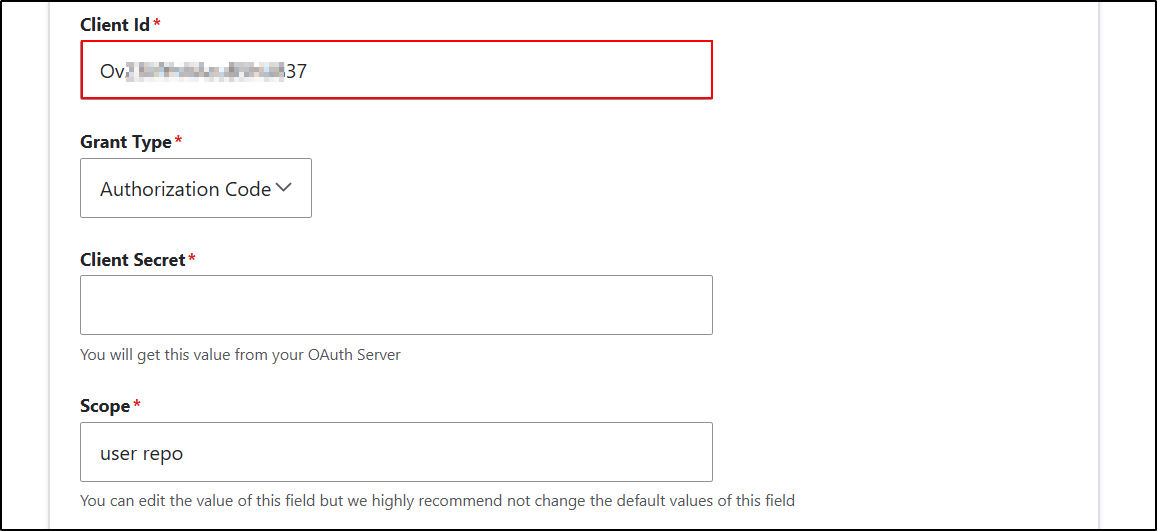
GitHub assigns a unique Application ID to your application. Copy the Client ID from the General tab.

-
Go to the Drupal site and paste the copied Client ID into the Client Id text field.
- Navigate to the GitHub portal.
-
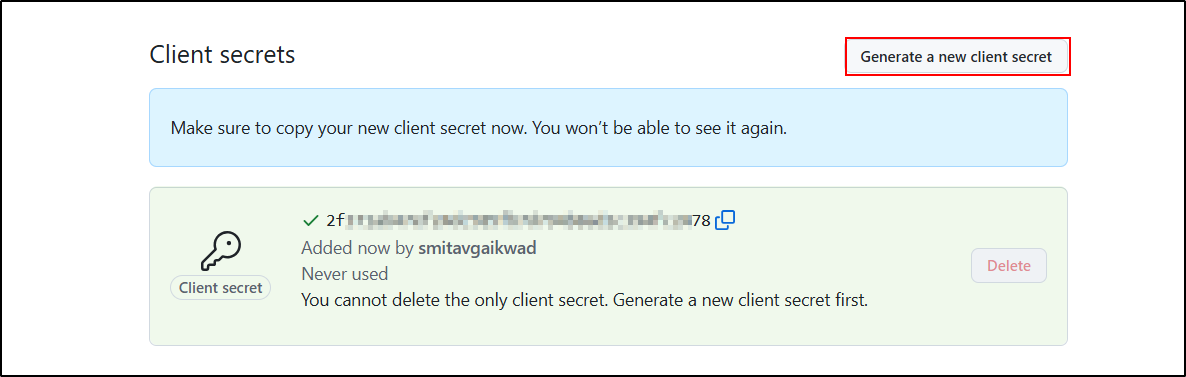
To generate a client secret, click on the Generate a new client secret button and copy the Client secret.
-
Navigate to the Drupal site, and paste the copied Client secret into the Client Secret text field.

- After that, check the Scope and Endpoints.
- The Send Client ID and Secret in radio button allows you to specify whether the Client ID and Secret should be included in the header or the body of the Token Endpoint Request. If you're unsure which option to select, you can stick with the default settings
-
Then, click on the Save Configuration button.
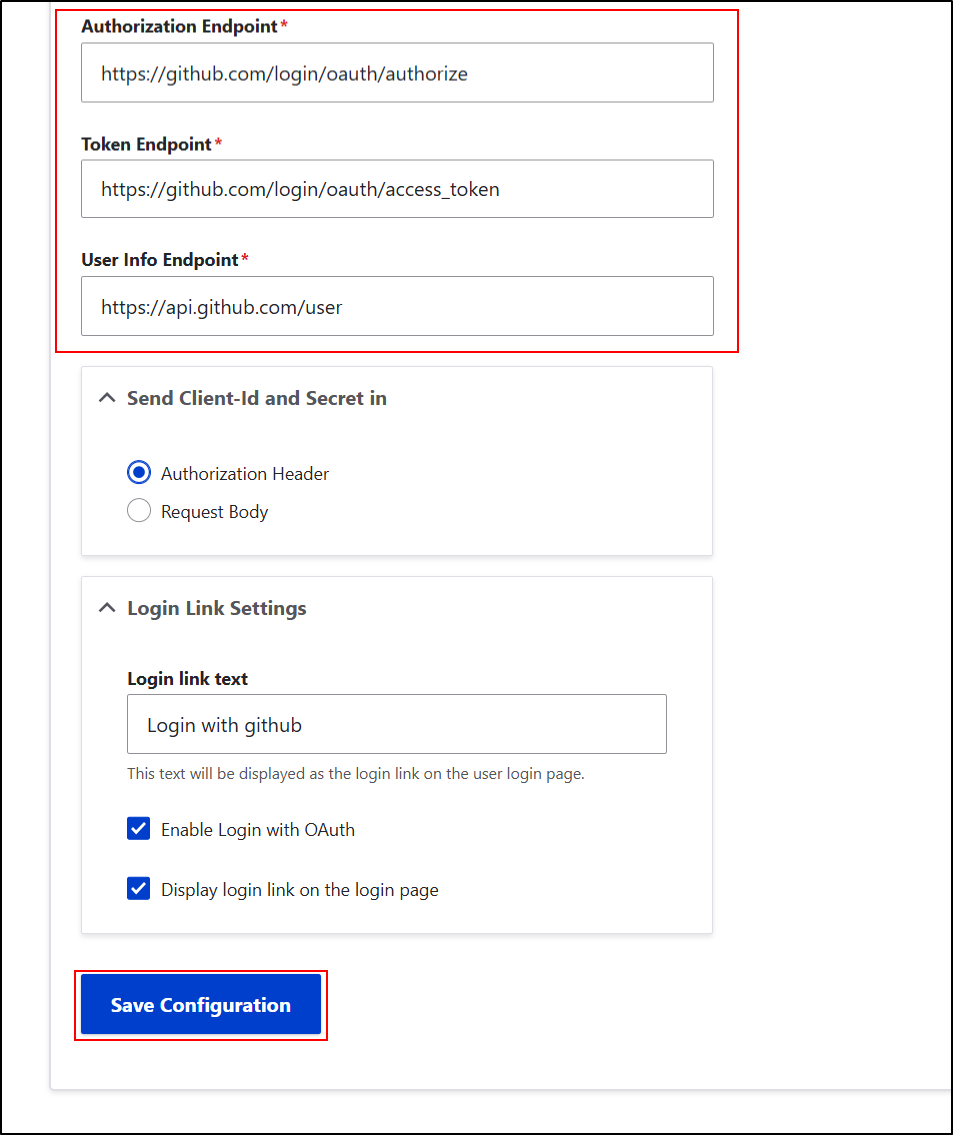
You can also refer to the GitHub Endpoints and scope from the table given below:
| Authorization Endpoint | https://github.com/login/oauth/authorize |
| Access Token Endpoint | https://github.com/login/oauth/access_token |
| Get User Info Endpoint | https://api.github.com/user |
| Scope | user repo |
Test Configuration of Drupal with GitHub:
-
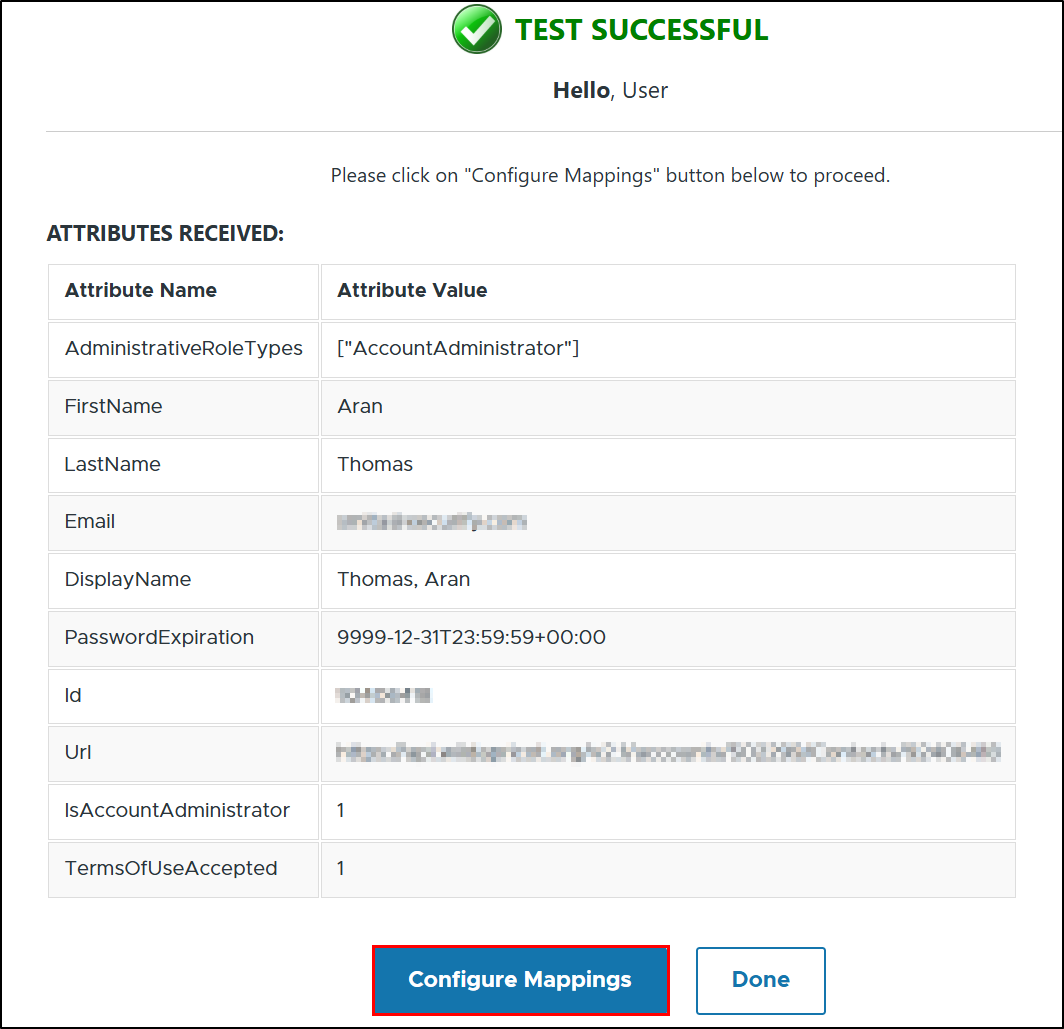
After successfully saving the configurations, click on the Perform Test Configuration button to check the Single Sign-On (SSO) connection between Drupal and GitHub.

- On a Test Configuration popup, if you don't have any active session in GitHub on the same browser, you will be asked to login into the GitHub account. Once you are successfully logged into the GitHub account, you will be provided with a list of the attributes that are received from GitHub.
-
Click on the Configure Mappings button.
-
Once you click on the Configure Mapping button, you will be redirected to the Attribute Mapping tab. From there, select the appropriate attribute from the OAuth Server Attribute dropdown where the email value is received, and then click the Save Configuration button.
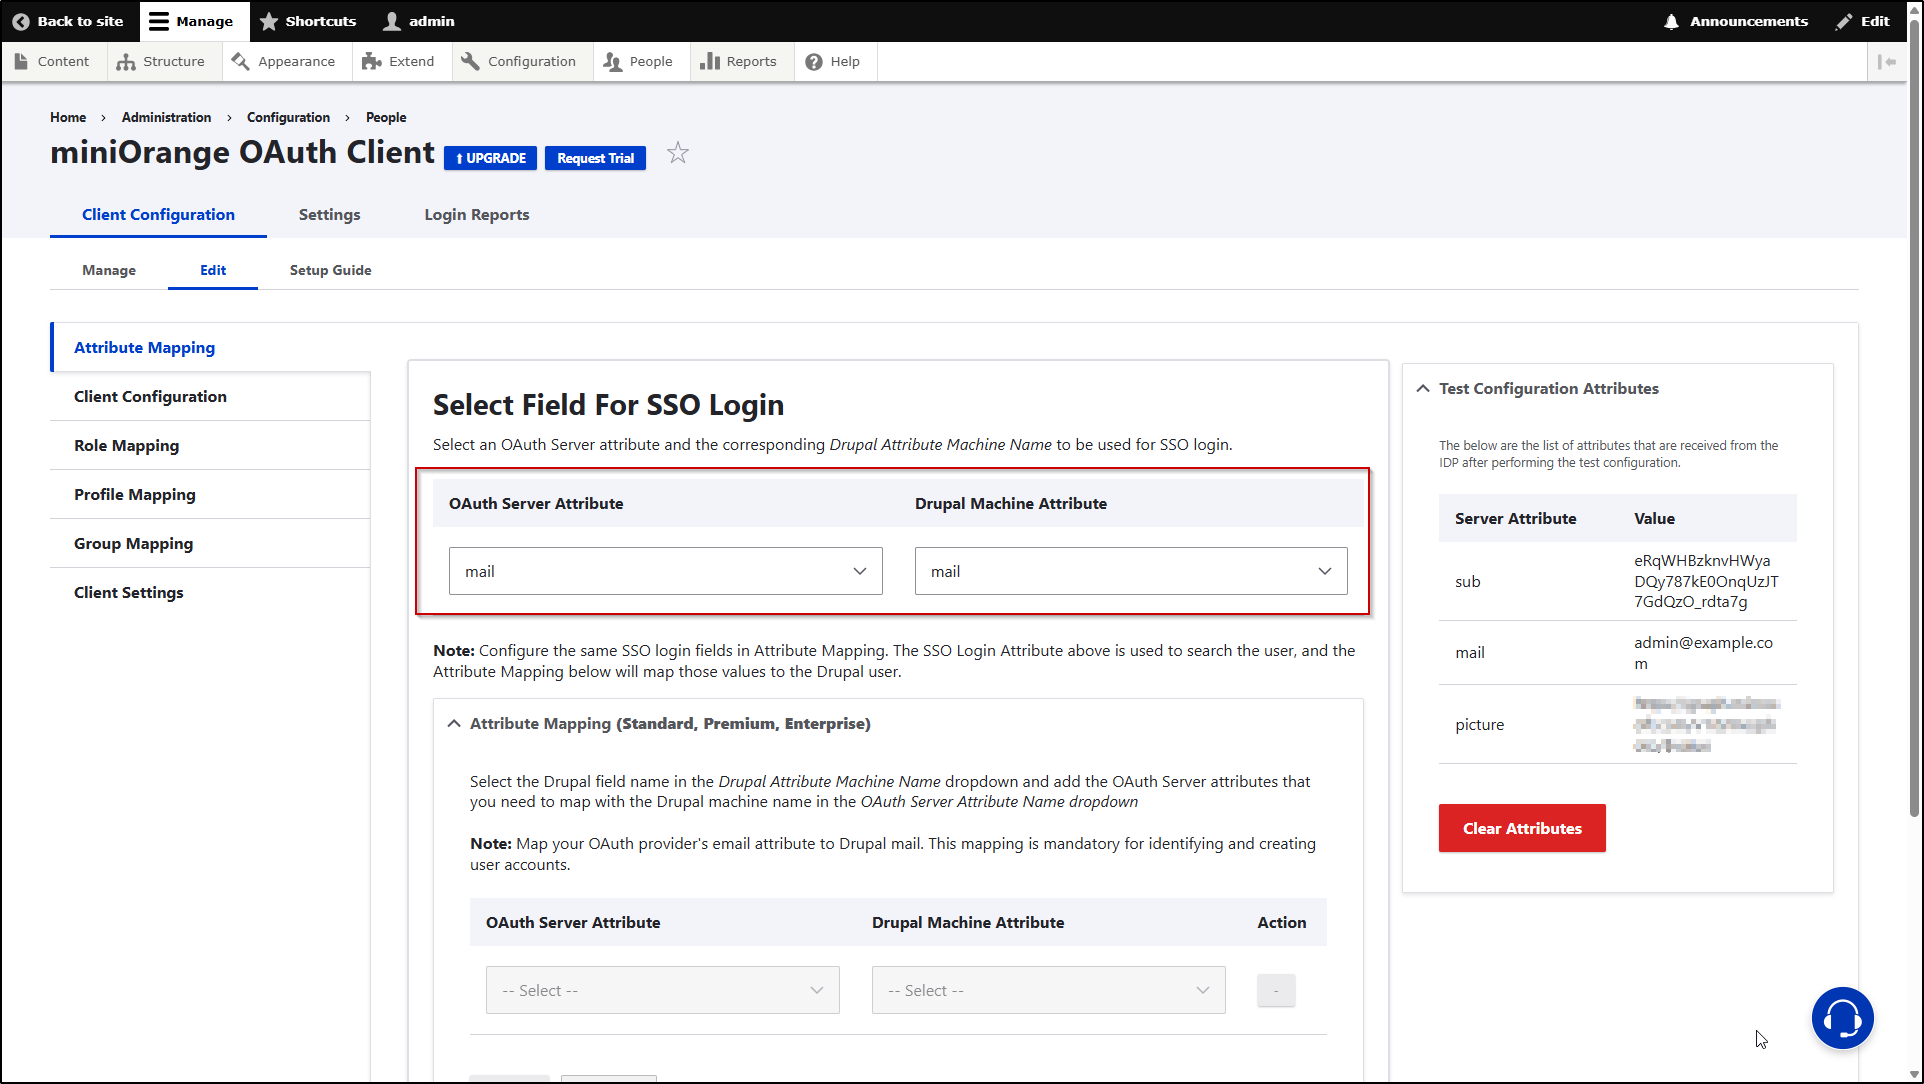
Please Note: Mapping the Email Attribute is mandatory for your login to work.
Congratulations! You have successfully configured GitHub as the OAuth Provider and Drupal as the OAuth Client.
How to perform the SSO login?
- Now, open a new browser/private window and go to your Drupal site login page.
- Click on the Login using GitHub link to initiate the SSO from Drupal.
-
If the configuration is correct, you will be logged in to the Drupal site.
Help improve this page
You can:
- Log in, click Edit, and edit this page
- Log in, click Discuss, update the Page status value, and suggest an improvement
- Log in and create a Documentation issue with your suggestion
