
Add a new server
This documentation needs work. See "Help improve this page" in the sidebar.
| User contribution by Oana Ilea, not yet verified in depth by Search API Solr developers but considered useful. |
As a preliminary step, the Search Api module is required and an Apache Solr server. For more information about web Solr hosts which are known to be compatible with the module make sure to read Search API Solr Search Requirements.
Note: Before starting the Solr server, make sure that it is using the proper configuration files. The correct way to do that is described in the INSTALL.txt within the module's folder.
1. Setting up Solr Cloud
For easy set up for local development, DDEV Solr Cloud integration is recommended.
For manual set up, follow these steps:
- download Solr from Solr Downloads
- unpack the Solr files into the working directory of the site that you are building (your Drupal installation). For the purpose of this tutorial we will use SOLR_version to name the unpacked Solr directory from now on.
- you can now start Solr on the localhost from your terminal with the command
SOLR_version/bin/solr start -e cloud -noprompt- you should see something similar to the following message in your console
Welcome to the SolrCloud example!

Starting up 2 Solr nodes for your example SolrCloud cluster.

Creating Solr home directory /Users/example_user/workspace/Drupal_installation/SOLR_version/example/cloud/node1/solr
Cloning /Users/example_user/workspace/Drupal_installation/SOLR_version/example/cloud/node1 into
   /Users/example_user/workspace/Drupal_installation/SOLR_version/example/cloud/node2

Starting up Solr on port 8983 using command:
"bin/solr" start -cloud -p 8983 -s "example/cloud/node1/solr"- you can confirm that your Solr has started and is running by launching Solr Admin UI in your web browser at Admin UI
- proceed further to configure a new server on your Drupal site
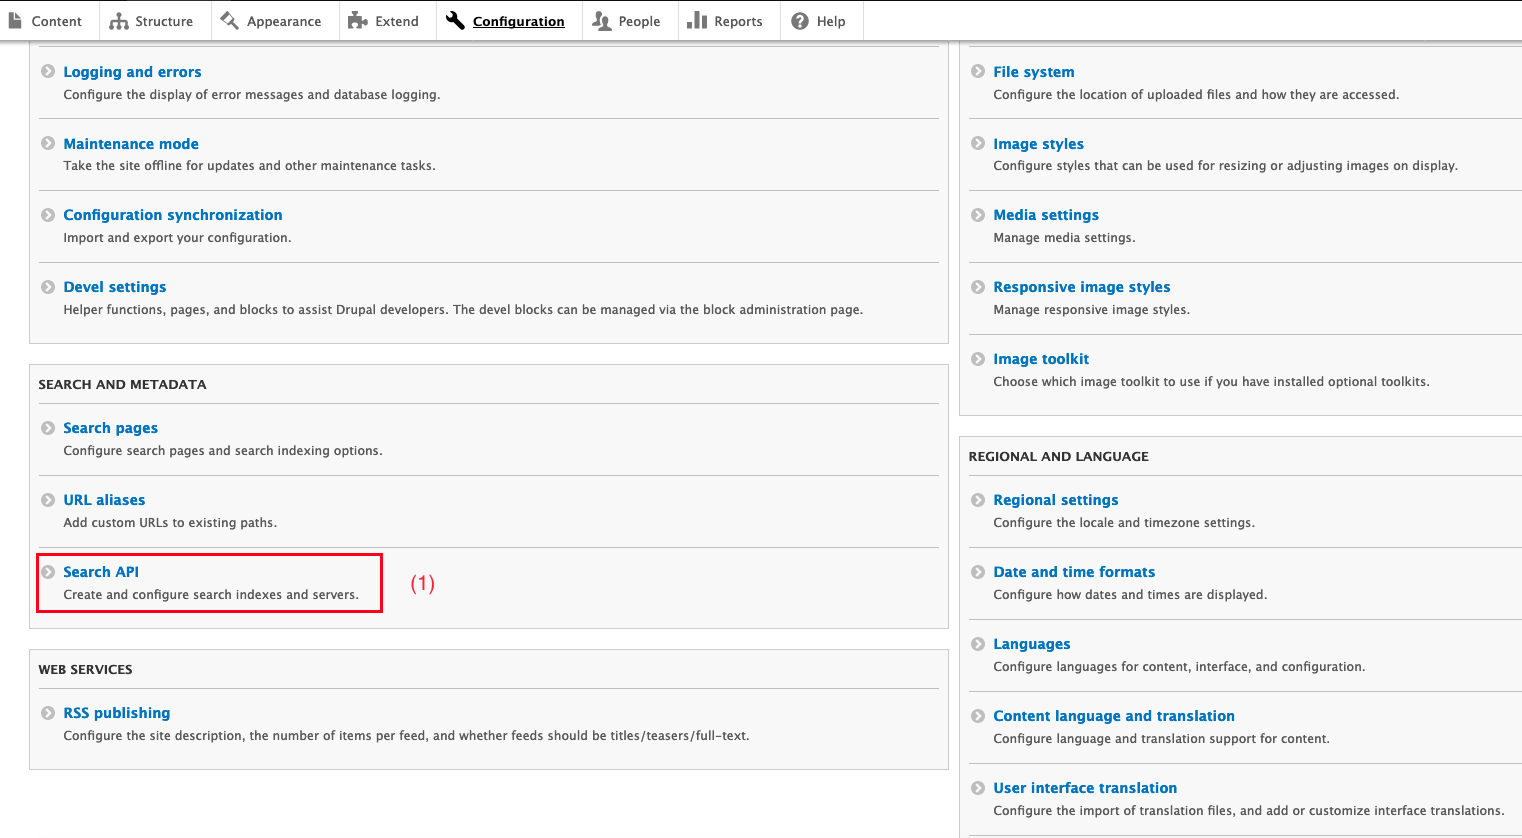
2. Select Administration > Configuration > under Search and Metadata click Search API (1)
3. Click Add server to add and configure a new server.
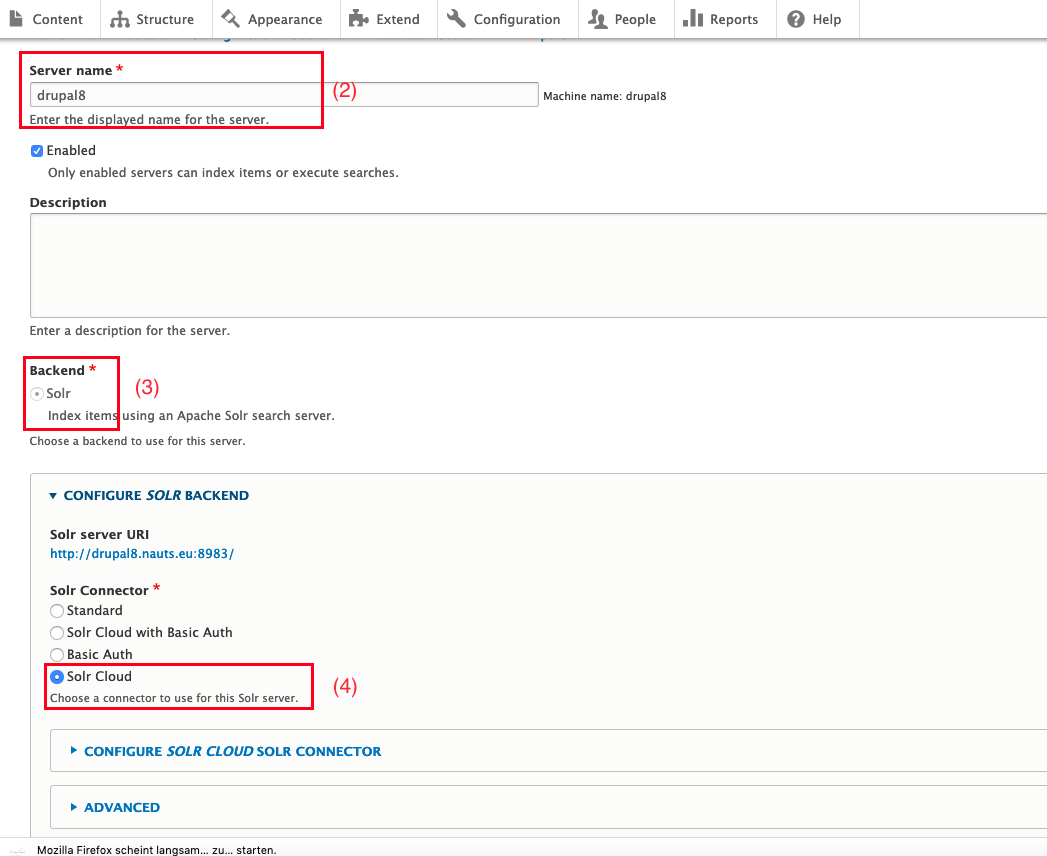
4. Fill in the server name (2), choose Solr as backend (3) and choose a connector to use for the Solr server. In the example below Solr Cloud was chosen (4). The server name can be any human-readable name and it is only used internally so changes can be made later.
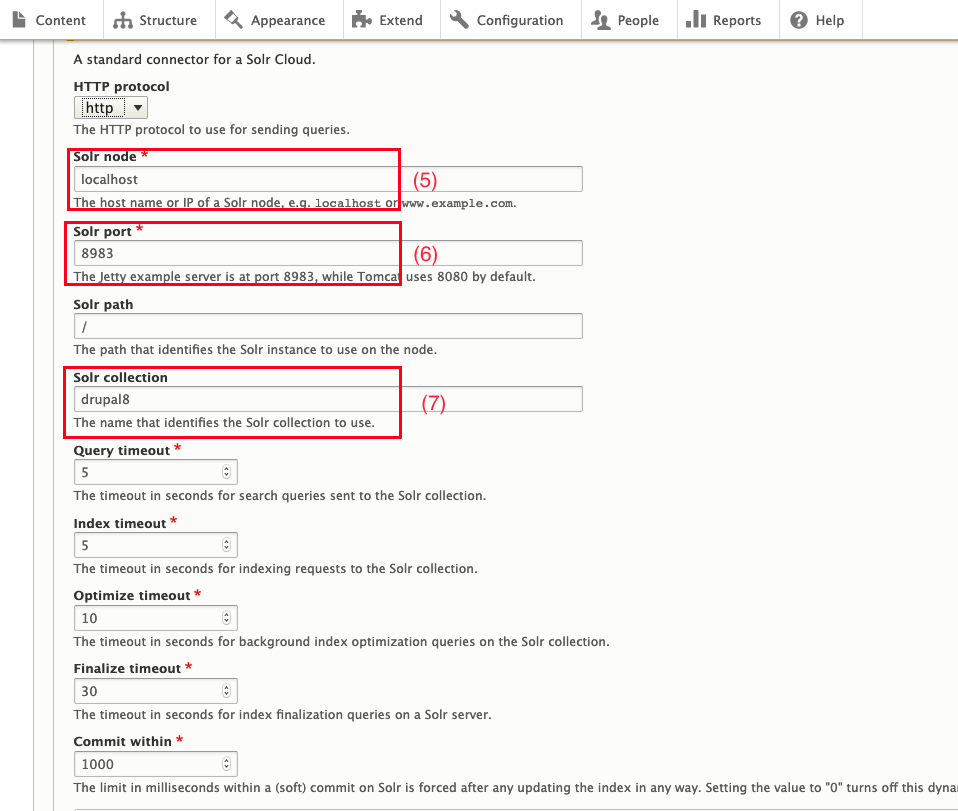
5. Configure the connector with the endpoint (5), port name (6) and solr collection (7). In the example below the default values for the Solr Cloud connector were used but if you have a different setup, these might vary. Also, the solr collection must be created prior to this step. For additional informaton about Solr collections and how to create one please visit the Solr Ref Guide on Collections.
6. Since you havent't deployed any configuration files yet, the status of your server and collection should still be 'not reached'(8).
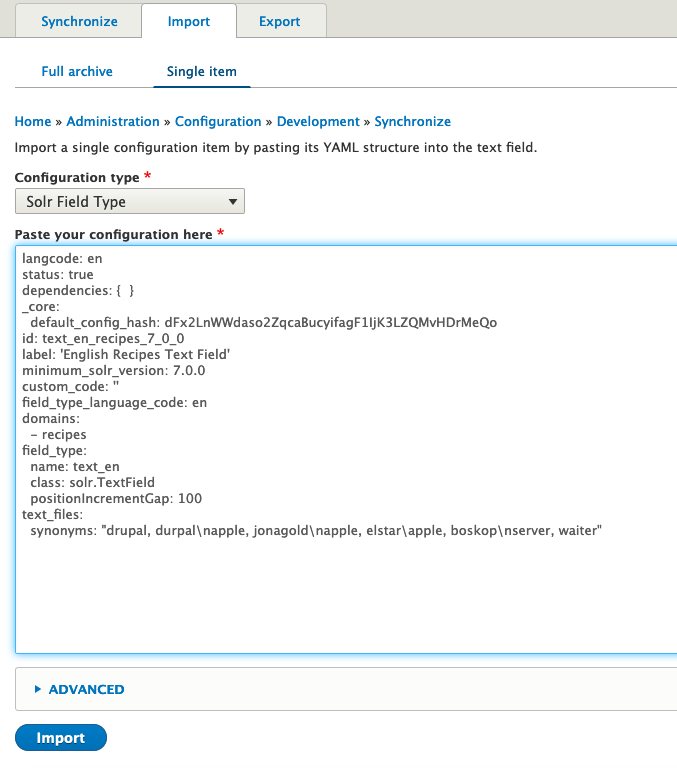
7. The Search API Solr Search module creates the right configs for you. In order to get them you need to click on Administration > Configuration > Search and Metadata > Search API > ServerName > Get config.zip (9) Deploy the config via Zookeeper.When configuration changes occur such as the installation of a new language, field type etc, it is necessary to download an updated config and deploy it to the solr server.

8. After deploying the config, you sould now be able to reach your collection and server (10).

Help improve this page
You can:
- Log in, click Edit, and edit this page
- Log in, click Discuss, update the Page status value, and suggest an improvement
- Log in and create a Documentation issue with your suggestion
