On this page
Creating Message Types for Notification
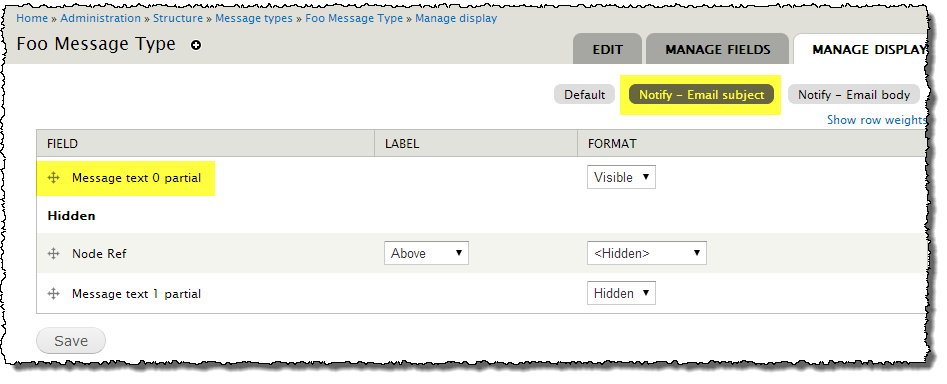
To construct the notification message, you need to create a message type with a multivalue message text field that will be used by the appropriate view modes. In the "Message text" area, press the "Add another item" button so you have two available text fields.
The first text (known as "Partial 0") will be used for the message title, and the second ("Partial 1") for the body.
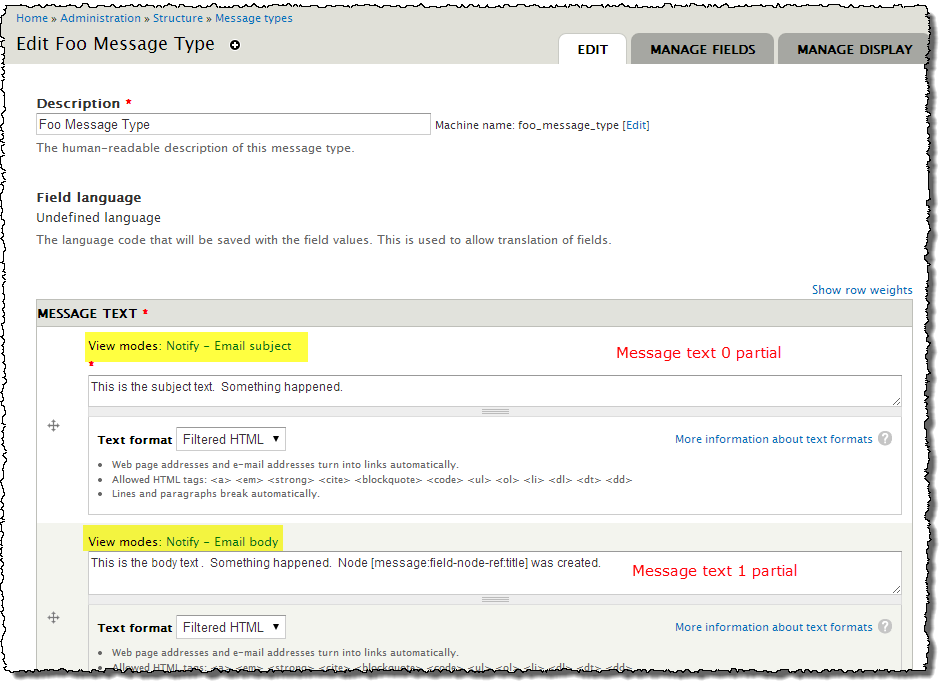
Then each of the message text partials is associated with each of the two view modes that come with the Message Notify module. Click on the "Manage display" tab and verify that the "Partial 0" field is used for the "Notify - Email subject" view mode, and that "Partial 1" is used for the "Notify - Email body" view mode.

Formatting notification messages using Twig
In most use cases using message text partials with tokens is sufficient, but for messages with complex content it is possible to compose the message using Twig. Since messages are normal content entities you can add your own fields and configure the message using view modes. The full power of the entity render system is available, so you can use Twig and template preprocessing functions to format the message to your liking.
As an example let's say you want to use Twig for the mail body content of your message template with machine name my_notification. In your module file you can define a theme override and preprocess function for your message template:
function mymodule_theme() {
  return [
    'message__my_notification__mail_body' => [
      'base hook' => 'message',
    ],
  ];
}

function template_preprocess_message__my_notification__mail_body(array &$variables) {
  // Any fields on the message can be made available as template variables.
  $message = $variables['message'];
  $variables['my_var'] = $message->get('field_myfield')->getString();
}
As usual, the Twig template itself is placed in your module in templates/message--my-notification--mail-body.html.twig.
{# A fancy HTML message #}
<table>
  <tr>
    <td>{{ my_var }}</td>
  </tr>
</table>
Help improve this page
You can:
- Log in, click Edit, and edit this page
- Log in, click Discuss, update the Page status value, and suggest an improvement
- Log in and create a Documentation issue with your suggestion

