On this page
- Contact our 24*7 support team
- Setting up Drupal:
- Integrating Drupal with Okta:
- Okta Base URL:
- Okta Bearer Token:
- Test UPN/ID:
- Provisioning / Synchronization:
- Manual/On-demand Provisioning:
- Activate User In Okta:
- Automatic Provisioning:
- Create the user without credentials:
- Create the user with credentials:
- Support / Contact Us:
- Additional Resource:
Setup Drupal Okta Synchronization
This module provides real-time synchronization of user information between Okta and Drupal, allowing you to quickly and easily manage user accounts across both platforms. It supports automatic, manual, and scheduler-based user provisioning, making it easy to keep user information up-to-date and consistent. With the Drupal Okta User Sync module, you'll have complete control over the flow of user information between the two platforms, ensuring that your users have the best possible experience.
Contact our 24*7 support team
Feel free to reach out to our Drupal experts if you need any sort of assistance in setting up Drupal Okta Sync and Provisioning module on your Drupal site.
Setting up Drupal:
- In the Configuration tab, click on the Okta User Sync link.
- Click on the Let’s configure the module button.
- In step 1, you have to choose how to perform the sync. For Drupal to Okta Sync, click on the Drupal to Okta Synchronization GIF.

Integrating Drupal with Okta:
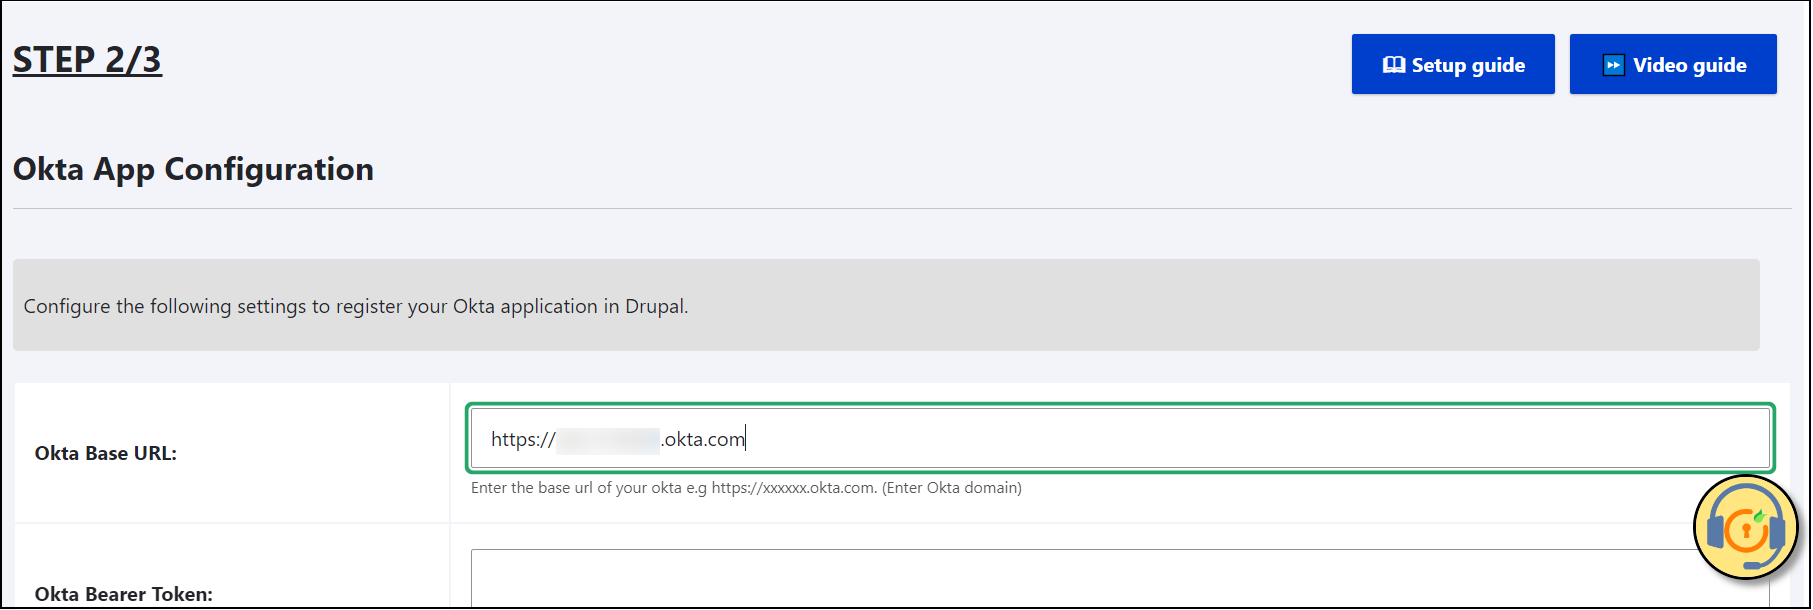
- In Step 2, you will have to configure the below-mentioned values from Okta into Drupal.

Okta Base URL:
- The Okta base URL is nothing but the base URL for the Org Authorization Server or your Okta Domain.
For example, https://${yourOktaDomain}. Copy this base URL.

- Paste the copied base URL in the Drupal’s Okta Base URL text field.
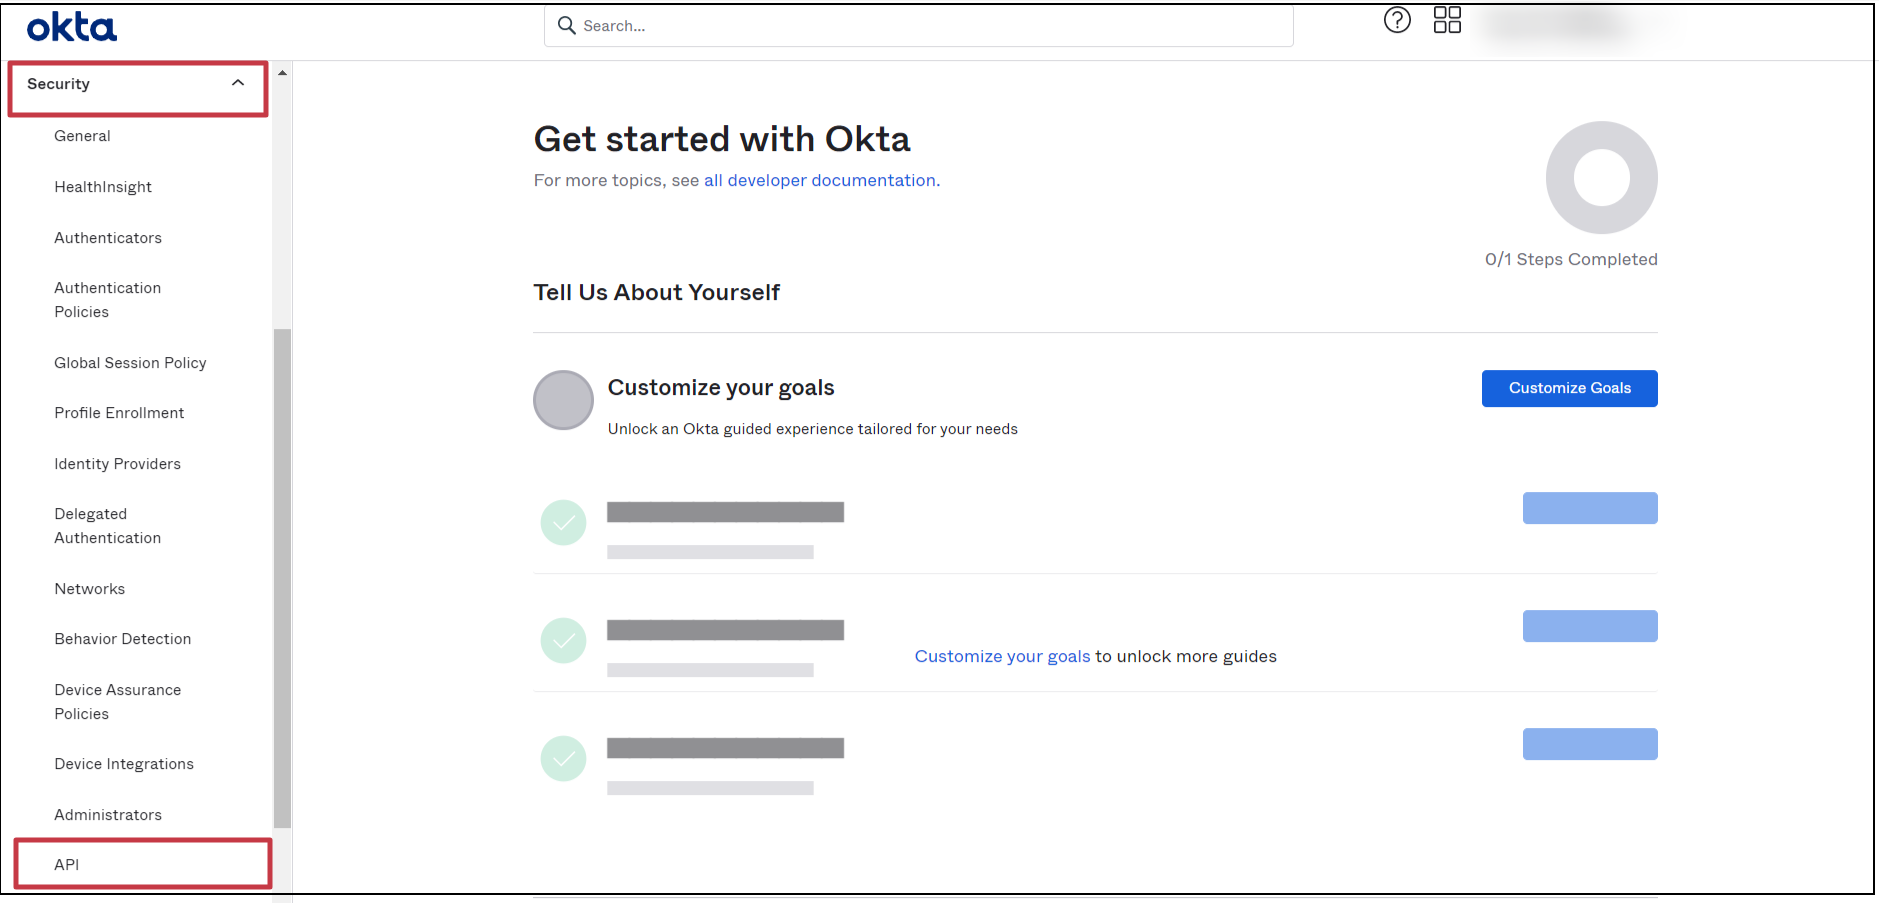
Okta Bearer Token:
-
To generate your Okta Bearer Token, log in to your Okta Dashboard with admin credentials.
-
From the left menu bar, click on the Security option and from the dropdown sub-menu, click on the API option.
- On the API Page, click on the Tokens options and then click on the Create token button.

- In the Create token window, enter the name for the token, and click on the Create token button.

- After that, it will generate the Bearer token. To copy the Token Value, you can simply click on the clipboard icon.
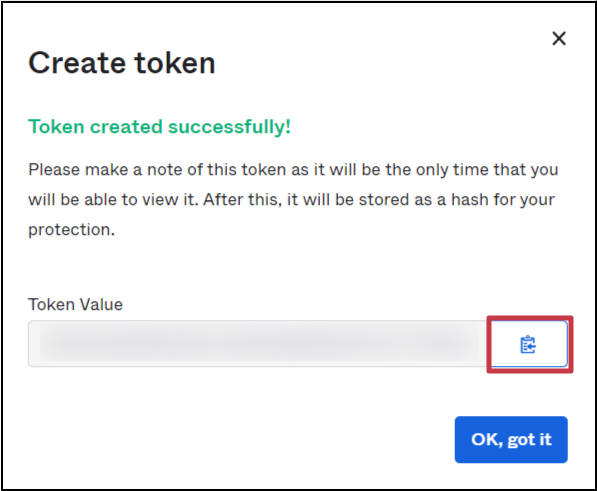
- Paste the copied bearer token in the Drupal’s Okta Bearer Token text field.

Test UPN/ID:
- In the Test UPN/ID field you will have to enter the user email id which is present in your Okta portal.
- Once done with all the configurations, click on the Save and Test Configuration button.
- If the Test Configuration is successful, you will receive a success message like:

- If you want, you can click on the link in the success message to check the attributes received from Okta.

- Alternatively, if there is an error in the integration of Okta with Drupal, then you can check the cause of the error by following the link in the error message or scrolling down to the Test Configuration Result section.

- Once successful integration, click on the Next button.
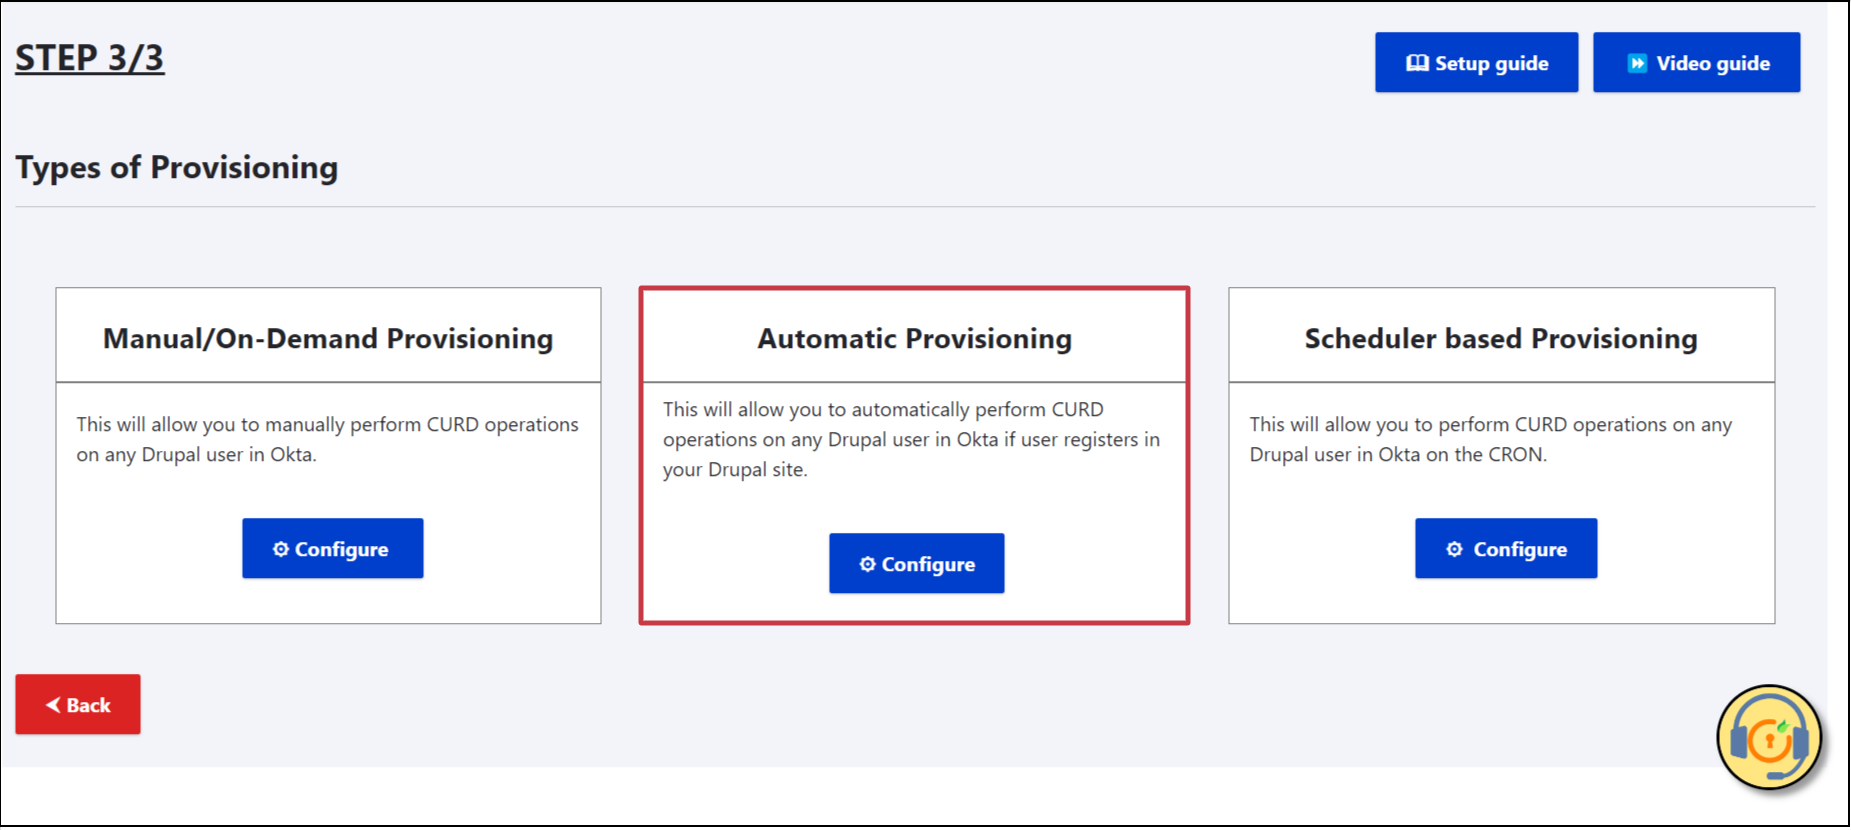
Provisioning / Synchronization:
In STEP 3, you can choose the method to provision the user.
Manual/On-demand Provisioning:
- In Manual/On-demand Provisioning you can manually sync the user with Okta.
- For this, click on the Configure button of the Manual/On-Demand Provisioning section.

- Under the Manual Provisioning Configuration section, check the checkbox of Create User and click on the Save button.

- Once saved, you can find the Sync Users section below.
- In the search field, you can enter the username of Drupal’s user and then click on the Sync button.

- If the provisioning is successful, you will receive the following status message:

- Alternatively, if there is an error in provisioning the user account to Okta, you can check the cause of the error by following the link in the error message.

- This method creates the user in okta without a password and staged state. Admin has to activate that user from the Okta portal separately.
Activate User In Okta:
- To activate the user, navigate to the Okta portal.
- From the left side menu bar, click on the Directory and then click on the People option from the drop-down menu.

- In front of the newly created user, you can see the Activate link. Click on that link to activate the user.

- In the pop-up, click on the Activate Person button.

- This will send the Activation link to the user, and the user can set the password to log in.
Automatic Provisioning:
- This method allows you to automatically create a new user in Okta once the account is created in Drupal.
- Click on the Configure button of the Automatic Provisioning section.
- Under the Automatic Provisioning Configuration section, check the Create User checkbox.
- You can see the two options to create the user in Okta:
Create the user without credentials:
- In this method, the user has to set the password manually after the sync with Okta.
Create the user with credentials:
- In this method, the Drupal Password will sync with Okta, and the user can log into Okta using the same password.
- Choose one of the methods and click on the Save button.

- Now, you can try to create a new user on the Drupal site and check the logs by navigating to Reports -> Recent log messages and using the user_provisioning filter.
- This method also creates the user in a staged state. To activate the user, you can follow the steps under the Activate User In Okta section.
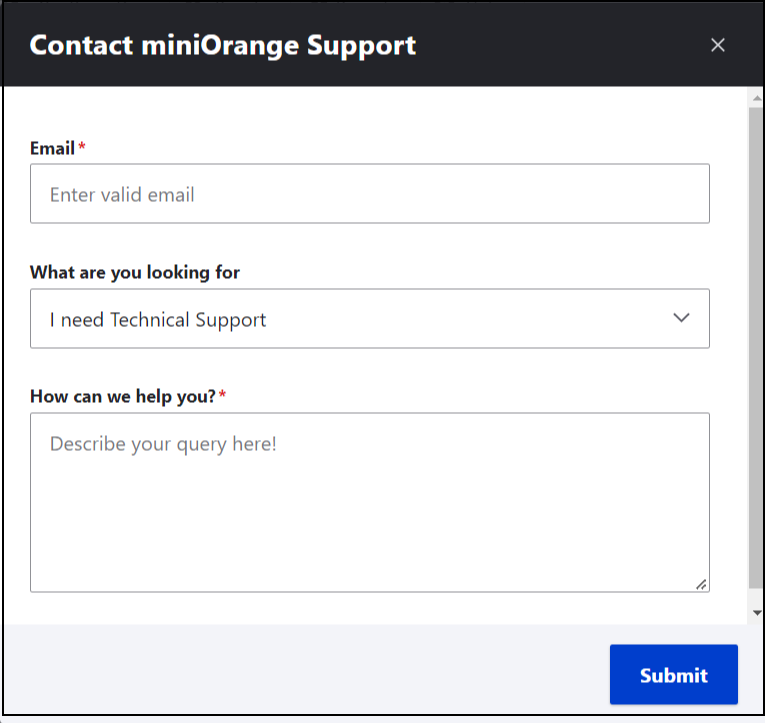
Support / Contact Us:
- If you have any questions or queries related to the Drupal Okta Sync module, you can reach out to us by clicking on the support icon present in the bottom right corner of the module, or you can simply drop an email to drupalsupport@xecurify.com.
Additional Resource:
Help improve this page
You can:
- Log in, click Edit, and edit this page
- Log in, click Discuss, update the Page status value, and suggest an improvement
- Log in and create a Documentation issue with your suggestion
