Guide for Drupal SCIM Server using CyberArk as SCIM Client
This document will assist you to configure Drupal as SCIM Server and CyberArk as SCIM Client. You will be able to push users and groups from CyberArk to Drupal. You can get the SCIM Base URL and SCIM Bearer Token under the SCIM Configuration tab.
Important Note:
This module is compatible with Drupal 10.
Active 24/7 Support:
If you face any issues or if you have any questions, please feel free to reach out to us at drupalsupport@xecurify.com. In case you want some additional features to be included in the module, please get in touch with us, and we can get that custom-made for you.
Installation of Drupal User Provisioning and Sync module:
Using Composer:
- For Window:
composer require drupal/user_provisioning - For Linux:
composer require 'drupal/user_provisioning' - Navigate to Extend menu on your Drupal admin console and search for miniOrange User Provisioning using the search box.
- Enable the module by selecting the checkbox and clicking on the Install button.
- Configure the module at
{BaseURL}/admin/config/people/user_provisioning/overview
Using Drush:
- Download the module:
drush dl user_provisioning - Install the module:
drush en user_provisioning - Clear the cache:
drush cr - Configure the module at
{BaseURL}/admin/config/people/user_provisioning/overview
Manual installation:
- Go to Extend menu on your Drupal admin console and click on Install new module.
- Install the User Provisioning and Sync module either by downloading the zip or from the URL of the package(tar/zip).
- Click on Enable newly added modules and search for miniOrange User Provisioning using the search box.
- Enable this module by enabling the checkbox and clicking on the Install button.
- Configure the module at
{BaseURL}/admin/config/people/user_provisioning/overview
Step 1: Setting up Drupal as SCIM Server:
- You get the SCIM Base URL and SCIM Bearer Token under the SCIM Configuration tab.
- Copy the Base URL and Bearer token and keep it handy.

Step 2: Setting up CyberArk as SCIM Client:
- Log in to your CyberArk administration account.

Setup CyberArk as IDP:
You can configure Drupal as a SAML SP with CyberArk as an IDP by following the steps enumerated here.
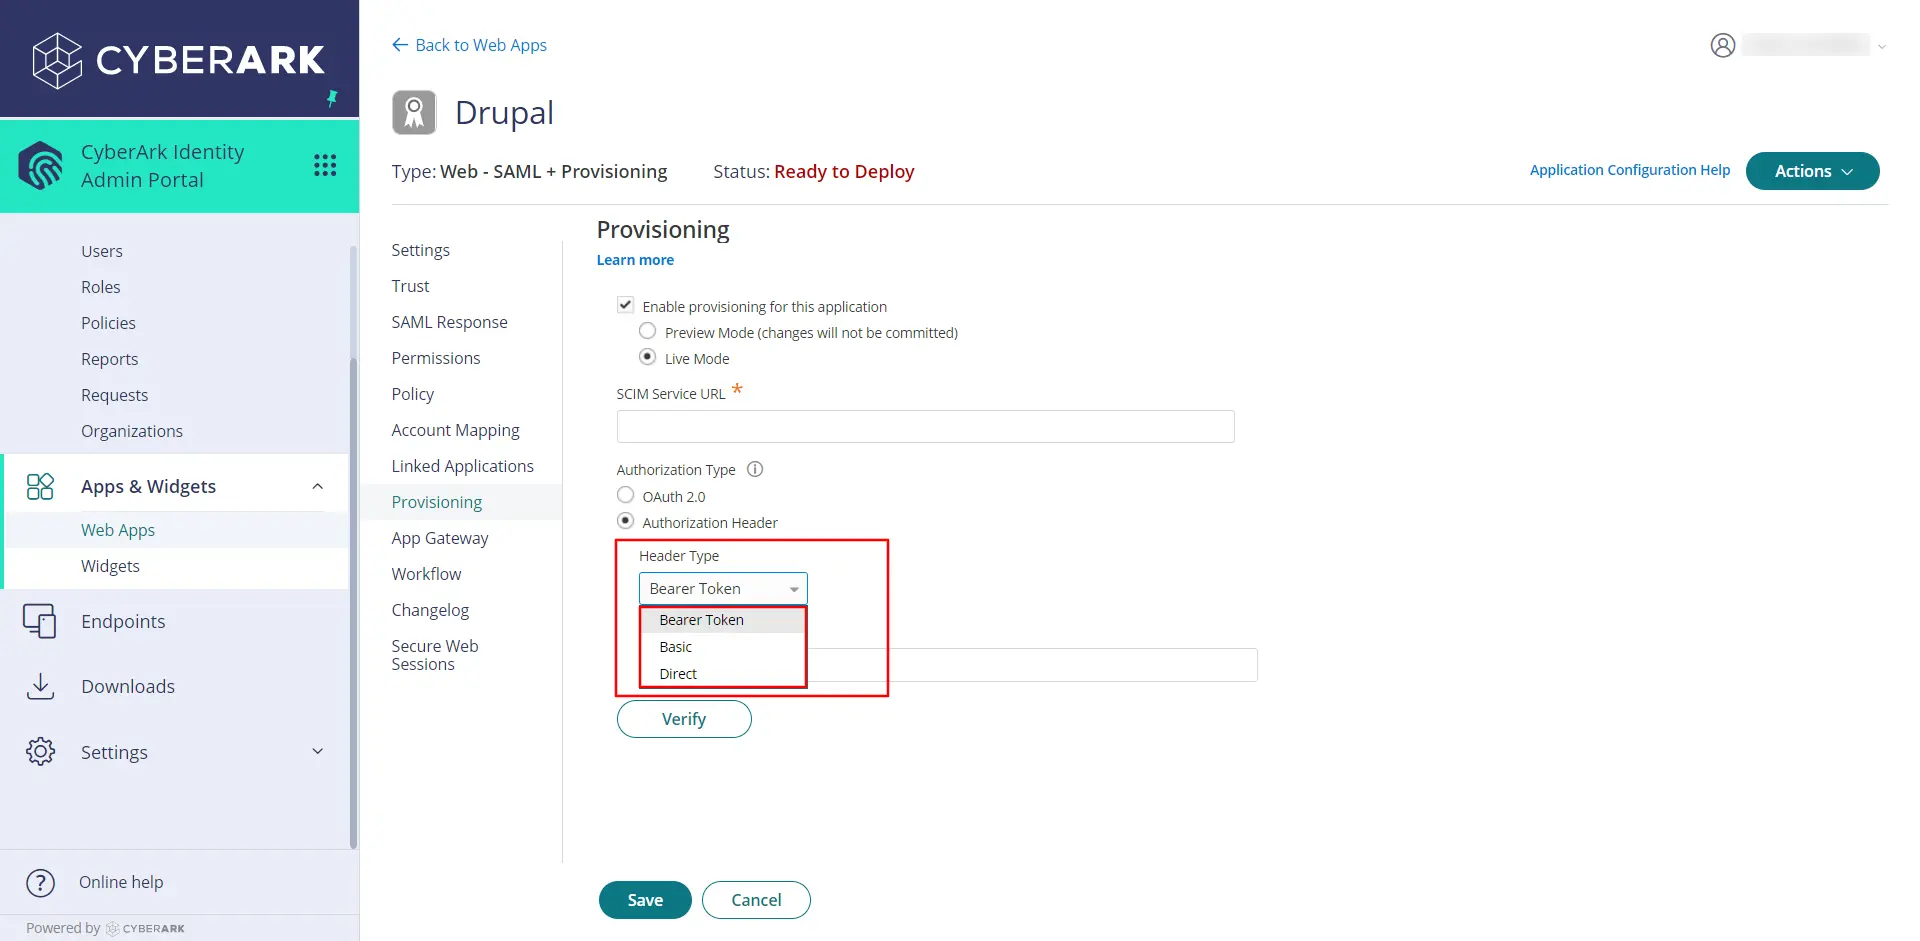
- Click on the Provisioning tab.
- Select Enable provisioning for this application, then click Save.

- Open a popup SCIM Provisioning window then click on Yes button.

- Select Preview and Live Mode.

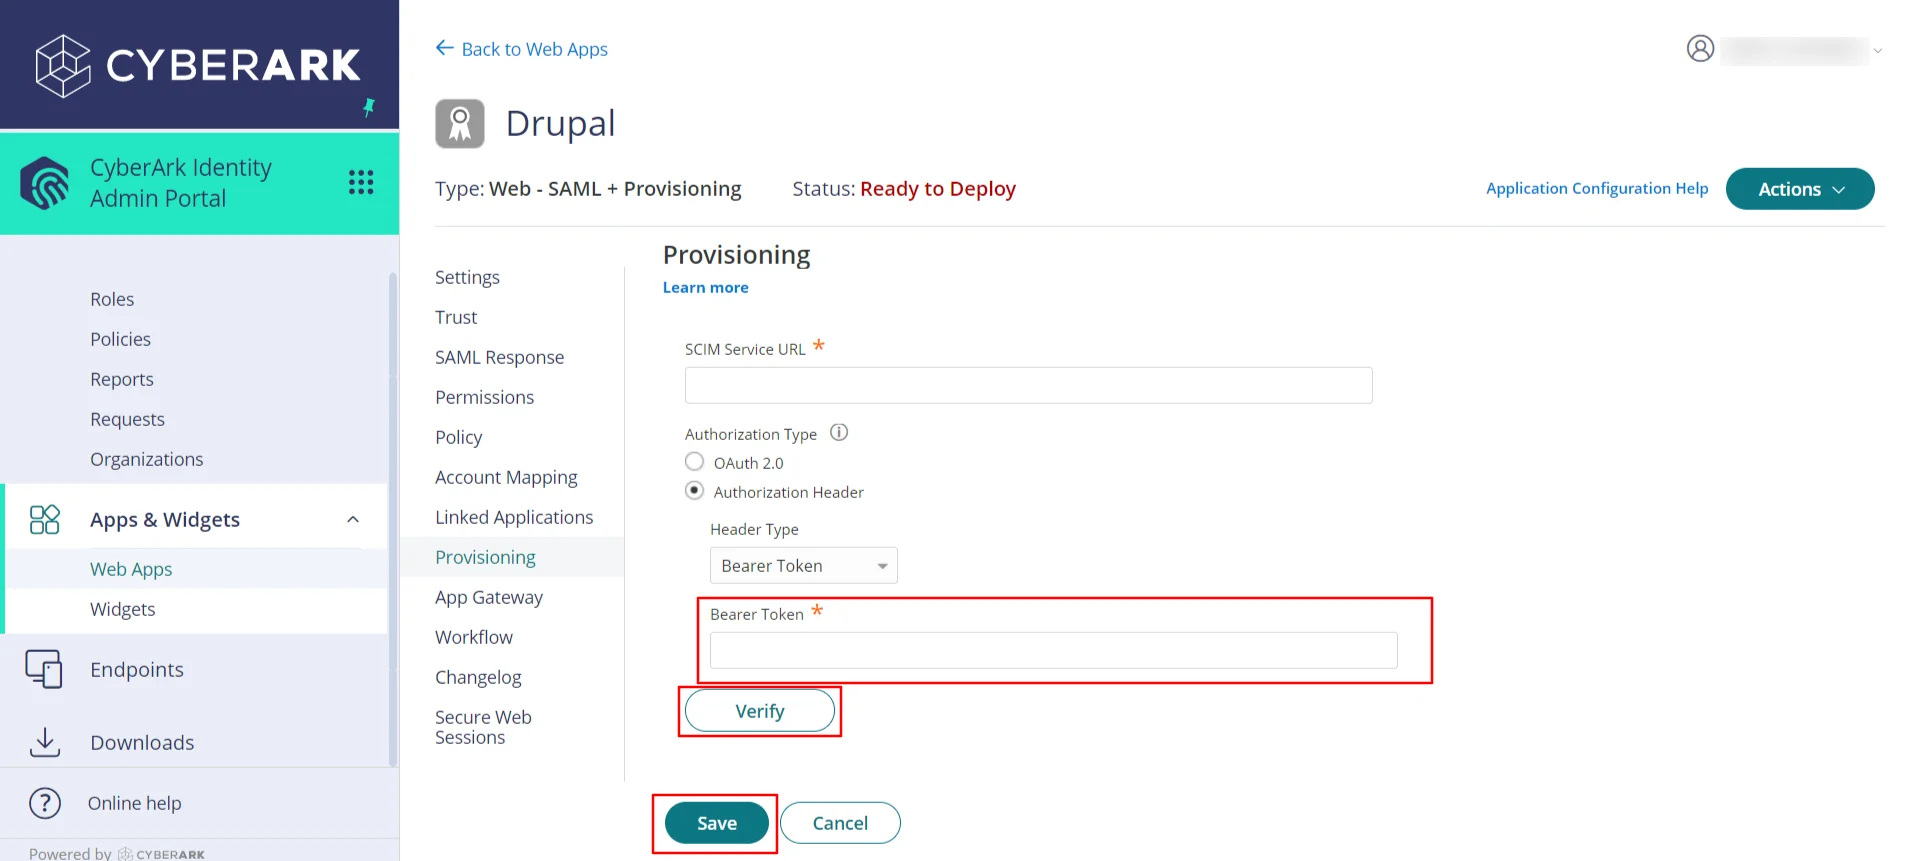
- Copy the SCIM Base URL from step 1 and paste it into the SCIM Service URL text field.

Authorization Type:
The Authorization Type specifies what information is required and where to find it.
- Select Authorization Type.
| OAuth 2.0 | This Authorization Type uses a workflow to authorize access. The Authorization Header directly provides credentials. |
| Authorization Header | It is necessary to select a header type. |

Fill out all of the required information in Authorization Type:
- If you select OAuth 2.0, you must provide the following information.

Choose Authorization Header:
- You must choose a Header Type if you choose Authorization Header.
- Bearer Token should be selected if your app requires a header in the format: Bearer.
- If your application requires HTTP BASIC authentication, select Basic.
- Select Direct if your app uses a different format.
- Select Bearer Token.
- The SCIM Bearer Token should be copied from the SCIM Configuration tab and pasted into the Bearer Token text field.
- To save your SCIM Provisioning information, click the Verify button.
- Then, click on Save button.
Help improve this page
You can:
- Log in, click Edit, and edit this page
- Log in, click Discuss, update the Page status value, and suggest an improvement
- Log in and create a Documentation issue with your suggestion
