REST API Advance Features
The miniOrange Drupal REST API and JSON API module enable you to restrict and manage access to your Drupal site using various authentication methods, including Basic Authentication, API Key Authentication, JWT Authentication, OAuth/Access Token Authentication, and External Identity Provider Authentication. This module offers numerous features to customize the authentication process according to your needs.
Advance Feature
- Custom Header
- Token Expiry Configuration
- Allow and & Restrict IP Addressed
- APIs to be Restricted
In this document, we will discuss the details of every feature, including how it works and how to configure it.
Pre-requisite
- Download and install the miniOrange Drupal REST API and JSON API module.
- Please follow these Setup Guides to configure the module with your desired authentication method.
1. Custom Header
The Custom Header feature lets you add a personalized header for authentication, making REST API interactions safer. This feature strengthens the API's security and ensures more secure and reliable access.
Let’s configure Custom Header Feature
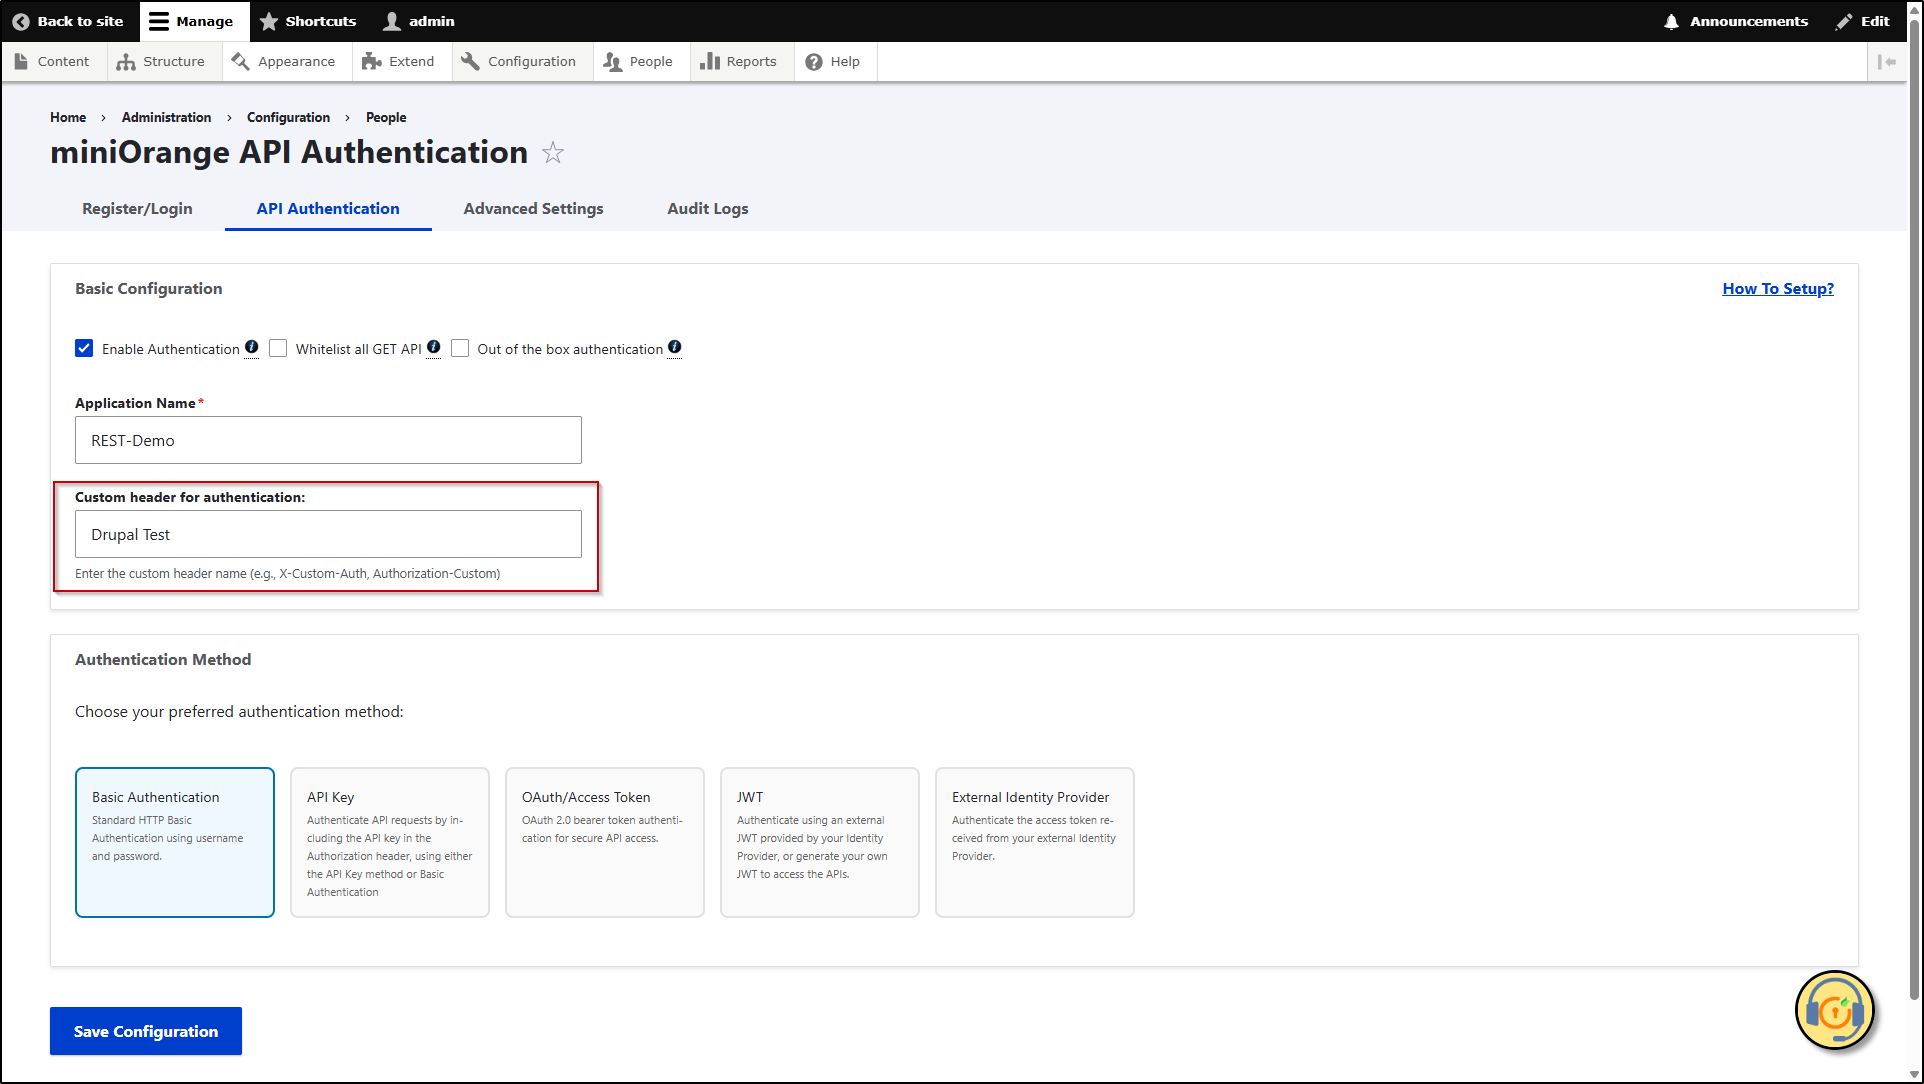
- After installing the module, configure it with your desired authentication method. In this example, we will set up Basic Authentication.
- After entering the application name in the Application Name text field, if you want a custom header, then enter the cutom header in the Custom header for authentication text field.
- After that click Save Configuration button.
- Now, let's check how it works. Navigate to Postman.
- Enter the API URL that you want to authenticate in the Enter URL text box.
- In the Header section, enter the custom header name from the Drupal site into the Key text field and enter the base64encoded username and password value using basic auth type into the Value text field (basic base64encoded).
For OAuth/Access Token, JWT, and External Identity Provider use Bearer OAuth type authentication.
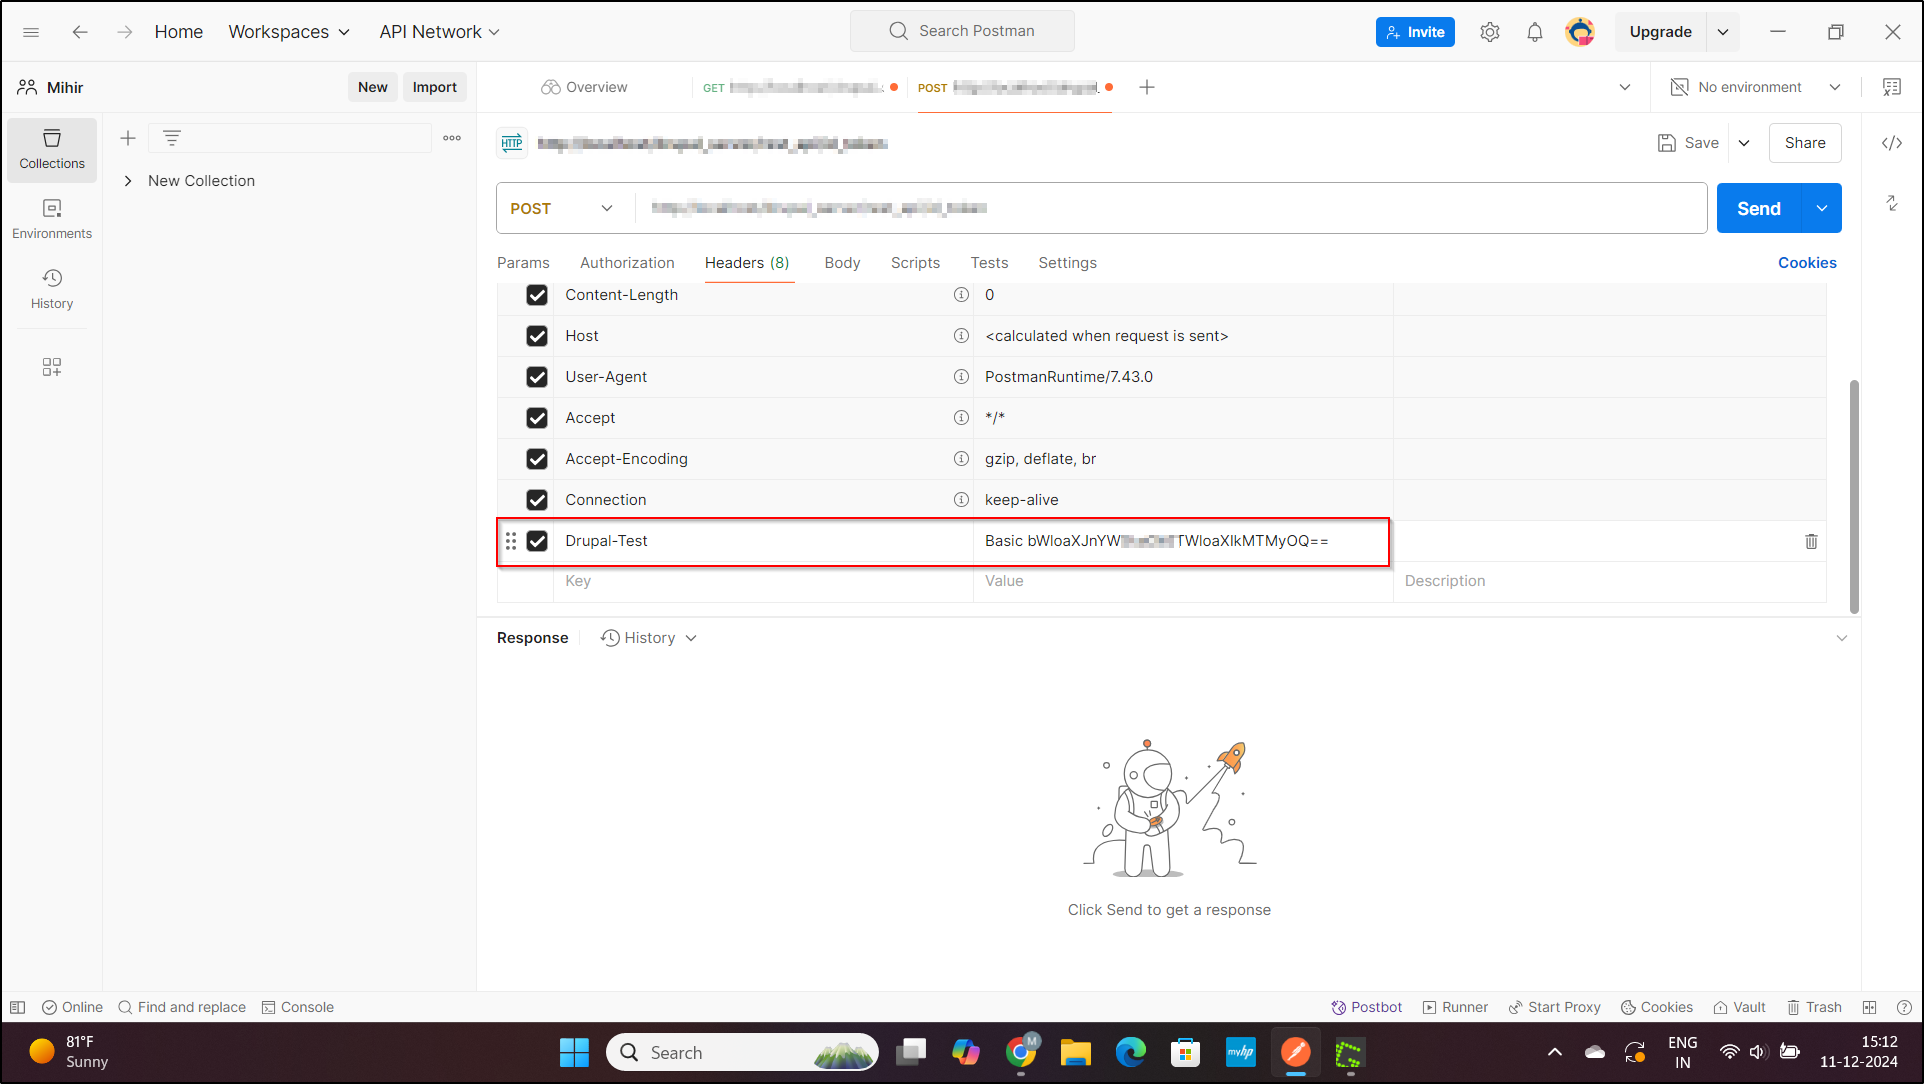
- Now, click on the Send button. If the entered details are correct then you will get the desired result.
The Custom Header feature has been successfully configured.
2. Token Expiry Configurations
Token expiry configuration allows one to decide the lifespan of authentication tokens, such as JWT Token or OAuth access tokens. This feature enhances security by controlling how long tokens remain valid. Expired tokens require reauthentication, to ensure secure access control.
Let’s configure Token Expiry feature
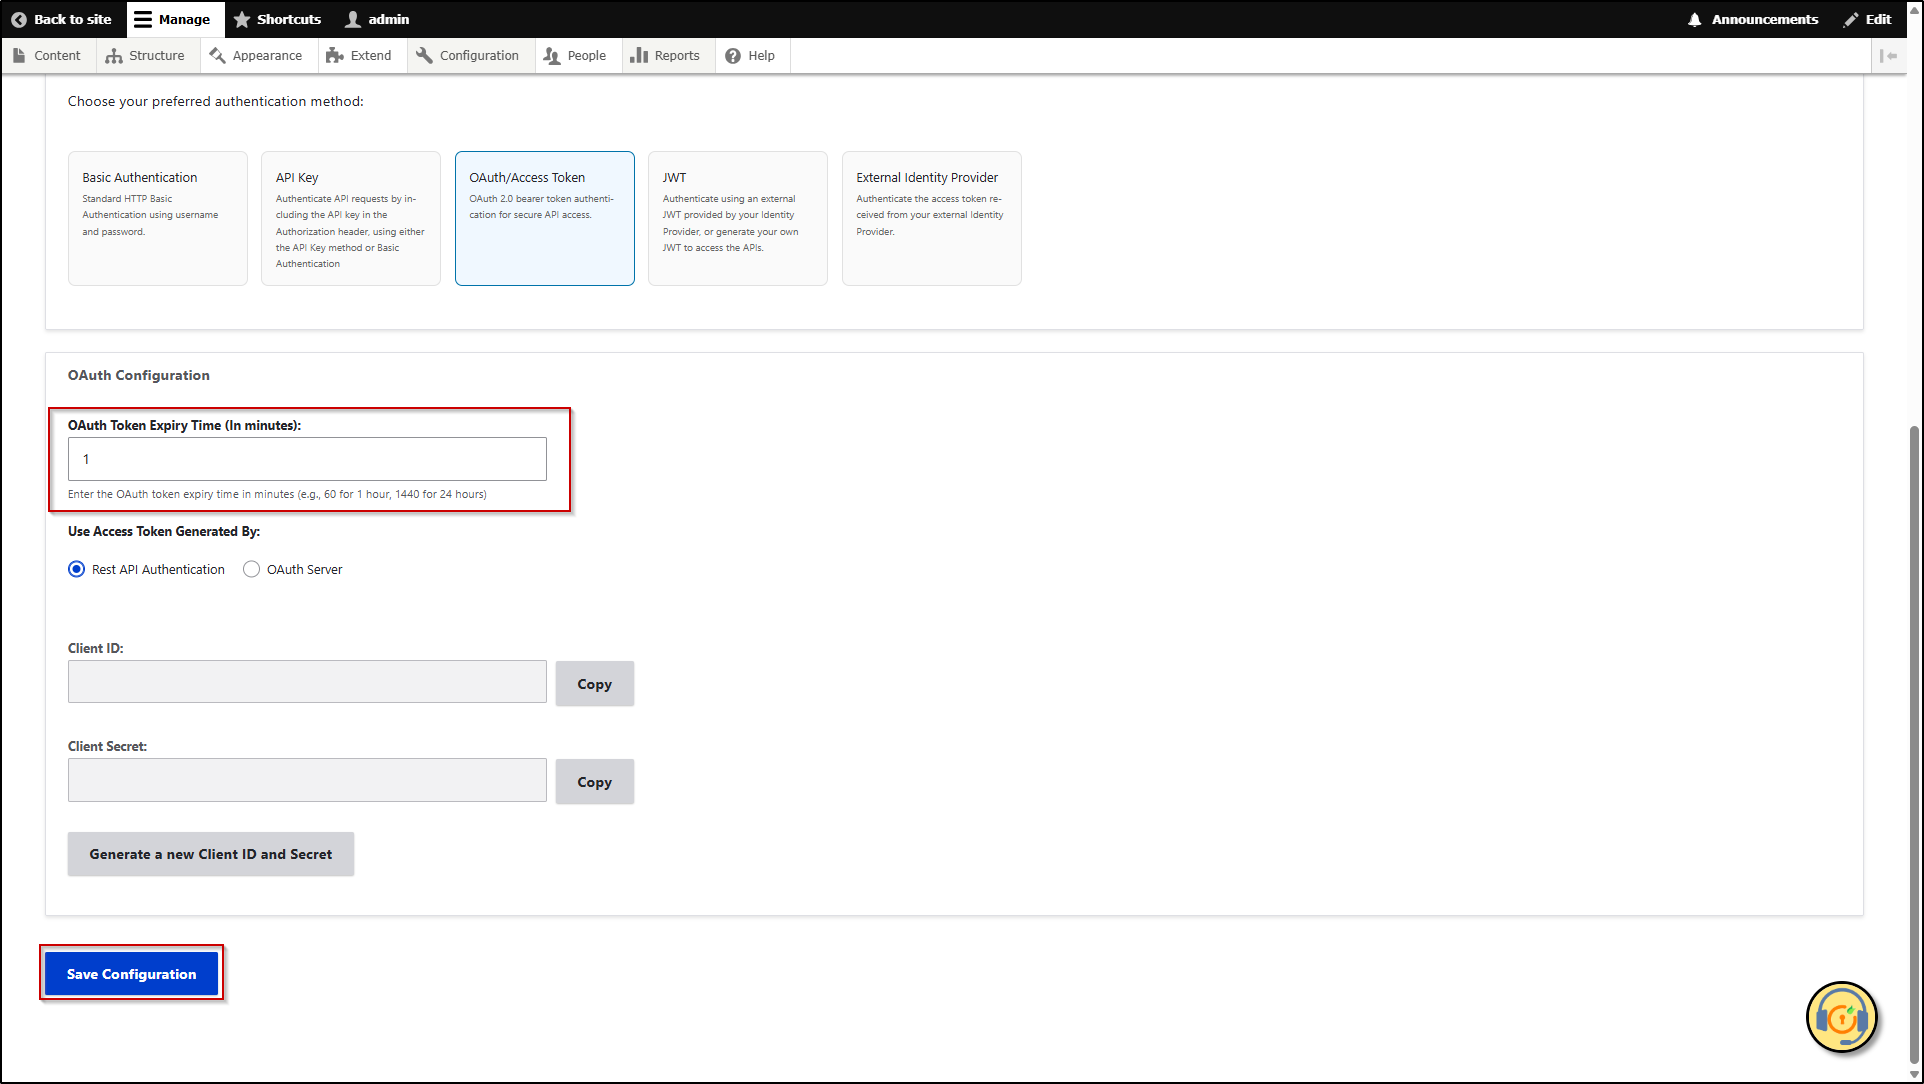
This feature is only compatible with OAuth/Access Token and JWT authentication methods.
- After installing the module configure it with the OAuth/Access Token or JWT authentication method.
- Here, we will go with OAuth/Aceess Token method.
- After selecting the OAuth/Access Token method, scroll down to the OAuth Configuration section.
- In this section, enter the duration (in minutes) in the OAuth Token Expiry Time field. The token will expire automatically after the specified time.
- Click the Save Configuration button.
Congratulations! You've successfully configured the Token Expiry feature.
3. Allow & Restrict IP Addresses
The Allow & Restrict IP Addresses feature enhances API security by controlling access based on IP addresses. It allows interaction only from trusted IPs or blocks specified IPs. This ensures that only authorized systems can use the APIs.
Let’s configure Allow & Restrict IP Addresses Feature
- After installing the module configure it with the desired authentication method.
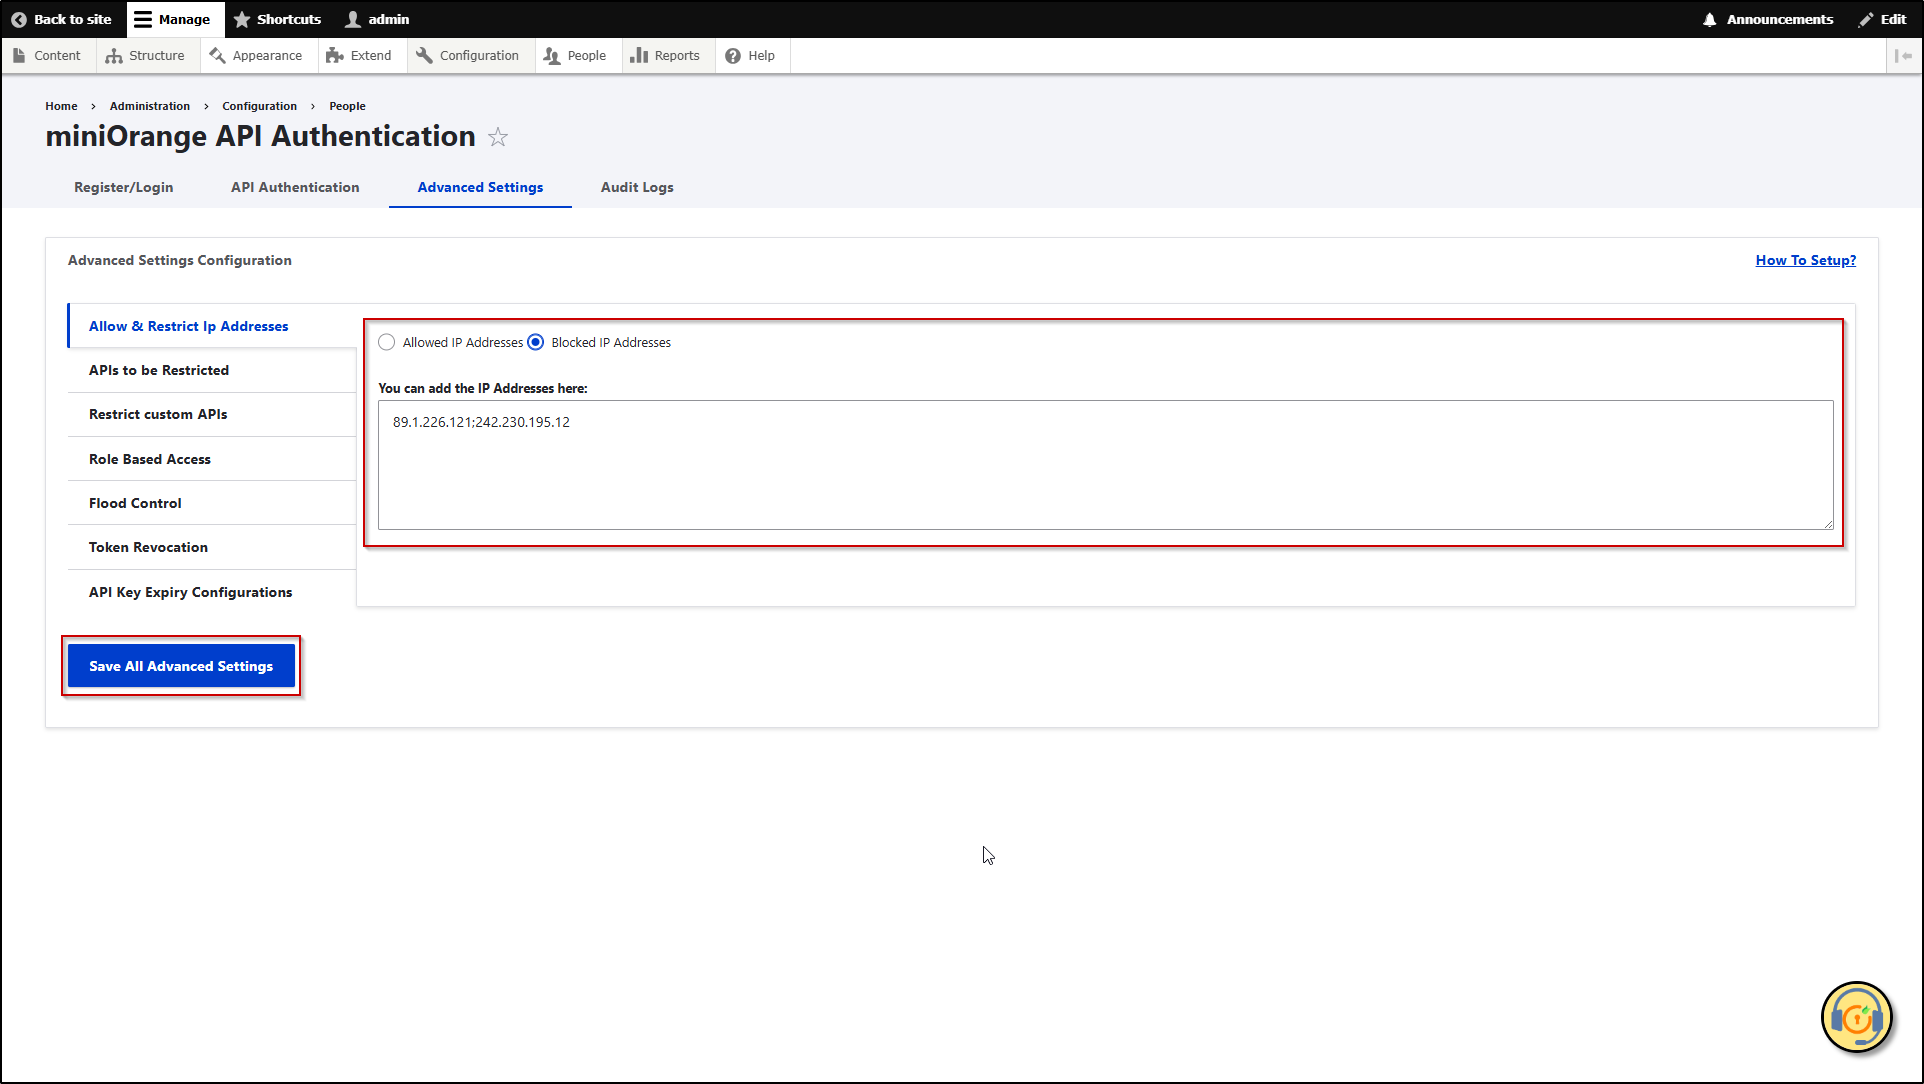
- Once the module is configured then, navigate to the Advanced Settings tab.

- In the Allow & Restrict IP Addresses section. Choose the action you want to apply from either Allowed IP Addresses or Blocked IP Addresses.
- Enter the IP address into the You can add IP Addresses here text field. Multiple IP addresses can be added by separating with the Semicolon (;).
- Click on the Save All Advanced Settings button.
The Allow & Restrict IP Addresses feature has been successfully configured.
4. APIs to be Restricted
The APIs to be Restricted feature controls access to specific APIs, such as JSON APIs, RESTful APIs, and any custom APIs. It enforces security by authenticating the APIs.
Let’s configure APIs to be Restricted Feature
- After installing the module configure it with the desired authentication method.
- Once the module is configured then, navigate to the Advance Settings tab.
- In the APIs to be Restricted section, select the type of API you want to restrict by enabling the checkbox. While making any API request, ensure that the format for both JSON and REST APIs matches the format mentioned in the module.
- Click on the Save All Advanced Settings button.
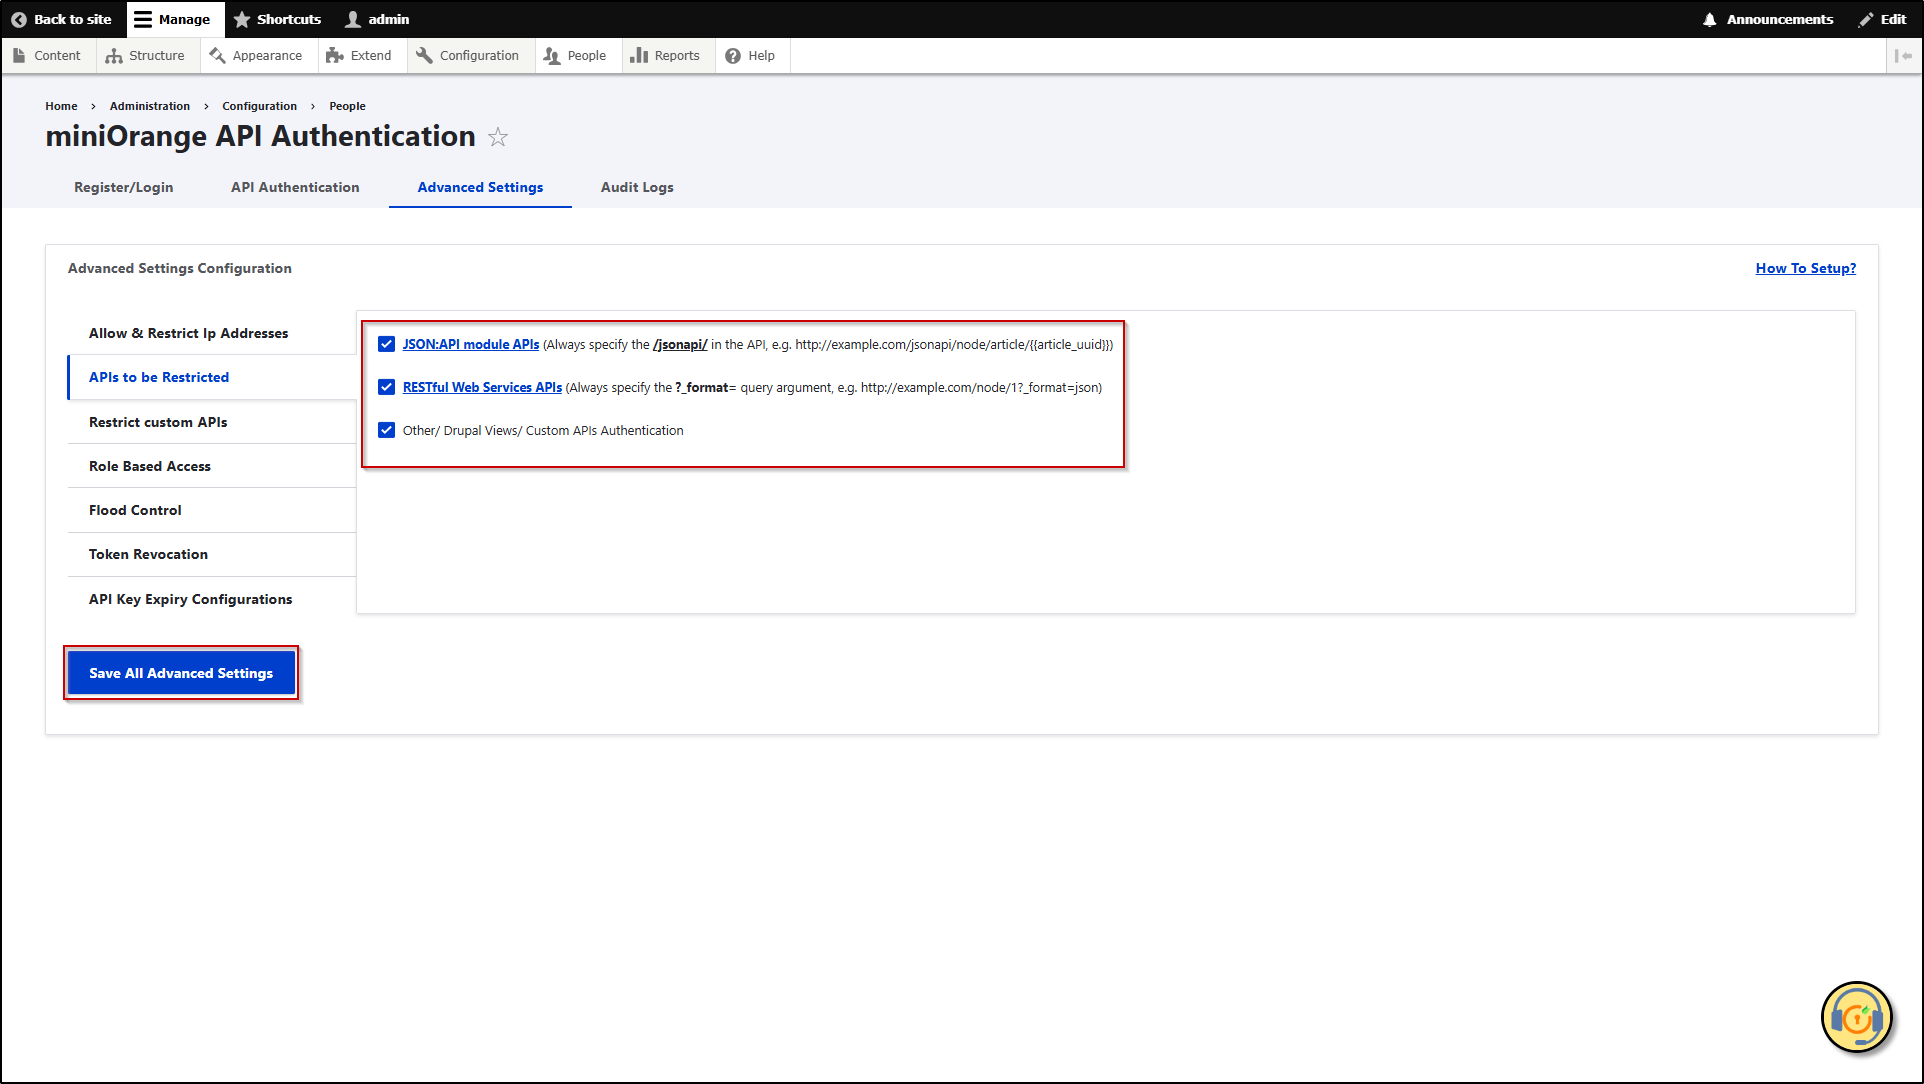
The APIs to be Restricted feature is successfully configured.
Help improve this page
You can:
- Log in, click Edit, and edit this page
- Log in, click Discuss, update the Page status value, and suggest an improvement
- Log in and create a Documentation issue with your suggestion
