Configuration
For general information on how to install a module, see the Installing modules instructions.
- Go to
admin/config/content/insert(via admin menu: Manage → Configuration → [Content Authoring] Insert module) to configure the module - Make sure the text formats you want to use the module with do not strip HTML tags and attributes required by the Insert module to work properly. You can either:
- Disable the Limit allowed HTML tags and correct faulty HTML filter, which you should only do if there is restricted access to using the text format.
- Edit the Allowed HTML tags of the Limit allowed HTML tags and correct faulty HTML filter manually, which is possible only when CKEditor is not used as text editor for the text format, e.g. using plain text areas for editing.
- Activate the Insert module CKEditor plugin as described in the section below.
- Editing your content type, go to the Manage form display tab (
admin/structure/types/manage/article/form-display, via admin menu: Manage → Structure → Content types → <Content type name> → select Manage form display from the drop-down menu). Configure your file or image widget by clicking the cog button in the corresponding field's line. Clicking on the collapsed field set labelled “Insert” expands the Insert widget settings. After adjusting the settings, finally click the Save button at the bottom of the page. - You probably also want to hide the actual field output making images (or files) show up inline only: Having switched to the content type's Manage display tab, click on the four-arrow handle to the left of the field's row, drag and drop it down below the Disabled heading and save the altered display configuration.
Additional considerations
Enabling support for required HTML when using CKEditor
For proper functionality, some HTML tags an attributes need to be allowed.
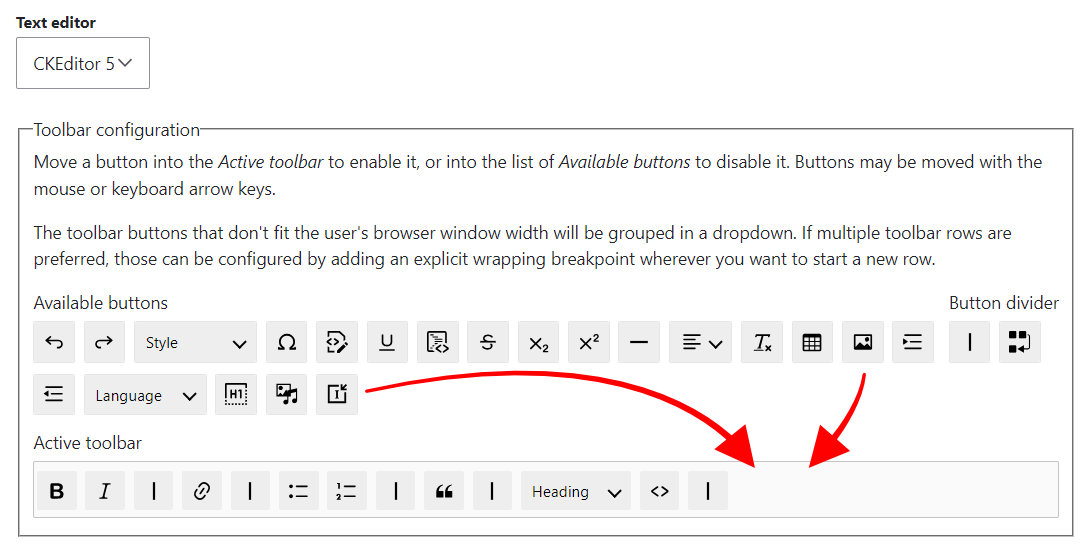
Having the Limit allowed HTML tags and correct faulty HTML filter enabled on a text format, specific tags and attributes are stripped from HTML input and output. Yet, for proper functionality of the Insert module, some tags (<img>, <a>, <span>) and attributes on those tags need to be enabled. As for text formats using CKEditor, you can have the Insert module automatically add required tags and attributes to the text format configuration per the CKEditor plugin provided by Insert. To do so, via /admin/config/content/formats, go to the text format's settings page, which you want to enable Insert module support for. There, drag the Insert module's CKEditor plugin button from the Available buttons into the Active toolbar. If you have not done so already, you will also need to activate Drupal core's Image plugin.
Loading Colorbox JS and CSS when using insert_colorbox
The Colorbox module provides a field formatter that attaches JS and CSS libraries to every page the formatter is used on. However, when not rendering a field using the Colorbox field formatter, those libraries are not loaded by default, and it's not possible for insert_colorbox to determine when to load the libraries. Therefore, you need to make sure to load the Colorbox libraries.
As an alternative to implementing a theme function attaching the libraries, you can use the practical approach of rendering the image field the Insert module is enabled on (that is not disabling it on the Manage display tab of the content type configuration), while having the Colorbox formatter assigned to the field. This will ensure the Colorbox libraries are loaded.
However, you will need to hide the actual field output by either providing your own CSS to hide the field output or by specifically overriding the field template in your theme to render nothing. For the latter, you want to either create a custom template for the field (so its output is hidden on every page) or for the field on a specific content type. Depending on the choice, in your <theme>/templates folder, create a field--node--<field>.html.twig or a field--node--<field>--<content type>.html.twig file (real-world examples: field--node--field-image.html.twig or field--node--field-image--article.html.twig) and leave those files just plain empty. (Remember to clear the cache after adding the files.)
Help improve this page
You can:
- Log in, click Edit, and edit this page
- Log in, click Discuss, update the Page status value, and suggest an improvement
- Log in and create a Documentation issue with your suggestion
