Setup Drupal Microsoft Entra ID - Azure Synchronization
Last updated on
15 October 2025
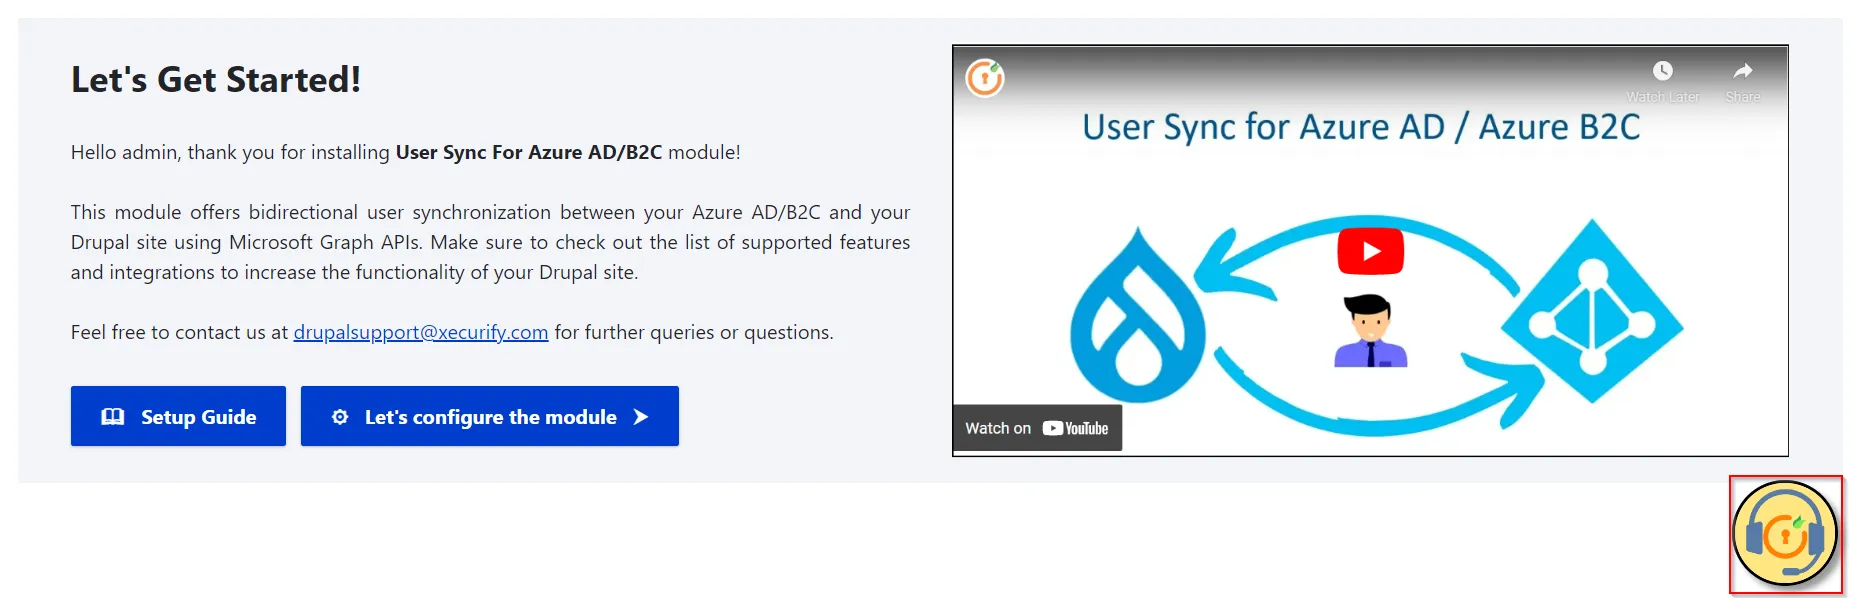
This document will assist you to configure user sync and provisioning between the Drupal site and Microsoft Entra ID, which means that user information gets provisioned/de-provisioned from the Drupal site to Microsoft Entra ID - Azure AD and vice versa using the miniOrange Azure Sync and Provisioning module. The module is compatible with Drupal 8, Drupal 9, and Drupal 10.
Check out the Installation steps:
Contact our 24*7 support team
Feel free to reach out to our Drupal experts if you need any sort of assistance in setting up Drupal Microsoft Entra ID - Azure Sync And Provisioning module on your Drupal site.
Setup Drupal:
- In the Configuration tab, click on the miniOrange Azure AD Sync option or navigate to the {Drupal-Site-URL}/admin/config/people/azure_ad/overview.
- Click on the Let’s configure the module button.

Setup Azure AD:
- Sign in to the Azure portal.
- Click on the Azure Active Directory from the Azure services.
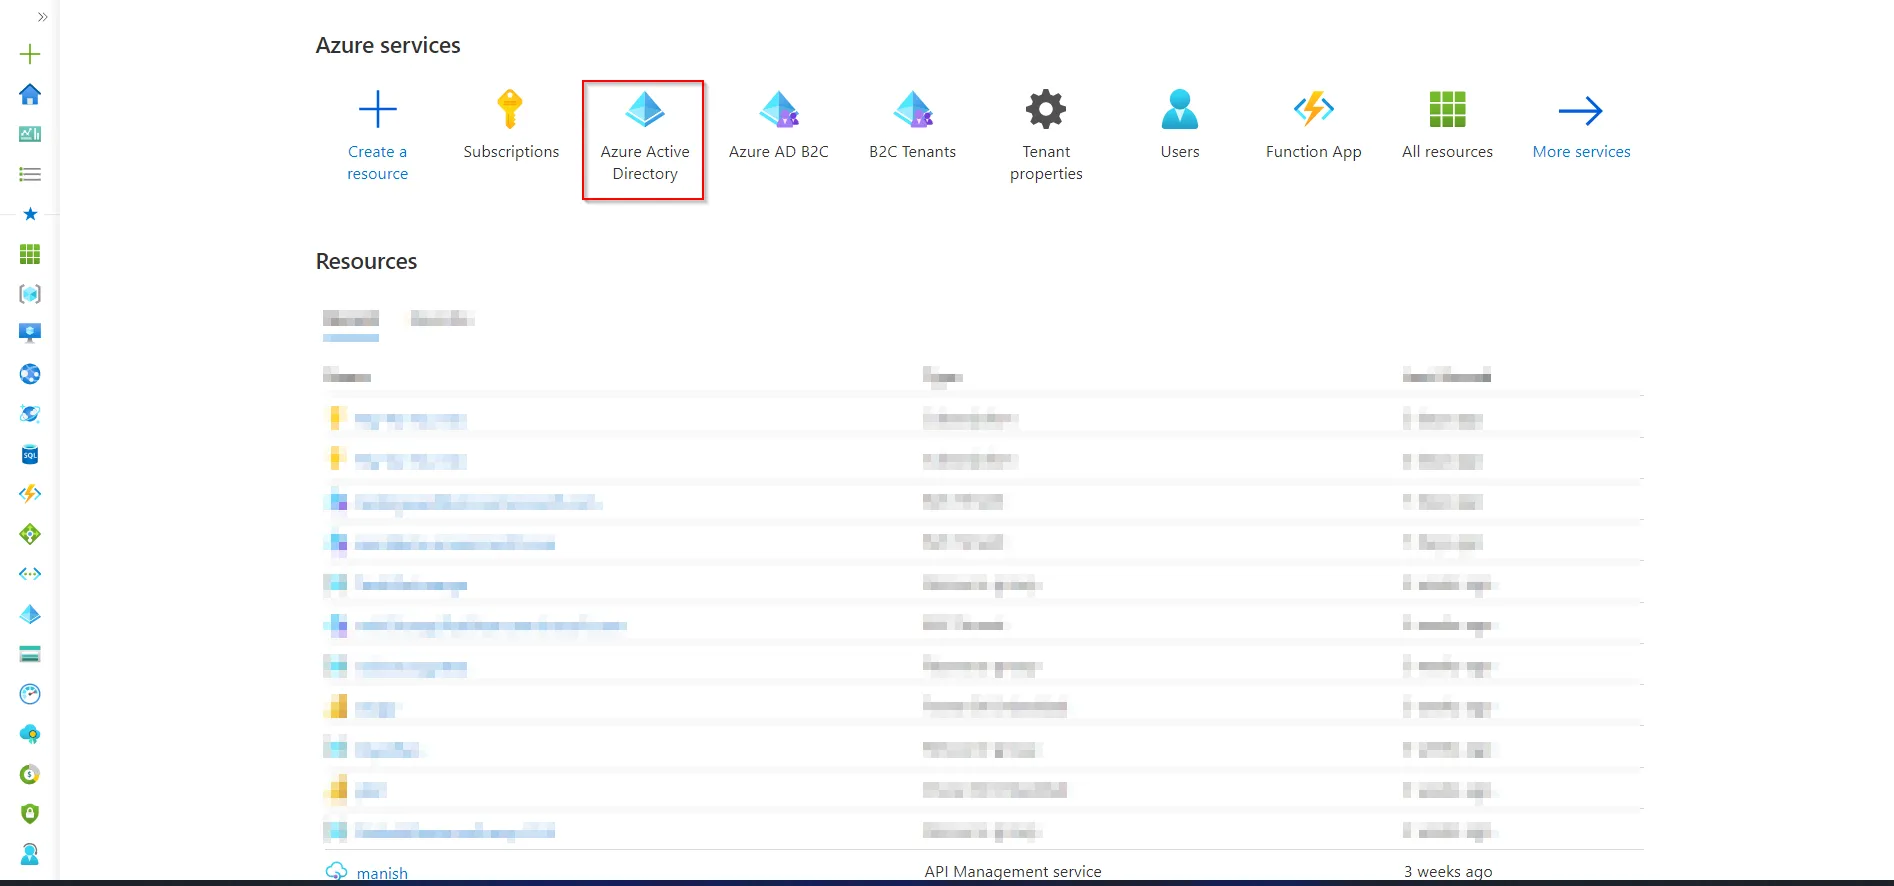
- From the left navigation panel, click on the App registrations, and then click on the New registration button.

- On the Register an application page, please enter the information based on the instructions mentioned below:
- Name: Display name of the application.
- Supported account types: Select one of the listed options as per your choice. You can also refer to Help me choose option if needed.
- Click on the Register button.

Add API Permissions to your Azure AD Application:
- Go to API Permissions from the left navigation panel and click on the Add a permission button.

- Select Microsoft Graph under the Microsoft APIs tab and then select Application Permissions.
- In the Select Permission search bar, search for the user.

- Scroll to the end and under the User section, select User.ReadWrite.All permission. Then, click on the Add permissions button.

- Click on Grant admin consent for <Default Directory> and click on the Yes button to grant admin consent confirmation.

Integrating Drupal with Azure AD:
- Now, navigate back to the Drupal site.
- In the Azure App Configuration step (STEP 1), you will have to configure the below-mentioned values from the Azure AD into Drupal.
Tenant ID:
- From the Overview section of the Azure AD Application, copy the Directory (Tenant) ID value.
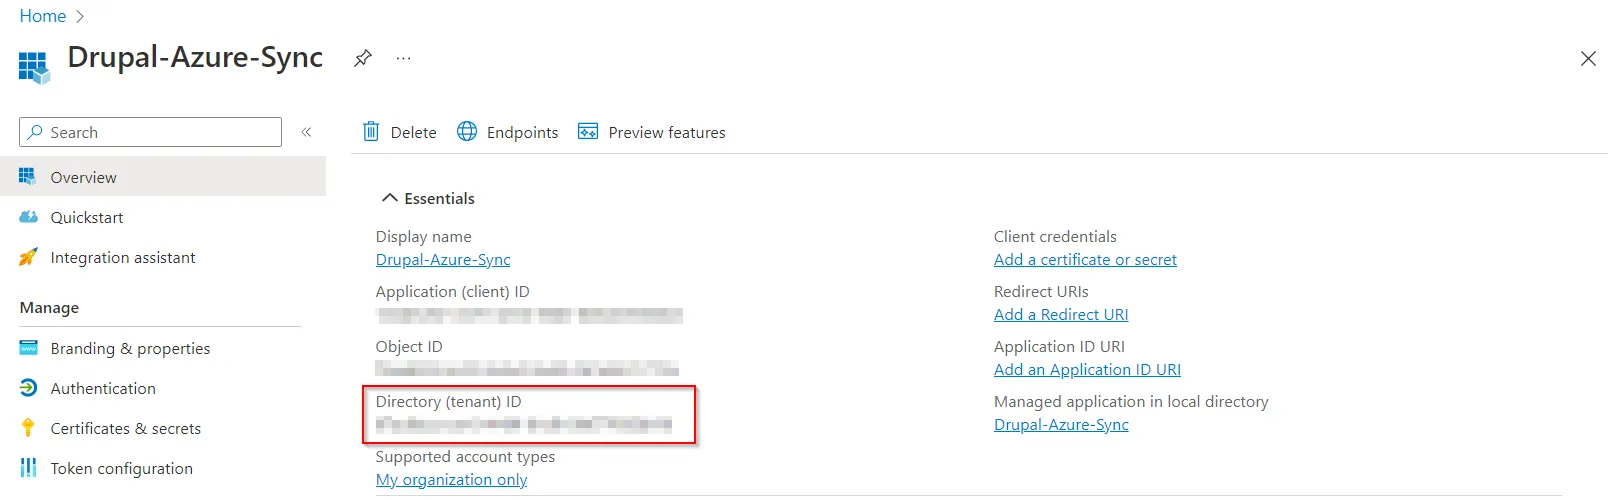
- Paste the copied Tenant ID into Drupal’s Tenant ID text field.
Application (Client) ID:
- From the Overview section of the Azure AD Application, copy the Application (client) ID value.

- Paste the copied Client ID in the Drupal’s Application (Client) ID text field.
Client Secret:
- From the left navigation panel, click on the Certificates & secrets menu and click on the New client secret button.
- Add a description for the secret and select the expiry of the secret.
- Click on the Add button.

- Now, copy the Secret Value.

- Paste the copied Secret value in Drupal’s Client Secret text field.
Tenant Name/Primary Domain:
- In the Azure Portal, hover over your profile (top right corner) and note down the Domain mentioned in the pop-up box.

- Type in the noted Domain value in Drupal’s Tenant Name/Primary Domain text field.
Test UPN/ID:
- Navigate to the Azure AD and click on the Users menu from the left navigation panel.
- Copy your user’s User Principal Name to test out the integration of Drupal and Azure AD.
- Paste the copied User Principal Name in Drupal’s Test UPN/ID text field.

- Once done with all the Configurations, click on the Save and Test Configuration button.
- If the Test Configuration is successful, you will receive a success message like the following:
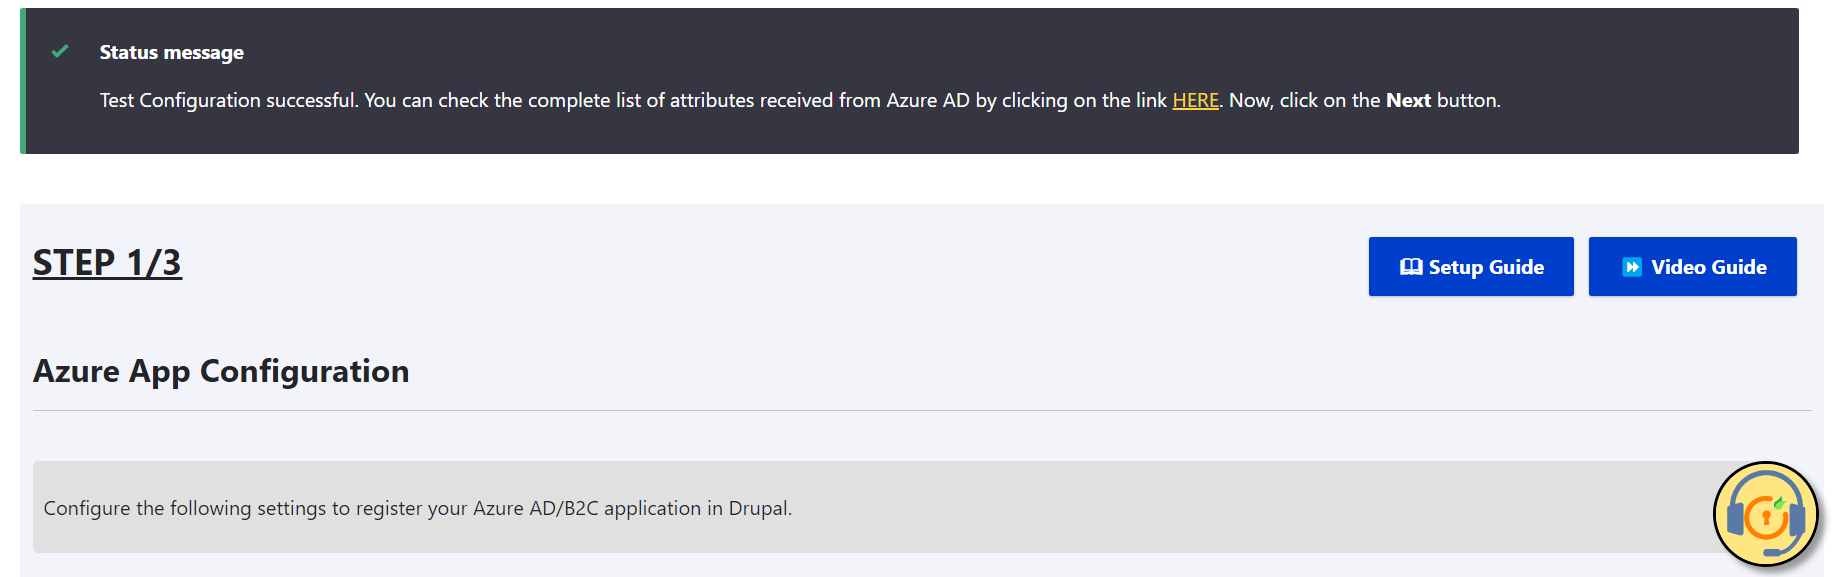
- If you want, you can click on the link in the success message to check the attributes received from Azure AD.
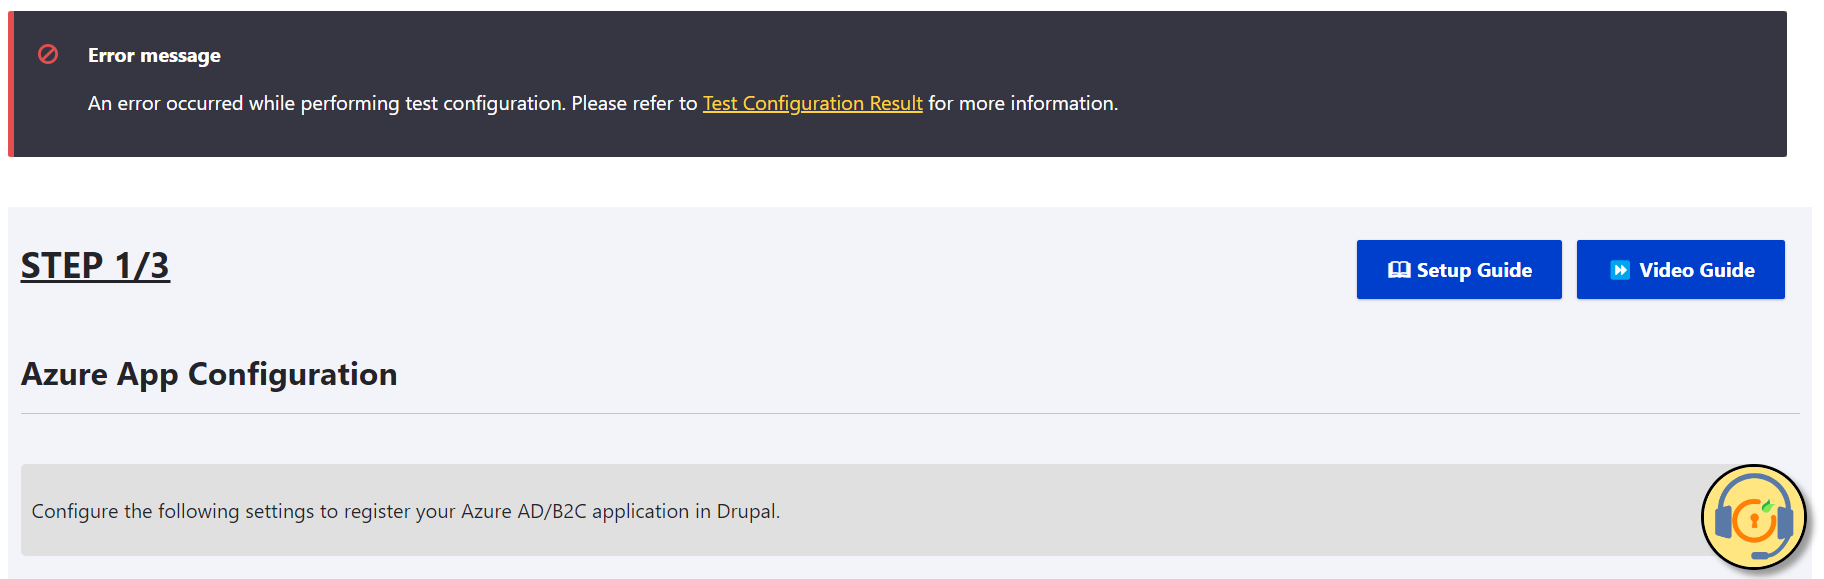
- Alternatively, if there is an error in the integration of Azure AD with Drupal, then you can check the cause of the error by following the link in the error message or scrolling down to the Test Configuration Result section.
- Once the integration is successful, click on the Next button.
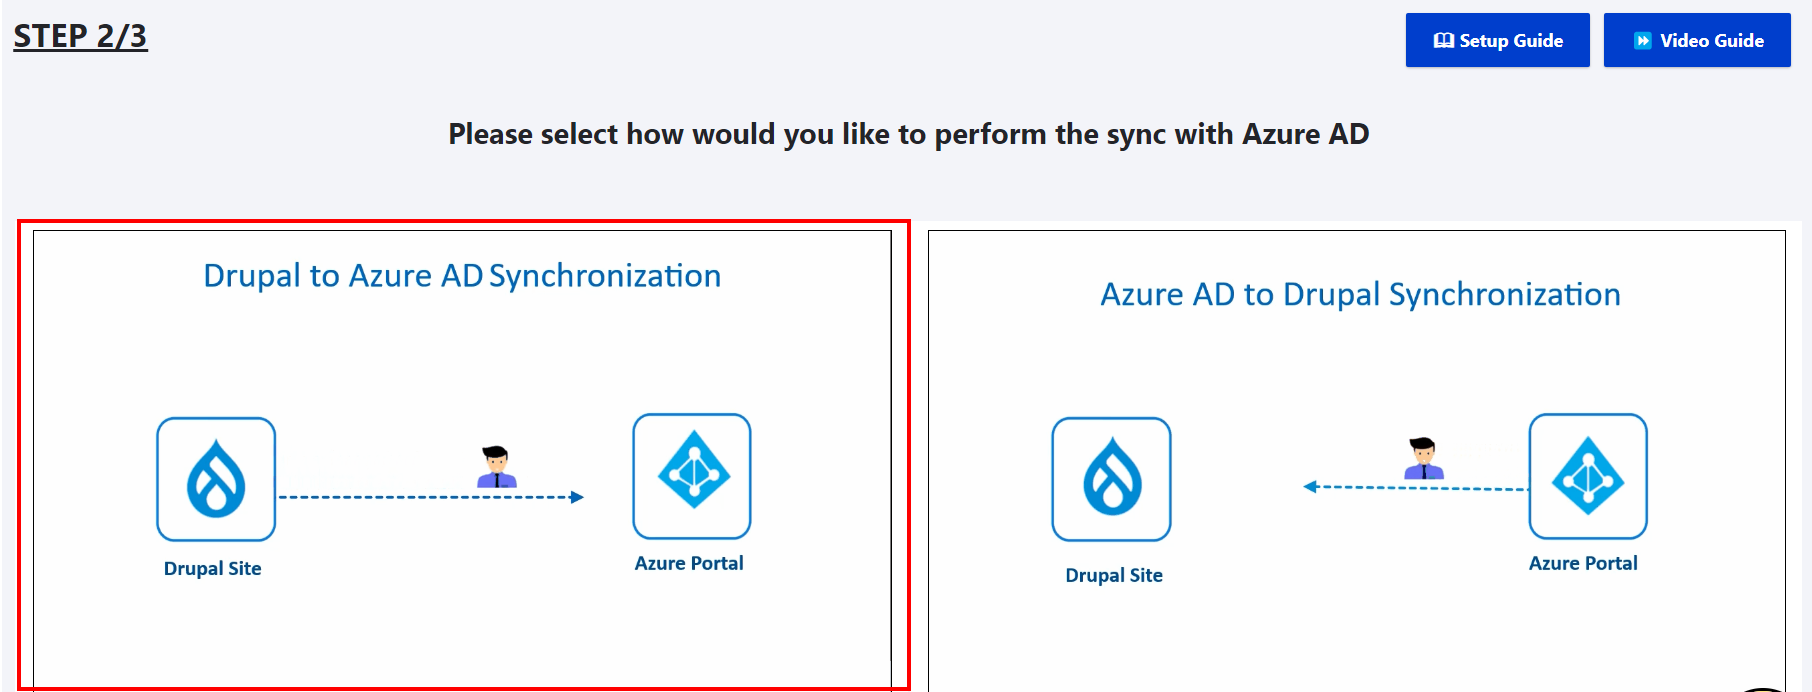
- In STEP 2, You can select how you would like to perform the Sync. For Drupal to Azure Sync, click on the first (left) GIF.
Provisioning / Synchronization:
- In STEP 3, you can choose the method to provision the user.
Manual/On-demand Provisioning:
- This method allows you to automatically create a new user in Azure AD.
- Click on the Configure button of the Manual/On-Demand Provisioning section.

- Under the Manual Provisioning Configuration section, check the checkbox of Create User and click on the Save button.

- Once saved, you can find the Sync Users section.
- In the search field, you can enter the username of Drupal’s user and then click on the Sync button.

- If the provisioning is successful, you will receive the following status message:

- Alternatively, if there is an error in provisioning the user account to Azure AD, you can check the cause of the error by following the link in the error message.

Automatic Provisioning:
- This method allows you to automatically create a new user in Azure AD once the account is created in Drupal.
- Click on the Configure button of the Automatic Provisioning section.

- Under the Automatic Provisioning Configuration section, check the checkbox of Create User and click on the Save button.

- Now, you can try to create a new user on the Drupal site and check the logs by navigating to Reports -> Recent log messages and using the user_provisioning filter.
Support / Contact US:
- If you have any questions or queries related to the Drupal Azure Sync module, you can reach out to us by clicking on the support icon present in the bottom right corner.

Help improve this page
Page status: No known problems
You can:
You can:
- Log in, click Edit, and edit this page
- Log in, click Discuss, update the Page status value, and suggest an improvement
- Log in and create a Documentation issue with your suggestion

