Embedding media with CKEditor 4
This documentation is deprecated.
Specific version(s)
These instructions are for Drupal 8.8.0 up to 9.5.x — since Drupal 10.0.0, CKEditor 4 is no longer supported in core, and is replaced by CKEditor 5. See CKEditor 5 page.
This page explains how to set up a text editor so that it can access the media library and use it to embed media in your content. If you have not already installed Media Library, see the Overview page for instructions.
To make the media library available to a text editor, you must configure the text format associated with the editor. See the Filter module documentation for more information on text formats and how to configure them.
Setting up media embedding in CKEditor
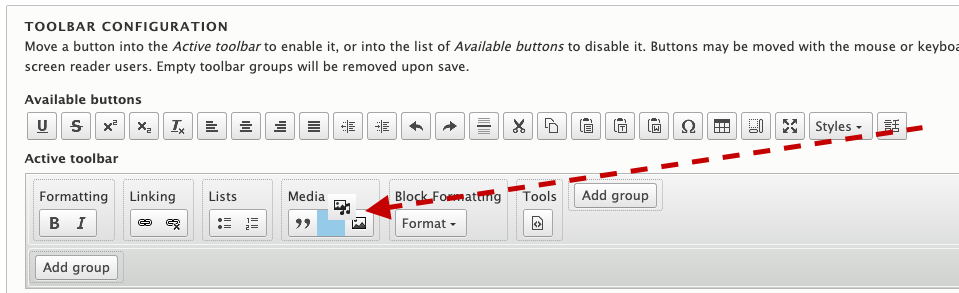
When configuring a text format that uses CKEditor, you should see this button for the media library, under "Available buttons" in the "Toolbar configuration" section of the page: ![]()
You can drag and drop that button into the active toolbar to add it to CKEditor (into any group of buttons, not just "Media"):
Having done that, you will also need to enable the "Embed media" filter, which actually allows media to be embedded in the editor:
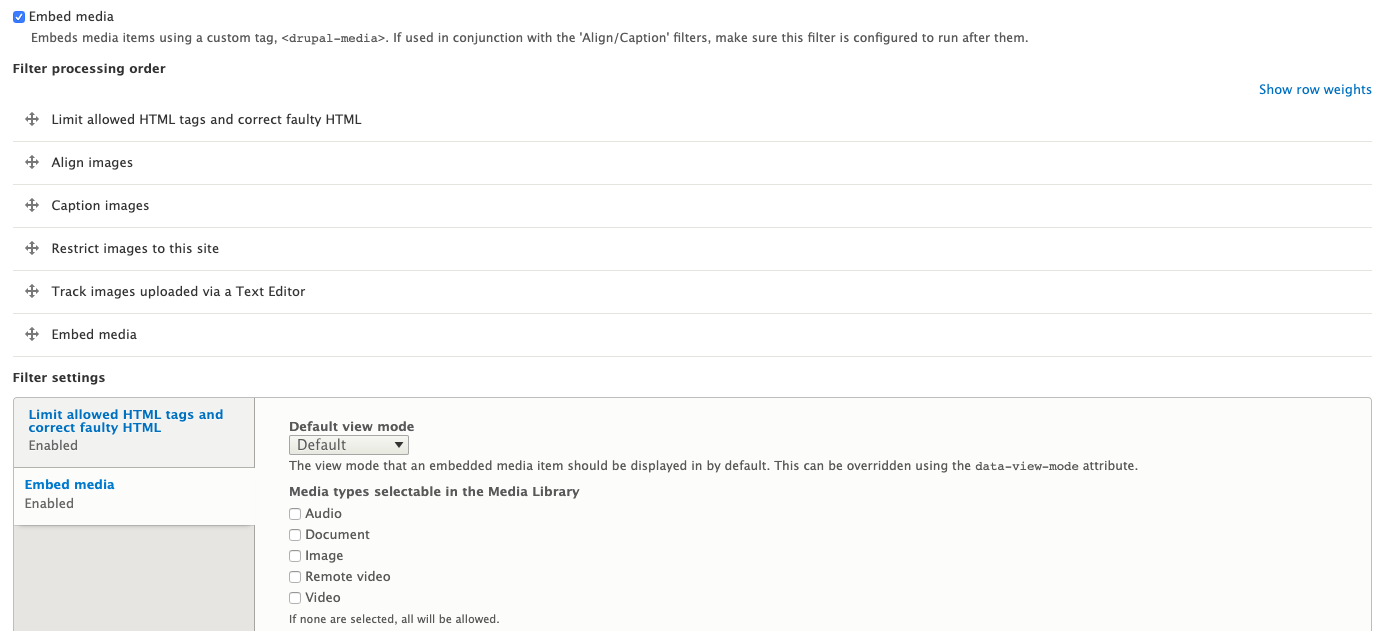
It's important to note that the "Embed media" filter must be placed after the "Limit allowed HTML tags and correct faulty HTML" filter, and -- if you're using them -- it must also be placed after the "Align images" and "Caption images" filters. In most cases, placing "Embed media" at the end of the filter processing order will be sufficient.
Additionally, if you have the "Limit allowed HTML tags and correct faulty HTML" filter enabled, you must ensure that the drupal-media tag also allows the alt, title, data-align, data-caption, data-view-mode, data-entity-uuid and data-entity-type attributes in order for the "Alternate text", "Title text", "Align", "Caption", and "Display" options, respectively, to appear in the "Edit media" dialog. For example:
<drupal-media data-entity-type data-entity-uuid data-view-mode data-align data-caption alt title>So, to recap, all you need to do to enable embedding media in CKEditor is:
- Drag the Media Library button into your CKEditor toolbar.
- Enable the "Embed media" filter and place it after all the other filters.
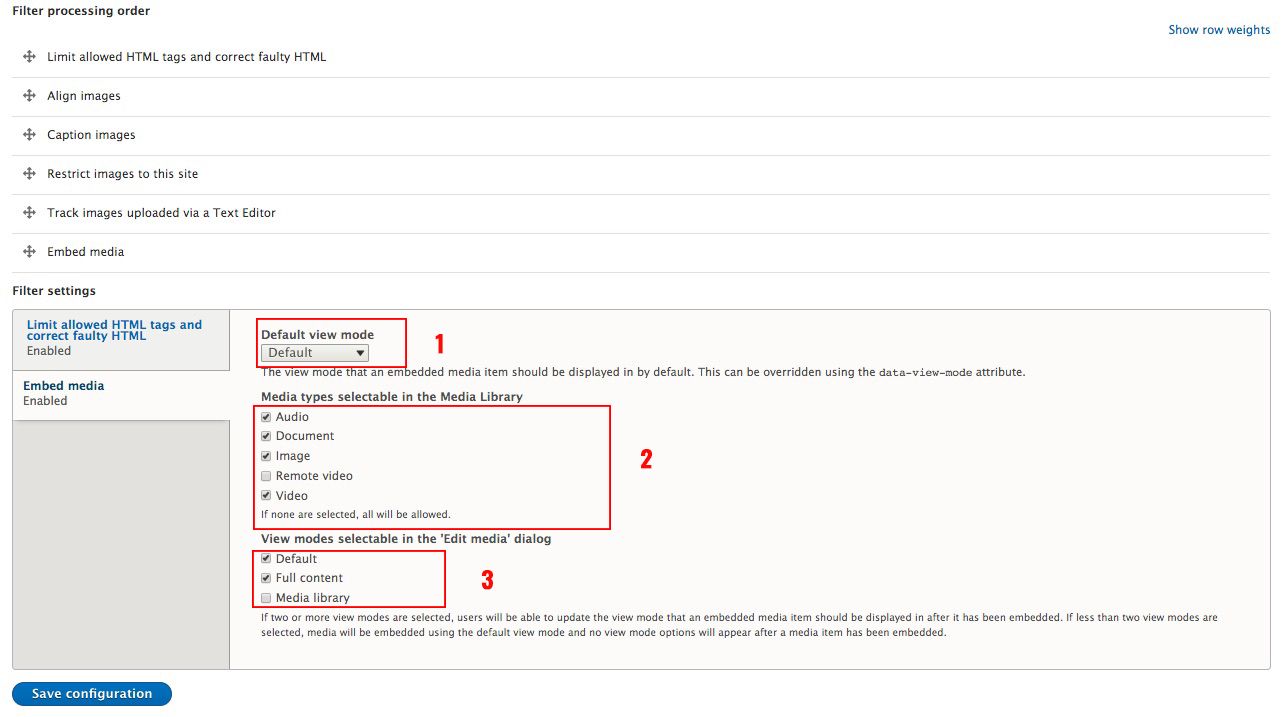
Optionally, you can tweak a few additional settings for the "Embed media" filter:
- Default view mode: This indicates the view mode configuration of the inserted media item, in other words, the way the media will be displayed on the front end.
- Media types selectable in the Media Library: This allows you to only offer certain media types in the Media Library selection interface.
- View modes selectable in the 'Edit media' dialog: These selections will create a drop-down field in the "Edit media" modal dialog (see second image below) and determine which view modes are available as select options.

Embedding media in CKEditor
When using CKEditor to edit content, you can access the media library if the text format you're using has been configured as described above. Clicking the Media Library button will pop the media library up in a modal, and you can interact with it exactly as you would with a media reference field.
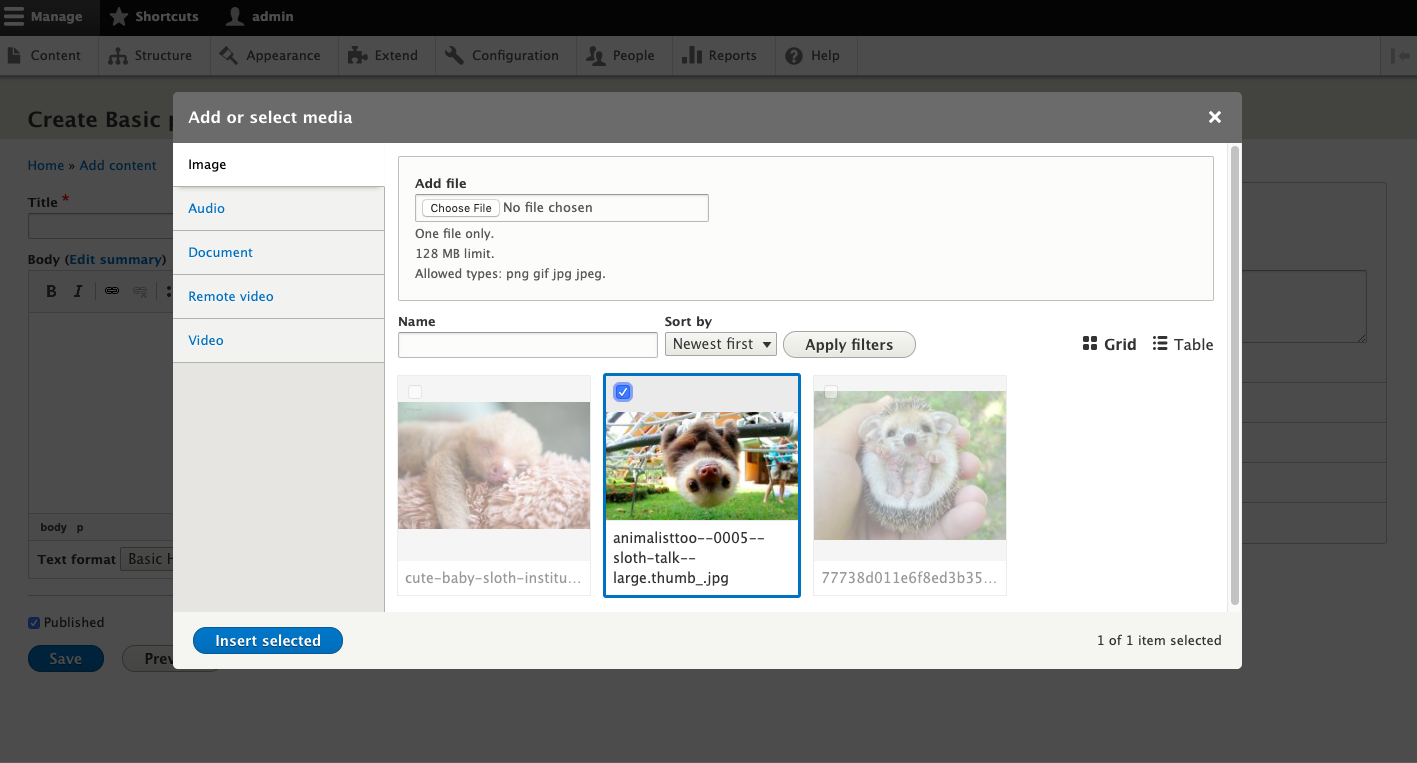
One major difference is that, when embedding media into an editor, you can only select (or add) one item at a time.
When you have finished with the media library, the media item you've embedded will appear in the editor as a live preview:

It's important to note that this preview is an approximation of what the embedded media will look like, not an exact representation. Exactly what the preview will look like depends on the media's type and the way your site is configured, but it may not have all the functionality you expect. For example, with the help of certain contributed modules, it may be possible to embed a tweet into the editor; yet, in the editor, you may just see a thumbnail or placeholder for the embedded item. That is because the preview is a placeholder, not the real thing. When the embedded media is displayed to your site's visitors on the front end, it will look correct and complete, and work as you expect it to. But inside the editor, it may differ.
You may edit each media item using the edit link illustrated above, which allows you to override alt text, set alignment options, and optionally add a caption.
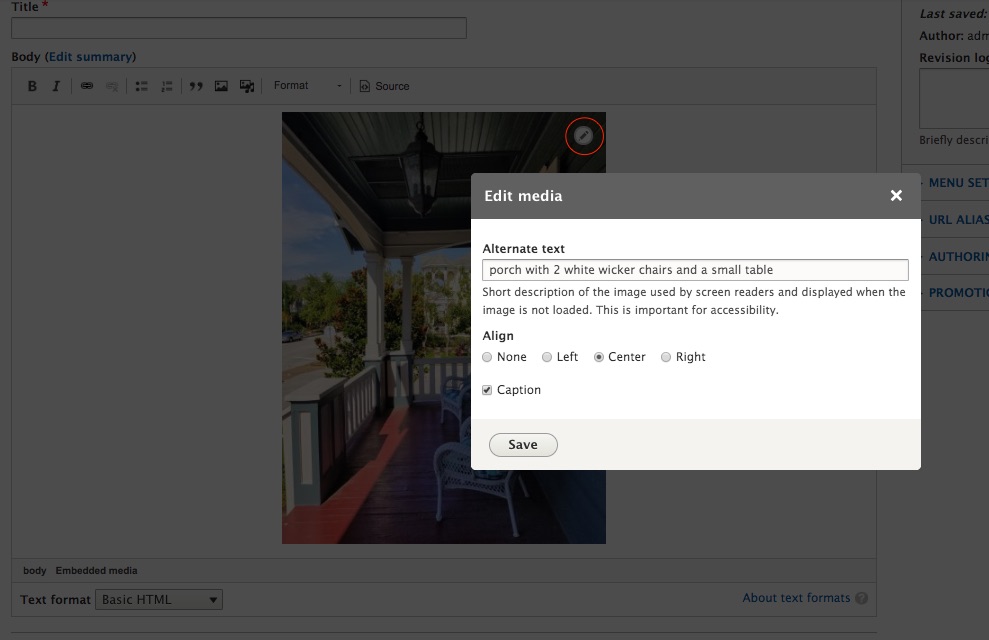
If you choose to add a caption, you will see an available field after saving the above options.

Note that the contents of the "Edit media" dialog will vary depending on how the text format is configured and the type of media you're embedding. For example, you must have the "Align images" filter enabled to see the alignment options. Similarly, you must have the "Caption images" filter enabled in order to create a caption. The "Alternate text" field only appears if you're embedding media that supports alt text (usually an image). The overall rule of thumb is that the "Edit media" dialog will only show options you can actually use, given the type of media you're embedding and the way the text format is set up.
Customizing the Edit Embedded Media form
Please note: this technique is not officially supported by Drupal core. It may break in minor releases.
If you need to add extra fields to the Edit form, such as manually entered classes; options to hide on mobile; and so forth, you can do this in the following way.
First, implement hook_form_FORM_ID_alter() for the editor_media_dialog form in a custom module or theme. Here's an example of adding a text field to allow extra CSS classes and an extra data-attribute option to the rendered output.
use Drupal\Core\Form\FormStateInterface;

/**
 * Implements hook_form_FORM_ID_alter().
 */
function MY_MODULE_form_editor_media_dialog_alter(array &$form, FormStateInterface $form_state) {
  if (isset($form_state->getUserInput()['editor_object'])) {
    $editor_object = $form_state->getUserInput()['editor_object'];
    $media_embed_element = $editor_object['attributes'];
  } else {
    // Retrieve the user input from form state.
    $media_embed_element = $form_state->get('media_embed_element');
  }

  $form['extra_classes'] = [
    '#title' => t('Extra Classes'),
    '#type' => 'textfield',
    '#step' => '1',
    '#default_value' => empty($media_embed_element['class']) ? '' : $media_embed_element['class'],
    '#parents' => ['attributes', 'class'],
  ];
  $form['data-my-data'] = [
    '#title' => t('Extra Data Attribute'),
    '#type' => 'textfield',
    '#step' => '1',
    '#default_value' => empty($media_embed_element['data-my-data']) ? '' : $media_embed_element['data-my-data'],
    '#parents' => ['attributes', 'data-my-data'],
  ];
}
After enabling your new module and clearing all caches, you should see two new fields in the Edit Media dialog box.
Note the #parents property. This ensures that the extra attributes will be added to the drupal-media tag, e.g.:
<drupal-media class="MY-EXTRA-CLASS MY-EXTRA-CLASS2" data-align="right" data-entity-type="media" data-entity-uuid="f060a7bd-a588-43c6-84d4-be7c1ff0167d" data-my-data="MY-VALUE-HERE"></drupal-media>Make sure to add any extra attributes to the relevant format, so that they won't be removed by the HTML filter. You can do this in the same way you need to add the standard extra attributes for embedded media.
These extra attributes will be added to the Attributes object when the embedded media is rendered. They can be retrieved from the Attributes object during processing.
Some examples of this are:
The class attribute: you probably don't need any more code. Normally this gets passed along to the standard template for embedded media.
The data-my-data attribute, you can deal with in either the appropriate preprocess function, or directly in the relevant Twig template (e.g. media--image.html.twig), like:
{% if attributes['data-my-data'] %}
  {# do stuff #}
{% endif %}
Help improve this page
You can:
- Log in, click Edit, and edit this page
- Log in, click Discuss, update the Page status value, and suggest an improvement
- Log in and create a Documentation issue with your suggestion
