
Installation
- Download and extract the module
- Add the php-encryption library using composer or Composer manager.
- For composer - from your Drupal installation directory run
composer require "defuse/php-encryption:~1.2. - For Composer manager, refer to its documentation
- For composer - from your Drupal installation directory run
Getting started
To get started sending content between your Drupal 8 sites, sign up for an account.
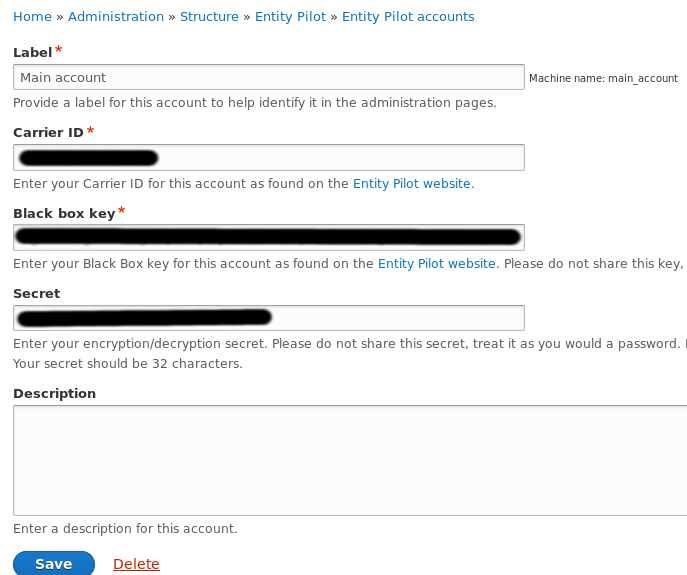
Once you've installed the module on the Drupal 8 sites you wish to share content between, create an Entity Pilot account on each site and enter the Black Box key and Carrier ID you received during checkout. If you didn't write them down, you can login to your account and retrieve them from the Licenses tab.
Next, create a secret key on one of your sites and copy it to the other site(s). The Entity Pilot module uses this key, along with the best of breed PHP Encryption library to encrypt your content before sending it to your personal content repository. You can have the module generate an appropriate random key for you, but make sure you use the same key on both sites, otherwise the receiving site won't be able to decrypt your contents. Because your key is never shared outside your own network of sites, your content is safe and secure.
Sending your first departure
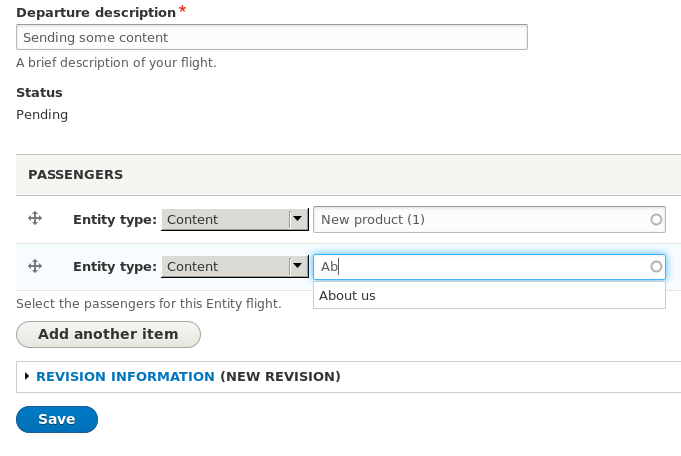
Sending content to Entity Pilot is done by creating a new departure on the sending site. Give the departure a name so you can recognise it at the other end and use the Passengers field (powered by Dynamic Entity Reference) to add the items of content you wish to send. You can send any content-entity.
Don't worry about adding dependencies, these are automatically detected for you. For example if you're sending a piece of content (node) that contains an image field and a term reference field, the departure will automatically add the image file entity, any tags you reference and the content author to the departure. After saving your departure you're given the opportunity to approve the dependencies it added, so you can always go back and add some more if you forgot to add something. Some limits apply to the size of each flight, but unless you're sending a large number of high-quality images, these shouldn't be a problem.
From the approval screen you're given the choice to 'Approve' (and save for later), 'Approve and Queue' (approve and send in the background) or 'Approve and Send'. Given this is your first flight, you're probably wanting to go with 'Approve and send'. Now wait while your content is encrypted and sent to your personal Entity Pilot content repository. The time this takes will depend on how big your flight is (and in particular how large your image files are) as well as your upload speeds.

Receiving your first arrival
Now you've sent some content to your personal Entity Pilot content repository, its time to import it on another site.
If you are sending content between two versions of the one site, sync your config - syncing config will make sure you get the maximum benefit out of transporting your content between sites.
If your sites don't share the same configuration (e.g. content-types and fields), then enable the Entity Pilot Map Config sub-module and you will be able to map incoming content types and fields into a local compatible fields/bundles as required.
On the receiving site, you should have already created an Entity Pilot account, adding your Black-Box key, Carrier ID and encryption secret as per the sending site.
Now you need to create a new Arrival. This will present you with a list of the flights you've previously sent to your personal Entity Pilot content repository. Select the flight you wish to land (import).
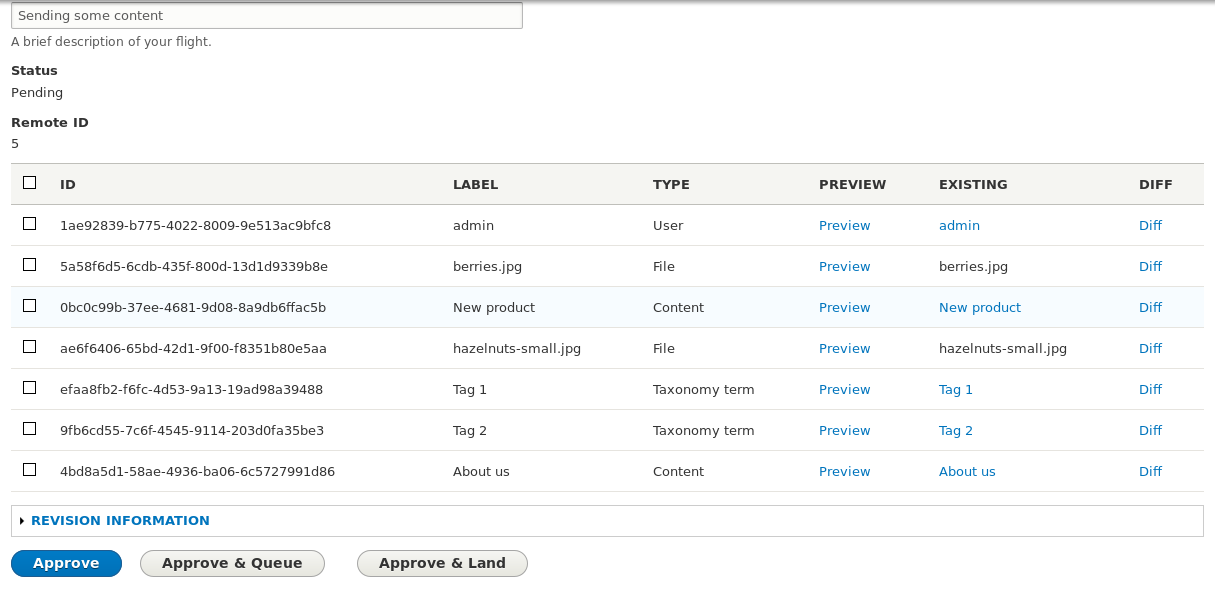
After saving the new Arrival, your site will download and decrypt the contents of your flight from Entity Pilot and present you with the approval screen.

This gives you the opportunity to preview the incoming content, or in the case of existing content - view a diff. After reviewing the incoming content, select the items you wish to import and approve the Arrival. Again you're given three options: 'Approve' (save your selected approvals for later), 'Approve and Queue' (approve and land in the background) and 'Approve and Land'. Again, as this is your first flight, you'll probably want to 'Approve and land'. Wait while the landing is processed and then view your imported content!

| Attachment | Size |
|---|---|
| Screenshot 2015-11-11 20.55.55.png | 46.42 KB |
| Screenshot 2015-11-11 21.04.01.png | 44.24 KB |
| Screenshot 2015-11-11 21.04.30.png | 11.06 KB |
| Screenshot 2015-11-11 21.06.56.png | 12.37 KB |
| Screenshot 2015-11-11 21.07.44.png | 78.79 KB |
| Screenshot 2015-11-11 21.08.48.png | 9.76 KB |


