Using the Local Translator

In TMGMT you can choose the Local Translator to submit a translation job to. During checkout, you can assign the job to a specific user or leave the choice to the translate administrator. Once the job is submitted, close the TMGMT overlay to return to a normal page.

With the Local Translator installed, new links are added to the user menu (top right of the screen in Bartik). Depending on the permissions, the 'Translate' and/or 'Manage Translation Tasks' links will be visible.

Choose the 'Translate' link. You will be presented with an overview of all translation tasks available to you. You can assign the jobs to yourself to proceed with the translation.

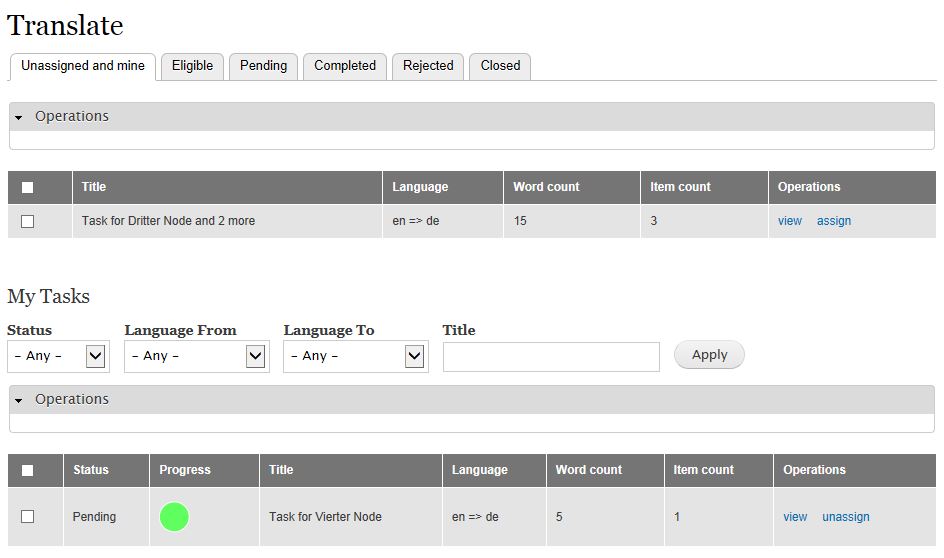
Choose the 'view' link to see the task items available for translation.

When clicking on the 'translate' link, you will (finally) get to the actual translation to be done.

Each data item (Title, Body, fields etc.) has its own pane. When finished with the work, it can be checked off. This is for administrative purposes only and has no influence on your ability to save and complete the task at hand.

Configuration

Languages

Use Locale to add the languages you need. For this, go to Administration > Configuration > Regional and language > Languages and add any language(s) you require.

Content Type Settings

In order to use Translation Management on a Content Type, you must make it language aware. Go to the settings of your content type, choose the Publishing Options and set the Multiligual Support to 'Enabled, with translation'.

A good starting point for testing is to use this setting on the standard content type 'Basic Page'.

Microsoft Translator

To follow this tutorial it is helpful to install the Microsoft Translator. Install and activate this module and a new translator will show up in the list.

To use it you need to obtain a client ID from Microsoft. This is free as long as you do not send more than 2'000'000 characters to MS for translation per month. You can get such a key from Microsoft Azure Marketplace.

Once you have registered, go to Administration > Configuration > Regional and language> Translation Management Translators and choose to edit the Microsoft Translator. Add your 'Microsoft Client ID' and 'Microsoft Client Secret' into the appropriate field. Save the Translator.

Setting Up TMGMT

Download the Translation Management Suite at http://drupal.org/project/tmgmt.

For a start, activate the following modules:

  • Translation Management UI
  • Content Source User Interface
  • Export / Import File

This will automatically trigger the activation of

  • Translation Management Core
  • Content Source
  • Translation Management Field

Out of the box, tmgmt comes with two included translators:

  • Export and import via xliff and html
  • Local Translator

This will allow you to choose a source (node in this tutorial), export it to a file for manual translation (or with an xlliff compatible system) and manage the process of getting the translation back.

The Local Translator gives you a two pane window to process the translation.

If required, a review step is activated, so that you can review and adapt the translation if necessary.

Once reviewed and accepted, the translated content will be added to the node.

More translators are available as seperate projects. You will can download and activate them as modules.

Preparation

To use Translation Management (Node Translation), the following modules must be installed:

Getting Started

This Section will guide you through the process of setting up and using TMGMT.

It assumes that Drupal 7 is installed and you have the rights to add and activate modules.

HowTo: Basic Internationalization setup

Note: The below article uses the older model of "Content Translation" instead of the newer model of "Entity Translation".

Subscribe with RSS Subscribe to RSS - multilingual setup