Support for Drupal 7 is ending on 5 January 2025—it’s time to migrate to Drupal 10! Learn about the many benefits of Drupal 10 and find migration tools in our resource center.
If you want to configure who can administer asset, create new asset types and etc, you should configure permissions. Permissions are applied to Roles. If you aren't already familiar with Drupal's Role based permissions, please read Users, roles and permissions.
Currently module fully supports integration only with CKEditor (v3). Next roadmap steps will be performed around integration with in-place editing option (Edit module) in terms of Spark project.
Evaluation of integration with TinyMCE and Aloha editor is in progress, feel free to request this integration in Issue tracker or post you code snippets that would introduce this integration.
Configure CKEditor
Follow instruction provided here to install and configure CKEditor module.
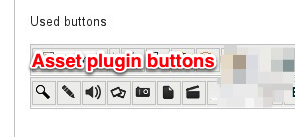
As soon as configuration was accomplished, navigate to Administration > Configuration > Content authoring > CKEditor and for each Profile, that should support Asset input (for example, Full and Advanced), in Editor appearance configuration activate Asset plugin and appropriate buttons.
The Filter core module allows you to configure formats for text input for your site (read more about Text formats and Filters).
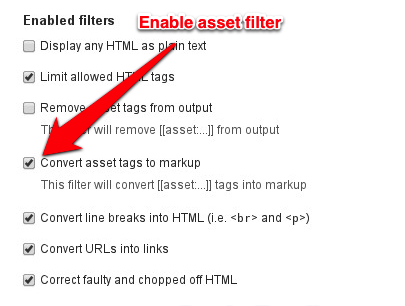
"Convert asset tags to markup" filter should be activated to allow Asset's markup being rendered correctly in WYSIWYG and on front-end.
Navigate to Administration > Configuration > Content authoring > Text formats and for each text format that should support Asset input (for example, Full HTML and Filtered HTML) activate "Convert asset tags to markup" filter.
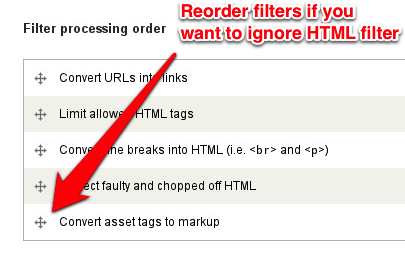
In the Filter processing order group, you need to ensure the correct processing order. Normally, Asset module should proceed with conversion of the markup after the Limit allowed HTML tags filter. So the simplest configuration looks like this: