Support for Drupal 7 is ending on 5 January 2025—it’s time to migrate to Drupal 10! Learn about the many benefits of Drupal 10 and find migration tools in our resource center.
The Picture module allows you to use picture groups created with inline image inserted in body field with WYSIWYG or CKEditor modules. This currently requires the dev version of Picture.
Configuration
Picture settings
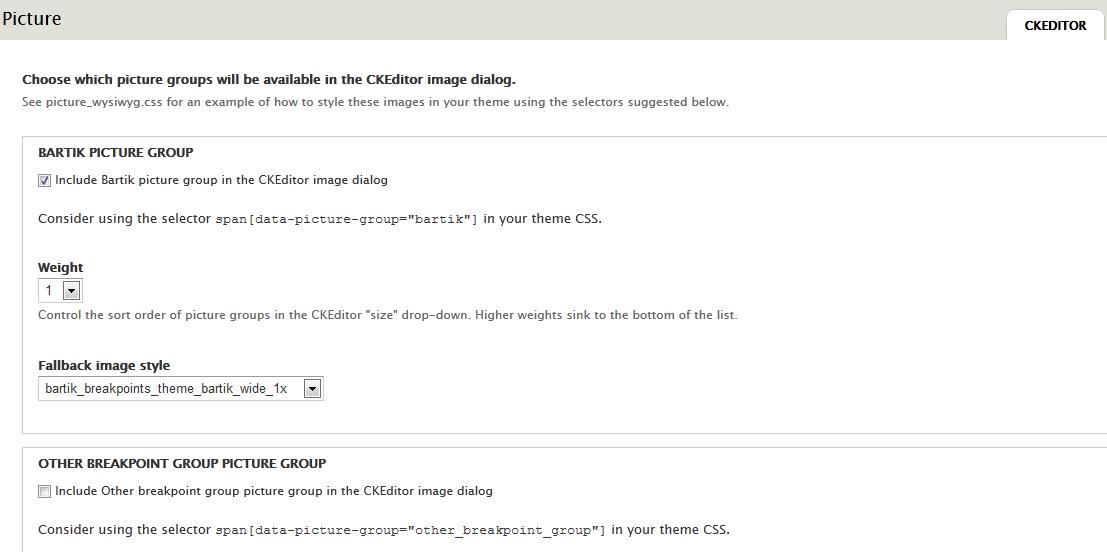
Navigate to Picture settings (admin/config/media/picture/ckeditor) and enable the picture groups which will be available in the ckeditor (the library) image dialog box.
You can set for each group his weight (in the select list) and the fallback image style
Filter Text format
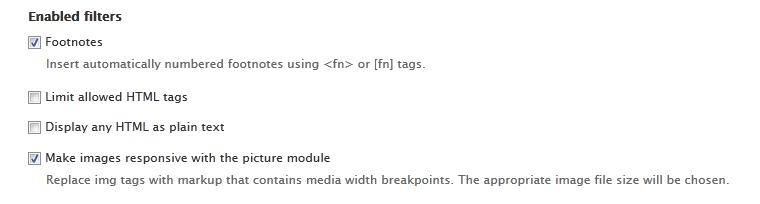
Navigate to the text format (admin/config/content/formats/full_html for the Full HTML Format) on which you want use picture module and enable the filter Make images responsive with the picture module.
You have to move Make images responsive with the picture module below Convert line breaks into HTML (i.e. <br> and <p>) if it is enabled, otherwise you'll get empty lines above the picture.
Copy the phplighter folder to your website's sites/all/modules or sites/yoursite.com/modules directory.
Download the PHPLigther package from https://github.com/brandonwamboldt/phplighter inside the module folder. You will have something like sites/all/modules/phplighter/PHPligther
Instead of download a zip, you can just clone the entire repository:
cd sites/all/modules/phplighter
  git clone git://github.com/brandonwamboldt/PHPLighter.git
Enable the phplighter.module on the Modules page.
Go to Configuration > Text formats. For each format you wish to add Code Filter to:
Click the "configure" link.
Under "Enabled filters", check the Code Filter checkbox.
Under "Filter processing order", rearrange the filtering chain to resolve any conflicts. For example, to prevent invalid XHTML in the form of <p><div class="phplighter"> make sure "Code filter" comes before the "Convert line breaks into HTML" filter.
This guide explains how to use the Mailadmin module. Starting from scratch, we end with a running mail server, with a clean web administration interface. IMAP access is handled by Dovecot, and mail delivering by Exim4.
First, install Drupal7 on a web server equipped with a PostgreSQL database.
Then, install and activate Mail admin module, which comes with a "Mail admin shared domain list" sub-module.
For this, you may have to intervene on your database to actually finish the installation. If you run into "PDOException : SQLSTATE[42704]: Undefined object: 7 ERROR language "plpgsql" doesn't exists ; HINT : use […] to load the language in the db" during the module activation, you'll need to log on your PostgreSQL Drupal database with sufficient privileges to pass this command : create language plpgsql
SSO doesn't work
If single sign-on doesn't seem to work for some users, try the following steps:
Clear Drupal site cache for each site in your Bakery cluster
Clear your browser cookies (if you're unsure how to do this for your internet browser, try searching online)
Log in to your master site as a user other than the admin (UID 1) account
Were you logged into the subsite? If not, or if logging in via a subsite doesn't work, continue reading:
Be sure you've set up the Bakery module correctly between sites. Look particularly for whether the Bakery secret key is the same between sites and that the Bakery cookie domain is the same between sites.
Try logging in as a non-admin user on the master site and see if SSO fails. If it does, continue reading:
Are you using a front-end proxy cache layer like Varnish? If so read about handling cookies.
This page will describe the process of migrating field collections.
Field collections are separate entities, which are linked to host entities. That is why we have to create separate migration classes for every field collection field.
Your field collection migration should be run after the host entity migration. For example, if the collection is attached to nodes via a field named field_attached_data, and if the Article nodes are being imported by ArticleMigration, your collection migration class constructor will have a code described below.
Specify dependencies
$this->dependencies = array('Article');
// If your article migration class was named 'ArticleMigration', the string is 'Article'
Because of this dependency, our field collection class ArticleAlbumMigration will not be able to be imported until ArticleMigration is fully imported.
Specify destination
$this->destination = new MigrateDestinationFieldCollection(
  'field_attached_data',
  array('host_entity_type' => 'node')
);