On this page
- Pre-requisites:
- About miniOrange LDAP/Directory Login module:
- Step 1: Install Certificate Authority, Create and Export the certificate
- 1.1: Install the "Active Directory Certificate Services" role through Server Manager roles.
- 1.2: Create a certificate template
- 1.3: Issue certificate template
- 1.4: Request a new certificate for the created certificate template
- 1.5: Export the created certificate
- Step 2: Configure LDAPS on the client-side server
- 2.1: Convert Certificate Format and Install the Certificate using OpenSSL
- 2.2: Install certificate in JAVA Keystore.
- Contact our 24*7 support team
Setup LDAPS on Windows Server
This document is designed to guide you through the steps that will allow you to set up LDAPS on the windows server with your LDAP & Active Directory Server to Drupal. The module is compatible with Drupal 8, Drupal 9 as well as Drupal 10.
Pre-requisites:
Before we jump to the setup, please ensure that you have the below module installed on your Drupal site. If you wish to test the module, you can simply reach out to drupalsupport@xecurify.com for a free 10-day trial.
About miniOrange LDAP/Directory Login module:
miniOrange LDAP/Directory Login: This module will allow your Drupal users to login into Drupal using LDAP & Active Directory credentials. This module is compatible with any Drupal 7, Drupal 8, and Drupal 9 site and includes support for NTLM/Kerberos authentication(Windows authentication).
Please install the above module and configure the basic LDAP setup. You can also refer to the step-by-step setup guide for the same.
Secure your LDAP server connection between client and server application to encrypt the communication. In the case of a simple bind connection using SSL/TLS is recommended to secure the authentication as a simple bind exposes the user credentials in cleartext.
Step 1: Install Certificate Authority, Create and Export the certificate
1.1: Install the "Active Directory Certificate Services" role through Server Manager roles.
-
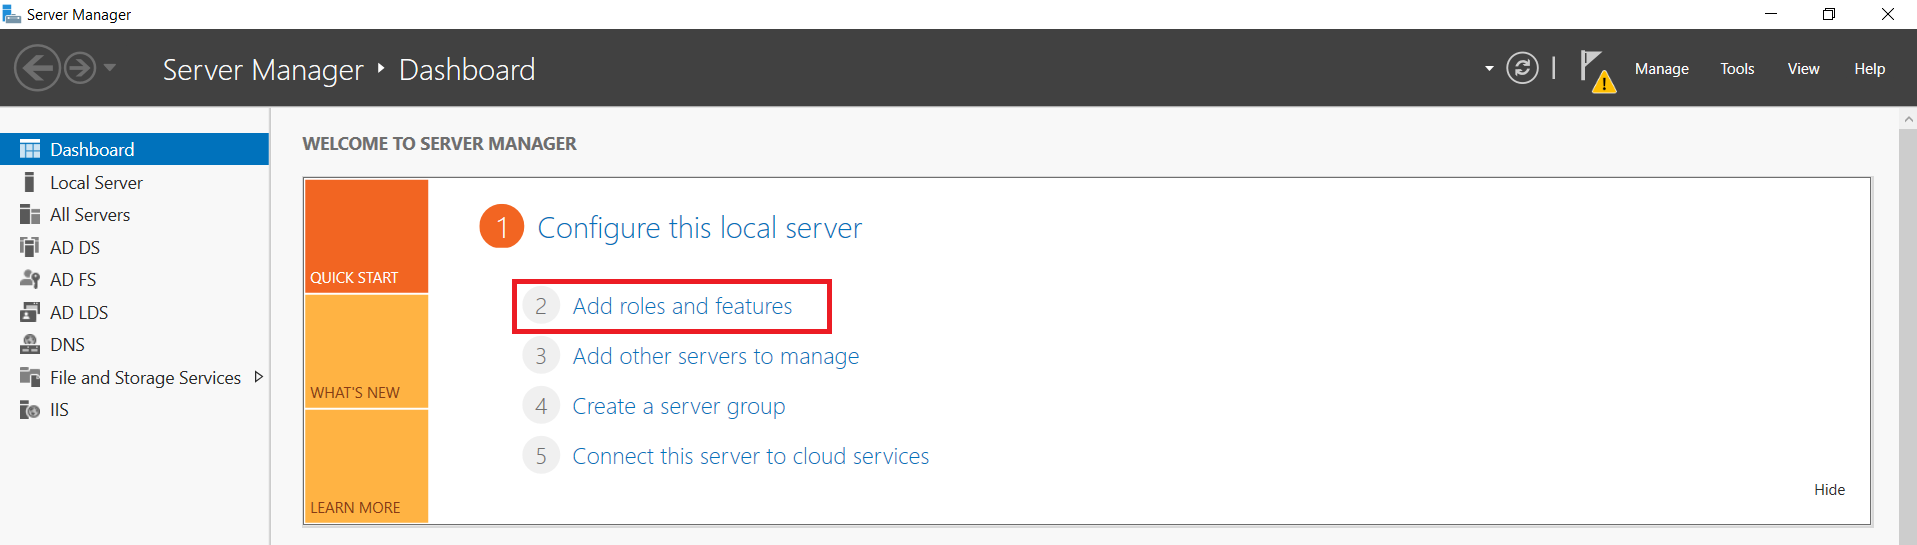
On your Windows Server Machine, click on Start -> Server Manager -> Add Roles and Features.
-
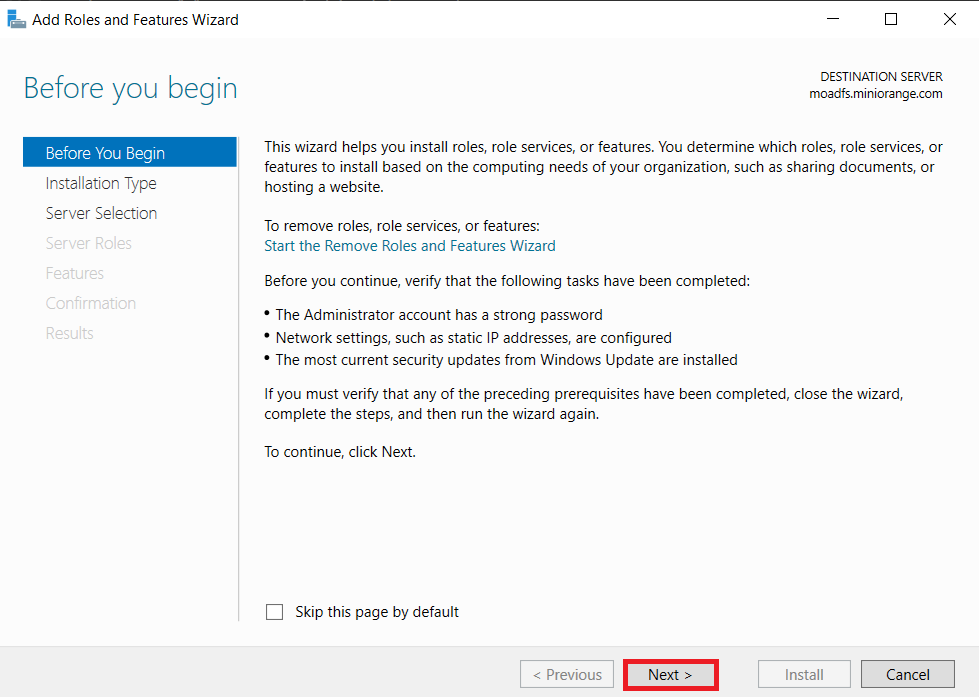
After selecting Add Roles and Features Click on Next.
-
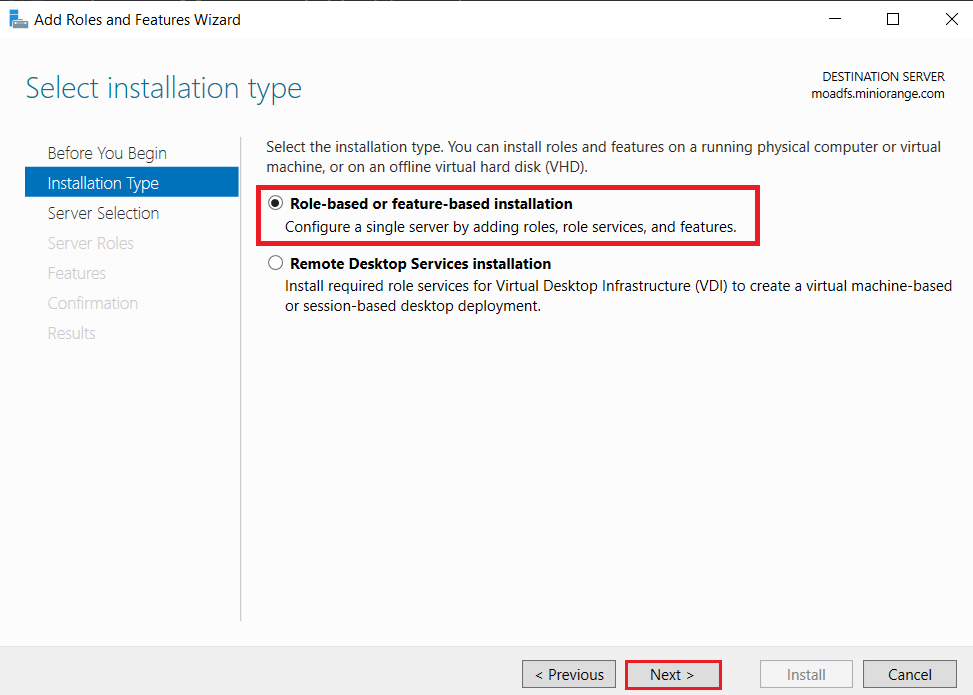
Choose the Role-based or feature-based installation option and click on the Next button.
-
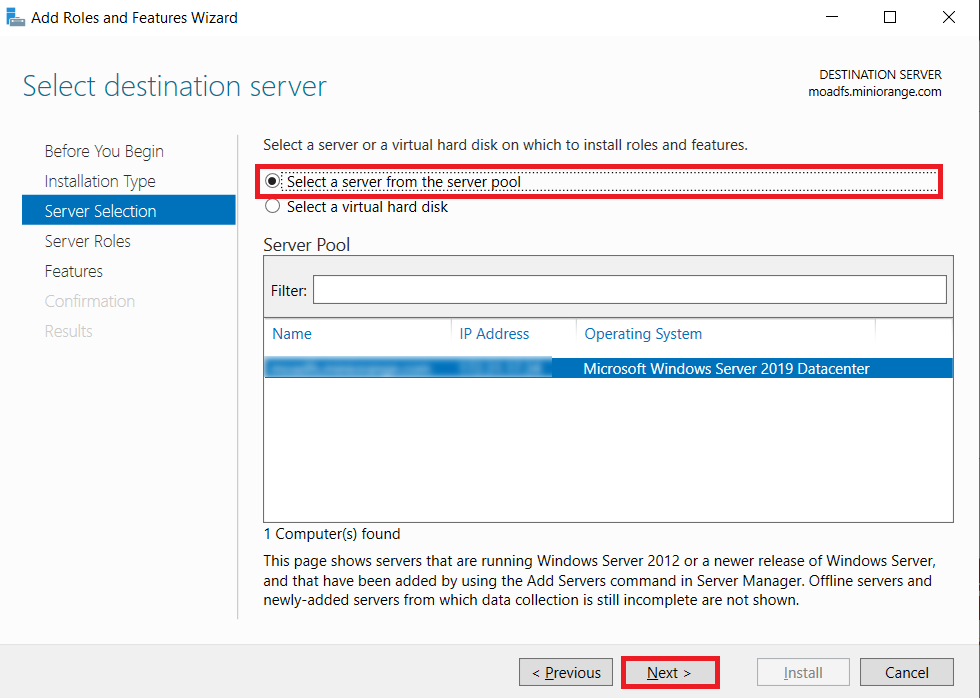
Choose Select a server from the server pool option & Select LDAP server from the server pool and click on the Next button.
-
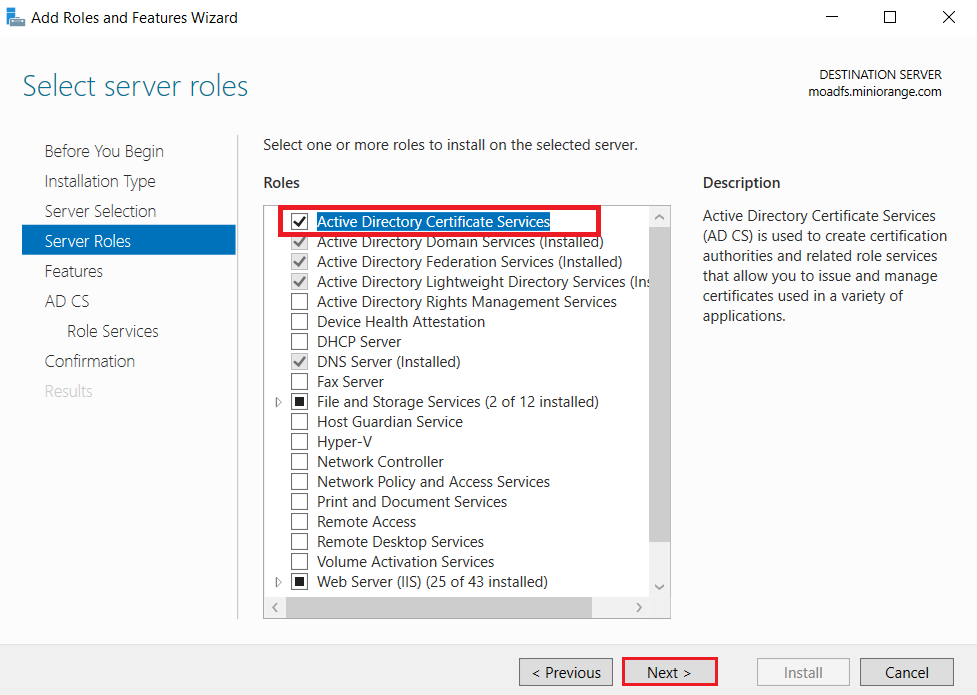
Choose the Active Directory Certificate Services option from the list of roles and click on the Next button.
-
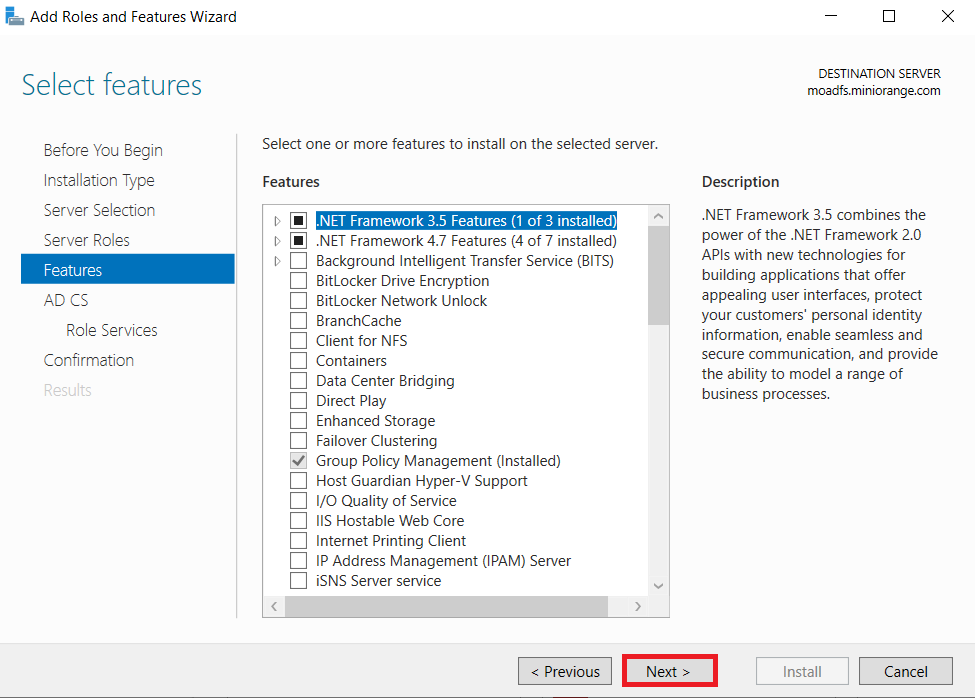
Choose nothing from the list of features and click on Next button.
-
In Active Directory Certificate Services (AD CS) choose nothing and Click on Next button.

-
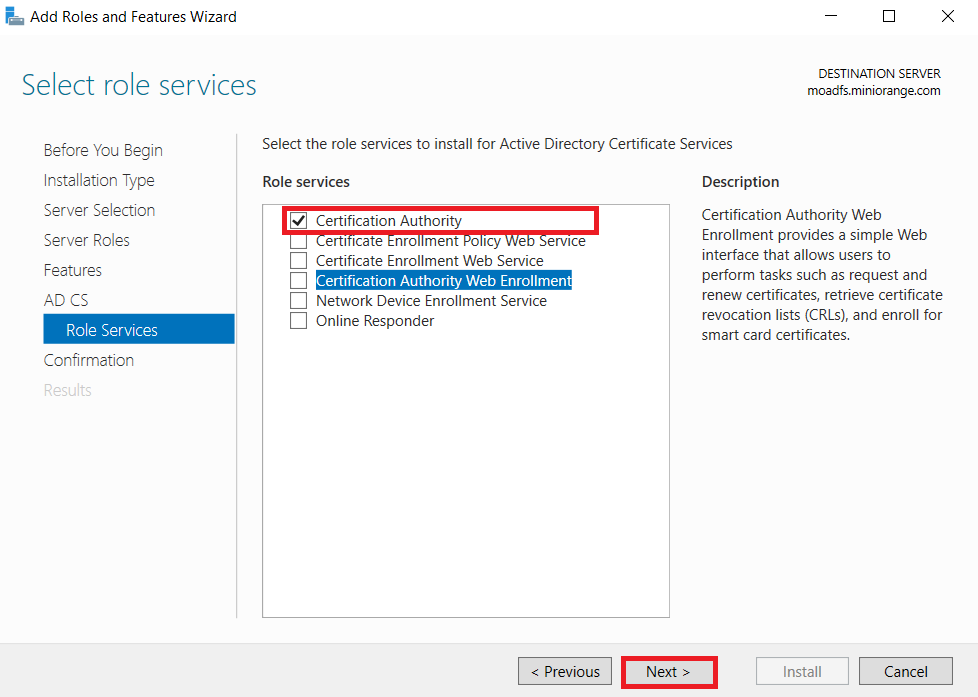
Mark Certification Authority from the list of roles and Click on Next button.
-
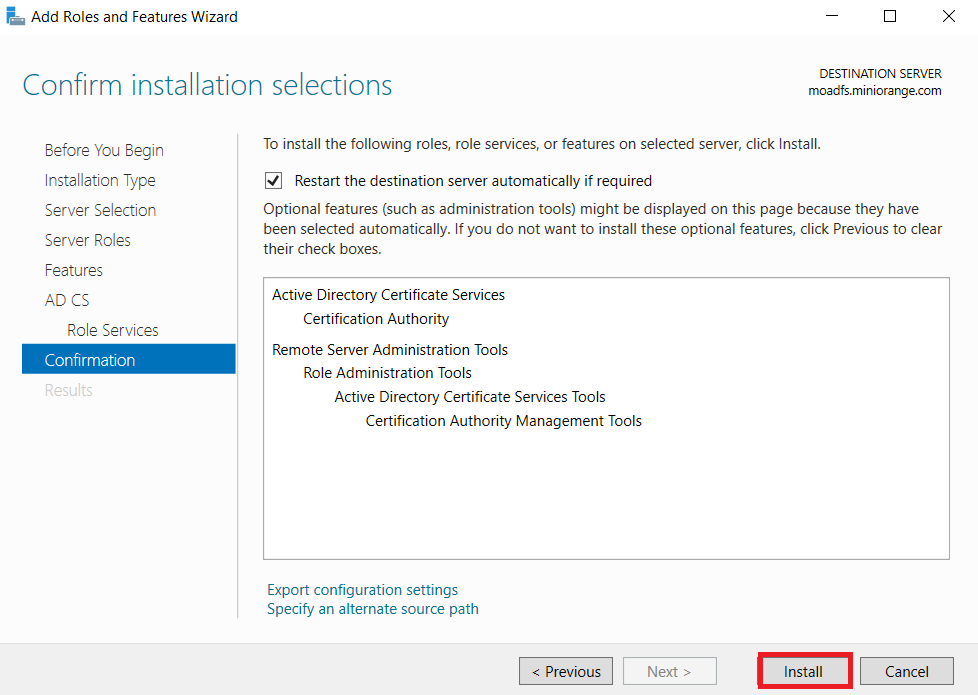
Click on Install button to confirm installation.
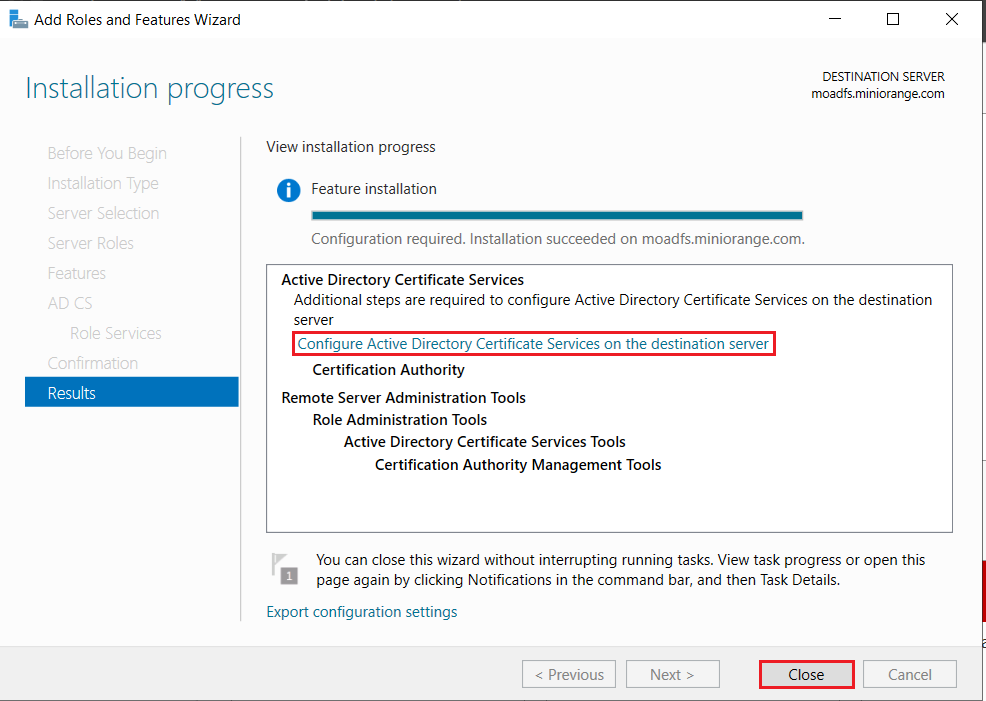
-
Now, click on Configure Active Directory Certificate Services on Destination Server option and click on Close button.
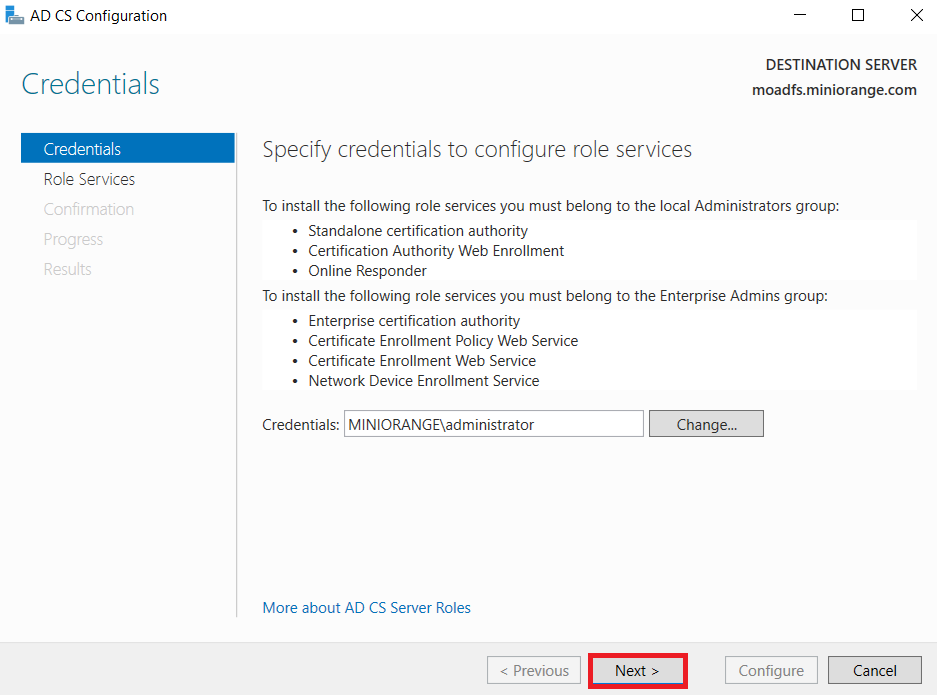
-
We can use the currently logged on user to configure role services since it belongs to the local Administrators group. Click on Next button.
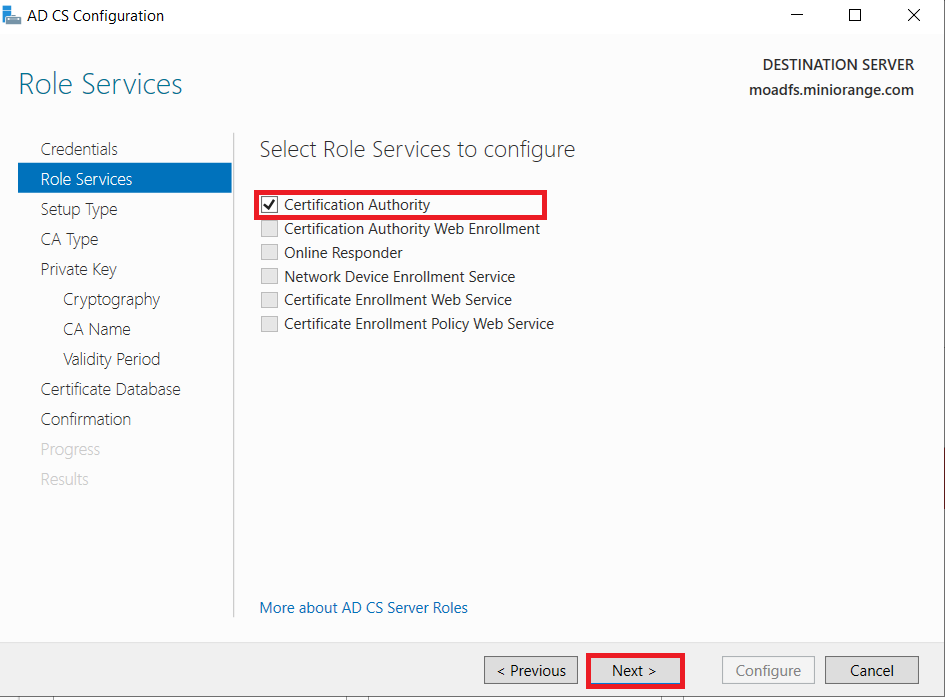
-
Mark Certification Authority from the list of roles and Click on Next button.
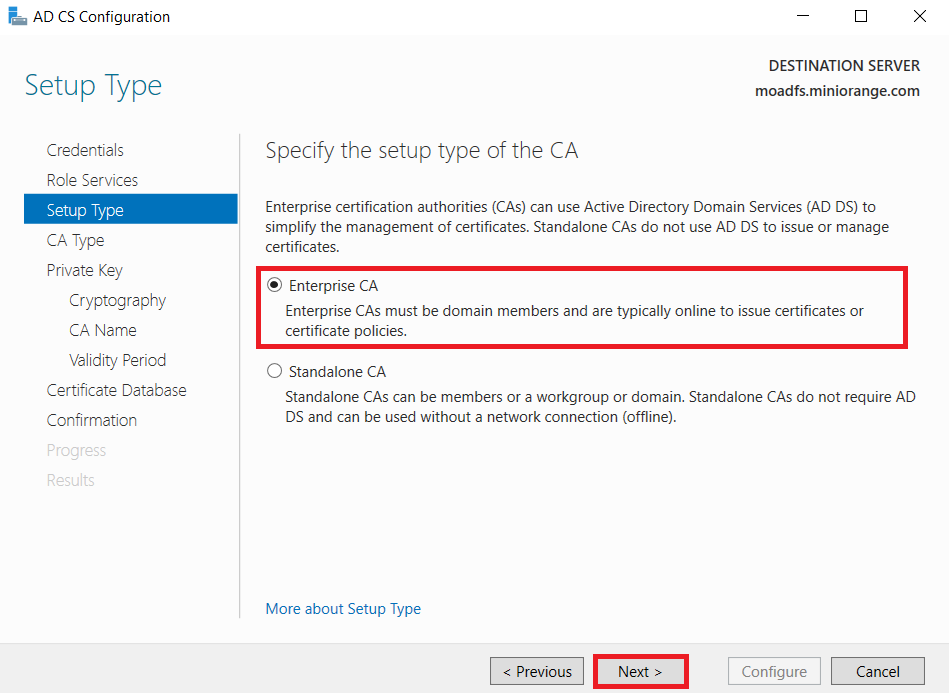
-
Choose Enterprise CA option and Click on Next.
-
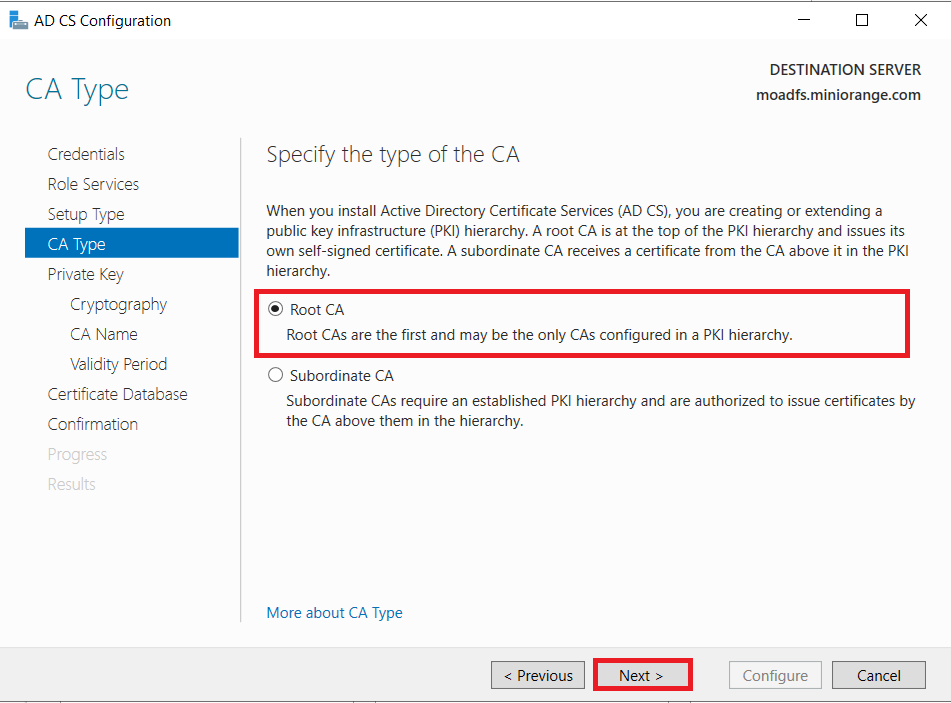
Choose the Root CA option and Click on the Next button.
-
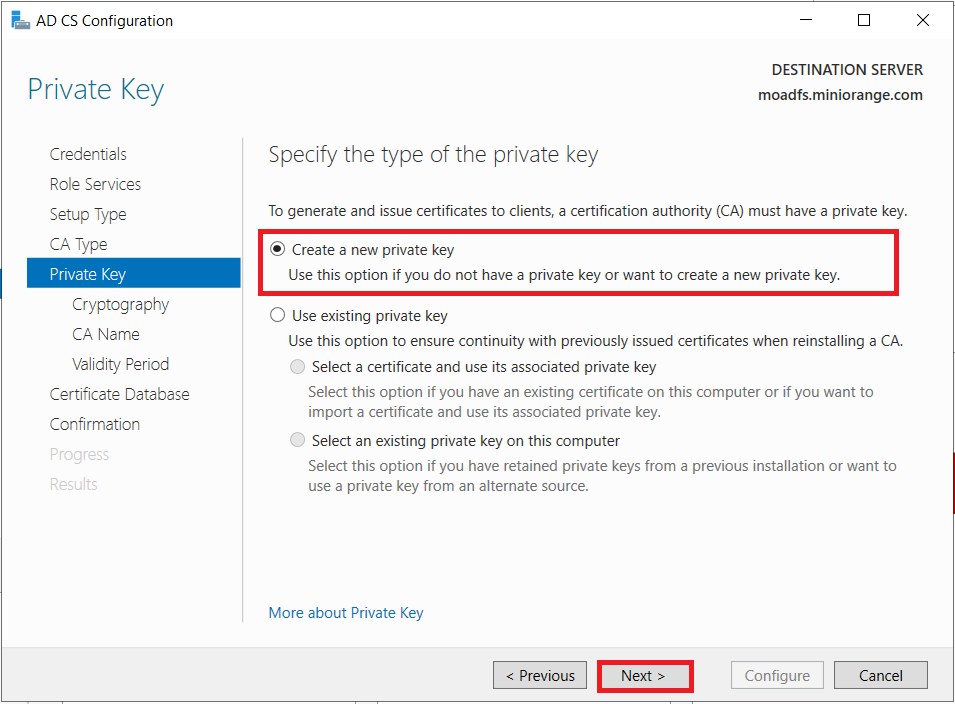
Choose to Create a new private key option and click on the Next button.
-
Choose SHA256 as the hash algorithm and Click on Next.
UPDATE: Recommended to select the most recent hashing algorithm.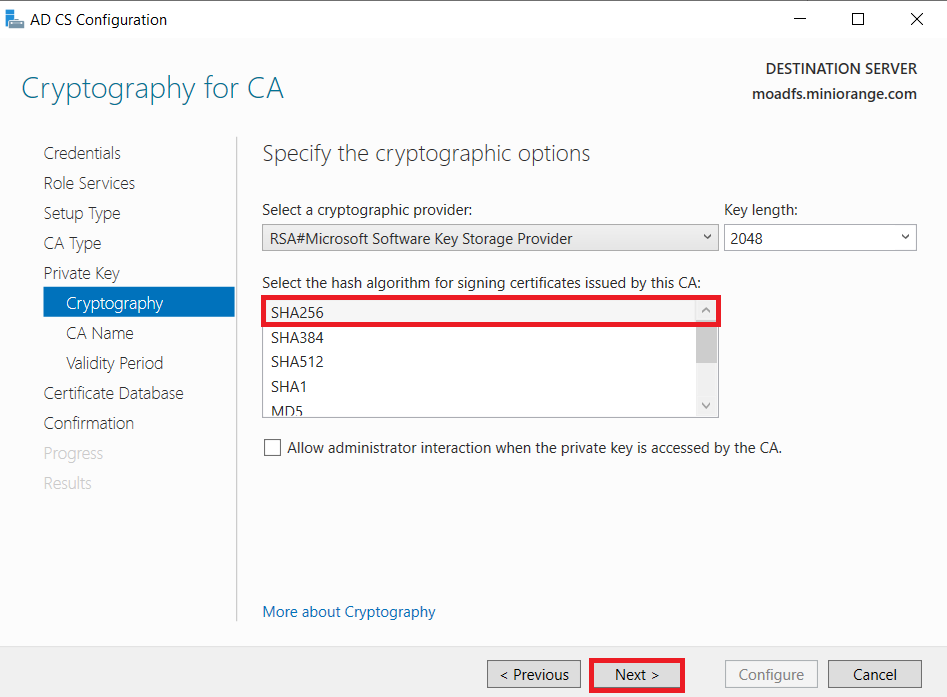
-
Click on the Next button.

-
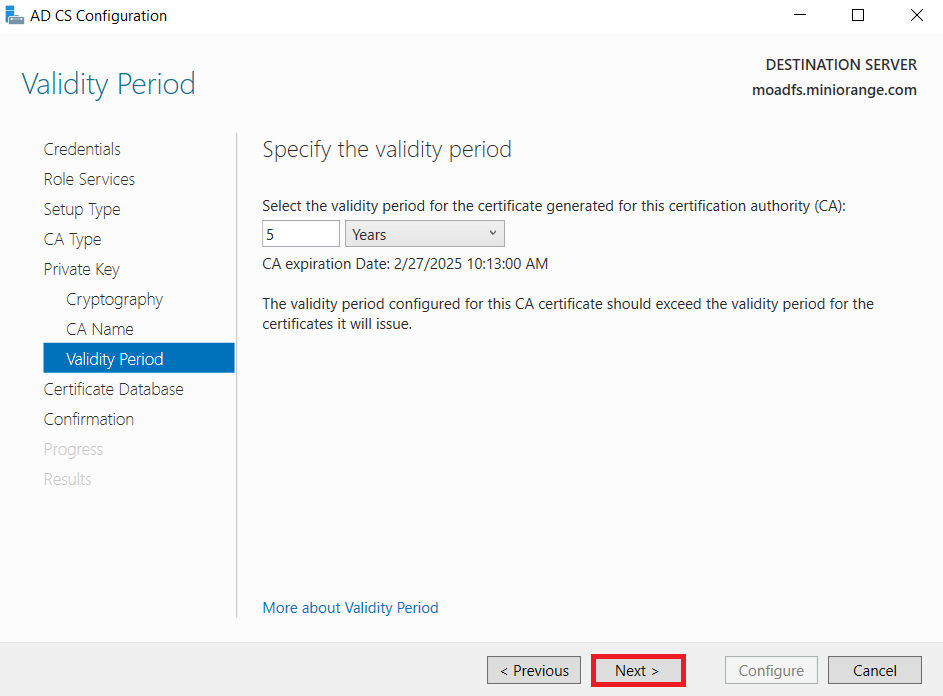
Specify the validity of the certificate choosing Default 5 years and Click on Next button.
-
Select the default database location and Click on Next.
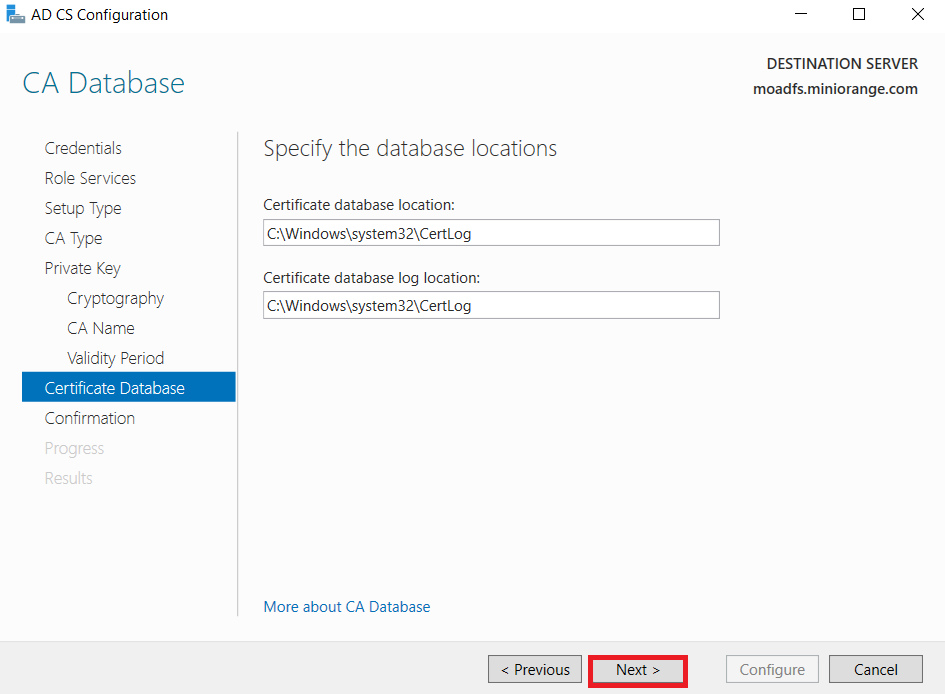
-
Click on Configure button to confirm.
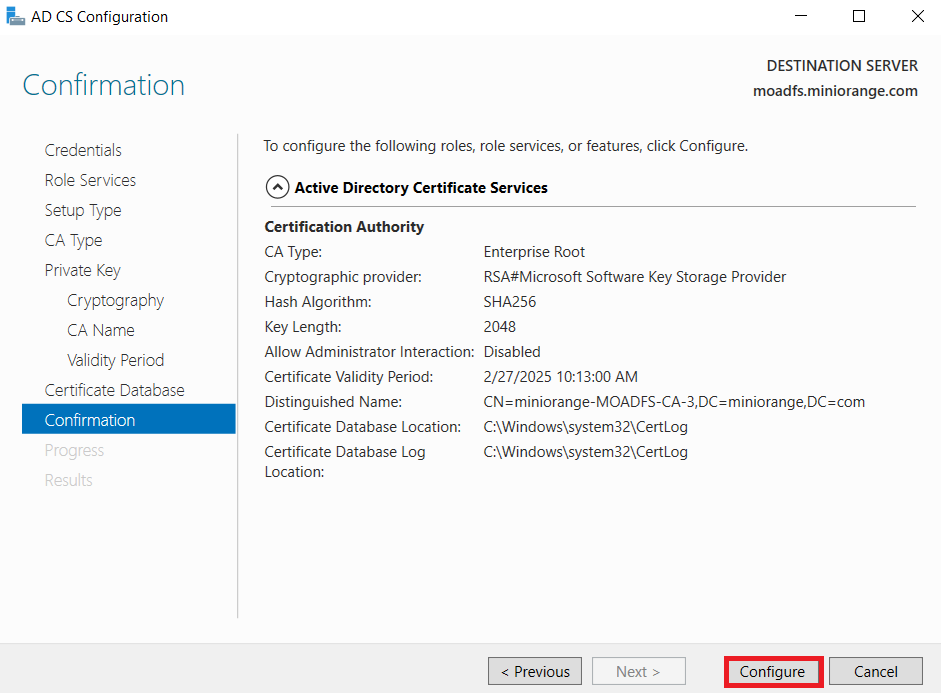
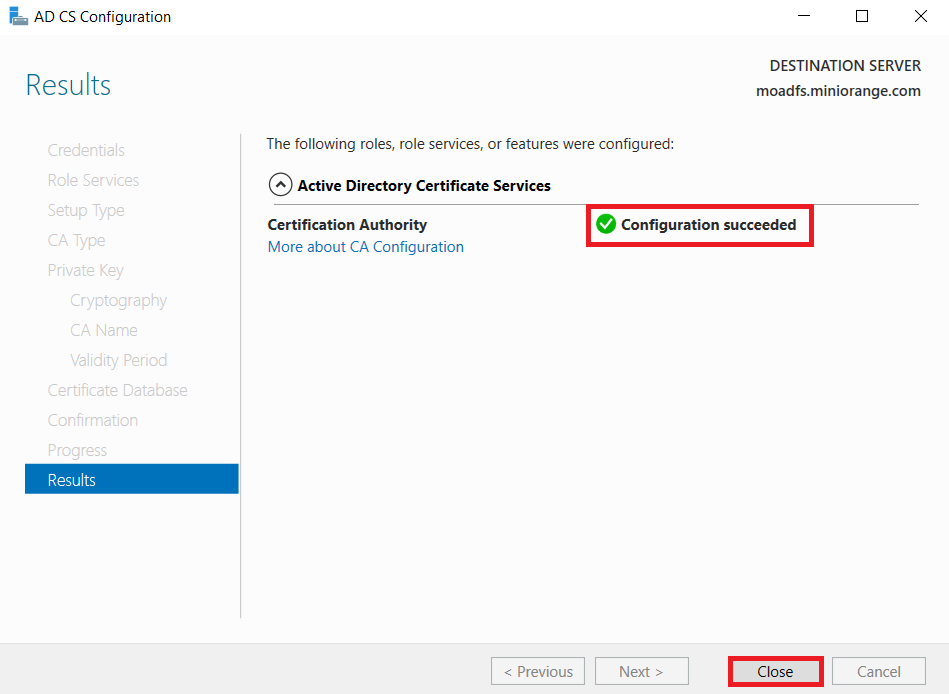
-
Once the configuration succeeded and click on Close button.
1.2: Create a certificate template
-
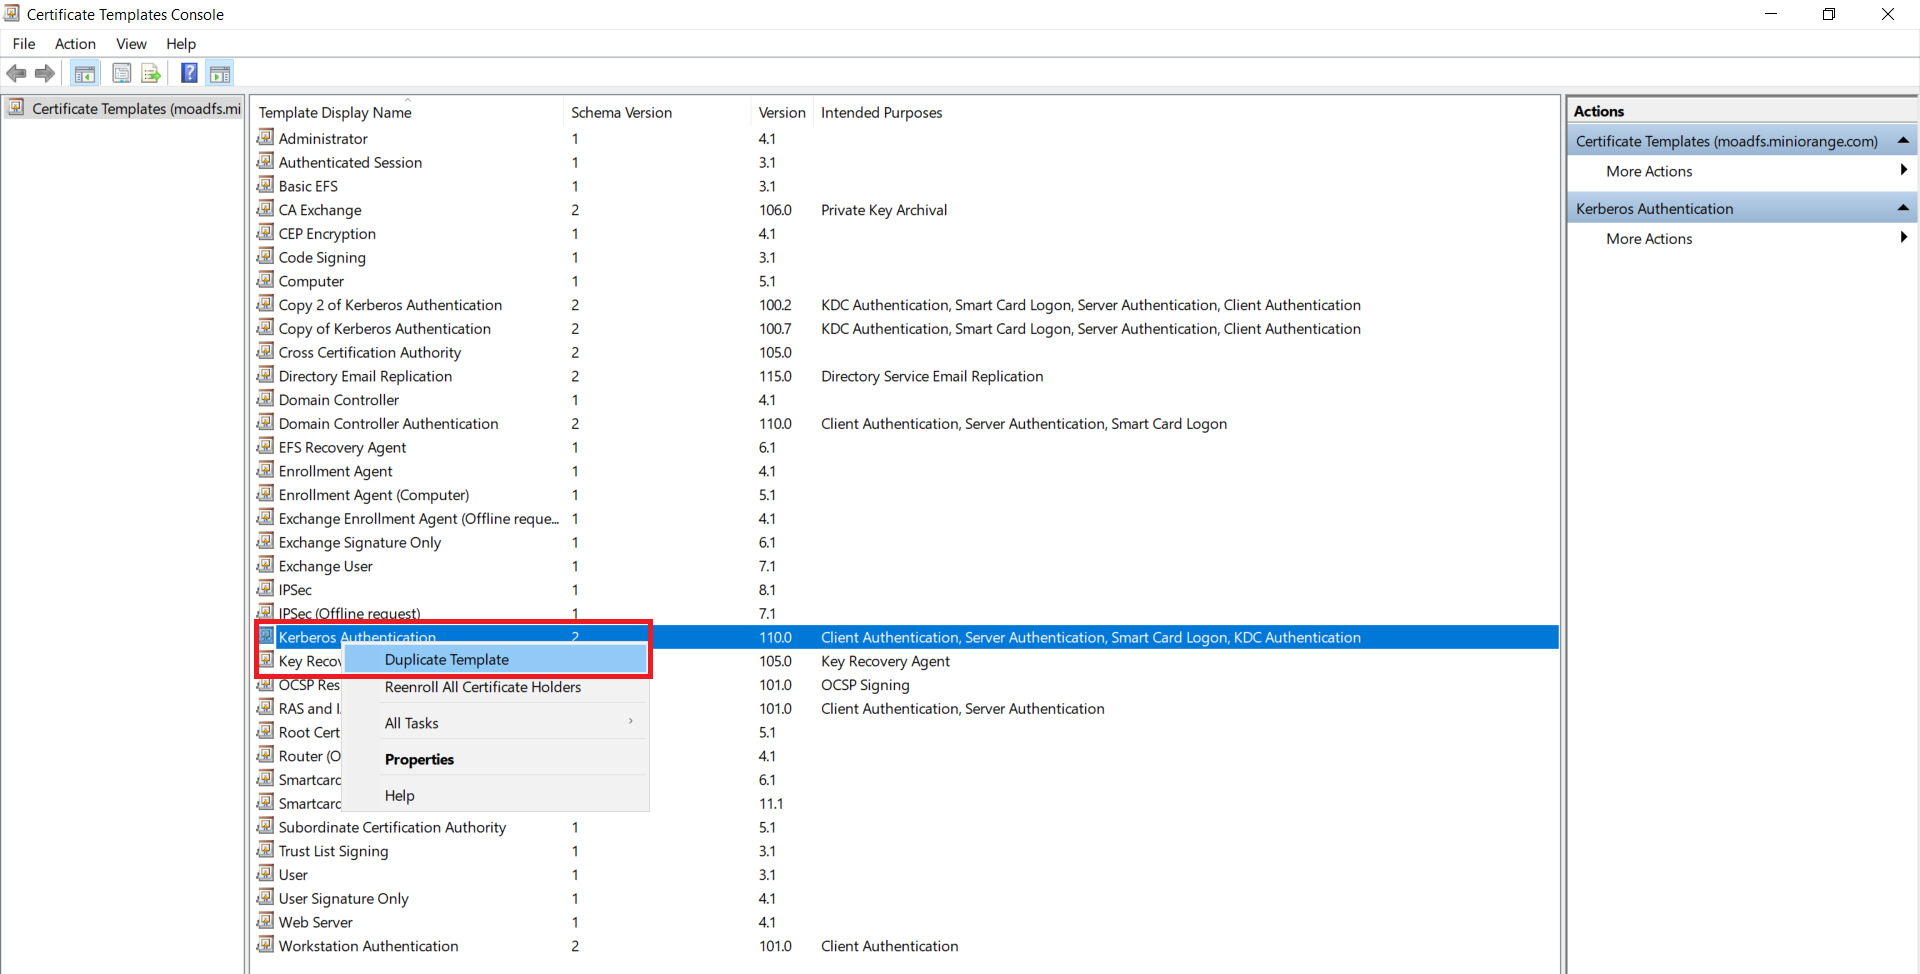
Go to Windows Key+R and run certtmpl.msc command and choose the Kerberos Authentication Template.
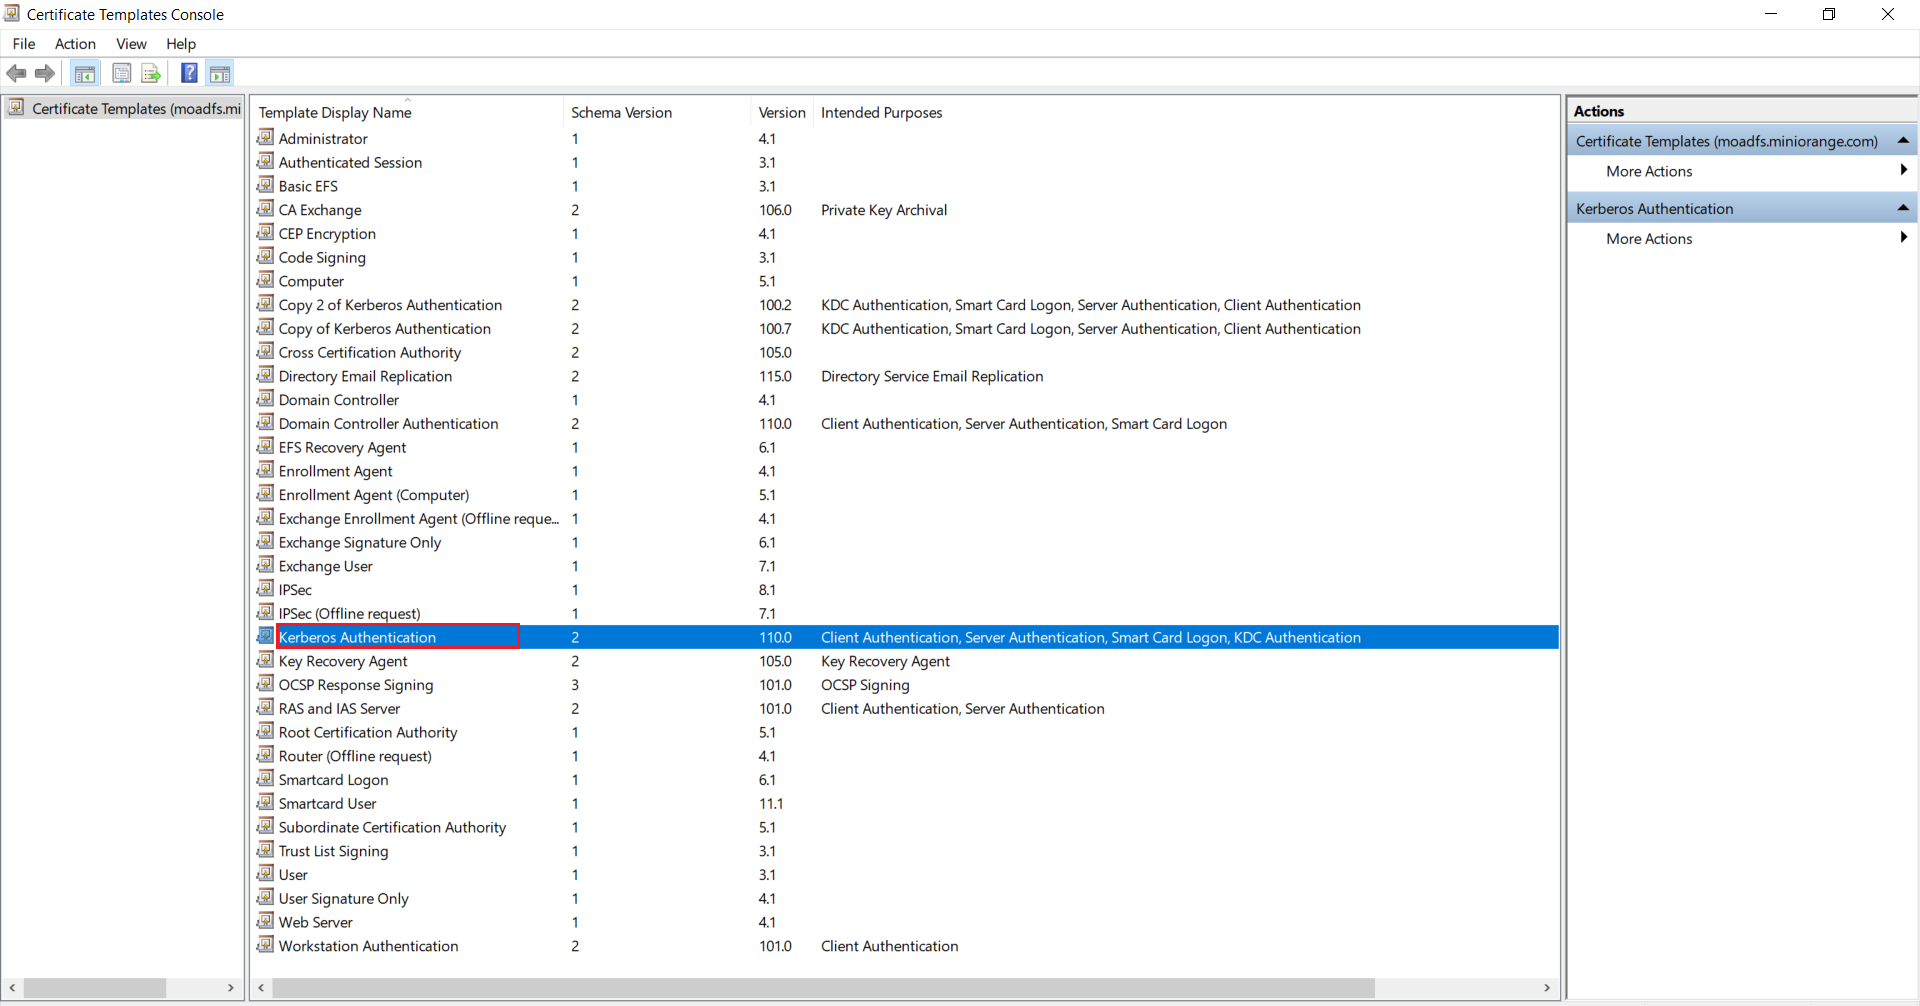
-
Right-click on Kerberos Authentication and then select Duplicate Template.
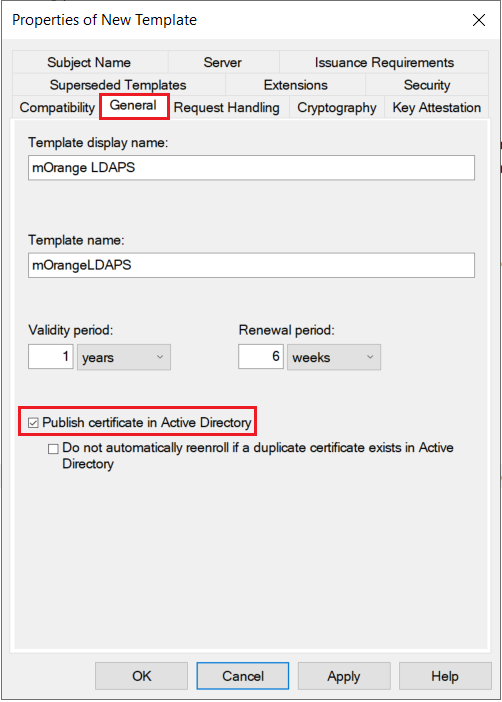
- The Properties of New Template will appear. Configure the setting according to your requirements.
-
Go to the General tab and Enable publish certificate in Active Directory option.
-
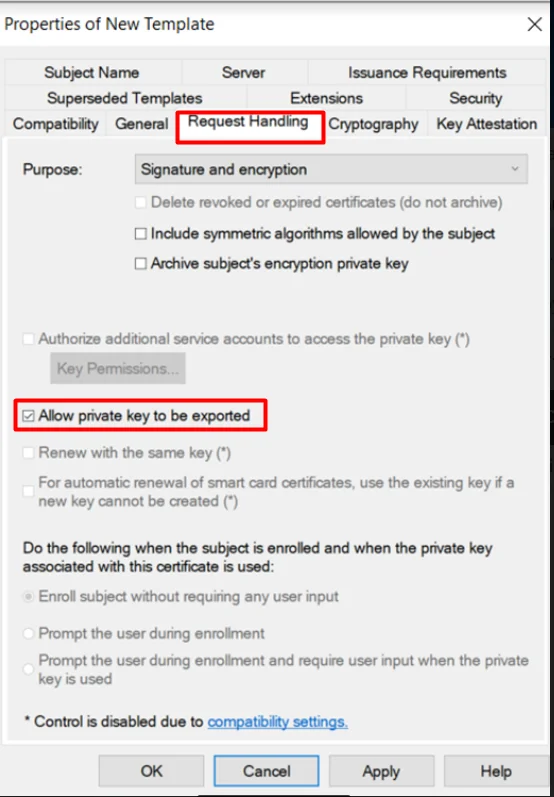
Go to the Request Handling Tab and Enable ‘Allow private key to be exported’ option.
-
Go to the Subject Name tab and Enable the subject name format as DNS Name and click on Apply & OK button.

1.3: Issue certificate template
-
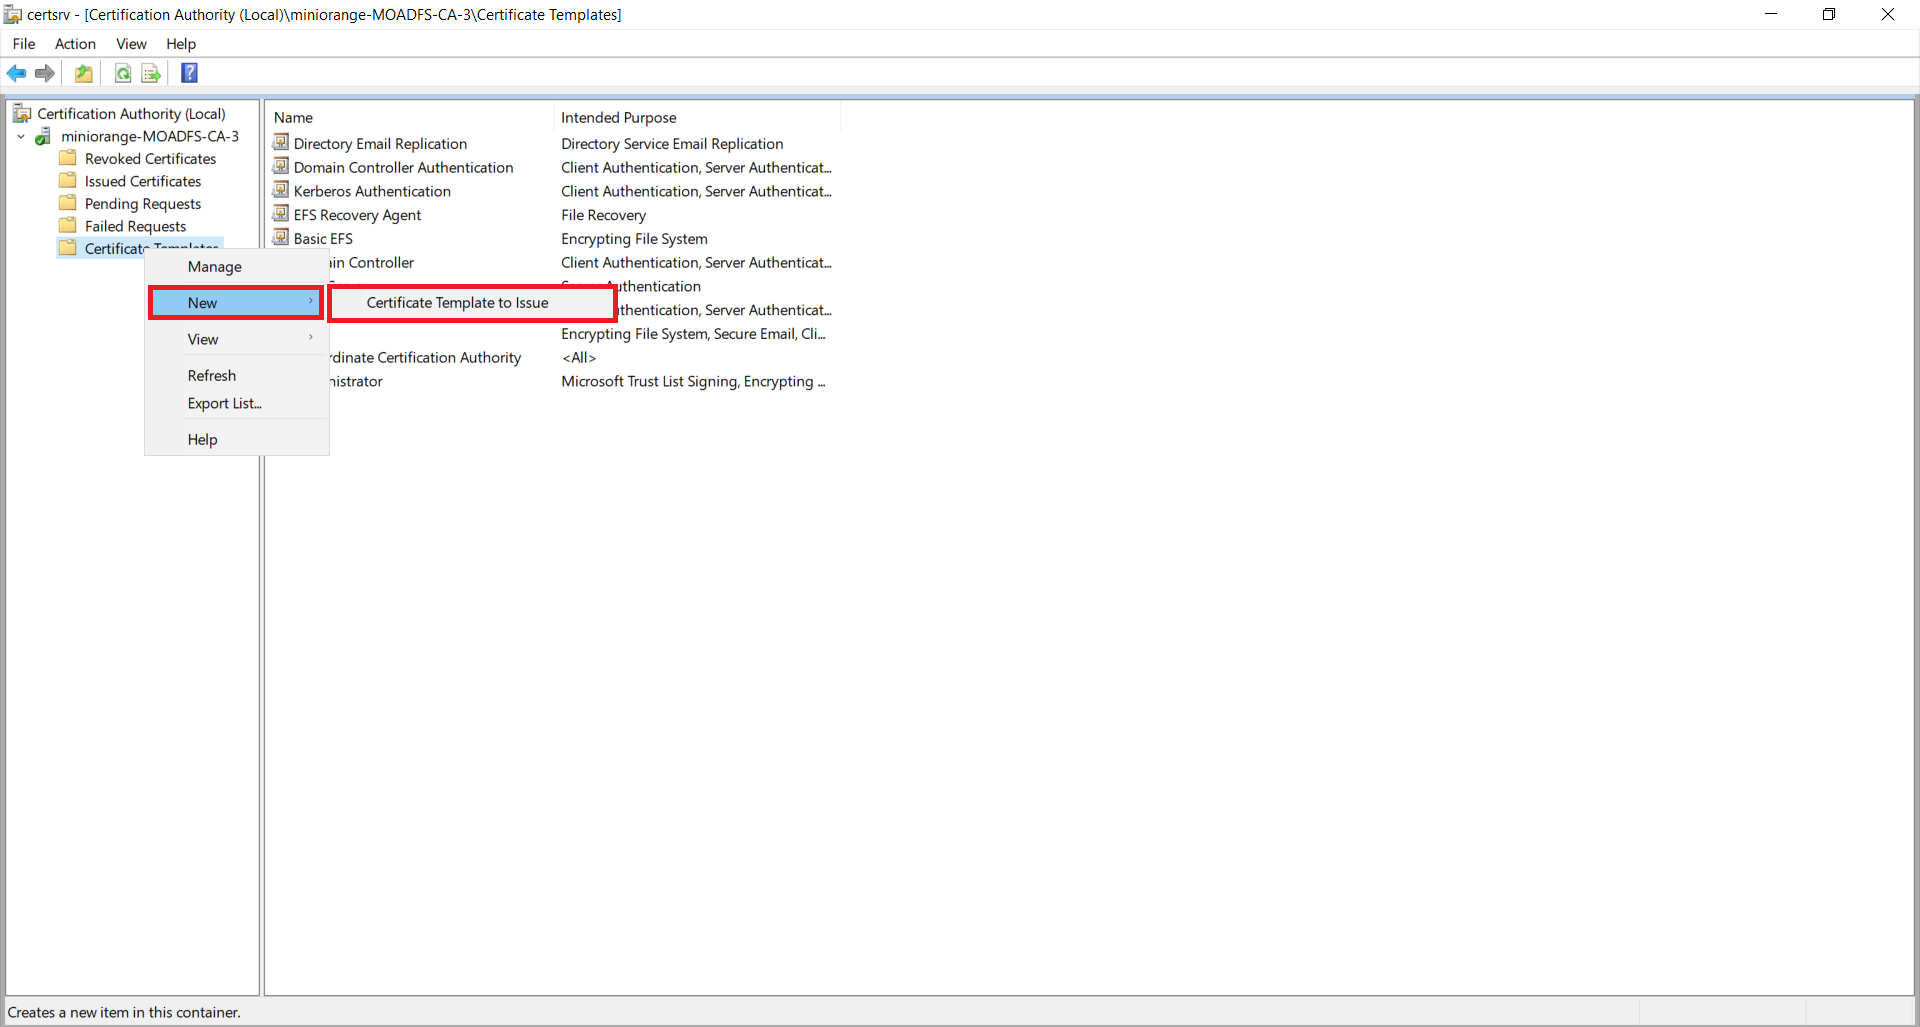
Go to Start -> Certification Authority Right-click on "Certificate Templates" and select New-> Certificate Template to Issue.
-
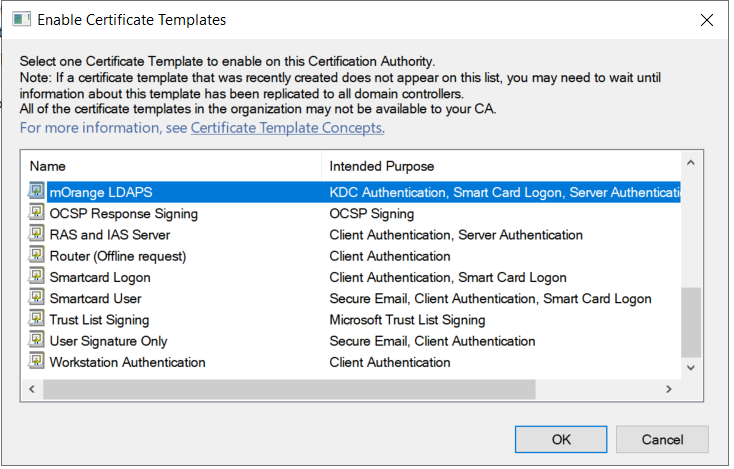
Now, select your recently created Certificate Template and click on the ok button.
1.4: Request a new certificate for the created certificate template
-
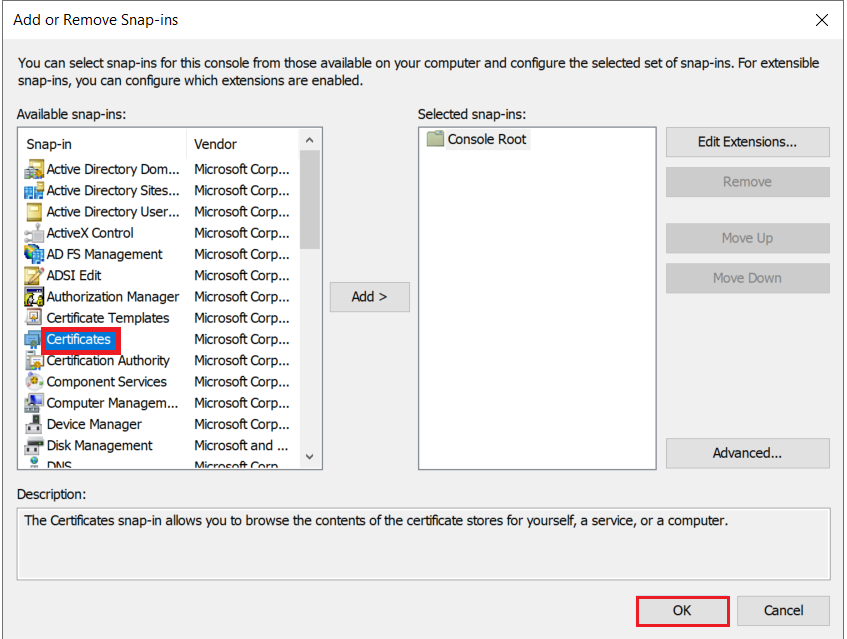
Go to Windows Key+R -> mmc -> File -> Add/Remove snap-in. Select Certificates, click on Add button, and then click on the Ok button.
-
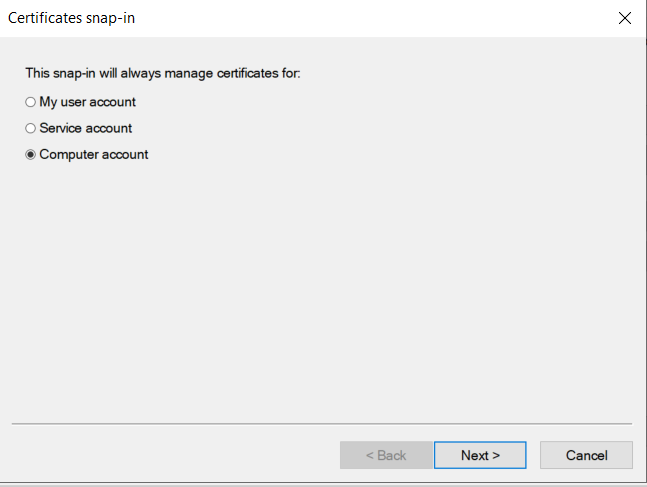
Select the Computer account option and click on the Next button.
-
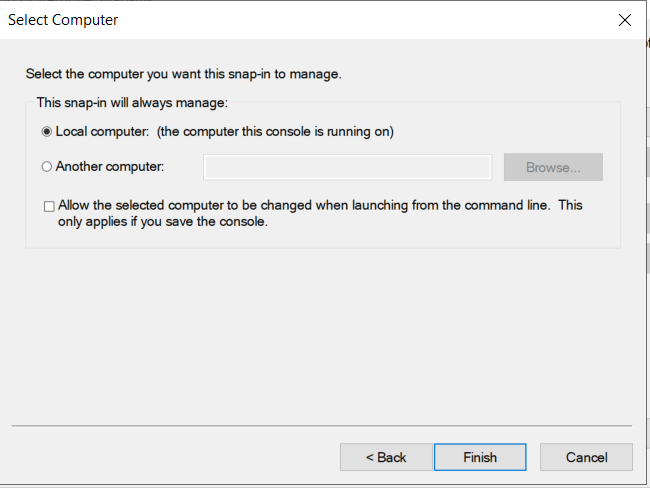
Select the Local computer option and click on the Finish button.
-
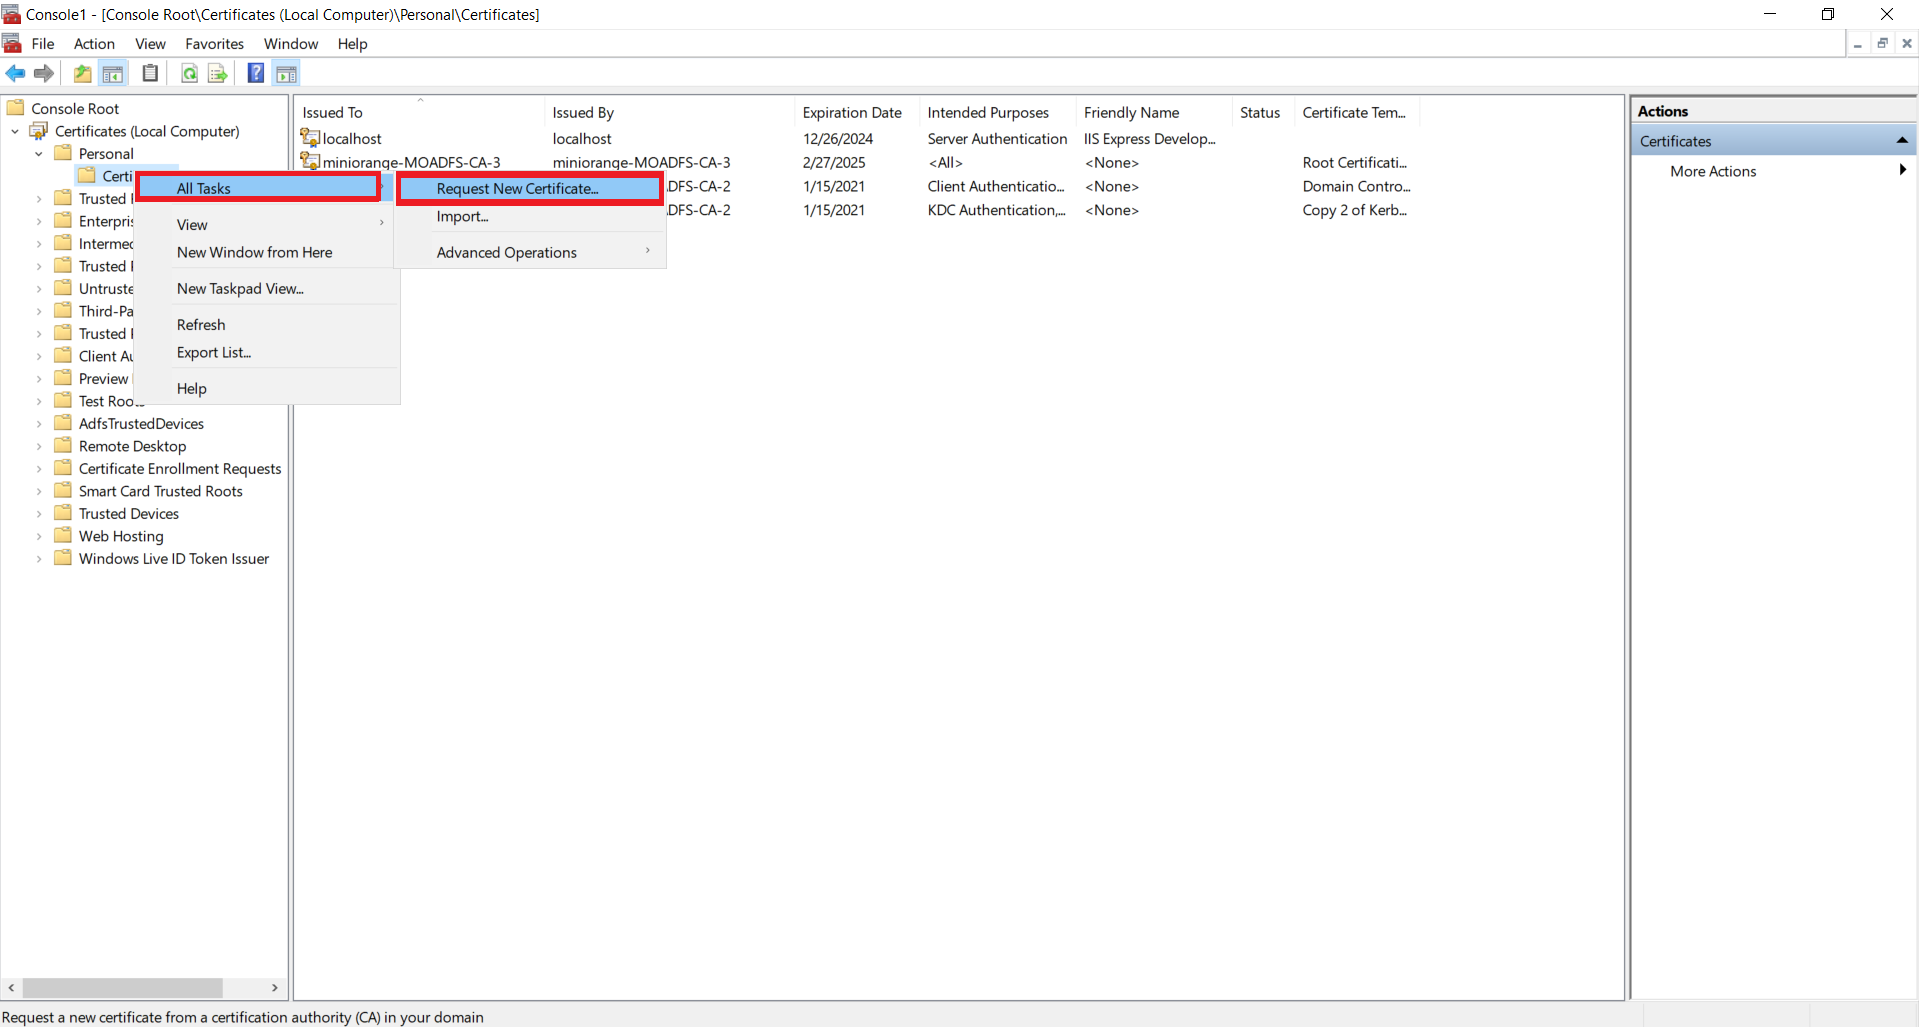
Now, right click on Certificates select All Tasks and click on Request for new Certificate.
-
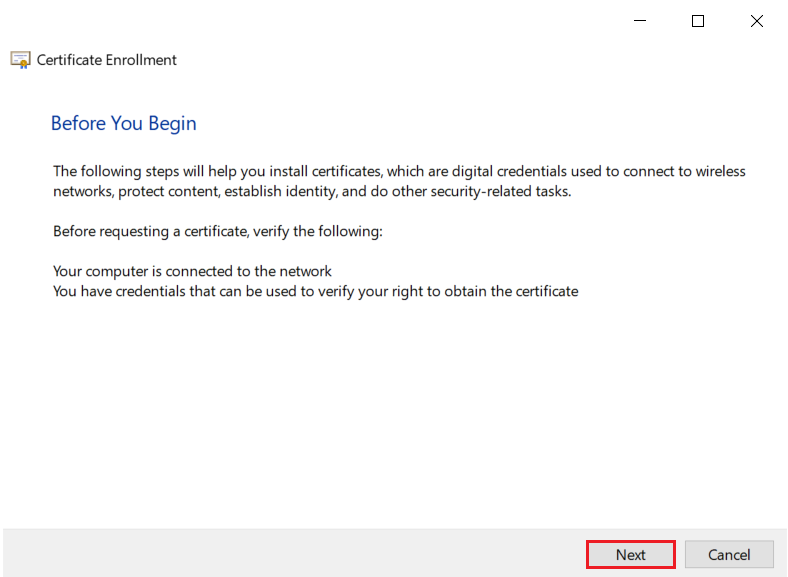
Click on the Next button.
-
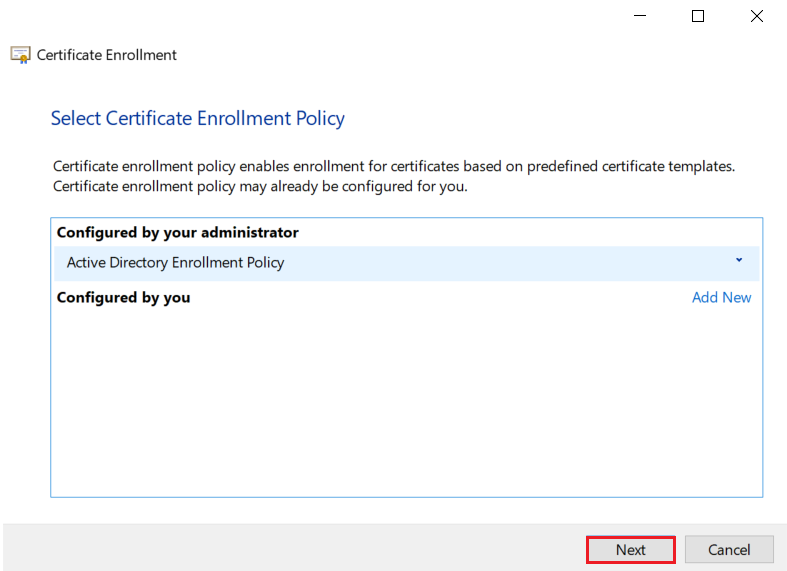
Click on the Next button.
-
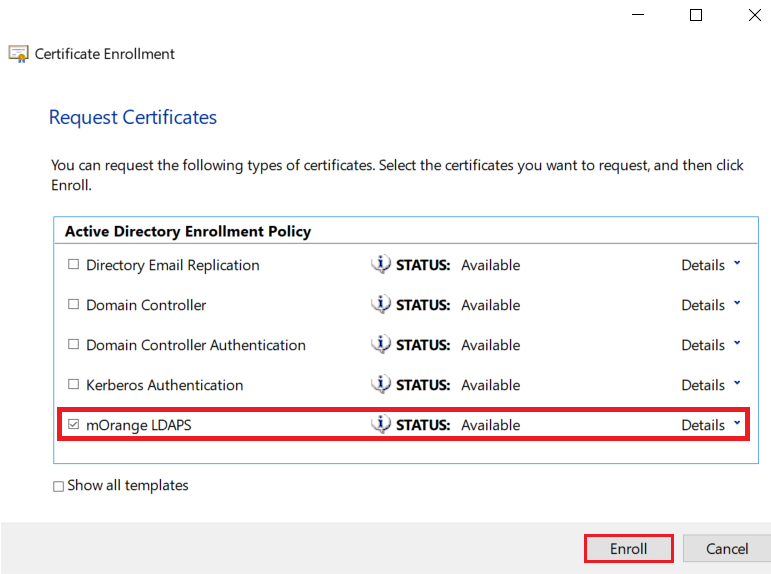
Select your certificate and click on Enroll button.
-
Click on the Finish button.
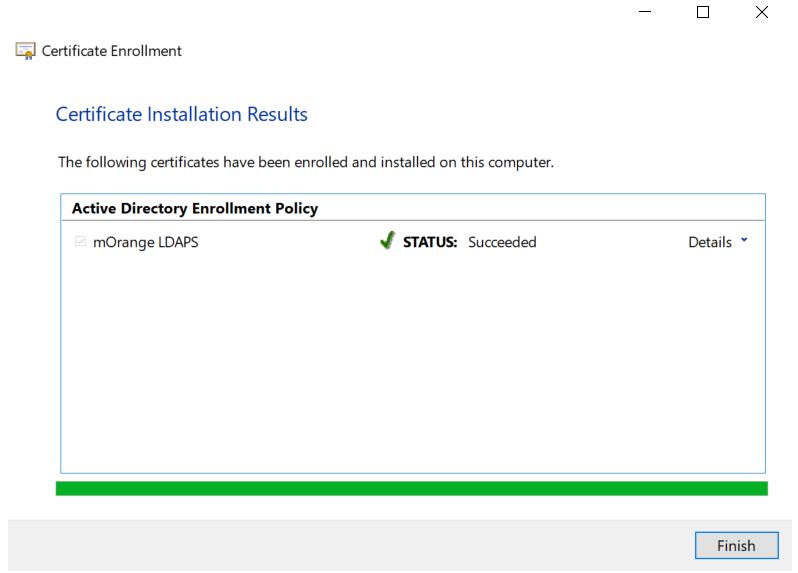
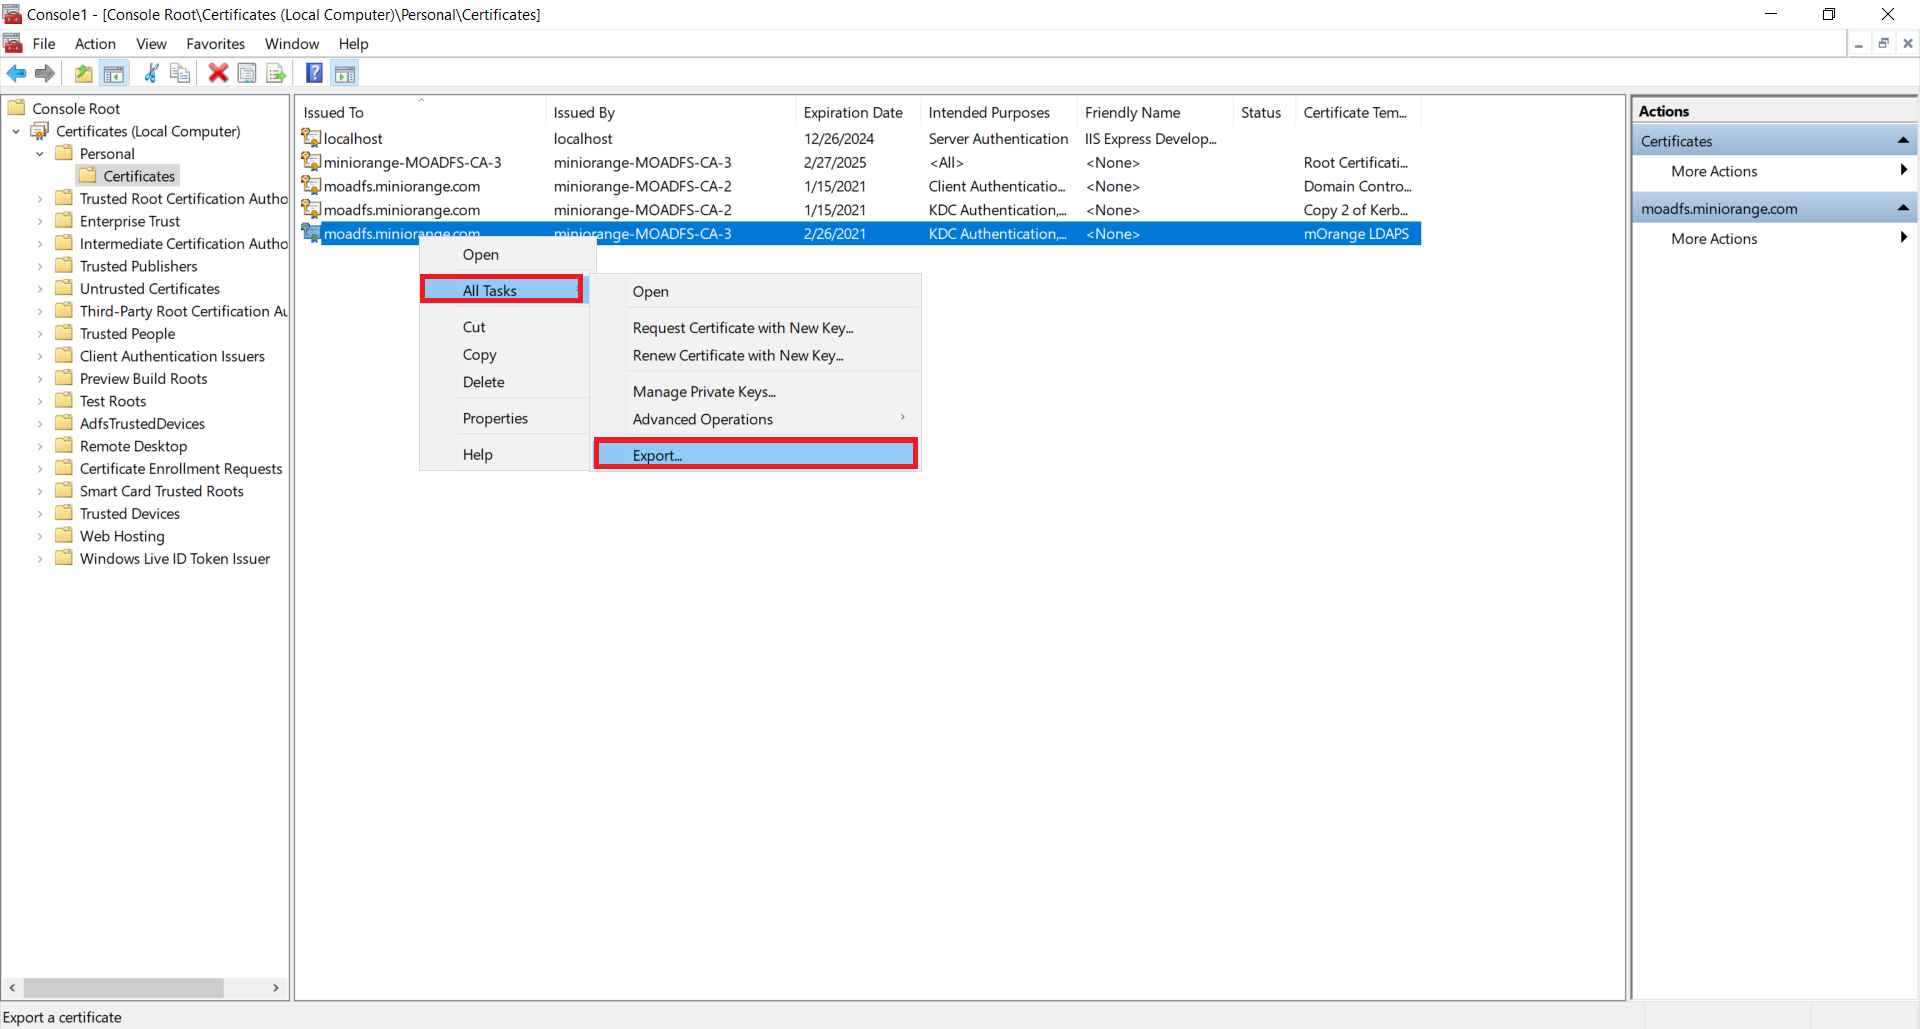
1.5: Export the created certificate
-
Right-click on the recently generated certificate and select All tasks -> Export.
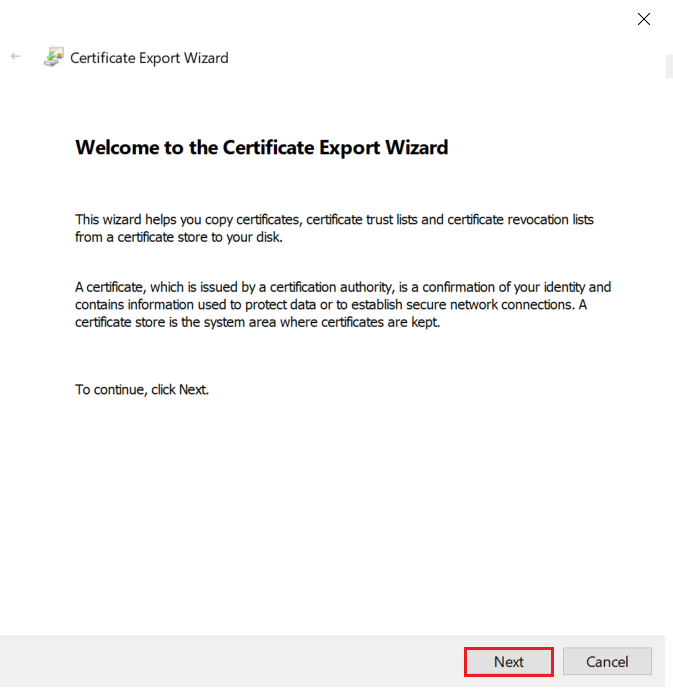
-
Click on the Next button.
-
Select Do not export the private key option and click on the Next button.

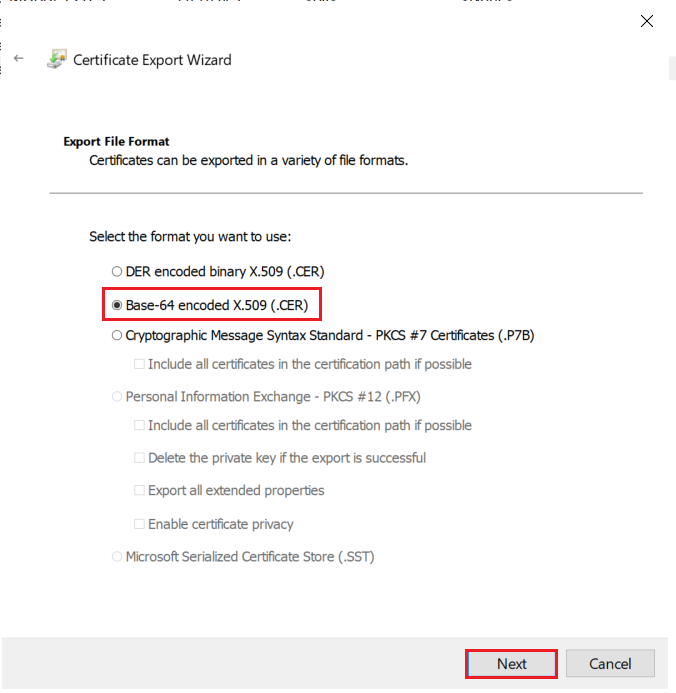
-
Choose Base-64 encoded X .509 file format and click on Next.
-
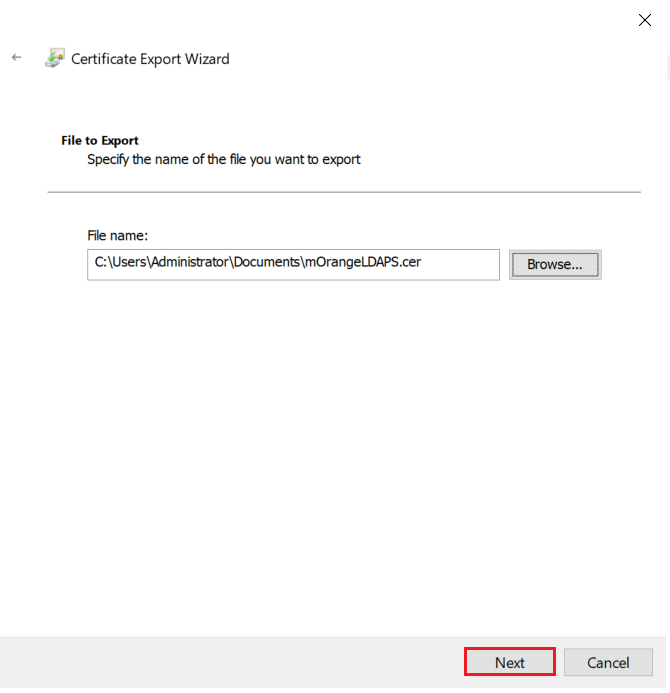
Export the .CER to your local system path and click on Next.
-
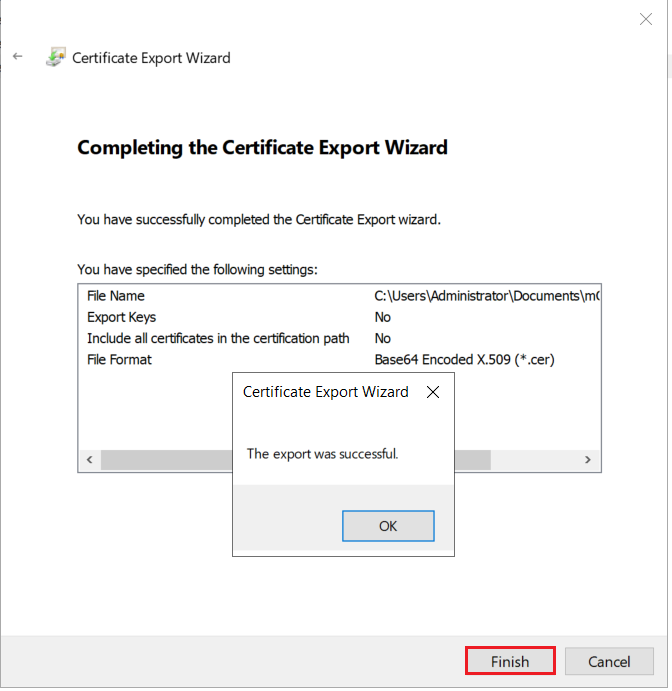
Click on the Finish button to complete the certificate export.
Step 2: Configure LDAPS on the client-side server
2.1: Convert Certificate Format and Install the Certificate using OpenSSL
To convert the certificate from .cer to .pem format you can use OpenSSL.
For Windows:
You can obtain this software from here: http://gnuwin32.sourceforge.net/packages/openssl.htm if you don’t already have it
-
Copy the certificate file you generated in the previous step to the machine on which PHP is running. Run the following command:
For example:
C:\openssl\openssl x509 -in mOrangeLDAPS.cer -out mOrangeLDAPS.pemThis creates the certificate file in a form that OpenLDAP Client Library can use.
- Place the .pem file generated in a directory of your choosing (C:\openldap\sysconf may be a good choice since that directory already exists.)
-
Add the following line to your ldap.conf file:
TLS_CACERT C:\openldap\sysconf\mOrangeLDAPS.pem
-
This directive tells the OpenLDAP Client Library about the location of the certificate, so that it can be picked up during the initial connection.
For Linux:
Run the following command to install the OpenSSL.
-
For Ubuntu:
sudo apt-get install openssl
-
For RHEL/CentOS:
yum install openssl
-
Copy the certificate file you generated in the previous step to the machine on which PHP is running. Run the following command:
For example:
/openssl x509 -in mOrangeLDAPS.cer -out mOrangeLDAPS.pem
This creates the certificate file in a form that OpenLDAP Client Library can use.
- Place the .pem file generated in a directory of your choosing (/etc/openldap/ may be a good choice since that directory already exists.)
-
Add the following line to your ldap.conf file:
TLS_CACERT /etc/openldap/mOrangeLDAPS.pem
- This directive tells the OpenLDAP Client Library about the location of the certificate, so that it can be picked up during initial connection.
- Restart your web server.
2.2: Install certificate in JAVA Keystore.
- Run the following command to install the certificate in cacerts.
-
For Windows:
keytool -importcert -alias "mOrangeLDAPS"
-keystore "C:\Program Files\Java\jre1.8.0_231\lib\security\cacerts"
-file "C:\Users\Administrator\Documents\mOrangeLDAPS.cer"
-
For Linux:
keytool -importcert -alias "mOrangeLDAPS"
-keystore "/usr/java/jdk1.8.0_144/jre/lib/security/cacerts"
-file "/home/mOrangeLDAPS.cer"
- Restart your web server.
Contact our 24*7 support team
Feel free to reach out to our Drupal experts if you need any sort of assistance in setting up LDAP / Active Directory Integration on your Drupal site.
Help improve this page
You can:
- Log in, click Edit, and edit this page
- Log in, click Discuss, update the Page status value, and suggest an improvement
- Log in and create a Documentation issue with your suggestion


