Installation Guide
Installation
If you have an existing Drupal site, it is highly recommended that you create a separate environment for installing and testing Intercept. Do not install Intercept on your production environment without thorough testing. Intercept requires Drupal core 10 or higher.
There are currently 3 paths for installation, depending on your abilities and preferences. Option A is the easiest and requires the least time & effort to set up.
Option A
Install Intercept on Pantheon using the Intercept Pantheon Upstream.
Option B
Install Intercept using the Intercept Profile installation profile. This will ensure that you get as many pieces and parts of the Intercept project as possible.
Note: The steps outlined below assume that you're using composer and lando as your local development environment. If you're using a local development environment other than lando, you'll need to adjust the process and commands slightly to work for your environment.
-
composer create-project --no-install drupal/recommended-project <yourprojectname> -
cd <yourprojectname> -
touch .lando.yml -
Edit your .lando.yml file to where it looks this:
name: intercept recipe: drupal10 config: webroot: web -
lando start -
Check composer.json in the Pantheon Upstream (https://github.com/AtenDesignGroup/intercept-pantheon-upstream/blob/master/composer.json) for latest required components. Exclude drupal/intercept_profile, as we'll add it later.
-
Update your site's composer.json. Add all "require"d packages from the upstream composer.json as well as all "patches" and set the "minimum-stability": "dev".
-
composer update -
mkdir web/profiles && cd web/profiles - Since packages.drupal.org doesn't currently work well with Drupal installation profiles:
git clone https://git.drupalcode.org/project/intercept_profile.git -
cd ../../ -
composer update -
Run your normal Drupal installation using your browser: https://YOURWEBSITE.com/install.php
-
Use database name, username, and password "drupal10", database host "database"
Option C
If you're really wanting to build Intercept yourself and perhaps integrate it into an existing Drupal site, this path might be the one for you. These instructions assume you are comfortable installing Drupal and associated modules via composer.
Download & install Intercept and its dependencies by running the following commands:
composer require drupal/intercept:1.x-dev
drush en intercept_event intercept_equipment intercept_room_reservation(Optional) Download & install the Polaris module:
composer require drupal/polaris:1.x-dev
drush en polaris(Optional) Download & install the Intercept Base theme:
composer require drupal/intercept_base:1.x-dev
drush en intercept_base
drush en components twig_field_value twig_tweak
Log into Drupal on your local site as an administrator.
If you enabled the Intercept Base theme, set this as the default theme by visiting: /admin/appearance
(Optional) If installing the Polaris module, configure the following keys for the Polaris module by visiting: /admin/config/system/keys
- POLARIS_API_ACCESS_ID
- POLARIS_API_ACCESS_KEY
- POLARIS_API_HOST
- POLARIS_API_STAFF_ID
- POLARIS_API_STAFF_DOMAIN
- POLARIS_API_STAFF_USERNAME
- POLARIS_API_STAFF_PASSWORD
- POLARIS_API_WORKSTATION_ID
- POLARIS_API_DEFAULT_PATRON_BRANCH_ID
Intercept Initial Configuration
Configuration Steps
- Visit Structure > Block Layout
- Add navigation blocks to the following regions for the Intercept Base theme:
- Primary Menu
- Intercept Management
- Restrict to these pages: (/user/*/manage, /user/*/manage/*)
- Main navigation
- Initial visibility level: 1
- Number of levels to display: 2
- Main Navigation Secondary
- Initial visibility level: 1
- Number of levels to display: Unlimited
- Intercept Management
- Secondary Menu
- User account menu
- Initial visibility level: 1
- Number of levels to display: Unlimited
- User login
- User account menu
- Content
- Messages
- Primary Menu
- Visit Configuration > System > Basic site settings
- Set a Default front page for your site such as /events
- Visit My Account > Manage > System Configuration > Site Settings
- Uncheck "Use logo supplied by the theme".
- Add your library’s logo.
- Visit My Account > Manage > System Configuration > Events > Audience
(If you enabled “demo content” at installation, these will already exist. You may want to edit) Add taxonomy terms for different audiences that your events will cater to such as:- Adults
- Parents
- Seniors
- Families
- Young children (0-5 years)
- Babies (0-18 months)
- Preschoolers (3-5)
- Toddlers (19 months-2 years)
- School age children (6-12 years)
- 6-8 years
- 9-12 years
- Teens (12-18 years)
- Adults
- Visit My Account > Manage > System Configuration > Events > Evaluation Criteria
- Add taxonomy terms that will allow people to evaluate events such as:
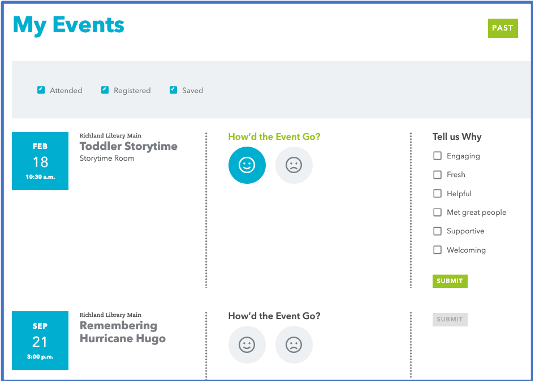
- Boring
- Challenging
- Chaotic
- Confusing
- Disappointing
- Engaging
- Exclusionary
- Fresh
- Funny
- Helpful
- High energy
- Inaccessible
- Inappropriate
- Insightful
- Inspiring
- Interesting
- Learned something new
- Life-changing
- Messy
- Met great people
- Not what I expected
- Overwhelming
- Pointless
- Poor quality
- Relevant
- Scary
- Supportive
- Surprising
- Too long
- Uncomfortable
- Unfriendly
- Unrewarding
- Wanted more
- Welcoming
- Add taxonomy terms that will allow people to evaluate events such as:
- Visit My Account > Manage > System Configuration > Events > Event Type
- Add taxonomy terms (and the matching positive/negative evaluation criteria) that will represent the different types of events you host such as:
- Arts, Crafts and Hobbies
- Author Event
- Business and Careers
- Clubs and Groups
- Community Awareness
- Computers and Technology
- Games and Play
- Health and Wellness
- Lifeskills
- Live Performance
- Movies
- Other
- Reading and Writing Skills
- Services
- Special Events
- STEAM
- Storytime
- Add taxonomy terms (and the matching positive/negative evaluation criteria) that will represent the different types of events you host such as:
- Visit My Account > Manage > System Configuration > Events > Population Segment
- Add taxonomy terms that will allow staff to record attendance for population segments such as:
- Adults
- Teens (Grade 6-12)
- School Age Children (K-5)
- Young Children
- Add taxonomy terms that will allow staff to record attendance for population segments such as:
- Visit My Account > Manage > System Configuration > Locations & Rooms
- Add some Room Types such as:
- Large Meeting Room
- Small Meeting Room
- Study Room
- Individual Desk
- Studio
- Event Space
- Auditorium
- Classroom
- Classroom with Computers
- Add some Room Types such as:
- Visit My Account > Manage > System Configuration > Locations & Rooms
- Add your locations
- Add your rooms
- Visit My Account > Manage > System Configuration > Equipment > Equipment Type
- Add some Equipment Types such as:
- Marketing
- Operations
- Technology
- Add some Equipment Types such as:
- Visit My Account > Manage > System Configuration > Equipment
- Add your equipment
- Visit My Account > Manage > System Configuration > Room Reservations
- Edit the Terms of Service Agreement copy
- Set the Customer Reservation Limit
- Set the Advanced Reservation Limit
- Add some Meeting Purposes such as:
- Board Meeting
- Faith-based meeting/study
- Family reunion planning
- For-profit meeting/planning
- Library staff use
- Non-profit meeting/planning
- Other
- Study
- Tutoring
- Workshop or training
- Adjust your Reservation emails if necessary.
Initial User Configuration - Staff
A number of roles and permissions come included with Intercept and are detailed at https://www.libraryintercept.com/how/. When looking at your site under the “People” menu link in the toolbar at the top of the site, you’ll find the area where you can start setting up your staff user accounts. You can add additional staff members in this area, add additional roles, and adjust permissions.
If you find that any adjustments are needed to the built-in roles and permissions, please feel free to make the adjustment on your site but also let the maintainers of Intercept know (by filing an issue at https://drupal.org/project/issues/intercept) so that they can consider making that same change when other organizations install Intercept.
Be sure to give yourself as admin all permissions and set the correct time zone.
Initial User Configuration - Customers
The main method of customer authentication with Intercept is via an ILS Plugin. It is assumed that your library will be using an ILS such as Polaris, Koha, Sierra, etc. Richland Library and Aten have initially built an ILS Plugin for the Polaris ILS at https://drupal.org/project/polaris. Other similar plugins can be built using the Polaris module as an example. There is also a SIP2 plugin included with Intercept that can be used to connect with multiple ILS'es. There are also developer resources included with the Intercept ILS module that is part of Intercept.
Another more tedious method of adding customers to the site could potentially be done by manually adding the customers in a similar fashion to how staff members are added. This would allow the customers to log into the site and interact with it. Customers should each be assigned the built-in “Intercept Customer” role.
Community
If you’d like to be part of the Intercept community please contact us for further information via LibraryIntercept.com. You can also join the Slack channel using the link from that same site.
Help improve this page
You can:
- Log in, click Edit, and edit this page
- Log in, click Discuss, update the Page status value, and suggest an improvement
- Log in and create a Documentation issue with your suggestion


