On this page
- Create team roles
- Configure permissions for roles
- Create and manage team invitations
- Configure team invitations
- Invite users to a team
- Manage team invitations
- Resend team invitation
- Revoke team invitation
- View invitations as a user
- Manage roles for team members
- Manage the fields displayed when viewing a team
- Configure Channel ID for your portal
Configure team management
The Apigee submodule Apigee Teams enables app developers to create teams and collaborate on apps, as described in Manage teams of app developers. The Apigee Teams submodule is supported for Apigee Edge, Apigee X, and hybrid organizations.
Note: This module uses Company APIs, if you are creating Teams in Apigee Edge organization, but will use AppGroups APIs if you are connected to a Apigee X organization.
To enable Apigee Teams in your developer portal:
- Select Extend in the Drupal administration menu.
- Enable the Apigee Teams module.
- Click Install.
Once the module is installed, you can configure the team management process, as described in the following sections:
- Create team roles
- Configure permissions for roles
- Create and manage team invitations
- Manage roles for team members
- Manage the fields displayed when viewing a team
Note: In addition, you can configure the following:
- The alias that is used to refer to teams in the developer portal, as described in Configure aliases.
- Caching of specific team data, as described in Configure caching.
Create team roles
Create one or more roles to be globally available for each team. Team administrators can then set one of the globally defined roles for each team member.
Note: The "member" role will be granted to all team members automatically. As a result, this role can be used to configure default permissions for roles.
To create a Team role:
- Select Configuration > Apigee > Teams.
- Click the Roles tab.
- Click Add role to add a new role.
- Complete the form.
- Click Save.
Configure permissions for roles
Configure the permissions that are enabled for each role you created. By default, all newly created roles will have "member" role permissions enabled. If you want to remove a permission enabled by default in a newly created role, you must first remove that permission from the "member" role.
To configure additional Team permissions for roles:
- Select Configuration > Apigee > Teams.
- Click the Permissions tab.
- Configure the permissions, as required, to enable team members to:
- Add or remove other team members
- Create, edit, delete or view analytics for team apps
- View and assign public, private, or internal API products to team apps
- Manage or accept team invitations.
- Click Save configuration.
To configure additional Global permissions, select People > Permissions.
Create and manage team invitations
The team invitation feature can be used to customize invitation emails, invite users to a team, and manage team invitations once sent. In order to utilize this feature, confirm that the appropriate global and team permissions are configured correctly, as shown in the table below.
| Permission Type | Role | Permission |
| Global | Authenticated user |
|
| Global | Administrator | Administer team invitation settings |
| Team | Administrator | Manage team members and invitations |
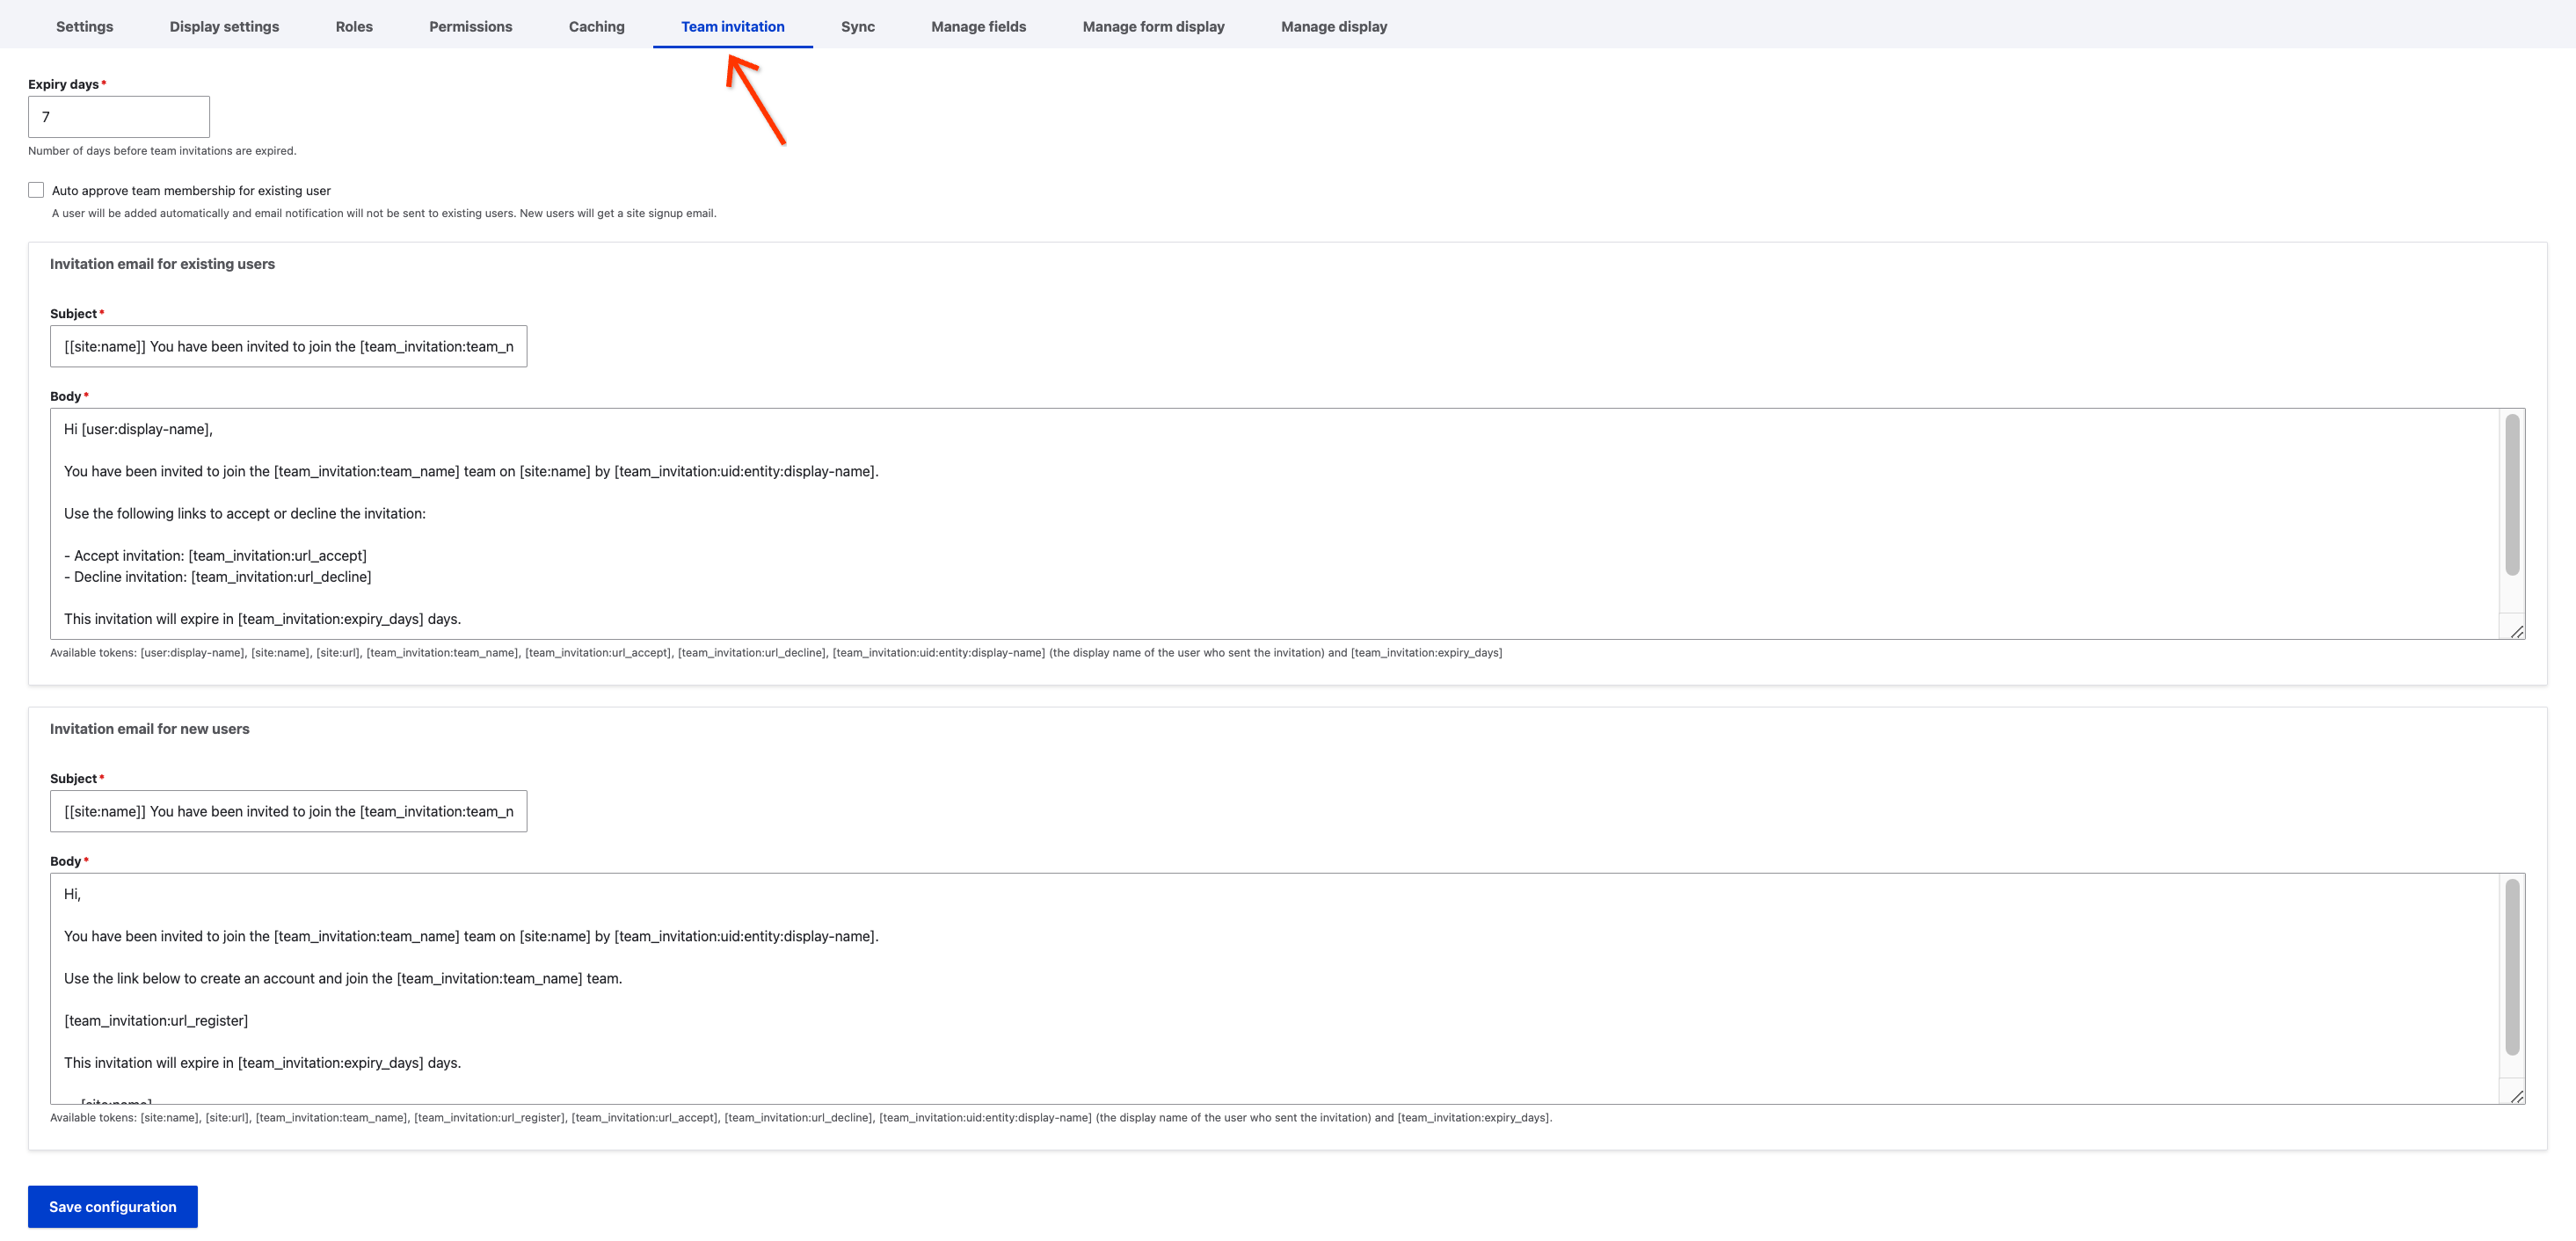
Configure team invitations
To configure team invitations to send to users:
- Select Configuration > Apigee > Teams.
- Click the Team invitation tab.
- Enter the desired number of days before invitations expire into the "Expiry days" field.
- To handle team invitation expiration, you need a configured cron maintenance task.
- See Configuring Cron for more information.
- Configure the email subject and body of the team invitation. There are two email templates available; one for existing users and one for new users.
- Click Save configuration.
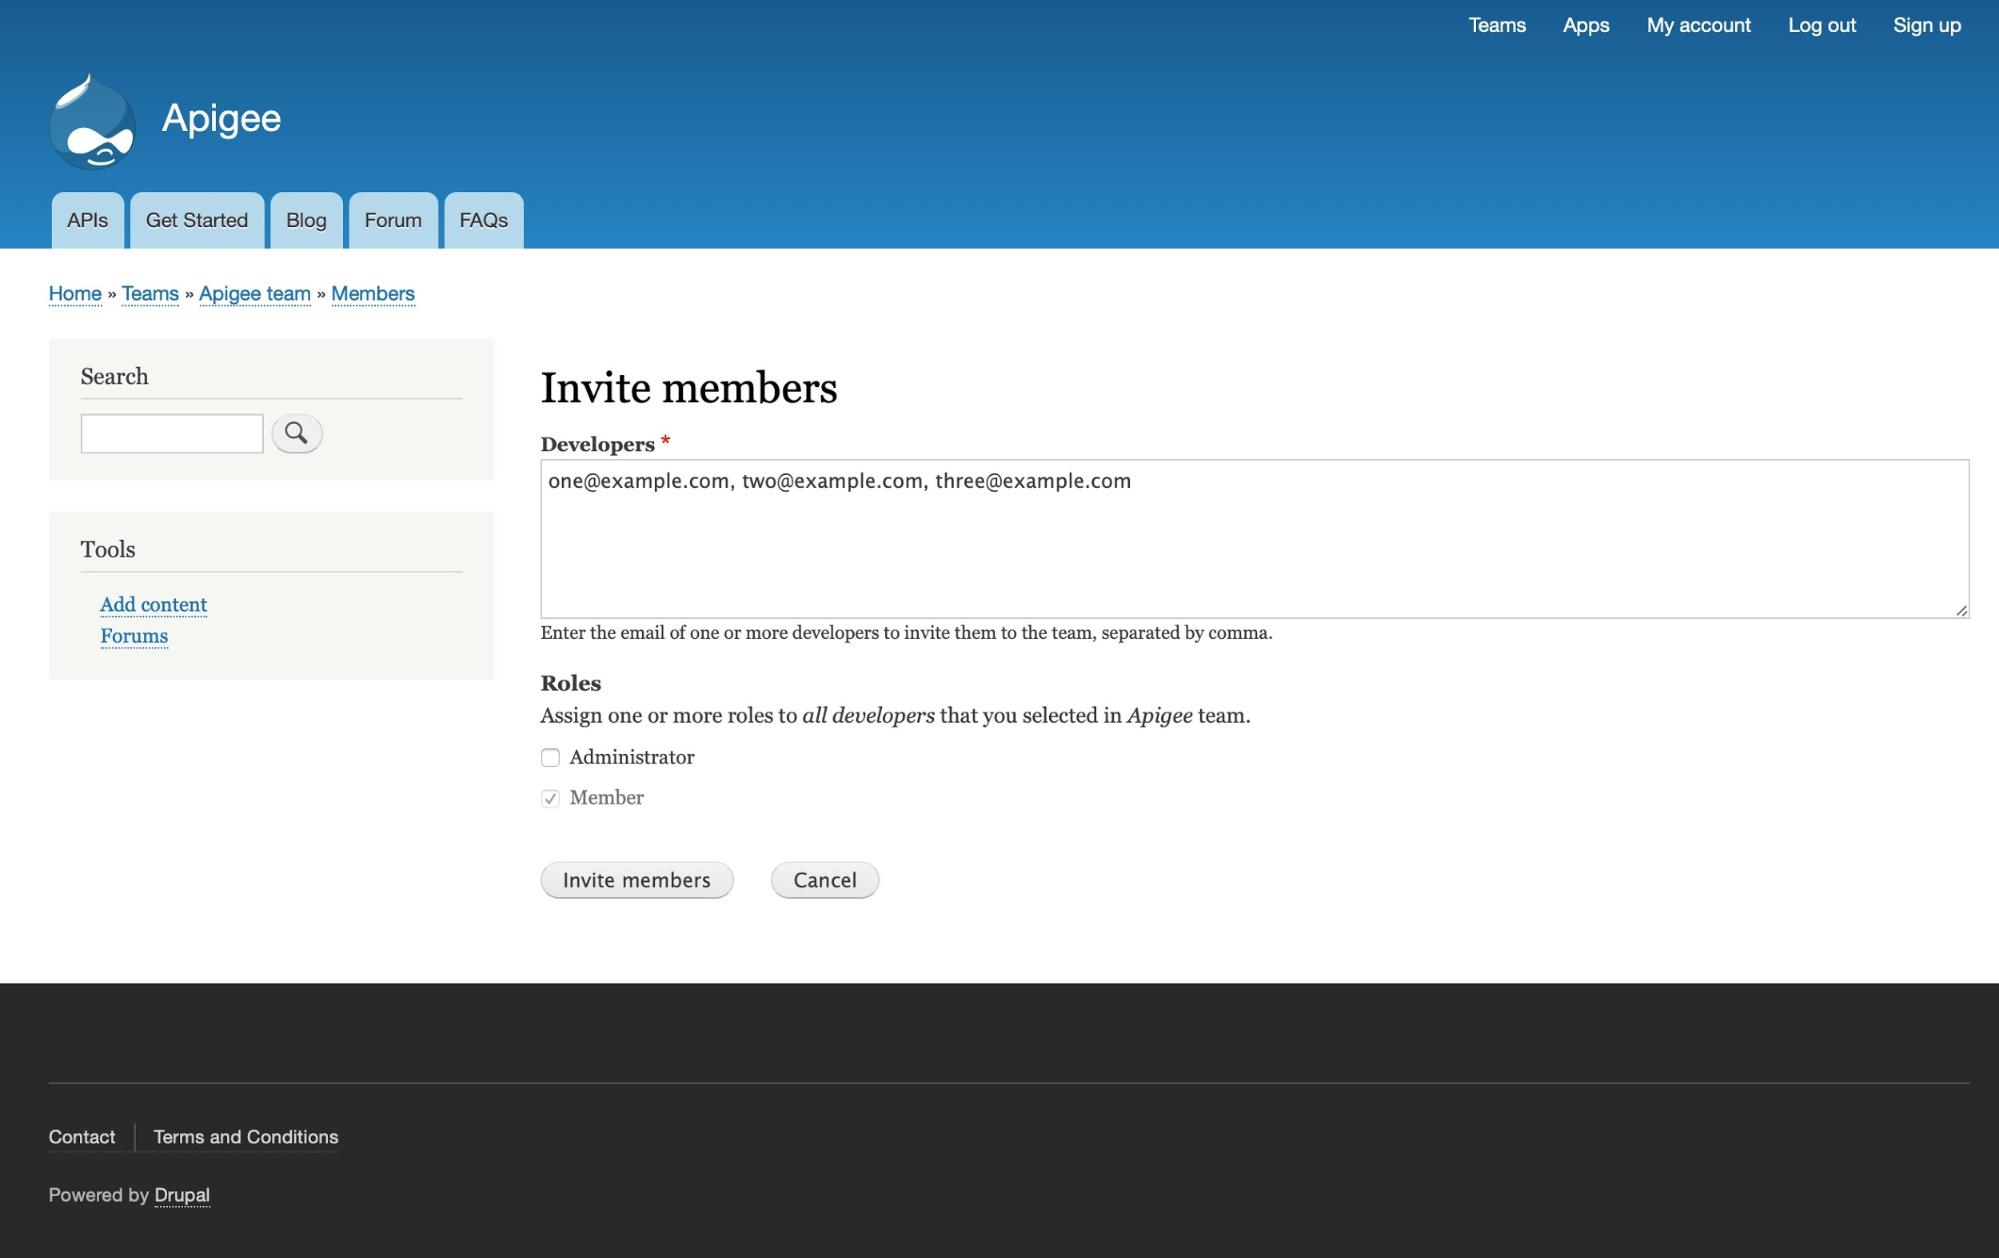
Invite users to a team
Any user with the Global "Manage team members" permission or the Team "Manage team members and invitations" permission can invite users to a team.
- Select Teams in the top navigation of your application.
- Click the name of the team to view the team details.
- Click the Members tab to view the team members.
- Click the Invite members button.
- Fill in the user email addresses, separated by commas.
- Select the roles for each member.
- Click Invite members.
Manage team invitations
From the Members tab, you can find a list of all current and invited team members, including pending invitations.

Resend team invitation
To resend an invitation email, locate the invitation recipient under Pending Invitations and click Resend.
Revoke team invitation
To revoke a team invitation, locate the invitation recipient under Pending Invitations and select Revoke from the Operations drop-down.
View invitations as a user
To view invitations sent to your user account, select My account > Invitations.
Manage roles for team members
To add roles or change global roles assigned to team members:
- Select Teams in the top nav bar of your application.
- Click the name of the team to view details.
- Click the Members tab to view members and their roles.
- Click Edit to add or modify team roles for a member.
- Click Save.
Manage the fields displayed when viewing a team
View team details by clicking its name on the Teams page.

Manage the fields displayed when viewing team details by selecting Configuration > Apigee > Teams to display the Teams configuration page and clicking the Manage display tab.
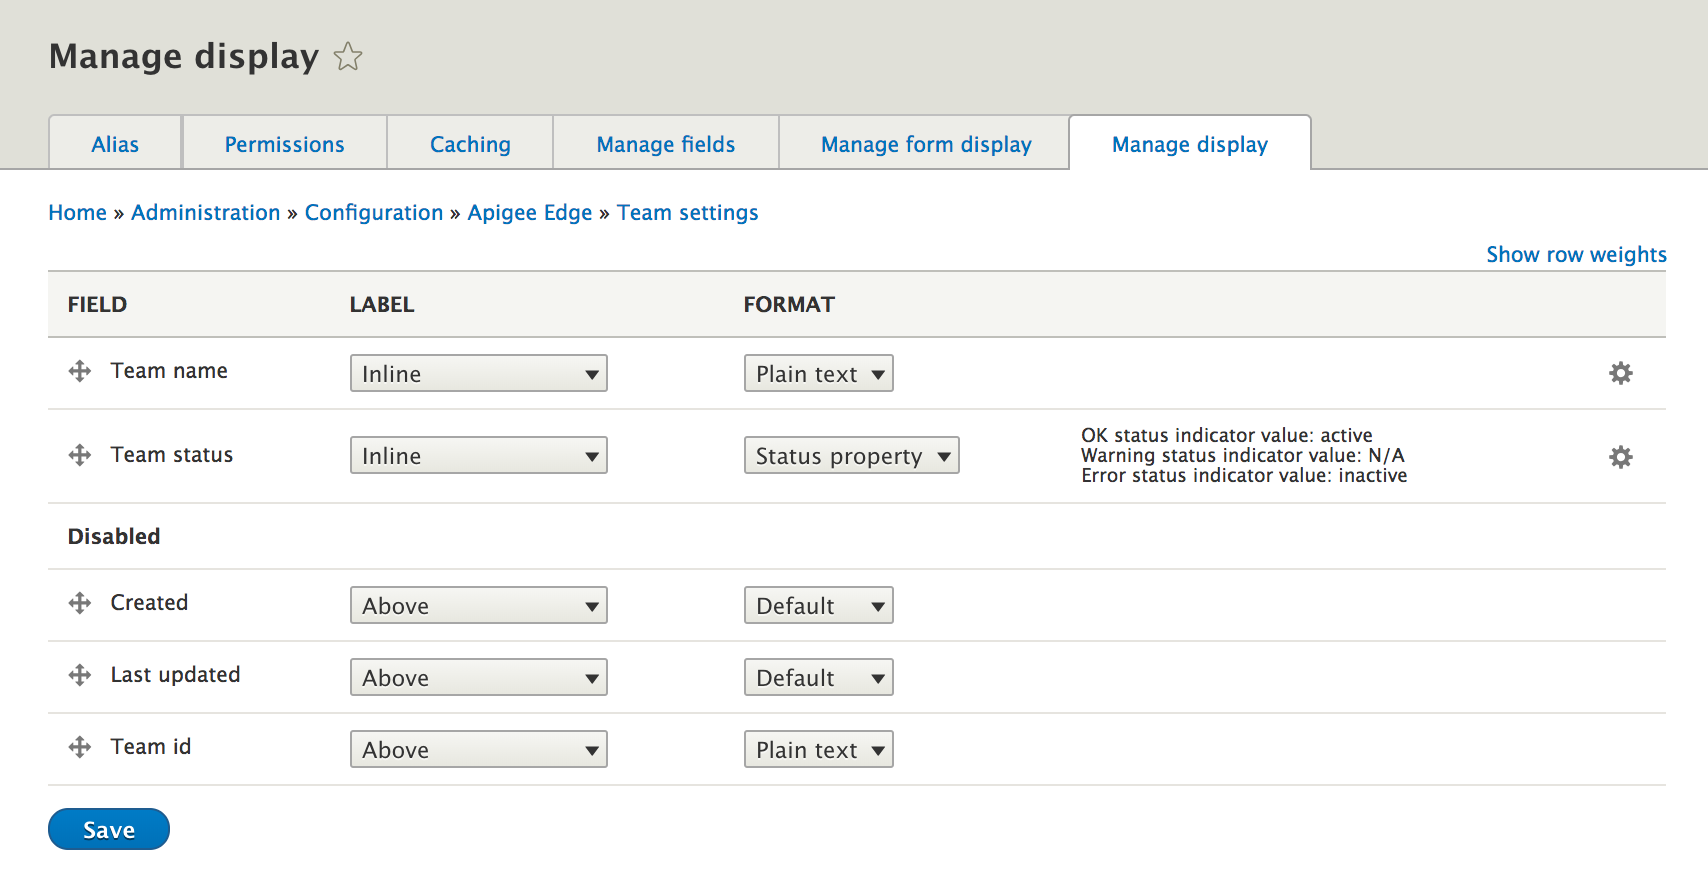
To manage the details, configure the following settings for each field, and click Save.
| Setting | Description |
|
|
Rearrange fields. Click and hold the drag-and-drop handle and drag the field to the desired location. To disable a field, drag it into the Disabled section.
Note: If you click Show row heights, you can change the order of fields by weight. In this case, lower values appear before higher values. |
| Label | Location in which the field label is displayed. Valid values include Above, Inline, Hidden, or Visually Hidden. Visually Hidden is provided for accessibility, to hide the field from view, but make it available to screen readers. |
| Format | Select the format to be used for the field from the drop-down menu (if there are multiple options). |
|
|
Configure the widget properties and click Update to save the changes. A quick summary of the configured properties are displayed. For example: Textfield size: 60 |
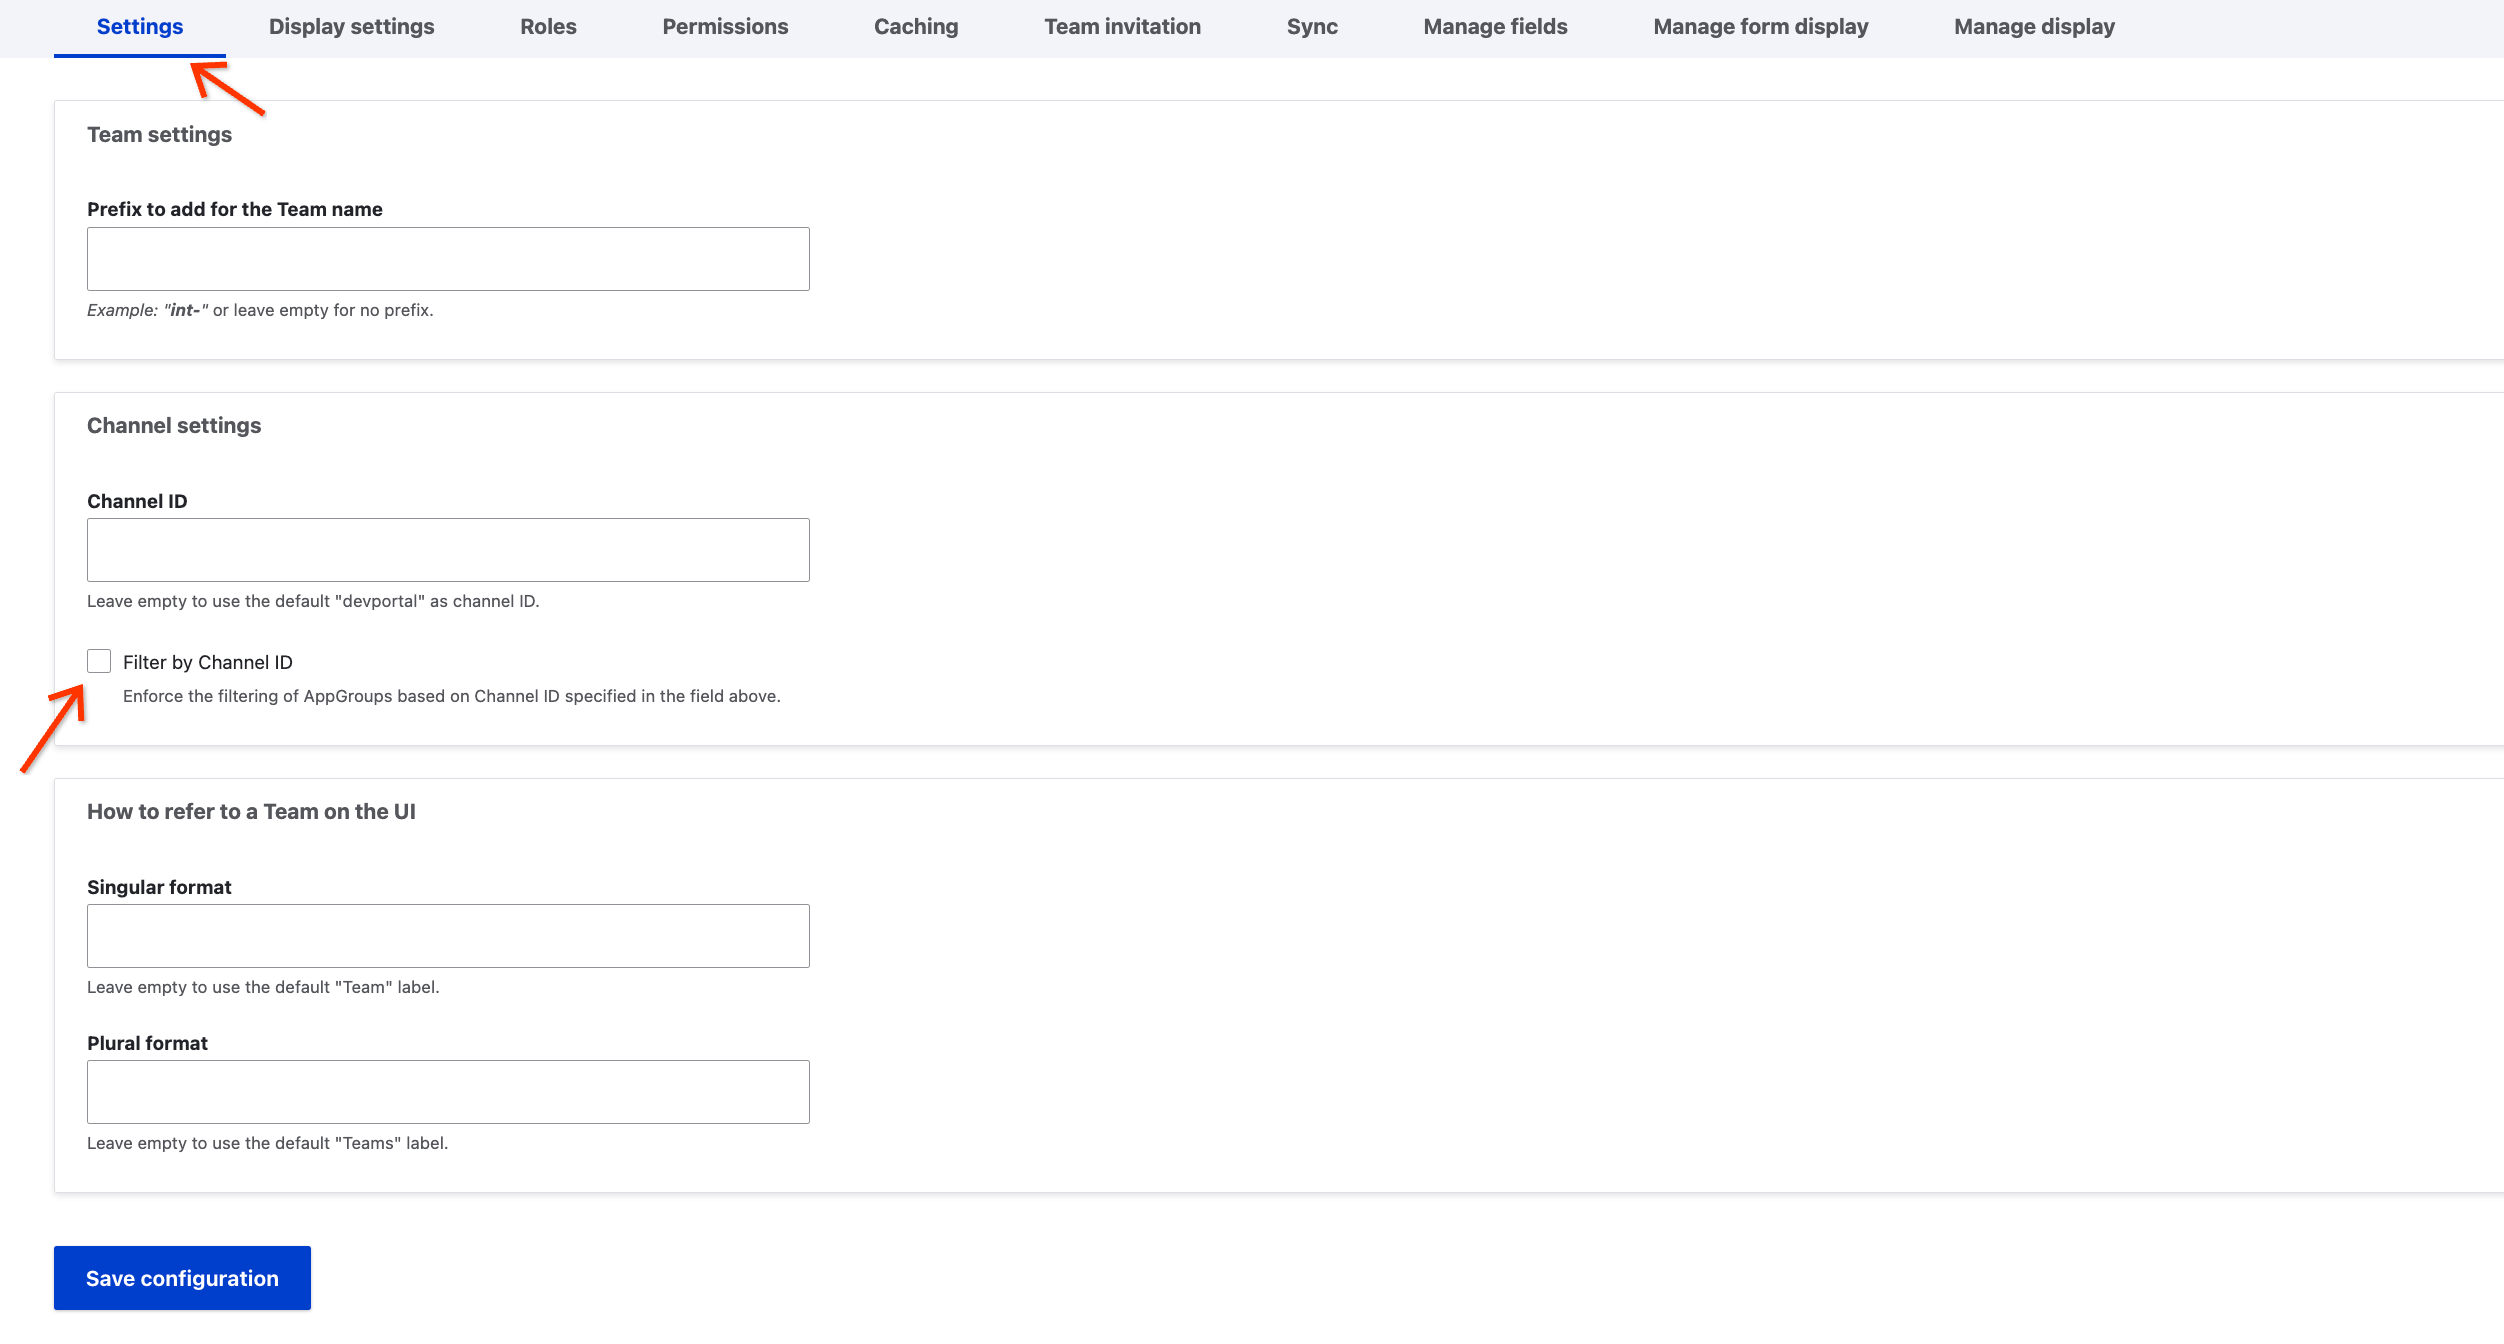
Configure Channel ID for your portal
The channel ID set in the configuration, filters the list of AppGroups returned by the module.
To configure AppGroup channelId filter:
- Select Configuration > Apigee > Teams.
- Click the Settings tab.
- Enter the desired channel Id into the "ChannelID" field.
- While creating new AppGroup, the configured ChannelID will be set for an AppGroup.
- If the Channel ID field is empty, the default "devportal" as channel ID will be set for an AppGroup.
- Enable the "Filter by Channel ID" checkbox to filter the AppGroup based on Channel ID.
- Click Save configuration.
Help improve this page
You can:
- Log in, click Edit, and edit this page
- Log in, click Discuss, update the Page status value, and suggest an improvement
- Log in and create a Documentation issue with your suggestion


